Monday 31 December 2012

Some of my favourite cards from 2012

Hi Bloggers.

As it's New Year's Eve, I thought I'd look back on some of the cards I've posted over the last year and share some of my favourites again. Some of you are new followers so may have missed them when I first posted them. I've picked one from each month - you may want to grab a cuppa. Each card has a link to the original post so you can go and read about how it was made if you like.

Thank you all for your support and kind comments over the last year. Happy New Year to you all!

January


I love the Vintage Inventor stamp sets designed by Sam Poole. This card is a great Valentines Card for a guy. You can see the details here.

February


This card was made using the Creative Expressions Beautiful Ladies Stamp Set. You can see the details here.

March


A card from one of the first Spellbinders Shows I did. Details are here.

April

 
I made this card way back in April but it got another airing on the Toolshed Show in November. Details are here.
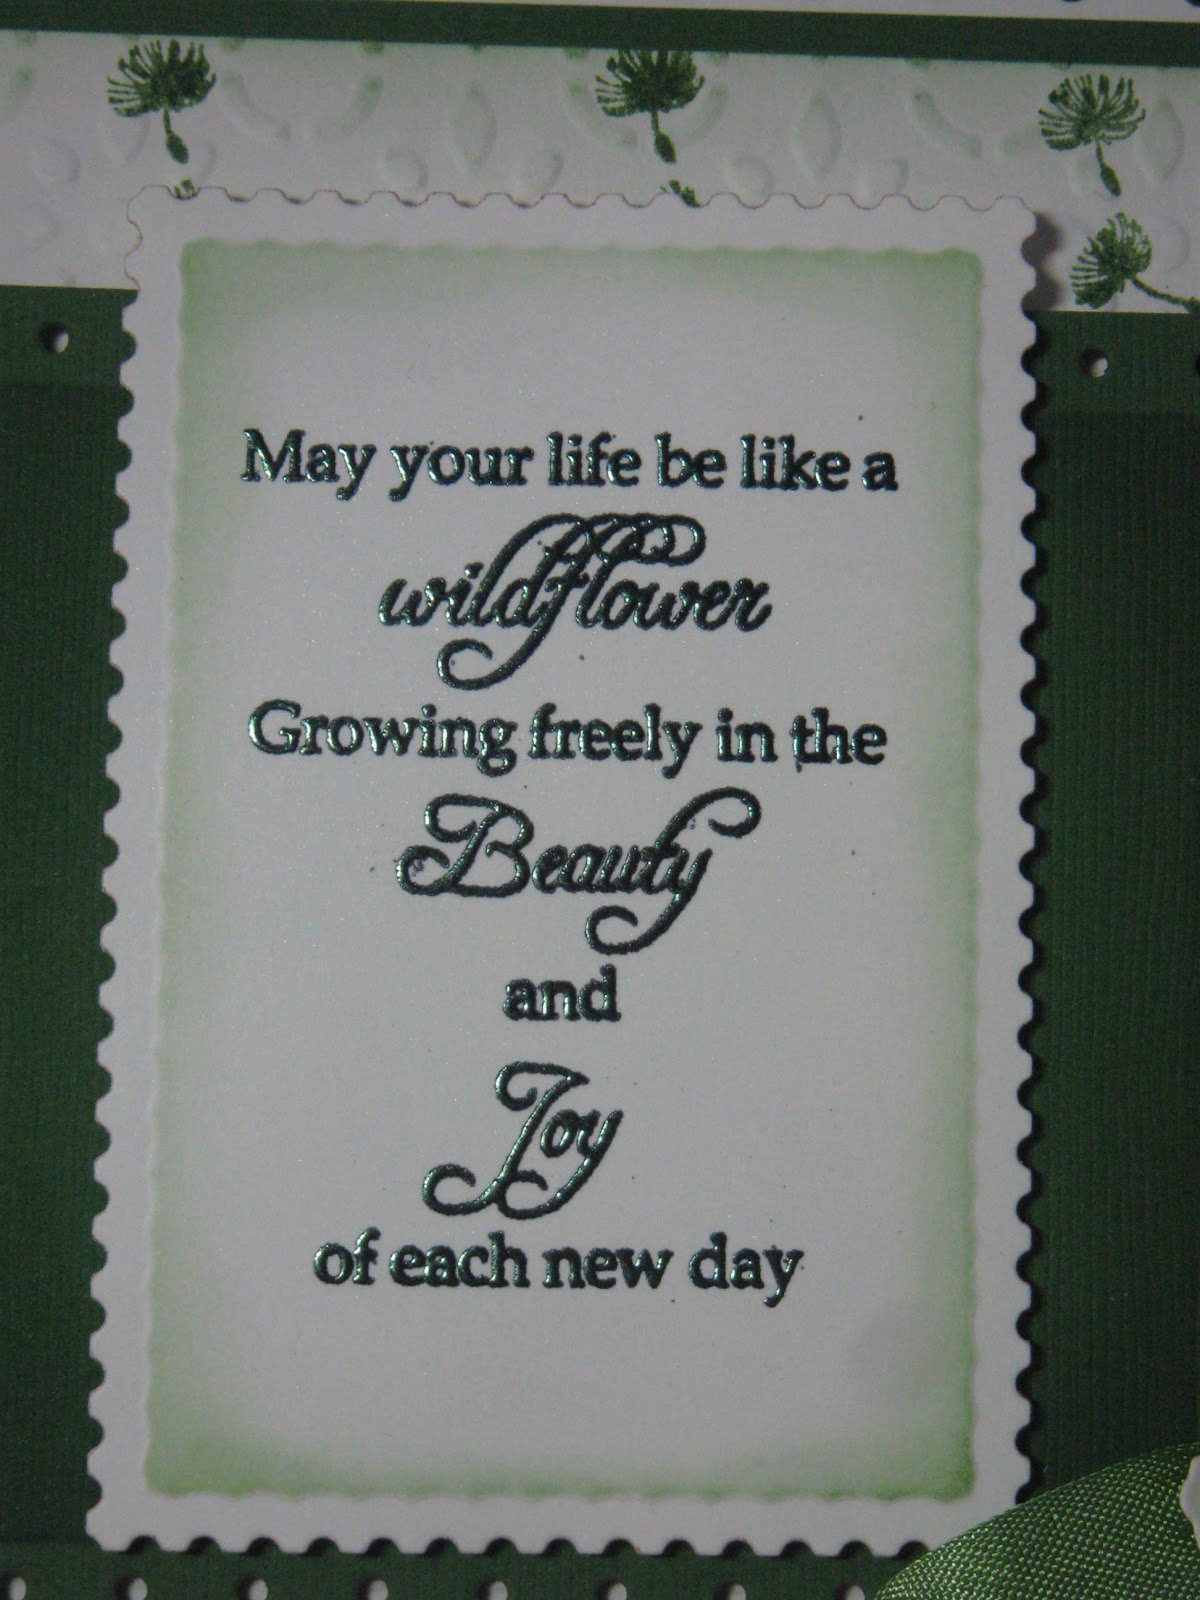
May


I loved how this one turned out - lots of different dies on this one but my favourite part is the Grosgrain rose. Details are here.

June

 
Yes - we were doing Christmas shows in June! This is one of my favourite Christmas cards that I've made this year. Details are here.

July

 
Half way through - hope you're not bored yet! This was a demo from the Pick of the Week that Hels and I did. Details are here.

August


Another card from the Pick of the Week in July. I've used this layout a few times since - love the yummy Cosmic Shimmer Embossing Powders. Watch out for those on my next shows. Details are here.

September

 
I loved working with the Walnut Hollow Metal Sheets and this is one of my favourite cards using them. Details are here.
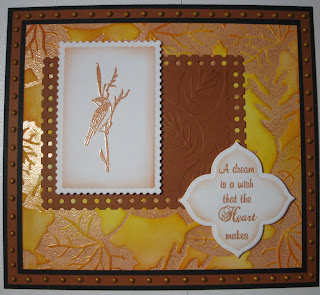
October


I just had to choose a card made with the Sole Creations Stamp Set. I have sold more of this stamp set than any other in my Amazon Store. It flew out at Ally Pally and at Kettering. Truly gorgeous images on this set. Details of this card are here.

November


I struggled a bit picking one out for November as there's quite a few that I really like from this month. This one is from the Toolshed show. Details are here.

December

 
Another difficult month to choose from. Details for this card are here.

Hope you've enjoyed my look back at the past year. Here's to 2013!

Thanks for stopping by.

Julia.

Sunday 30 December 2012

Friends are like

Hi Bloggers.

Here's today's card -

For the background, I spritzed through the Flower Mask with Cosmic Shimmer Tarnished Gold Vintage Mister on to some Milk Card. Then I randomly stamped a rose from the Creative Expressions If the Shoe Fits ... Stamp Set using Sepia Paris Trunk Dye Ink. I made sure that the ink was dry and then ran it through the Grand Calibur with the Couture Creations Intrinsic Embossing Folder. I ran it through a second time to extend the pattern - here I have used ribbon to hide the join. I inked around the edges with Yellow Damasque Paris Trunk Dye Ink using Cut n Dry Foam before adding the ribbon.

I stamped the bra and knickers from the Creative Expressions Frilly Things Stamp Set using Jet Black Archival and embossed with Cosmic Shimmer Clear Embossing Powder. I coloured it in using Sepia Ink and Enchanted Gold Mica Powder from the Cosmic Shimmer Garden Flora Mica Spray Set. I cut them out with scissors and went around the edges with a black marker pen to hide any white bits.

I stamped the sentiment from the Frilly Things Stamp Set using Jet Black Archival and embossed with Cosmic Shimmer Clear Embossing Powder. I cut it out using Spellbinders Floral Ovals and inked through the die with Yellow Damasque.

I tied a bow using 2 lengths of London Tan American Seam Binding and added a Light Brown Dazzler.

I assembled the card as shown adding some dots of Cosmic Shimmer Pearlescent PVA in Olympic Gold around the edges.

Thanks for stopping by.

Julia.


Saturday 29 December 2012

You are in my thoughts

Hi Bloggers.

Here's today's card -

For the background, I popped a piece of Coconut White Card through the Grand Calibur with the Couture Creations Bon Jour Embossing Folder. I inked around the edges with Raisin Adirondack Dye Ink using Cut n Dry Foam.

I stamped the image from the Creative Expressions Trees of Imagination Stamp Set using Plum Archival and embossed with Cosmic Shimmer Clear Embossing Powder. I cut it out using Spellbinders Scalloped Labels One and inked through the die with Raisin Adirondack.

I stamped the sentiment from the same stamp set using Plum Archival and embossed with Cosmic Shimmer Clear Embossing Powder. I cut it out using the Spellbinders French Frills die set and inked through the die with Raisin.

I tied a bow using 2 lengths of American Seam Binding in Tropic Wine and added a Medium Circle Dazzler.

I assembled the card as shown adding some 3mm and 5mm White Pearls in the top 2 corners and some dots of Cosmic Shimmer Pearlescent PVA in White around the edges.

Thanks for stopping by.

Julia.

Friday 28 December 2012

Every Flower is a Soul

Hi Bloggers.

Here's today's card -

For the background, I ran a piece of Coconut White Card through the Grand Calibur with the Spellbinders Paisley M-Bossabilities Folder. I inked around the edges with Aqua Adirondack Dye Ink using Cut n Dry Foam.

I stamped the sentiment from the Creative Expressions Garden Sayings Stamp Set using Jet Black Archival and embossed with Cosmic Shimmer Clear Embossing Powder. I cut it out using Spellbinders Floral Ovals and inked through the die with Aqua ink. I cut a Spellbinders Labels 25 out of Blue Card. At the emboss stage I added the Delicate Mask. I inked through the die with Aqua Ink. I cut a Persian Motif out of White Card and inked through the die with Aqua Ink. I cut it in half and popped it behind the Labels 25 die cut.

I cut a border out of Blue Card using the Persian Accents Die Set.

I cut 6 circles out of 2 shades of Blue Card using Spellbinders Splendid Circles and used them to make a scrunched up flower. I cut a corner from the Persian Accents die set and popped that underneath the flower.

I assembled the card as shown adding some Pearl Swirls and some dots of Cosmic Shimmer Pealescent PVA in Summer Blue.

Thanks for stopping by.

Julia.


Thursday 27 December 2012

You Look 'Scent'sational!

Hi Bloggers.

Well that's Christmas over for another year. Hope you've had a lovely time and haven't eaten tooo much! How many of you are hitting the sales today? I have reduced some of the prices of older stock in my Amazon Store so you may wish to have a look at the bargains there?

Here's today's card -

The background on this is very subtle. Use a darker colour ink if you want it to stand out more. I started by spritzing some Coconut White Card with Cosmic Shimmer Antique Rose Vintage Mister. I then inked through the Flower Mask with Lavender Organza Paris Trunk Dye Ink using Cut n Dry Foam. Next I randomly stamped one of the small perfume bottle stamps from the Creative Expressions You Look 'Scent'sational Stamp Set using the Lavender Organza Pad. Then I popped the background through the Grand Calibur using the Couture Creations Cultivated Embossing Folder. Finally, I inked around the edges with the Lavender Organza.

I stamped the main image from the same stamp set using Jet lack Archival and embossed with Cosmic Shimmer Clear Embossing Powder. I coloured it in using the Lavender Organza Ink and Pearlescent Mica Powder from the Cosmic Shimmer Metallics Mica Spray Set. I cut it out using the Spellbinders Splendid Circles die set and inked through the die with Lavender Organza. I really love this die - one of my all time faves.

I stamped the sentiment from the same stamp set using Jet Black Archival and embossed with clear powder. I cut it out using Spellbinders Matting Basics B and inked through the die with Lavender Organza.

I tied a bow using 2 lengths of Blue White American Seam Binding and added a Pink Dazzler. I assembled the card as shown adding some Pearl Swirls and some dots of Cosmic Shimmer Pearlescent PVA in White around the edges.

Thanks for stopping by.

Julia.

Wednesday 26 December 2012

You Go Girl!

Hi Bloggers.

Happy Boxing Day. Hope you're enjoying your holidays. Also, hope you had some gifts like the ones on this card!

The background is made using the Couture Creations Cabaret Embossing Folder. I have inked over the embossed detail with Garnet Paris Trunk Dye Ink using Cut n Dry Foam.

I stamped the image from the Creative Expressions If the Shoe Fits ... Stamp Set using Jet Black Archival and embossed with Cosmic Shimmer Clear Embossing Powder. I coloured it in using Garnet, Cherry Blossom and Lavender Organza Paris Trunk Dye Inks and some Violet Frost Mica Powder from the Cosmic Shimmer Garden Flora Mica Spray Set and some Pearlescent Mica Powder from the Cosmic Shimmer Metallics Mica Spray Set. I cut it out with scissors and went around the edges with a black marker pen to hide any white bits.

I cut a Spellbinders Labels 25 out of Coconut White Card. At the emboss stage I added the Eyelet Lace Mask. I inked though the die with Garnet ink.

I stamped the sentiment from the same stamp set using Jet Black Archival and embossed with Clear Embossing Powder. I cut it out with a smaller labels 25 die and inked through the die with Garnet.

I assembled the card as shown adding some Black Swirls, a small bow made with 2 lengths of Rose Petal American Seam Binding, a Black Dazzler and some dots of Cosmic Shimmer Pearlescent PVA in Vintage Pink around the edges.

Thanks for stopping by.

Julia.

Tuesday 25 December 2012

Kick up Your Heels

Hi Bloggers.

Happy Christmas to you all - I hope you're having a lovely day. I'm off to my Mom & Dad's house today for a couple of days so relying on Blogger to schedule posts for me.

I have a few more cards from the shoes/handbags/corsets/perfume show I did at the end of November. This one is a very simple one - the embossing folder does most of the work.

So, the background is a piece of Coconut White Card popped inside the Couture Creations Timeless Embossing Folder and run through the Grand Calibur. I inked around the edges with Poppy Paris Trunk Dye Ink using Cut n Dry Foam. I wrapped a piece of Blue White American Seam Binding around the centre.

I stamped the sentiment from the Creative Expressions If the Shoe Fits .... Stamp Set using Jet Black Archival and embossed with Cosmic Shimmer Clear Embossing Powder. I cut it out using Spellbinders Floral Ovals and inked through the die with Poppy ink.

I stamped the shoe from the same stamp set using Jet Black Archival, embossed with clear powder and coloured it in using Poppy and Yellow Damasque Dye Inks. I cut it out with scissors and then went around the edges with a black marker pen to hide any white bits.

I stamped the hat from the Creative Expressions Handbags Galore Stamp Set using Jet Black Archival and embossed with clear powder. Again, I coloured in using Poppy and Yellow Damasque ink, cut out and went around edges with black pen.

I assembled the card as shown adding a bow made from 2 lengths of Blue White American Seam Binding and a Light Brown Dazzler, some 5mm White Pearls and some dots of Cosmic Shimmer Pearlescent PVA in White around the edges.

If you're looking to buy the stamp sets, I don't have any in my Amazon Store but Sam Poole has them here.

Thanks for stopping by.

Julia.

Monday 24 December 2012

Doing What You Like

Hi Bloggers.

Hope you're all ready for Christmas and not having to brave the shops today. I've been having a clear out in my craft room and there's lots of good stuff that I just don't use so I've popped them on ebay - you can have a  look here. Items include some Martha Stewart punches, some Sizzix dies and a Cuttlebug Machine plus some other stuff.

A manly card to share today -

The background is a piece of Foundations Argyle Paper. I stamped the sentiment from the Sincere Sentiments Stamp Set on to some Milk Card using Jet Black Archival and embossed with Cosmic Shimmer Clear Embossing Powder. I cut it out using Spellbinders Labels 28. I cut the next size up out of Black Card.

I cut 2 x border backers out of Milk Card using the Spellbinders Diamond Strips & Accents CFT die set. I cut 2 x border CFT out of Black Card using the same die set. I folded & tucked them ans glued them to the backers.

I tied a gi-normous bow out of Black/Ivory Striped Grosgrain. I assembled the card as shown adding a 5mm Black Pearl in each corner ans some dots of Cosmic Shimmer Pearlescent PVA in Black Pearl around the edges.

A fairly simple, quick card for a guy or change the colours and it could be for a lady.

Thanks for stopping by.

Julia.

Sunday 23 December 2012

Dream

Hi Bloggers.

A very pink card today.

I first cut the apertures out of Foundations Diamond Line Paper. I placed the backer die from the Spellbinders Triumphant Blossom Cut, Fold & Tuck Die Set where I wanted it and secured it with Removable Tape. I also placed the border backer die from the Spellbinders Octagon Strips & Accents Cut, Fold & Tuck die set where I wanted it on one side of the Triumphant Blossom die. I cut and embossed and then removed the dies. I placed the Octagon backer die on the other side of the Triumphant Blossom. I placed the paper on the Cutting Plate so that the first 2 cuts were hanging over the edge so that I did not lose the embossed detail around the apertures. I made sure they were still hanging over the edge when I embossed the 2nd Octagon border.

I cut a piece of Foundations Shades Paper that was 1/4" larger than the patterned paper. I placed the patterned paper on top and replaced the Triumphant Blossom backer die and the Octagon backer die back in place in the patterned paper. I used these to line up the Triumphant Blossom CFT die and the Octagon Border die. I secured them in place and removed the patterned paper and the backer dies. I cut & embossed the CFT dies. I removed the dies from the paper and then replaced the patterned paper so that I could line up the Octagon CFT die in the other border aperture. I made sure that the Pink Paper was hanging of the edge of the plates as before so that I did not lose the embossed detail of the already cut areas.

I folded and tucked. I glued the patterned paper in place and added lots of White Pearls.

I stamped the sentiment from the Creative Expressions Fanciful Phrases Stamp Set using Jet Black Archival and embossed with Cosmic Shimmer Clear Embossing Powder. I cut it out using the little tag die from the Octagon Strips & Accents die set. I folded and tucked and added a pearl.

I assembled the card as shown adding a Pearl Swirl and some dots of Cosmic Shimmer Pearlescent PVA in White around the edges.

Thanks for stopping by.

Julia


Saturday 22 December 2012

Lacy Medallion

Hi Bloggers.

Another card from the Pick of the Day last month -

For the background, I ran a piece of Coconut White Card with the Spellbinders Garden Lattice A4 M-Bossabilities Folder. I stamped one of the Medallions from the Creative Expressions Lacy Medallions Stamp Set using Jet Black Archival and embossed with Cosmic Shimmer Clear Embossing Powder. I cut it out using the backing die from the Spellbinders Puzzle Effect Cut, Fold & Tuck die set. I added a 8mm White Pearl to the centre. I cut another from the same die out of Black Card. I cut the smallest of the Grand Decorative Circles out of White Card and the next size up out of Black Card.

I cut 2 borders out of Black Card using the Spellbinders Octagon Strips & Accents die set. I folded and tucked them. I added some 8mm and 5mm White Pearls.

 I cut 4 of the little motifs from the same die set and folded and tucked them and added a 5mm White Pearl to the centre.

I tied a bow using 2 lengths of Black Silky Crush Ribbon. I added a Fancy Pearl Embellishment and a couple of Black Decorative Stick Pins.

I finished the card by adding some Black Swirls and some dots of Cosmic Shimmer Pearlescent PVA in Black Pearl around the edges.

Thanks for stopping by.

Julia.


Friday 21 December 2012

Nature

Hi Bloggers.

Here's today's card -

For the background, I simply ran some Coconut White Card through the Grand Calibur with the Spellbinders Elite M-Bossabilities Folder. I inked around the edges with Stonewashed Adirondack Dye Ink using Cut n Dry Foam.

I dusted a piece of Coconut White Card with my Anti-Static Bag and stamped the sentiment from the Creative Expressions Falling Leaves Stamp Set and embossed with Cosmic Shimmer Steel Blue Embossing Powder from the Metallics & Darks Set. I cut it out using the largest of the Fancy Postage Edge dies. While Still in the die, I stamped the Ivy Branch from the same stamp around the edges using the Stonewashed Ink Pad. I then inked through the die with Stonewashed using Cut n Dry Foam. I threaded some Blue Baker's Twine from the Primary Set  through the holes in the die cut.

I tied a bow out of Blue Satin Edged Organza. I made a flower using the Bitty Blossoms die set, inking through the die with Stonewashed before rolling.

I assembled the card as shown adding some dots of Cosmic Shimmer Pearlescent PVA in White around the edges.

Thanks for stopping by.

Julia.

Thursday 20 December 2012

Friends are Lifetime Treasures

Hi Bloggers.

This is one of my favourite cards featuring the new Cut, Fold & Tuck dies that were on the Pick of the Day last month.

For the background, I randomly stamped one of the swirls from the Creative Expressions Mini Swirl Stamp Set using Jet Black Archival. I made sure the ink was dry then I ran it through the Grand Calibur with the Spellbinders Garden Lattice A4 M-Bossabilities Folder.

I cut a Spellbinders Grand Decorative Circle out of Black Card. I cut the large Puzzle Effect die out of White Card and folded and tucked it. I added a Red Dazzler to the centre.

I stamped the sentiment from the Creative Expressions Thoughtful Sentiments Stamp Set using Jet Black Archival and embossed with Cosmic Shimmer Clear Embossing Powder. I cut it out using a die from the Spellbinders French Frills die set. I cut another of the same die out of Black Card. I used the inner from the white one with the sentiment and just the outer from the black one.

I wrapped some Red Sheer Wrinkle Edge Ribbon around the background and added some Black American Seam Binding on top. I tied a bow using 2 lengths of the Sheer Ribbon. I cut a motif out of White Card using the Spellbinders Botanical Swirls & Accents die set and added a Black Dazzler to the centre. I added a couple of Black Decorative Stick Pins to the back of the bow.

I assembled the card as shown adding some dots of Cosmic Shimmer Pearlecent PVA in Black Pearl around the edges.

Thanks for stopping by.

Julia.


Wednesday 19 December 2012

May your life be like a wildflower

Hi Bloggers.

Here's today's card -

For the background, I randomly stamped the dandelion seeds from the Creative Expressions Dandelion Wishes Stamp Set onto some Milk Card using Meadow Adirondack Dye Ink. I dried it with my heat tool and then popped it inside the Spellbinders Elite M-Bossabilities Folder. I ran it through a second time to extend the pattern and then inked around the edged with Meadow Ink using Cut n Dry Foam.

I dusted a piece of Milk Card with my Anti-Static Bag and then stamped the sentiment from the same stamp set using Perfect Medium and embossed with Cosmic Shimmer Lapis Black Aurora Embossing Powder from the Metallics & Darks Set. I wiped the excess mica away with a dry wetwipe. I cut it out using Spellbinders Fancy Postage Edge and inked through the die with Meadow.

I cut the largest of the Spellbinders Fancy Ribbon Threader dies out of green card and inked through the die with Meadow ink. I threaded some Moss Green American Seam Binding through the slits in the die cut. I tied a bow using 2 lengths of the ribbon. I made a flower using the Bitty Blossoms die set, inking through the die with Meadow before rolling it.

I assembled the card as shown adding some dots of Cosmic Shimmer Pearlescent PVA in Black Pearl around the edges.

Thanks for stopping by.

Julia.