Hi Bloggers.
I'm launching a new One Day Special on Hochanda at 6pm today with some lovely dies from the November release of Dies by Sue Wilson. There's another show today at 8pm and then more shows tomorrow at 9am, 1pm and 5pm. I hope you can join me.
Here's today's card -
For the background on this one, I have used my favourite background technique with Pixies Powders on Acetate. I have been asked to demo this on one of my shows so hopefully I will get time to show it again at some point (probably tomorrow at 9am).
So, to re-cap how it's done - I used a piece of
Heat Emboss Acetate. I added
CS Glue, spritzed with water and spread the glue all over using my finger. I then added Cosmic Shimmer Pixie Powders in
Straw Yellow,
Burnt Orange,
Bronze Blush,
Lava Red and
Pale Olive so that all the glue was covered. I spritzed with a
little more water and then added
CS Frosty Dawn Diamond Frost.
I scrunched up a piece of White Tissue Paper, opened it out and added
it to my background. I dabbed it down using a piece of Kitchen Roll and
put aside to dry.
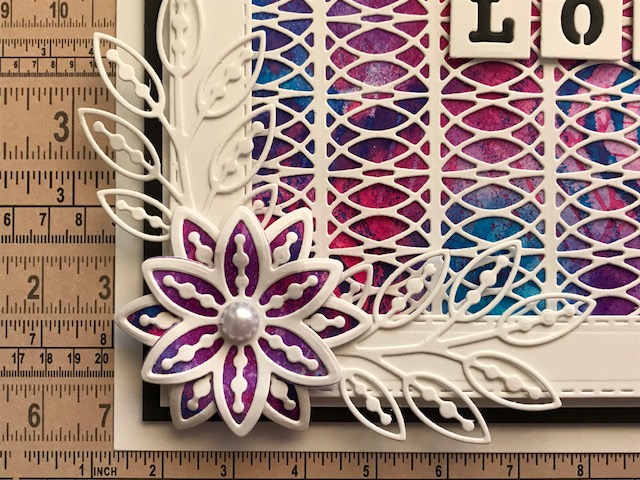
I wanted to use the
Linear Leaf Background over the top of my Acetate but I also wanted to add a frame made using the
Stitched Square Peg Board Die Set so I needed to extend the Linear Leaf. It is a little bit tricky but it is possible. I cut it once and then slotted the left hand leaf column of the die into the right hand left column of the die cut. I've already cut this in the pic below and extended it lengthways but I wanted to show what I mean.
As you can see from the pic, I have already extended the background's length - it's just a little short for the largest frame you can cut from the Peg Board Die Set. This is a little trickier - the dies are hand drawn so do not line up perfectly. Below seems to be the best fit for the length I needed - leave the edge of the die where it's overlapping where you have already cut so that you son't get a line from the edge of the die.
I slotted the die back in once more to complete the piece.
Once my Acetate Pixie Powder background was dry, I added my Linear Leaf Background and my Frame. I matted onto a couple of pieces of Coconut White Card.
I cut the words for my sentiment out of
Black Card using the
Mix & Match Friendship Die Set. I glued them to my frame using
CS Glue in a
Fine Tip Glue Applicator.
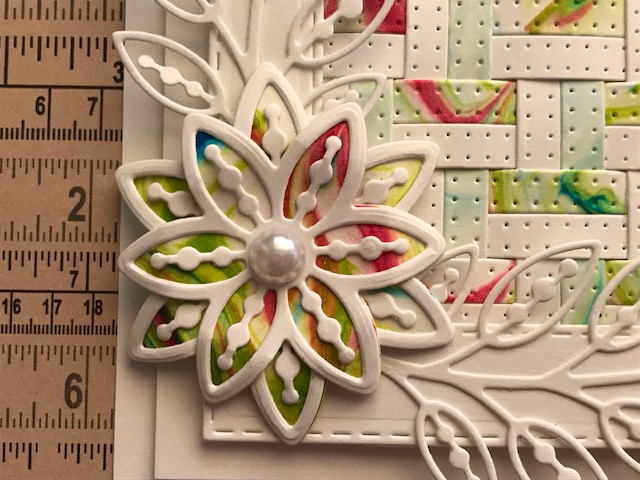
I cut some sunflowers and leaves from the
Sunflower Bouquet Die Set out of Coconut White Card. I painted the flowers with Straw Yellow Pixie Powder and the leaves using Pale Olive Pixie Powder. I shaped the flowers a little using a
Woodware Shaping Tool on a
Moulding Mat. I popped a little
CE Double Sided Self Adhesive Sheet onto Coconut White Card and cut 3 sunflower centres. I removed the backing and added
Dark Bronze Polished Silk Glitter.
I'm offering 10% discount on items from the shows on my website. You can find them
here. Please enter JULIAWATTS in the discount code box at checkout to activate the discount. Offer applies till midnight tomorrow night or while stocks last.
I have loaded photos of the samples from the shows to the Gallery Section of this Blog and to my Julia Watts Crafts Facebook Page.
Thanks for stopping by.
Julia.
www.juliawattscrafts.co.uk