Thursday 31 January 2013

Two Hearts

Hi Bloggers.

Here's today's card - quite a simple one.

For the background, I laid the Celtic Border Mask over a piece of Coconut White Card towards the right hand side and spritzed with Cosmic Shimmer Patina Vintage Mister.

I stamped the image from the Creative Expressions Hearts Entwined Stamp Set using Jet Black Archival and embossed with Cosmic Shimmer Clear Embossing Powder. I cut it out using Spellbinders Heart Circles and inked through the die with Tumbled Glass Distress Ink using Cut n Dry Foam. I cut another Heart Circles out of blue card. I cut in between each heart on both the circles and pulled them forward. I used 3d Foam to stick the 2 circles together off-setting the hearts.

I stamped the sentiment from the same stamp set, again using Jet Black Archival and embossed with Cosmic Shimmer Clear Embossing Powder. I cut it out using Spellbinders Heart Squares and inked through the die with Tumbled Glass.

I assembled the card as shown adding some Pearl Swirls and some dots of Cosmic Shimmer Pearlescent PVA in White around the edges.

Thanks for stopping by.

Julia.

Wednesday 30 January 2013

Thank You

Hi Bloggers.

I'm going to mix it up a bit as I still have some samples to share from the shows on 11th Jan. So, I'll alternate it a bit with the samples from 21st Jan and then at the weekend I'll start sharing samples from my next shows on 4th Feb. I'm having to keep un-blogged cards in a separate box so I can keep track!

Anyway, here's today's card - simple but quite dramatic, I think.

For the background, I randomly stamped one of the flowers from the Creative Expressions Artsy Floral Stamp Set on to some burgundy card using Jet Black Archival. I made sure the ink was dry and then ran it through the Grand Calibur with the Couture Creations Alora Embossing Folder. I ran it through a second time to extend the pattern (doesn't match up exactly but you don't notice).

I stamped the sentiment from the same stamp set using Perfect Medium and embossed with Cosmic Shimmer Ruby Blush Blaze Embossing Powder from the Brights Set.  I cut it out using the second largest Spellbinders Resplendent Rectangles but did not bother to emboss it as the edge would be hidden. I inked around the edges and towards the centre with Aged Mahogany Distress Ink using Cut n Dry Foam. I cut a frame out of black card using the largest and the next but one of the Resplendent Rectangles die set.

I tied a bow using Black Crochet Ribbon. I made a flower using Red Sheer Wrinkled Edge Ribbon (see Sue's tutorial here) and added it to my bow.

I assembled the card as shown adding some dots of Cosmic Shimmer Pearlescent PVA in Berry Red around the edges.

Thanks for stopping by.

Julia.


Tuesday 29 January 2013

Birthday Wishes

Hi Bloggers.

This card was another demo from the shows on the 21st -

As usual, starting with the background, I spritzed through the Delicate Mask onto some Coconut White Card using Cosmic Shimmer Antique Rose Vintage Mister. I dried it with my heat tool and then inked through the Heart Confetti Mask with Dusty Concord Distress Ink using Cut n Dry Foam. Next, holding the crackle stamp from the Creative Expressions Textures Stamp Set in my hand, I randomly stamped sections of it using Aged Mahogany Distress Ink. Then I repeated the process with the script stamp from the same stamp set using Victorian Velvet Distress Ink. I finished the background off by inking around the edges with Aged Mahogany using Cut n Dry Foam.

I cut the largest of the new Spellbinders Stately Circles and inked through the die with Aged Mahogany. I stamped a flower from the Creative Expressions Funky Floral Stamp Set using Perfect Medium and embossed with Cosmic Shimmer Amethyst Mist Lustre Embossing Powder from the Pinks & Purples Set. I cut it out using the next size down of Stately Circles and inked through the die with Aged Mahogany. I stamped a smaller flower, cut it out with scissors and added it to the larger flower with 3D Foam. I added some 3mm White Pearls as shown.

I put 'birthday' and 'wishes' from the same stamp set on to my block and stamped with Perfect Medium. I embossed with the Amethyst Mist Lustre Powder and cut it out using one of the new Spellbinders Framed Tags One dies. I inked through the die with Aged Mahogany and added a bow made with May Arts Two Tone Ribbon.

I assembled the card as shown adding some Pearl Swirls. I inked around the edges of my white mat with Aged Mahogany before adding some dots of Cosmic Shimmer Pearlescent PVA in White around the edges.

Thanks for stopping by.

Julia.

Monday 28 January 2013

From the Heart

Hi Bloggers.

This card was a demo from the shows on 21st -

For the background, I ran a piece of Burgundy Card through the Grand Calibur with the Couture Creations Damask Embossing Folder. I ran it through a second time to extend the pattern (it doesn't line up exactly but you don't really notice).

I stamped the sentiment from the Creative Expressions From the Heart Stamp Set onto some Milk Card using Perfect Medium and embossed with Cosmic Shimmer Blue Raspberry Aurora Embossing Powder from the Pinks & Purples Set. I cut it out using the new Spellbinders Locking Loops Card Creator Die Set and inked through the die with Aged Mahogany Distress Ink using Cut n Dry Foam. I cut a mat out of Burgundy Card using Spellbinders Matting Basics B. I cut the largest of the Locking Loops dies out of Milk Card and inked through the die with Aged Mahogany.

I stamped one of the large hearts from the Creative Expressions Hearts Entwined Stamp Set 5 times using Perfect Medium and embossed with the Blue Raspberry Aurora Powder. I cut them out with scissors and then inked around the edges with Aged Mahogany. I glued them all to a circle of card using Cosmic Shimmer Dries Clear Glue overlapping them as shown to form a flower. I added a Fancy Pearl Embellishment to the centre.

I assembled the card as shown adding some Pearl Swirls and some dots of Cosmic Shimmer Pearlescent PVA in Berry Red around the edges.

Thanks for stopping by.

Julia.


Sunday 27 January 2013

With Love

Hi Bloggers.

I has had a lovely day with Kathryn yesterday. Today's card is a really simple one to show off 4 of the embossing powders in the Cosmic Shimmer Pinks & Purples set.

The background is simply a piece of Coconut White Card run through the Grand Calibur with the Creative Expressions Flourish Embossing Folder. I inked around the edges with Dusty Concord Distress Ink  using Cut n Dry Foam.

The heart stamp is from the Creative Expressions Funky Floral Stamp Set. I stamped it using Perfect Medium. The embossing powders I used from left to right are - Tropic Violet Lustre, Regal Arctic Aurora and Tropic Blueberry Blaze. I cut each one out using Spellbinders Heart Squares and inked through the die with Dusty Concord.


I put the 'with' and 'love' words from the same stamp set together on my block and again stamped with Perfect Medium. This time I embossed with Blue Moon Aurora. I cut it out using Spellbinders Resplendent Rectangles and inked through the die with Dusty Concord.

I assembled the card as shown adding some dots of Cosmic Shimmer Pearlescent PVA in White around the edges.

Thanks for stopping by.

Julia.


Saturday 26 January 2013

You hold the Key

Hi Bloggers.

Hopefully, snow permitting, I'm off to see Kathryn for the day today. For those of you who asked or missed the link last week, here's the link to see all of the new Spellbinders dies due in shops at the end of February/beginning of March here.

Here's today's card -

The background is simply a piece of Coconut White Card popped through the Grand Calibur with the Creative Expressions Lattice Embossing Folder. I ran it through a second time to extend the pattern. For a change, I rounded off the corners with a corner rounder punch.

I stamped the heart from the Creative Expressions From the Heart Stamp Set using Jet Black Archival and embossed with Cosmic Shimmer Clear Embossing Powder. I cut it out using scissors and went around the edge with a black marker pen to hide any white bits. For the concertina backing, I cut 2 of the largest Spellbinders Stately Circles out of Burgundy Card. Then I scored across the circles. I scored from every peak in the design across to every recess in the design. I made a cut along one of the score lines to the centre and then concertina folded. I repeated this with the other circle and then glued the 2 together and popped the stamped heart on top.

You can see the dimension this gives a bit better with this photo -

I stamped the sentiment from the same stamp set again using Jet Black Archival and embossed with Cosmic Shimmer Clear Embossing Powder. I cut it out using Spellbinders Matting Basics B and made a mat out of Burgundy card using Matting Basics A.

I tied a bow using Red Sheer Wrinkled Edge Ribbon and added a Black Dazzler. I coloured a Key Charm with a Black Promarker and glued it below the bow using Cosmic Shimmer Dries Clear Glue.

I assembled the card as shown adding some dots of Cosmic Shimmer Pearlescent PVA in Black Pearl  around the edges.

Just a reminder that Sam Poole is on Create & Craft at 10am and 4pm with her new Sherlock Holmes Stamp Set and lots of other goodies.

Thanks for stopping by.

Julia.


Friday 25 January 2013

Two Hearts

Hi Bloggers.

Here's today's card -

For the background, I simply ran a piece of Coconut White Card through the Grand Calibur with the Couture Creations Walrus & Carpenter Embossing Folder. I ran it through a second time to extend the pattern ans then inked around the edges with Festive Berries Distress Ink using Cut n Dry Foam.

I cut the smallest of the Spellbinders Grand Stately Circles and inked through the die with Festive Berries. I cut the largest of the Spellbinders Stately Circles and at the emboss stage added the Delicate Mask. I inked through the die with Festive Berries.

I stamped one of the large heart images from the Creative Expressions Hearts Entwined Stamp Set twice using Jet Black Archival and embossed with Cosmic Shimmer Clear Embossing Powder. I cut them out with scissors and went around the edges with a black marker pen to hide any white bits.

I stamped the sentiment from the same stamp set, again using Jet Black Archival and embossed with clear powder. I cut it out using Spellbinders Labels 22 and inked through the die with Festive Berries. I cut the middle size of the Spellbinders Decorative Labels 22 and inked through the die with Festive Berries.

I tied a bow using Rose Sheer Wrinkled Edge Ribbon and added a Black Dazzler.

I assembled the card as shown adding some 5mm Black Pearls and some dots of Cosmic Shimmer Pearlescent PVA in Vintage Pink around the edges.

Thanks for stopping by.

Julia.


Thursday 24 January 2013

You are so Loved

Hi Bloggers.

Bit of a Gothic heart on today's card.

For the background, I spritzed a piece of Coconut White Card with Cosmic Shimmer Tarnished Gold Vintage Mister. I then inked through the Delicate Mask with Dried Marigold Distress Ink using Cut n Dry Foam. Now the Mask is square and my card is rectangular - it's easy to move the Mask and line an end section up with where you've already been and carry on extending the pattern. If doing this, then it looks better if you start off the card in the first place.  Next, I randomly stamped one of the flowers from the Creative Expressions Funky Floral Stamp Set using Dried Marigold.

I stamped the heart from the Creative Expressions Hearts Entwined Stamp Set using Jet Black Archival and embossed with Cosmic Shimmer Clear Embossing Powder. I cut it out using Spellbinders Decorative Labels 22 and inked through the die with Dried Marigold. I also added some Dried Marigold to the heart. I threaded some White Sheer Wrinkled Edge Ribbon through the slots in the die cut.


I stamped the sentiment from the Creative Expressions From the Heart Stamp Set using Jet Black Archival and embossed with Clear Embossing Powder. I cut it out using Spellbinders Resplendent Rectangles and inked through the die with Dried Marigold.

I cut a strip of Coconut White Card and spritzed it with Tarnished Gold Vintage Mister. I placed the Elegance Border Mask over the top and inked through with Dried Marigold. I cut the largest Resplendent Rectangle out of Coconut White Card, trimmed it and glued it behind my patterned border.

I assembled the card as shown adding some dots of Cosmic Shimmer Pearlescent PVA in White around the edges.

Thanks for stopping by.

Julia.


Wednesday 23 January 2013

Be Mine

Hi Bloggers.

I haven't heard from Granny Sue, winner of the Just a Note Card, so if you're reading this please email me at juliawattscrafts@gmail.com with your address so I can pop it in the post to you. If I haven't heard from Granny Sue by end of Friday then I'll draw another winner on Saturday morning.

White card today with just a little colour from embossing powder.

The background is simply a piece of Coconut White Card run through the Grand Calibur with the Couture Creations Walrus & Carpenter Embossing Folder. I ran it through a second time to extend the pattern.

I stamped the sentiment from the Creative Expressions Hearts Entwined Stamp Set using Perfect Medium and embossed with Cosmic Shimmer Arctic Lake Lustre Embossing Powder from the Pinks & Purples Set. I then stamped the frame around it (cut the excess rubber out of the centre of your stamp) and embossed again. I cut out using Spellbinders Decorative Labels 22. I cut the next size up of Decorative Labels 22, turned it and threaded some White Silky Crush Ribbon through the slots either side.

I cut the largest of the Spellbinders Matting Basics A out and also the next size down. With the latter I added the Couture Creations Damask Folder at the emboss stage.

I tied a bow using 2 lengths of the Silky Crush Ribbon. I pressed a Fancy Pearl Embellishment into the Perfect Medium Ink Pad and added some of the Arctic Lake Lustre Embossing Powder. I tapped off the excess and heat set.


I assembled the card as shown adding some dots of Cosmic Shimmer Pearlescent PVA in White around the edges.

Thanks for stopping by.

Julia.


Tuesday 22 January 2013

With Love

Hi Bloggers.

Thanks for all your support yesterday. I was worried about getting there but the roads were fine and I had allowed myself plenty of time to get there. It was quite nice to have 2 shows quite close together in the afternoon.

Today's card was a demo in the 3pm show and I made it to show off some of the Pinks & Purples Cosmic Shimmer Embossing Powders. Well, here there's actually 3 of the pink ones anyway.

As always, I'll start with the background. I spritzed a piece of Coconut White Card with Antique Rose Vintage Mister. I dried it with my heat tool (I'm too impatient to wait for it to air dry) and then placed the Ivy Border Mask across the top section. I inked over the top of the mask with Victorian Velvet Distress Ink. I moved the mask down the the middle of the background and inked again, then repeated in the bottom section. I then randomly stamped one of the flowers from the Creative Expressions Funky Floral Stamp Set using Victorian Velvet.

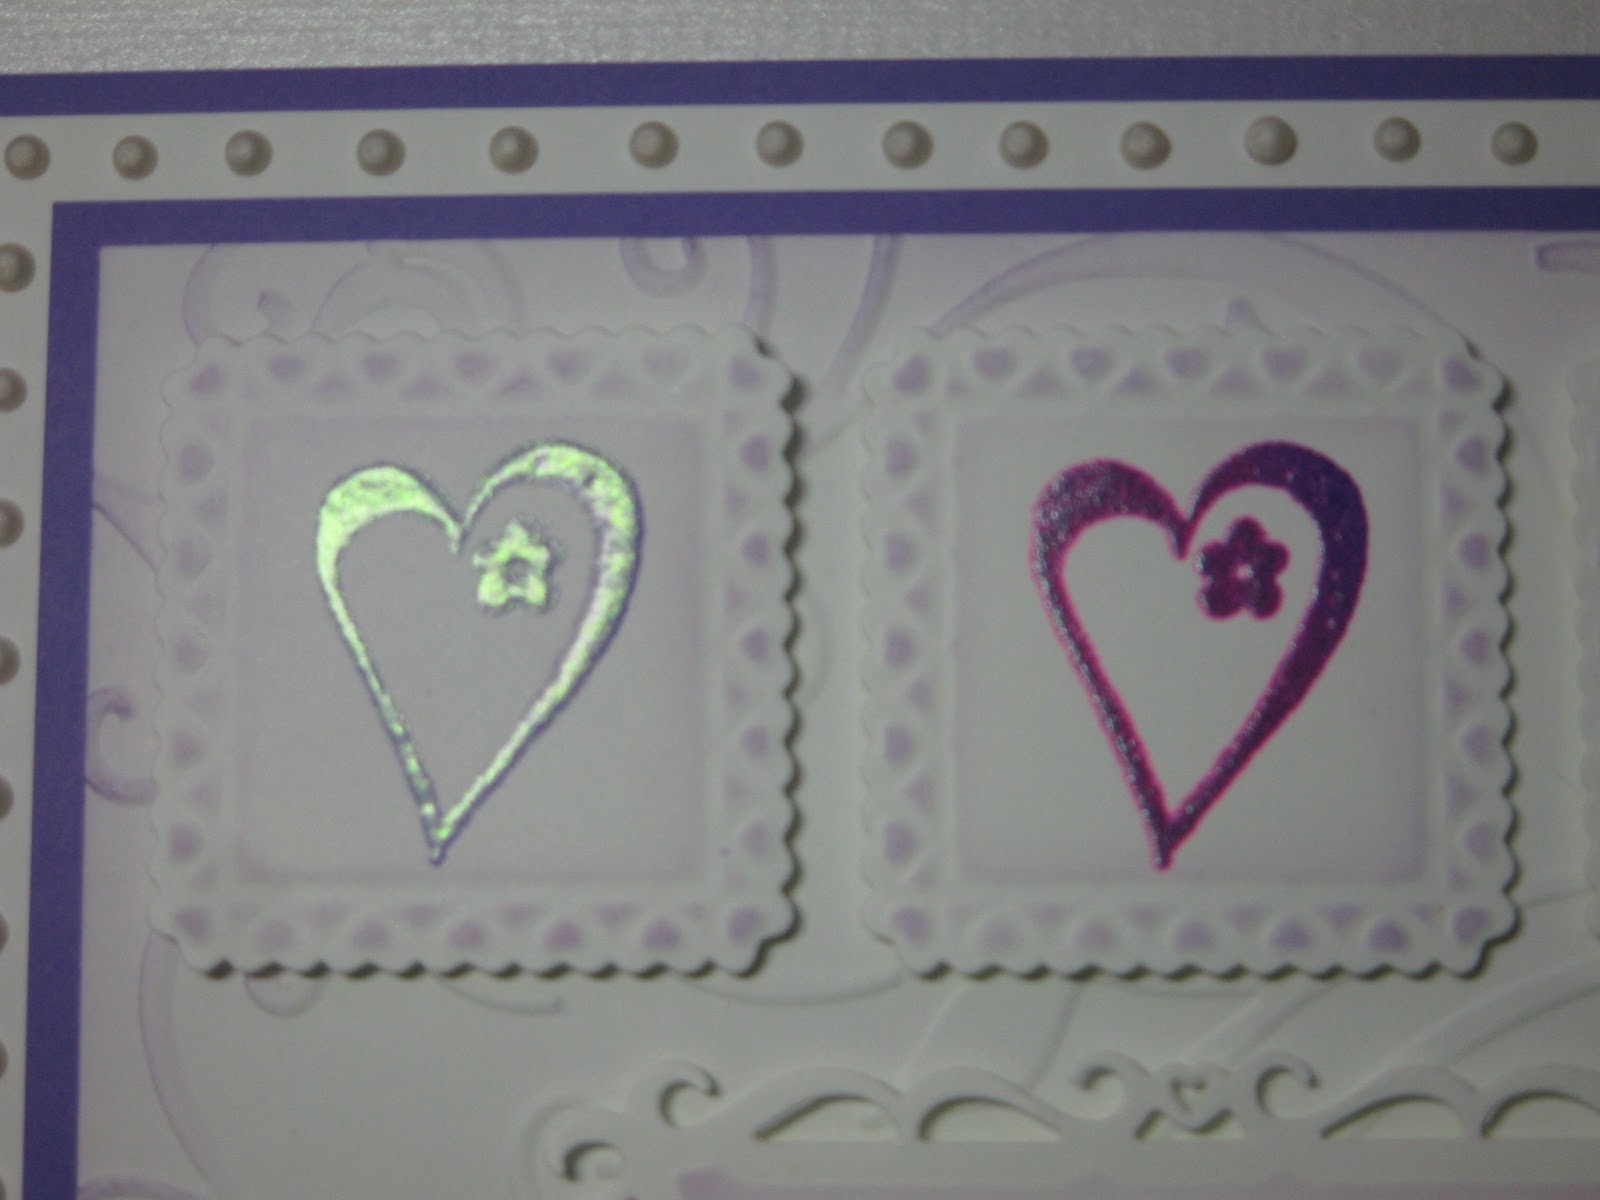
For the 3 large panels, I used one of the large scroll stamps from the stamp set. I dusted some Coconut White Card with my anti-static bag and stamped with Perfect Medium. I added Cosmic Shimmer Lapis Pink Aurora Embossing Powder (the one on the left) and heat set. I cut it out using Spellbinders Matting Basics B.

I stamped again and added Cosmic Shimmer Tropic Pink Blaze Embossing Powder (the one in the centre). Again I cut out using Matting Basics B trying to get it in roughly the same position.

Then I stamped and embossed with Cosmic Shimmer Sunrise Pink Lustre Embossing Powder (the one on the right hand side) and cut out with Matting Basics B.

I stamped a heart from the same stamp set and embossed in each of the powders. I cut them out with scissors and popped one on top of each panel mixing them up. I cut a pink mat out for each panel using Matting Basics A.

The Funky Floral Stamp Set hasn't got any sentiments as such but it does have lots of single words in different fonts so you can make up your own sentiment. I like that. I placed the 'With' and 'Love' stamps on my block and stamped with Perfect Medium. I chose to emboss with the Sunrise Pink Lustre Powder. I cut it out with Matting Basics A and cut a pink mat out using Matting Basics B.

I assembled the card as shown adding some dots of Cosmic Shimmer Pearlescent PVA in Vintage Pink around the edges.

Just before I sign off today, I know some of you have been put off buying the Matting Basics Dies as, let's face it, they are a bit boring compared to many of the other Spellbinders dies. But, I have to say I find that I use them a lot especially A's and B's together as you get an 1/8" increment. Of course you can cut rectangles yourself but it's the embossed edge that really does it for me. And, there are a lot of yummy Card Creator dies coming out which build on the core (a fave Spellbinders term it seems) that the Matting Basics Sets give you. Just food for thought!

All for now. Let me know what you think of the Pinks & Purples Embossing Powders.

Thanks for stopping by.

Julia.

Monday 21 January 2013

I Love You

Hi Bloggers.

I'm on Create & Craft today at 3pm (with Zoe) and 6pm (with Martyn) - as long as snow permitting I can get there! Hope you can join me. The theme is love as we have 2 new Heart themed stamp sets and Valentine's Day is just around the corner but I also have another set of Cosmic Shimmer Embossing Powders on the show - Pinks & Purples. They are gorgeous and I'm planning to use them in all of my demos to give you a real good look at the colours. For those that asked, I am planning to use the stamp in the hand technique in the 6pm show.

This card isn't a demo but it's in what I'd call traditional colours - most of the demos cards I've made aren't traditional at all!

For the background, I randomly stamped one of the large heart stamps from the Creative Expressions Hearts Entwined Stamp Set using Jet Black Archival onto some Coconut White Card. I made sure the ink was dry and then ran it through the Grand Calibur with the Couture Creations Damask Embossing Folder. I ran it through a second time to extend the pattern - it doesn't exactly match up but it's such a busy pattern that you can't really see the join especially with the stamped background. I inked around the edges with Aged Mahogany Distress Ink using Cut n Dry Foam.

There are some frames on both of the new heart themed stamp sets. I find it easier to stamp the sentiment first and then line the frame up around it. To do this you will need to cut the excess rubber away from the centre of the frame stamp so you can see through the middle to position it correctly. I did this using Jet Black Archival. I did not emboss this one. I used a Matting Basics Die to cut it out and inked around the frame with Aged Mahogany.

I cut the burgundy frame using Matting Basics B with Labels 4 in the centre. At the emboss stage I added the Heart Confetti Mask. I cut a black mat using Matting Basics A.

I tied a bow using 2 lengths of Red Sheer Wrinkled Edge Ribbon. I added a Fancy Pearl Embellishment and a couple of Black Decorative Stick Pins.

I assembled the card as shown adding some Self Adhesive Pearls and some dots of Cosmic Shimmer Pearlescent PVA in Berry Red around the edges.

Hope you can tune in later. Emails welcome as always.

Thanks for stopping by.

Julia.


Sunday 20 January 2013

Winner of the Just a Note Card

Hi Bloggers.

Kathryn picked number 29 and that means that .....

GRANNY SUE is the winner!!

Please email me at juliawattscrafts@gmail.com with your snail mail address and I'll pop it in the post to you.

All for now.

Julia.

Heartfelt Wishes

Hi Bloggers.

I was wondering which card to share first from the shows tomorrow - I eventually decided on this one because a) It's pastel and b) It uses all the stamp sets that are on the shows. It also uses a couple of the new Spellbinders Card Creators - not on tomorrow's show but should be arriving in the shops at the end of February. You can see all the new die sets from Spellbinders on the Creative Expressions website here.


So, as always, starting with the background - I inked through the Delicate Mask onto some Coconut White Card using Tattered Rose Distress Ink. I then randomly stamped a leaf stamp from the Creative Expressions Funky Floral Stamp Set using Dried Marigold Distress Ink. Next I randomly stamped the Crackle Stamp from the Creative Expressions Texture Stamp Set using Tattered Rose. I stamped it with the stamp in my hand not on a block. I'll hopefully show this in a demo of another card in the 6pm show tomorrow. Then I used the same method to randomly stamp the Script Stamp from the same Texture Stamp Set using Victorian Velvet Distress Ink. I have to say that I was really surprised that this set of Distress Inks went so well together and you may well see this combo again in future as I really like it. I finished the background off by inked around the edges with Tattered Rose using Cut n Dry Foam.

I stamped the sentiment from the Creative Expressions From the Heart Stamp Set using Jet Black Archival and embossed with Cosmic Shimmer Clear Embossing Powder. I cut it out with a Spellbinders Floral Ribbon Threader die and inked through the die with Dried Marigold. I cut a Spellbinders Locking Loops out of pale peach card.

I made a couple of flowers using the small Heart Stamps from the Creative Expressions Hearts Entwined Stamp Set and the From the Heart Stamp Set using Tattered Rose and Dried Marigold Distress Inks. I stamped the Dried Marigold one 5 times and the Tattered Rose one 6 times. I glued the hearts to a small circle of card and added a 8mm White Pearl to the centres.

I assembled the card as shown adding some leftover bits from some Pearl Swirls and some dots of Cosmic Shimmer Pearlescent PVA in White around the edges.

Thanks for stopping by.

Julia.

Saturday 19 January 2013

The Beauty of Life

Hi Bloggers.

This is my final card from the shows last Friday for a while as tomorrow I'll start sharing some cards from my shows on Monday. I do have a few more cards from this set to share - I'll pop them in later at some time.

This card is another re-vamp of a card we make with Sue at a workshop a few years ago. It uses the Faux Batik technique that is on her DVD if you're lucky enough to have a copy - I've used it many times.

So, for the faux batik background, I dusted a piece of Coconut White with my anti-static bag and then randomly stamped some of the flowers from the Creative Expressions Whimsical Floral Stamp Set using Perfect Medium. I stamped a few at a time and then added Cosmic Shimmer Clear Embossing Powder. When I had the coverage that I wanted, I heat set the embossing powder. I then folded the card this way and that and then turned it over and folded a few more times. With the right side up, I spritzed with some water. I put some Aged Mahogany Distress Ink onto my brayer and ran it diagonally across my background. I dried the brayer off and then applied some Barn Door Distress Ink and filled in the gaps. I used a kitchen towel to remove the excess ink from the embossed flowers. I put it aside to dry.

I stamped one of the large flowers from the stamp set 3 times using Cosmic Shimmer Coral Glow Aurora Embossing Powder from the Brights Set and cut them out with scissors leaving a border around them.

I cut a frame out of red card using the largest and the next but one largest of the Spellbinders Resplendent Rectangles Die Set. I stamped the sentiment using Perfect Medium and embossed with the Coral Glow Aurora Powder. I cut it out using the Resplendent Rectangle die in between the ones used to cut the frame. I didn't bother to emboss the die cut as it would be hidden. I did ink the area around the sentiment with Barn Door using Cut n Dry Foam.

I assembled the card as shown adding some dots of Cosmic Shimmer Pearlescent PVA in White around the edges.

Thanks for stopping by.

Julia,

Friday 18 January 2013

Just a Note and a Demo Card Give Away

Hi Bloggers.

This card was a demo last Friday -

For the background, I ran the Couture Creations Compassionate Embossing Folder through the Grand Calibur with some Coconut White Card. I ran it through a second time to extend the pattern and then inked around the edges with Chipped Sapphire Distress Ink using Cut n Dry Foam. I wrapped a piece of White Crochet Ribbon and a piece of Sky Blue American Seam Binding around the centre.

I stamped the large stamp from the Creative Expressions Artsy Floral Stamp Set using Perfect Medium and embossed with Cosmic Shimmer Tropic Aqua Blaze Embossing Powder from the Brights Set. I cut it out using Spellbinders Wavy Rectangles and inked through the die with Chipped Sapphire. I stamped the co-ordinating flower from the Creative Expressions Whimsical Floral Stamp Set 3 times using Perfect Medium and embossed with the Tropic Aqua Blaze Powder. I cut them out with scissors, trimming a little extra off one of them, and inked with Chipped Sapphire.

I stamped the sentiment from the Artsy Floral Stamp Set using Perfect Medium and embossed with the Tropic Aqua Blaze Powder. I cut it out using Spellbinders Resplendent Rectangles and inked through the die with Chipped Sapphire.

I tied a bow using 3 lengths of the American Seam Binding. I spritzed it with some water, scrunched it up and dried it. I added a Medium Square Dazzler to the centre.

I assembled the card as shown adding some dots of Cosmic Shimmer Pearlescent PVA in White Pearl  around the edges.

I have the card that I made in the Studio to give away as it was the other card that I made that was sent out to the viewer who's email was pulled out of the Watering Can of Wonder. So, if you would like it, leave a comment on this post. I will draw a winner on Sunday evening (20th Jan).

Thanks for stopping by.

Julia.