Friday 31 July 2015

Freebie Friday

Hi Bloggers.

Here's today's card that needs a new home -

Leave a comment below to be in with a chance of winning this card. I will do the draw on Monday.

You can read how this card was made here.

Also - more Freebiess! I'm sure you can imagine that I have boxes and boxes of sample cards! It's getting a bit out of hand actually - they're everywhere. I'm having little success selling them on ebay, partly for charity so, to reduce my storage problem, during August, I will send a free sample card to everyone who places an order on my website. I realise that not everyone will want one, so, if you do, please enter 'Free card please' in the comment box at checkout. If you forget, email me at admin@juliawattscrafts.co.uk BEFORE you receive your email saying your order has been sent. There'll be no specific topic, I'll just open the first box I come to under my bed and go from there. Remember, there is a postage charge of £2 for orders under £20, £20 and over is free postage (UK only). There is a postage charge to Europe - I think I have that sussed now.

Thanks for stopping by.

Julia.
www.juliawattscrafts.co.uk


Thursday 30 July 2015

John Lockwood Christmas Stamps now available!

Hi Bloggers.

I've just received stock of John's gorgeous new Christmas Stamps - you can order them here


Please scroll down to the previous post to see today's card.

All for now.

Julia
www.juliawattscrafts.co.uk

Peace

Hi Bloggers.

Continuing with the Christmas theme, here's today's card -

For the background, I inked up the Creative Expressions Frosty Swirls Embossing Folder with Perfect Medium and ran it through the Grand Calibur with a piece of Milk Card. The ink transferred to the deboss pattern. I then brushed Enchanted Gold Cosmic Shimmer Mica Powder over the surface.

I cut the Spellbinders Angel of Peace Die out of Vintage Gold Card. I cut the largest die in the Spellbinders Oval Majesty Die Set out of Milk Card and inked through the die with Antique Linen Distress Ink using a Smoothie.

I cut the Spellbinders Peace Strip Die out of Vintage Gold Card and added it to the bottom section of my card.

I assembled the card as shown adding some Cream 8mm Pearls and piercing around the edges using my Tim Holtz Ruler and a Precision Probe.

Thanks for stopping by.

Julia.
www.juliawattscrafts.co.uk

Wednesday 29 July 2015

Let it Snow

Hi Bloggers.

Another Christmas Card today - sorry if I'm bombarding you with Christmas at the moment. I am frantically trying to get samples made for my demo at Colemans in Rushden on Saturday. It a Sue Wilson Christmas Dies demo this time so I have to make a whole new set of samples! No time to do anything else!

Here's today's card -

For the background, I ran a piece of Coconut White Card through the Grand Calibur with the Creative Expressions Snowflake Lattice Embossing Folder and inked around the edges with Stonewashed Adirondack Dye Ink using a Smoothie.

I cut the tree, star and tree stand out of Coconut White Card using Spellbinders Stylized Trees Die Set (there are 3 trees in this set as well as some bits and bobs).
I cut some spotty paper from my stash using Spellbinders 5 x 7 Matting Basics B. I cut a mat out of Cobalt Card (I would haved used 5 x 7 Matting Basics A to do this but it has gone missing in my Craft Room! lol).

I cut the lovely corner flourish die from the Spellbinders 5 x 7 Holly Frame Die Set (the one I used in yesterday's post) and inked through the die with Stonewashed ink.

I stamped the sentiment from the Creative Expressions Peace on Earth Clear Stamp Set using Cobalt Archival. I cut it out using Spellbinders Holly Tags Die Set.

I assembled the card as shown adding some White 8mm Pearls and piercing around the edges.

As many of you may know, John Lockwood, has just released some more Clear Stamp Sets. I have them on order and hopefully they will arrive in the next day or so and I can get them onto my website. I do already have his 8 x 8 Paper Pad in stock here.

Phill's latest collection of colours - Frosty ones, and his new 8 x 8 Paper Pad are in stock here. I am waiting for my Frosty colours to arrive and will make some samples when I get them. I do have Phill's latest Christmas stamps in stock in this section here.

I have some lovely ribbon in stock that I have cut into lengths for you to make it more affordable, including Two-tone ribbon, Sheer Iridescent Ribbon (we used to call it Cosmic Ribbon) and Vintage Ribbon - in this section here. There's not much of the Christmas Red Sheer Iridescent Ribbon and none left in the warehouse so be warned!

All for now.

Thanks for stopping by.

Julia.
www.juliawattscrafts.co.uk

Tuesday 28 July 2015

Warm Wishes

Hi Bloggers.

Another Christmas Card today folks -

This card features the new Spellbinders Holly Frame 5 x 7 Card Creator Die Set.

I started by cutting the largest die in the set out of Rich Plum Card. I added a Spellbinders 5 x 7 Matting Basics B Die to the centre to make the frame.

I cut the largest die in the Spellbinders 5 x 7 Matting Basics B Die Set out of Milk Card and then ran it through the Grand Calibur with the Creative Expressions Frosty Swirls Embossing Folder. I edged it with a little Plum Archival.

I stamped the sentiment from the Creative Expressions Peace Joy Love Clear Stamp Set onto Milk Card using Plum Archival. I cut it out using Spellbinders 5 x 7 Matting Basics B and cut another die from the same set out of Rich Plum Card. I trimmed down some Cream Pearl Corners ro make them a little smaller and added them to the sentiment panel.

Using the dinky dies in the Holly Frame Die Set, I cut some little poinsettias out of Rich Plum and Vintage Gold Card, shaped them and added a 3mm Cream Pearl.

Using the Spellbinders Layered Poinsettia Die Set (still a favourite), I made a larger flower and added a 5mm Cream Pearl. I tied a knot in a piece of Cream Tulle, trimmed it a little and added it to the back of the flower.

I made a couple of Stick Pins using Cream Pins, Cream Pearls, Bead Spacers - one with a Frosted Amethyst Teardrop Bead and one with an Amethyst Teardrop Bead all stuck together with Glossy Accents.

I assembled the card as shown piercing around the edges using my Tim Holtz Ruler with a Precision Probe on a Piercing Mat.

All highlighted products are in stock now on my website.

Thanks for stopping by.

Julia.
www.juliawattscrafts.co.uk

Monday 27 July 2015

Freebie Friday Winner

Hi Bloggers.

The winner of the card from Freebie Friday on July 24th is .......................

BERYL TREBLE

Please email me at juliawattscrafts@gmail.com with your address and I'll pop it in the post to you.

All for now.

Julia.

Noel

Hi Bloggers.

Here's today's card -

This card uses a couple of the new Spellbinders Christmas dies.

I started by trimming a piece of Coconut White Card to 4 1/4" wide. I positioned the Spellbinders Noel Strip Die towards the bottom of the card and ran it through the Grand Calibur. I backed it onto a piece of Aqua Card.

I cut a piece of Coconut White Card using Spellbinders 5 x 7 Matting Basics B and then embossed it using the Creative Expressions Sparkle Squares Embossing Folder

I cut the Spellbinders Shining Star Die out of Coconut White Card 3 times. On one of them I added Cosmic Shimmer Sparkle Star Twinkles using a little piece of Cut n Dry Foam. Once dry, I glued all 3 die cuts together using Cosmic Shimmer Dries Clear Glue.

I assembled the card as shown adding some Pearl Corners and some White 5mm Pearls.

Don't forget to pop by later to see you you have won last Friday's card.

Thanks for stopping by.

Julia.
www.juliawattscrafts.co.uk

Sunday 26 July 2015

Friends fill your life with joy

Hi Bloggers.

I don't think that I've shared this card on the blog -

For the background, I ran a piece of Milk Card through the Grand Calibur with the Creative Expressions Art Deco Fanfare Embossing Folder. I wrapped a piece of Brugundy/Ivory Striped Grosgrain Ribbon around it as shown.

I made an ink pad by spritzing some Cosmic Shimmer Mulberry Mist Vintage Ink Spray Mist onto a piece of Cut n Dry Foam. I spritzed a little more onto my Craft Sheet and added a little Ruby Red Mica Powder from the Cosmic Shimmer Delicate Lace Mica Spray Set. I picked this up onto the Cut n Dry Foam. I used this 'ink pad' to ink up the Justrite Dotted Fronds Background and stamped onto Milk Card. I trimmed it down to a panel and matted onto Rich Red Card.

I selected the Spellbinders Labels 29 die which fitted the accent stamp from the Justrite Special Gifts Labels 29 Clear Stamp Set and cut it out of Milk Card. I inked through the die with Aged Mahogany Distress Ink. I then used my 'ink pad' the stamp the accent stamp on both sides of the die cut.

I stamped the little frame from the same stamp set using my 'ink pad'. I added the sentiment, again from the same stamp set, using Red Geranium Archival. I cut it out using another Spellbinders Labels 29 die.

I assembled the card as shown adding some Cream Pearls and piercing around the edges using my Tim Holtz Ruler and a Precision Probe and Piercing Mat.

Thanks for stopping by.

Julia.
www.juliawattscrafts.co.uk

Saturday 25 July 2015

Thanks for everything

Hi Bloggers.

I'm demoing at Strikes Garden Centre in Poynton today 10 till 4. Please stop by if you're in the area.

Here's today's card -

For the background, I spritzed a piece of Milk Card with water and ran it through the Grand Calibur with the Spellbinders Decorative Applause 3D Embossing Folder (really love that folder!). I rubbed Enchanted Gold Gilding Wax all over the surface.

I cut the largest die in the Spellbinders Floral Assortment Die Set out of Coconut White Card.

I cut the middle die from the Spellbinders Labels 47 Decorative Elements Die Set out of Milk Card and the smallest diagonal lattice work die from the same set out of Vintage Gold Card.

I stamped the sentiment from the Creative Expressions Amazing Sentiments Clear Stamp Set using Clear Perfect Medium and embossed with Cosmic Shimmer Gold Detail Embossing Powder. I cut it out using the smallest die from the Spellbinders Floral Assortment Die Set.

I cut the vine from the Spellbinders Flower Bundle Die Set out of Coconut White Card and a set of flowers out of Milk Card using the same die set. I rubbed Enchanted Gold Gilding Wax over the flowers. I snipped the vine in 2 and added it as shown with the flowers on top using 3D Foam.

I assembled the card as shown adding some 5mm and 8mm Cream Pearls and piercing around the edges using my Tim Holtz Ruler with a Precision Probe and Piercing Mat.

Thanks for stopping by.

Julia.
www.juliawattscrafts.co.uk


Friday 24 July 2015

Freebie Friday

Hi Bloggers.

Here's today's card that needs a new home -

Just leave a comment below and I'll draw a winner on Monday.

You can read how this card was made in this post.

I'm heading up to Cheshire again this afternoon for a demo at Strikes Garden Centre in Poynton tomorrow. Hopefully, the motorways will be kind!

John Lockwood & I are heading down to Taunton for the weekend at the end of September. John's workshops are already sold out but there are spaces still available on the Sunday for a double demo session with both of us. For more info and to book, please contact Craftasmic on 01823 423894

Thanks for stopping by.

Julia.
www.juliawattscrafts.co.uk


Thursday 23 July 2015

Wishing you a joyous Christmas

Hi Bloggers.

I have another Christmas Card to share today -

Spellbinders have released some card creator dies for Christmas and this is one of them - 6 x 6 Decorative Holly Frame. I cut it out of Emerald Card and matted it onto a piece of Milk Card cut using the largest die in the Spellbinders 6 x 6 Matting Basics A Die Set.

I cut the label die from the Decorative Holly Frame Die Set out of Vintage Gold Card. I stamped the sentiment from Phill Martin's Christmas Sentiments Collection Stamp Set onto Milk Card using Perfect Medium and embossed with Cosmic Shimmer Gold Detail Embossing Powder. I cut the embellishment die from the Decorative Holly Frame Die Set out of Emerald Card.

I assembled the card as shown adding some Phill Martin Cosmic Shimmer Vintage Berry Twinkles and piercing around the edges.

I managed to pick up some Christmas Spellbinders Dies yesterday and they're now on my website. You can find them here.

Kathryn has blogged some more pics from our holiday here.

Sue Wilson has shows on Create & Craft today at 4pm and 7pm. Hope you can join her.

Thanks for stopping by.

Julia.
www.juliawattscrafts.co.uk

Wednesday 22 July 2015

Merry Christmas

Hi Bloggers.

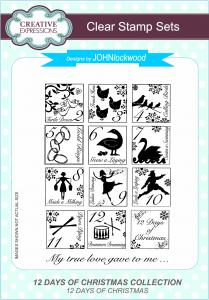
Sue, Phill, John and myself are all up at Creative Expressions HQ today running a training day for CE Retailers. It's my job to demonstrate new Christmas Spellbinders Dies which CE have instock now for your local retailer to buy. I've just received my stock of dies and will be busy loading them onto my website this evening.

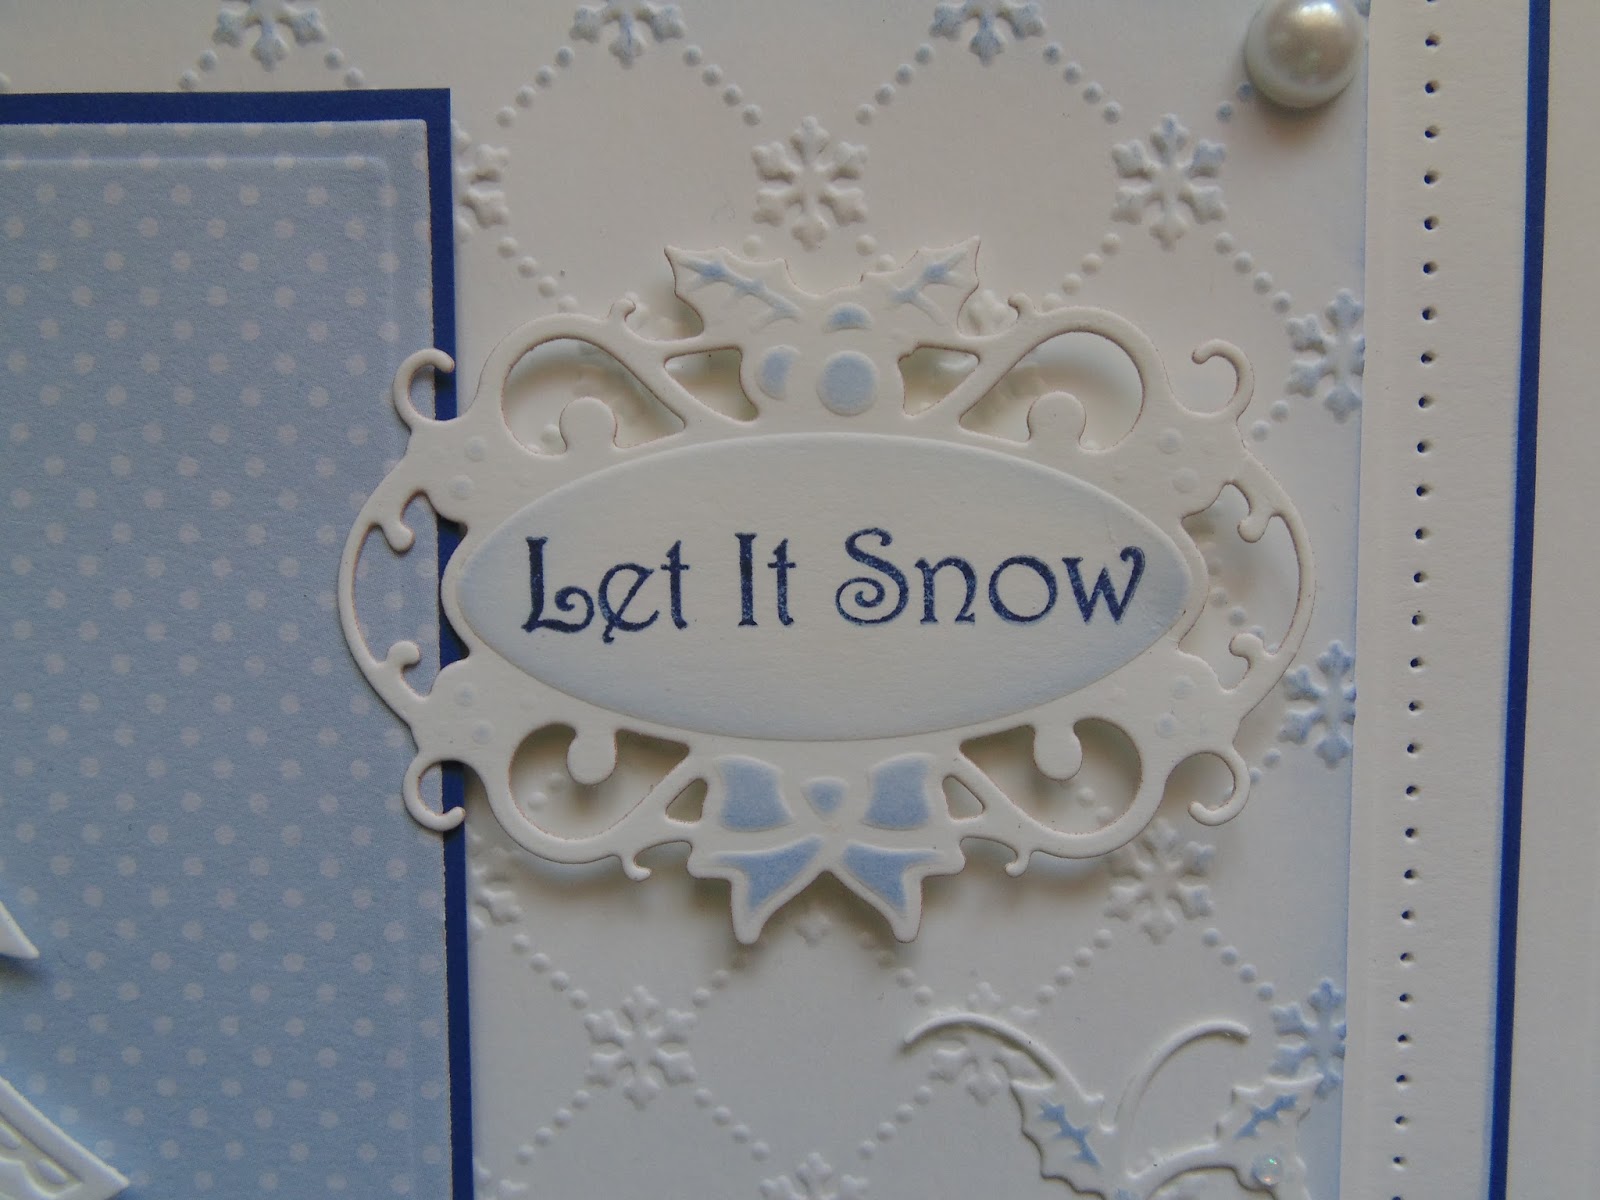
So, today, I thought I'd share one of the samples I've made -

For the background, I stamped one of the corners from Phill's Christmas Holly Corners Borders & Icons Stamp Set onto Coconut White Card using Forest Moss Distress Ink. I then ran it through the Grand Calibur with the Creative Expressions Swirling Holly Embossing Folder and inked around the edges with Festive Berries Distress Ink using a Smoothie.

I used Spellbinders Lattice Ornaments Die Set. I cut the outer die of the bell and the bauble out of Brunswick Green Card (cutting the bell twice) and both dies of the bell and the bauble out of Rich Red Card (again cutting the bell twice). The little bow is from the same die set and I cut it 3 times out of Vintage Gold Card. I added some Bakers Twine from the Primary Set at the back of the baubles.


I stamped the sentiment from the Creative Expressions Peace on Earth Stamp Set using Vermillion Archival. I cut it out using A2 Matting Basics and inked through the die with Forest Moss Distress Ink. I cut a mat out of Brunswick Green Card using another A2 Matting Basics Die.

I assembled the card as shown adding some 8mm White Pearls to the corners and piercing around the edges.

We went to see Ant Man on Monday night. Nathan is 19 and we always go and see Marvel and DC films together. We really enjoyed the movie - very funny in places. Would recommend it if you like Marvel films.

I have no more holiday photos to share. Kathryn has been busy working at the Drystack in Port Solent so hasn't blogged since the last link I shared with you.

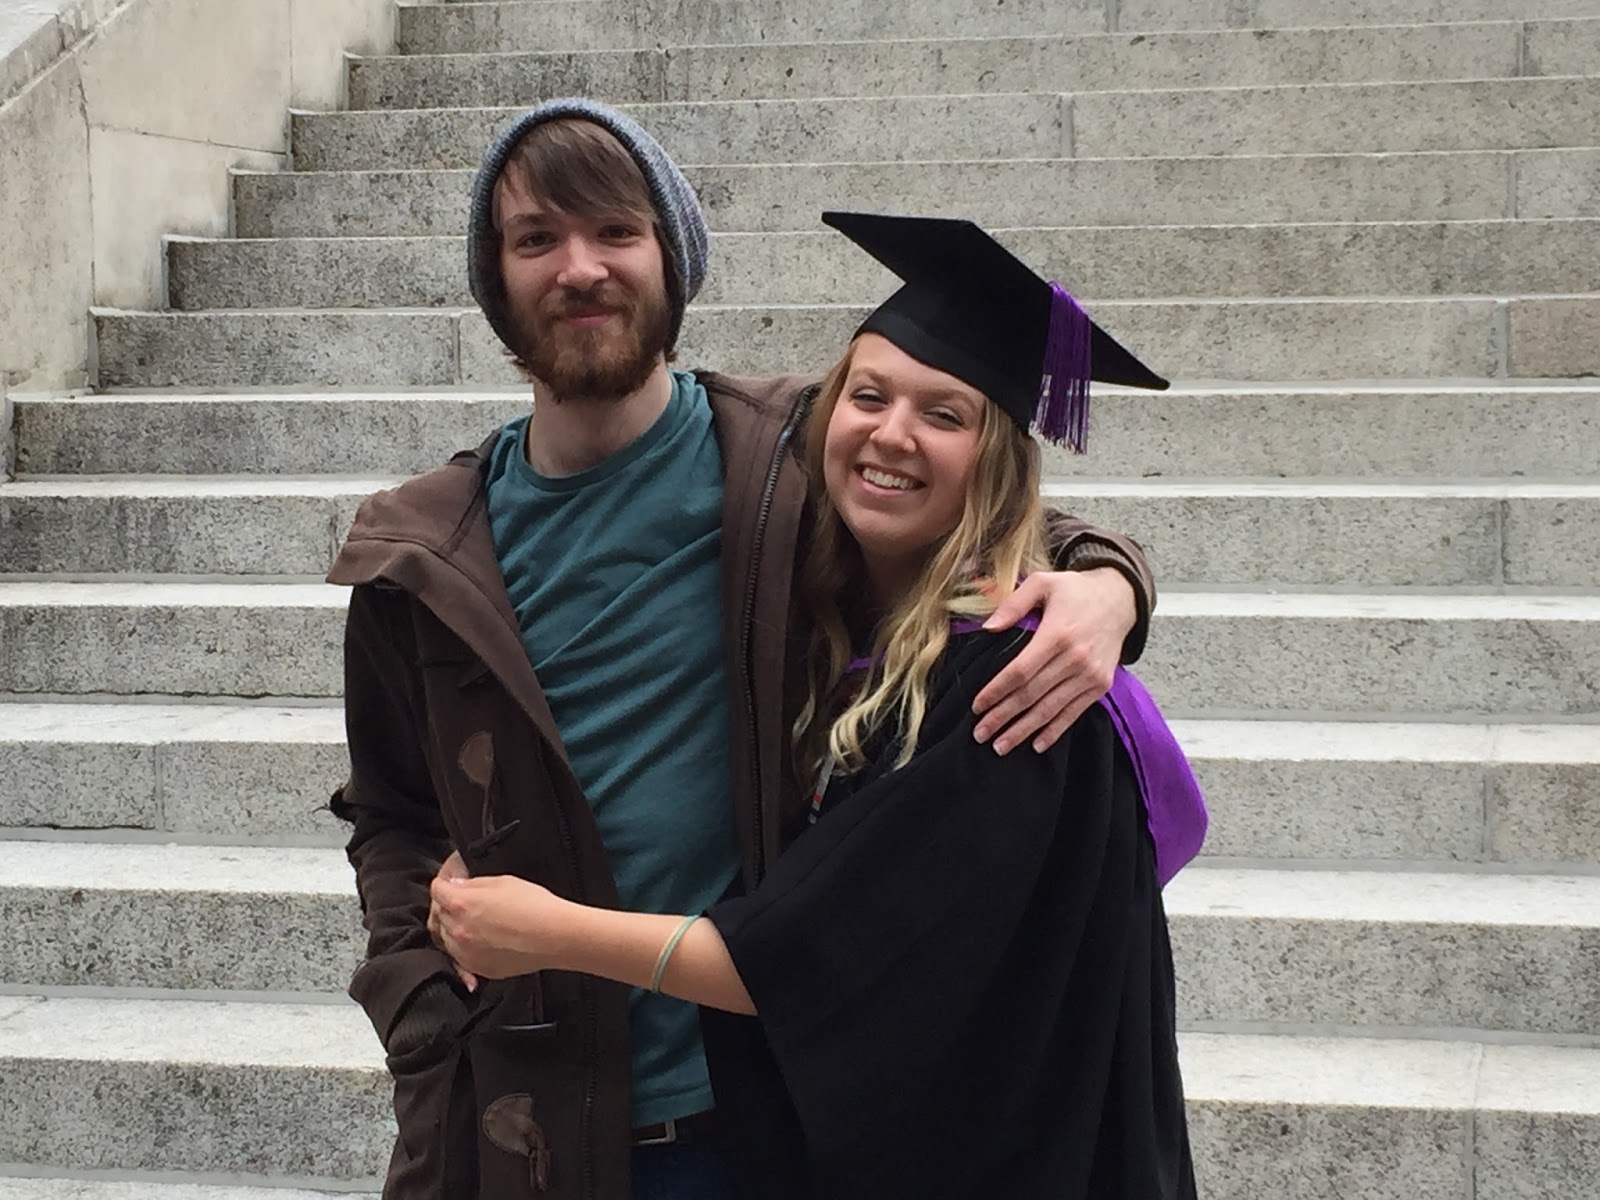
I have got a few more photos to share with you from Kathryn's Graduation last week -


I've had to jiggle the dates of the workshops at Thats Really Crafty in Loughborough. July 27th has been moved to Monday 7th September, 8th August has been moved to Monday 12th October. My first workshop is on Monday 17th August and will have a Christmas theme.

Thanks for stopping by.

Julia.
www.juliawattscrafts.co.uk