Friday, 17 August 2012

You're a Classic

Hi Bloggers.

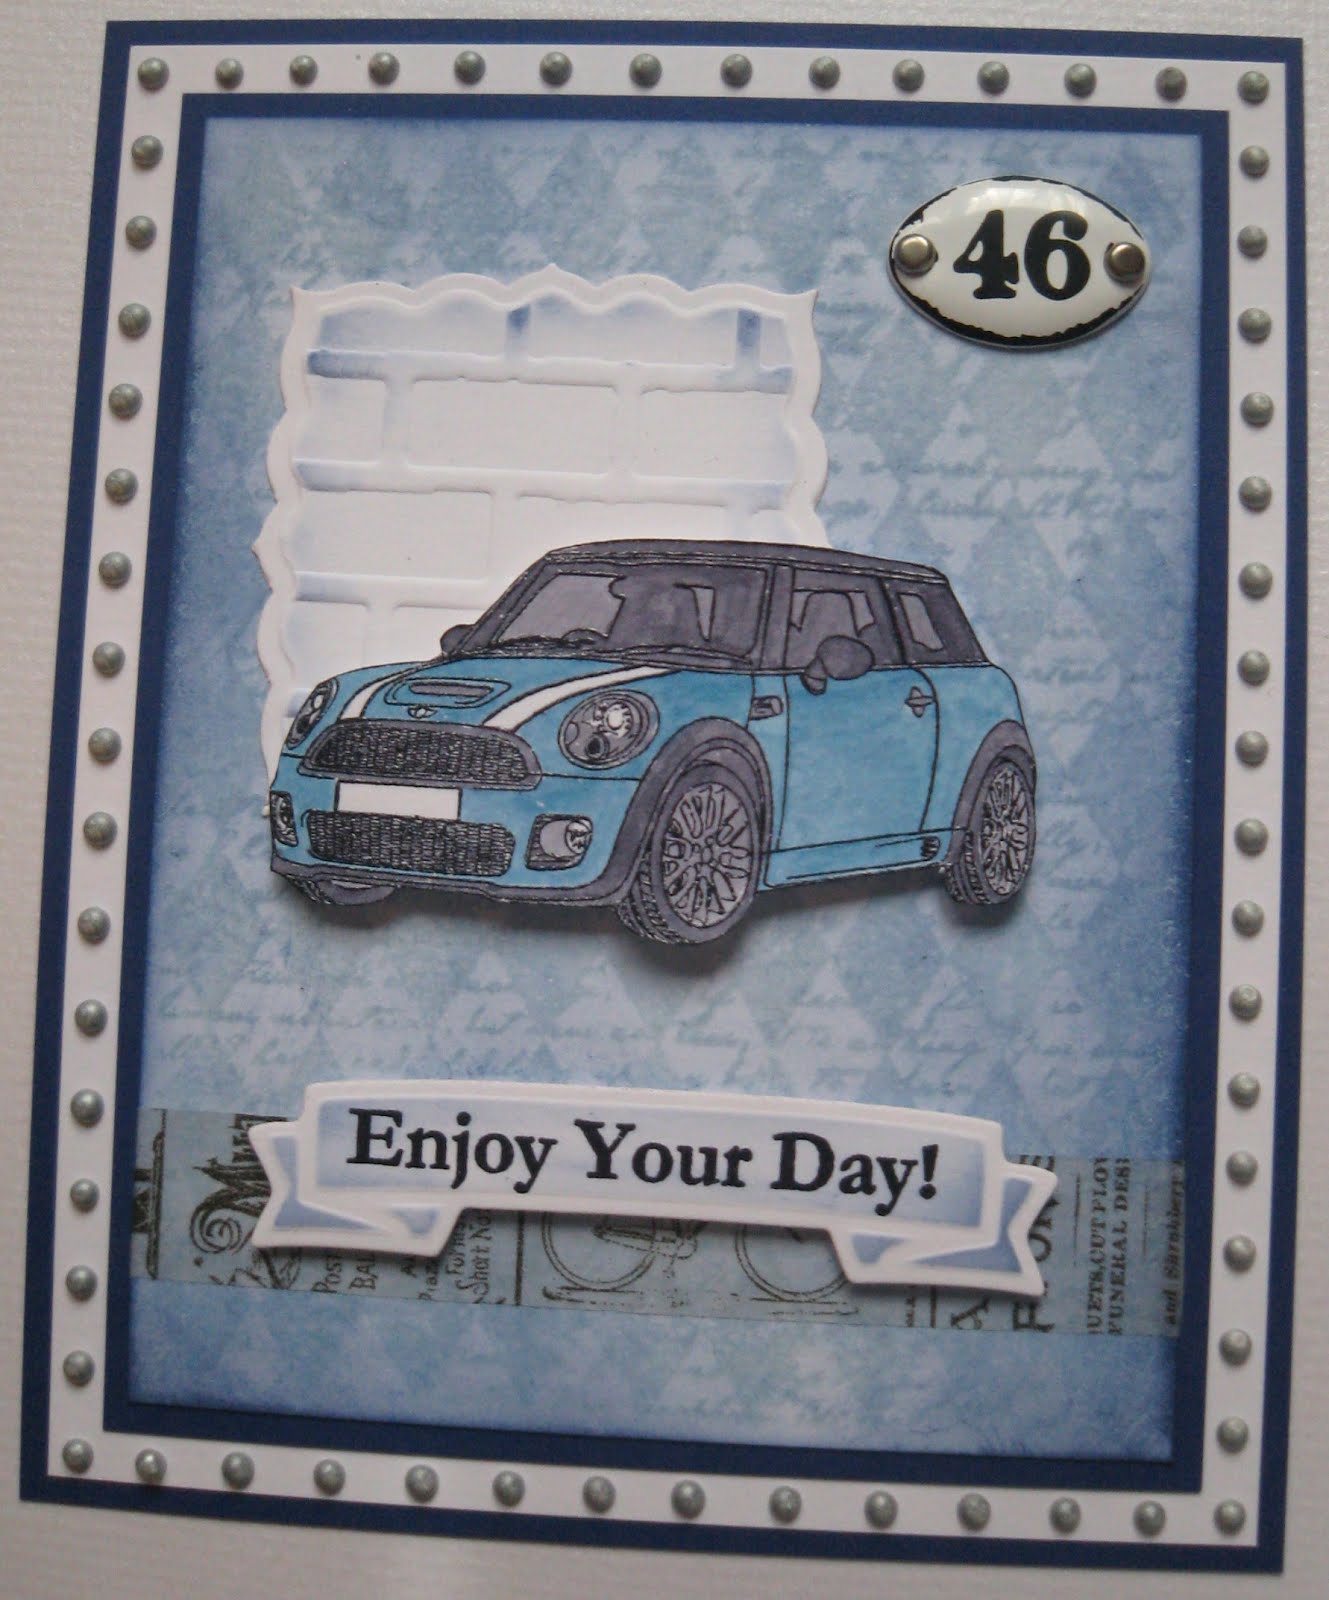
Here's another monochromatic card from the Cars shows, but this time I've used milk card instead of white.


For the background I popped the Tyre Tracks Mask on to some milk card at a jaunty angle and ran it through the Grand Calibur using the embossing sandwich. I inked all over with Black Soot Distress Ink using Cut n Dry Foam. I curled a couple of the corners using a cocktail stick. I wrapped some Black & White Baker's Twine around the bottom section of the background and tied a Creative Expressions Key Charm which I had coloured with a Black Promarker to it.


I stamped the image from the Creative Expressions Classic Cars Stamp Set using Jet Black Archival and embossed with Cosmic Shimmer Clear Embossing Powder. I cut it out using Spellbinders Labels Twenty-Eight and inked through the die with Black Soot Distress Ink.


I stamped the sentiment from the same stamp set again using the Jet Black Archival and embossed with the clear powder. I cut it out using Spellbinders Mega Curved Rectangles and inked through the die with Black Soot.


I assembled the card as shown adding dots of Cosmic Shimmer Pearlescent PVA around the edges.

Thanks for stopping by.

Julia.

Thursday, 16 August 2012

A Level Results

Hi Bloggers.

Thanks for all your good luck wishes.

Kathryn got an A in English and C's in Chemistry & Biology so she has her place at Postmouth Uni. Well Chuffed!

All for now.

Julia.

Homespun Part 2

Hi Bloggers.

Today is A level results day! I can tell you I've had everything crossed for weeks now. I'll try and post again this evening to let you know how Kathryn got on.

As promised, here's another card made with the Spellbinders Homespun die set.


I started with the background. I attached the Trellis Mask to a piece of Coconut White Card and ran it through my Grand Calibur with the embossing sandwich. I kept the mask in place and inked through it with Chipped Sapphire Distress Ink using Cut n Dry Foam.

I cut some of the motifs from the Spellbinders Homespun die set out of white card and inked through the dies with Barn Door Distress Ink.

I tied a large bow tied from Sheer Dots Ribbon and added a Blue Zipper Rose.


I assembled the card as shown adding some dots of Cosmic Shimmer Pearlescent PVA in Berry Red. Job done. Easy peasy!

Thanks for stopping by.

Julia.

Wednesday, 15 August 2012

Homespun

Hi Bloggers.

A break from Cars today as the lovely Christine Emberson is due on Create & Craft with some Spellbinders shows featuring some new dies. So, I'm sharing a simple card featuring the new Homespun set from Spellbinders.


The backing paper is My Mind's Eye Lost and Found. I inked around the edges of it with Peeled Paint Distress Ink using Cut n Dry Foam.

I cut a Spellbinders Labels Twenty-Six out of Coconut White Card and inked through the die with Peeled Paint. I cut the basket out of Kraftcore and carefully sanded a little to reveal the core. I cut the little flowers out of white card and inked through the die with Victorian Velvet Distress Ink. I cut the little leaves out of felt that I got from Sam Poole here.


I stamped the sentiment from the Creative Expressions Dandelion Wishes Stamp Set using Jet Black Archival and embossed with Cosmic Shimmer Clear Embossing Powder. I cut it out using just the centre die of one of the Spellbinders Fancy Framed Tags Two dies. I inked through the die with Peeled Paint. I then cut the tag frame using both sections of the die pair.


I assembled the card as shown adding some dots of Cosmic Shimmer Pearlescent PVA in Choco Brown.

I'll share another Homespun card tomorrow.

Thanks for stopping by.

Julia.

Tuesday, 14 August 2012

New Products in My Amazon Store

Hi Bloggers.

I've just popped some gorgeous new pearl embellishments from Creative Expressions into my Amazon Store. You can view them here and here.

There's also 4 different packs of Shrink Plastic.

I have also re-stocked the Khaki Card and Black Pearl PVA.

All for now.

Julia

Enjoy Your Day

Hi Bloggers.

Here's another demo card from the shows last week.


For the background I placed the Justrite Harlequin Script Background stamp onto my craft sheet face up. I rubbed some Picket Fence Distress Stain onto the stamp. I then placed some Coconut White Card on top and carefully rubbed all over to transfer the stain. I removed the card and then dried the background. I then inked all over with Chipped Sapphire Distress Ink using Cut n Dry Foam.

I stamped the image from the Creative Expressions Dream Cars Stamp Set using Jet Black Archival and embossed with Cosmic Shimmer Clear Embossing Powder. I coloured it in using Cosmic Shimmer Matt Drawing Inks. I used Blue Cotton from the Soft Velvet Set and Black Night from the Summer Fayre Set.

I cut a piece of Coconut White card using Labels Twenty-Six. At the emboss stage I added the Creative Expressions Brick Embossing Folder. The sandwich you need for this is base plate, approx 15 sheets of copy paper, folder (open),die with card in it with cutting edge facing up (away from the folder), tan mat, pink embossing plate. DO NOT close the folder or you will damage it. I left the card in the die and inked around the edges with Chipped Sapphire Distress Ink using Cut n Dry Foam.


I wrapped some Idea-ology Journeyman Tissue Tape around the bottom section of the background. I stamped the sentiment from the same stamp set using the Jet Black Archival and embossed with the clear powder. I cut it out using Spellbinders Ribbon Banners. I inked through the die with Chipped Sapphire.


I added an Idea-ology Plaquette and assembled the card as shown. I popped some dots of Cosmic Shimmer Pearlescent PVA in Silver Lustre around the edges.

Thanks for stopping by.

Julia.

Monday, 13 August 2012

The Road to a Friend's House

Hi Bloggers.

Here's one of those cards where I've used the sentiment as the focal point and the image on the background.


Starting with the background, on some Milk Card, I randomly stamped one of the images from the Creative Expressions Classic Cars Stamp Set using Walnut Stain Distress Ink. I then popped the Grid Mask on top and ran it through the Grand Calibur with the embossing sandwich. I distressed the edges with my scissors and then inked all around them with Vintage Photo Distress Ink using Cut n Dry Foam. I wrapped some Idea-ology Journeyman Tissue Tape around the background as shown.

I stamped the sentiment from the same stamp set using Coffee Archival and embossed with Cosmic Shimmer Clear Embossing Powder. I cut it out using Spellbinders Labels Twenty-Eight and inked through the die with Vintage Photo. I cut another Labels Twenty-Eight the next size up and again inked through the die.


I stamped a couple of the small tickets from the Creative Expressions Celebration Tickets Stamp Set using Coffee Archival and embossed with Clear Powder. I coloured then in using the Umber and Dark Spice Matt Drawing Inks from the Autumn Shades Set and cut them out. I glued them to the background using Cosmic Shimmer Dries Clear Glue and then added a couple of staples that I had dyed with some Latte Alcohol Ink.


I threaded some Black & White Baker's Twine through 2 Idea-ology Shabby Accoutrements.


I tied some Baker's Twine through a Creative Expressions Watch Face Charm
and again used Cosmic Shimmer Dries Clear Glue to secure it.


I assembled the card as shown adding some faux stitching around the edges.

Thanks for stopping by.

Julia.

Sunday, 12 August 2012

Vroom

Hi Bloggers.

Today I'm sharing one of the demo cards from Wednesday's shows.


I made my own background using some of the stamps and masks on the show. I started with a piece of Milk Card. I popped the Retro Circles Mask on top and spritzed some Jade Teal from the Nature's Gift Cosmic Shimmer Misting Inks Set and then I spritzed some Moss Green from the Winter Garden Set. I removed the mask and washed it and dried the background. I then used the Bubblewrap stamp (not on the block, just in my hand) with Forest Moss Distress Ink and stamped randomly over the background. I repeated this process with the Newsprint stamp and Black Soot Distress Ink.

Next I stamped the Justrite Chevron Striped Background on a separate piece of Milk Card using Jet Black Archival. I cut out an arch using the Spellbinders Labels Twenty-Eight. I distressed the edges with my scissors and then inked them with Black Soot using Cut n Dry Foam. I placed some Idea-ology Journeyman Tissue Tape on my craft sheet and then rubbed some Peeled Paint Distress Stain over it, dried it and added it to my Chevron Arch/Tunnel.

I stamped the image from the Creative Expressions Classic Cars Stamp Set using the Jet Black Archival and embossed with Cosmic Shimmer Clear Embossing Powder. I coloured it in using Cosmic Shimmer Matt Drawing Inks. I used Jade Teal from the Garden Twist Set and Black Night from the Summer Fayre Set.


I cut a ribbon banner out of Milk Card using Spellbinders Ribbon Banners Large and inked around the edges while still in the die with Black Soot. I then added the word 'Vroom' using Idea-ology Ransom Alpha Parts.

I coloured some Creative Expressions Antique Silver Faux Screw Brads with a Black Promarker (you could also use Alcohol Ink) and added them to the corners of my background.


I assembled the card as shown adding some dots of Cosmic Shimmer Pearlescent PVA in Black Pearl around the edges.

Thanks for stopping by.

Julia

Saturday, 11 August 2012

You're a Classic

Hi Bloggers.

Here's a card featuring 3 of the images from the Creative Expressions Dream Card Stamp Set.


I stamped all 3 images onto some white shrink plastic using Jet Black Archival and put it aside to dry. When they were dry, I cut them out and shrank them with my heat tool.

I cut 3 Spellbinders Scalloped Labels One from black card and at the emboss stage I added the Grid Mask.

For the background, I inked through the Distressed Chequers Mask with Black Soot Distress Ink. I did a section at a time, adding Cosmic Shimmer Clear Embossing Powder and heat setting. I repeated this process over each area a couple of times and the checks took on a tiled effect. I wrapped a couple of pieces of Idea-ology Journeyman Tissue Tape around the background.


I stamped the sentiment from the same stamp set using the Jet Black Archival and embossed with the clear powder. I cut it out using Spellbinders Ribbon Banners and inked through the die with Black Soot Distress Ink.


I assembled the card as shown adding an Idea-ology Plaquette and some dots of Cosmic Shimmer Pearlescent PVA in Black Pearl.


Thanks for stopping by.

Julia

Friday, 10 August 2012

You've Got Real Style

Hi Bloggers.

A very girly card today. I used to love Thunderbirds when I was little and when I saw the Rolls Royce on the stamp set I thought I could pretend it was Lady Penelope's although the style is a bit different.


For the main background I placed the Grid Mask at a jaunty angle onto some hot pink card and spritzed the Black Night misting ink from the Cosmic Shimmer Winter Garden Misting Inks Set. You can use the ink on the mask to create another background if you wish or just wash it off the mask with water.

I placed some Coconut White Card inside the Creative Expressions Brick Embossing Folder and ran it through the Grand Calibur. I tore around the edges and inked all over with Black Soot Distress Ink using Cut n Dry Foam.

I stamped the image from the Creative Expressions Dream Cars Stamp Set using Jet Black Archival and embossed with Cosmic Shimmer Clear Embossing Powder. I coloured it in using Matt Drawing Inks. I used Mallow and Black Night from the Summer Fayre Set. I cut it out using the Out of the Box technique and Spellbinders Labels Twenty-Eight.

First I positioned the die over the image. I drew around the die with a pencil.


I then cut around the part of the image which was outside the pencil line plus a little further in. I slid the die underneath the part of the image that I'd cut around and lined the rest of the die up over the pencil line.


Here's what it looked like at the back -


Then I popped the imaged through the Grand Calibur to cut & emboss as usual.

I cut a larger Labels Twenty-Eight out of black card.


I stamped the sentiment from the same stamp set again using the Jet Black Archival and embossed with the clear powder. I cut it out using Spellbinders Ribbon Banners and inked through the die with Black Soot Distress Ink using Cut n Dry Foam


I threaded some Black & White Baker's Twine through an Idea-ology Shabby Accoutrement, added a Creative Expressions Tassel and tied a bow.


I assembled the card as shown adding some bling with a Creative Expressions Black Swirl and some dots of Cosmic Shimmer Pearlescent PVA in Black Pearl around the edges.

Thanks for stopping by.

Julia.

Thursday, 9 August 2012

You're Vintage

Hi Bloggers.

Thanks for your comments and emails yesterday - much appreciated. Here's quite a simple card from the shows yesterday.


I started with the background. I inked up one side of the Creative Expressions Brick Embossing Folder with Vintage Photo Distress Ink. I placed a piece of Milk Card on the clean side of the folder, closed the folder and then used a brayer over the top to transfer the ink. I then added some Cosmic Shimmer Clear Embossing Powder and heat set. Next I ran the background through the Grand Calibur with the Retro Squares Mask, I tore around the edges and then inked all over with Vintage Photo using Cut n Dry Foam. I splatted some Vintage Photo Distress Stain and dired with my heat tool. The splats seemed to settle behind the embossing powder even though they were added afterwards. Cool, eh?

I stamped the image from the Creative Expressions Vintage Cars Stamp Set using Coffee Archival and embossed with Cosmic Shimmer Clear Embossing Powder. I coloured it in using some Vintage Photo Distress Ink that I smeared on my craft sheet, added water to and used a paint brush.


I stamped the sentiment from the same stamp set using the coffee archival and embossed with clear powder. I cut it up into sections, edged it with a little Vintage Photo and added it to the background.


I added a Key Charm to the top left hand corner and some dots of Cosmic Shimmer Pearlescent PVA in Choco Brown around the edges.


Thanks for stopping by.

Julia

Wednesday, 8 August 2012

A Real Classic

Hi Bloggers.

As I expected, yesterday's card didn't go down too well. I still like the card myself. Today's card is one I have prepped for a demo in the 7pm show. Incidentally, I have also prepped a demo using the out of the box technique featured in Monday's post for the same show.


I started with the background and a piece of Milk Card. I love these types of backgrounds as they're quick and easy, fun and inexpensive (once you have the stamps, of course!). I used the Justrite Harlequin Script Background stamp (I didn't put it on a block) and inked a bit of it with Vintage Photo Distress Ink and then randomly stamped repeating until I was happy. Next I inked up the Bubblewrap stamp in the same way using Pumice Stone Distress Ink and stamped filling in some of the gaps. The I added some splats of Vintage Photo Distress Stain. I distressed the edges of the piece using my scissors and then inked all around with Pumice Stone using Cut n Dry Foam.

I stamped the Harlequin background onto a separate piece of Milk Card using Vintage Photo. I dried it with my heat tool and then cut it out using Spellbinders Labels Twenty-Six. I inked through the die with Vintage Photo.

I stamped the image from the Creative Expressions Dream Cars Stamp Set using Coffee Archival and embossed with Cosmic Shimmer Clear Embossing Powder. I coloured it in using Cosmic Shimmer Matt Drawing Inks. I used Marigold from the Autumn Shades Set and Black Night from the Summer Fayre Set.


I stamped the sentiment from the same stamp set again using the Coffee Archival and embossed with clear powder. I distressed the edges of the panel with my scissors and edged with Pumice Stone.


I tied a Key Charm and a Tassel to some Black & White Baker's Twine and added it to the card using Cosmic Shimmer Glue (I didn't notice the tassel had gathered at the top of the key for the photo).


I assembled the card as shown adding some dots of Cosmic Shimmer Pearlescent PVA in Silver Lustre around the edges.

Hope you can join me today at 11am with Debbie and 7pm with Martyn.

Thanks for stopping by.

Julia.

Tuesday, 7 August 2012

Who said cars were just for men?

Hi Bloggers.

I'm a bit wary of sharing this card with you as it's green and yellow and I know you guys aren't too keen on this colour combo. But, I'm really pleased with how this one turned out. I wanted to show that you can make girly cards with the stamp sets on the shows tomorrow. I was teasing Kathryn that I'd just made her 25th birthday card! I'm going to try really hard to keep it safe for the next 7 years and give it to her! Don't expect I'll manage it.

Anyway, here's the card -


For the background, I covered a piece of Coconut White Card with Peeled Paint Distress Stain. I dried it with my heat tool and then ran it through the Grand Calibur with the the Creative Expressions Bark Embossing Folder. I sanded it to reveal the white core.

I stamped the image from the Creative Expressions Classic Cars Stamp set using Jet Black Archival and embossed with Cosmic Shimmer Clear Embossing Powder. I coloured the image in using Cosmic Shimmer Matt Drawing Inks. I used Sunflower and Black Night from the Summer Fayre Set. I cut it out using Spellbinders Labels Twenty-Six and inked through the die with Forest Moss Distress Ink.


I cut a Spellbinders Sprial Blosson Three out of Scattered Straw Distress Colorcore and cut a 'leaf' out of Peeled Paint Distress Colorcore using the Venetian Motifs die set.


I added an Idea-ology Plaquette.


I assembled the card as shown, piercing around the edges with my Tim Holtz Ruler.

Thanks for stopping by.

Julia.

Monday, 6 August 2012

New Products in My Amazon Store

Hi Bloggers.

Just a quickie to let you know that I have some new products in my Amazon Store.

A couple of new Spellbinders die sets -

Create-A-Flake Four

Fall Foliage


Some new stamps including the 3 sets I'll have on the shows on Wednesday (I'm having trouble loading the Dream Cars at the moment - please email me if you want this set and we'll get round it somehow!) -

Vintage Cars

Classic Cars

Vintage Photography
Let It Snow

Urban Life

Urban Beats

I have also, as requested, added some Khaki card (Sue calls it taupe). Please ignore the picture on Amazon - it's not at all green! It's the card that's in the neutral card pack.

I've also re-stocked some PVA including the Cosmic Pearl (white dots) which has been very hard to get hold of recently and I've re-stocked the Gala Event and Dandelion Wishes stamp sets.

That's it for now. I'll let you know when I get the Dream Cars loaded.

Julia