Wednesday 31 October 2012

Simply Fabulous

Hi Bloggers.

Once again, I'm doing this post on the other half's ipad so the photo isn't brilliant and there's only one - but at least I'm able to post a card.

I cheated a bit with this card and used the background of a demo I didn't get to finish on an earlier show.

To recap - for the background, I spritzed a piece of Coconut White card with Marigold Cosmic Shimmer Vintage Mister. I then inked through the Floral Vines Mask with Wild Honey Distress Ink, moving the mask around so that the whole area was covered.

I stamped the image from the Stylish Ladies Stamp Set using Jet Black Archival and embossed with Cosmic Shimmer Clear Embossing Powder. I coloured the image in using Cosmic Shimmer Matt Drawing Inks. I also used some of the Pearl Shine from the Metallics Set to colour in the feather headress, the gloves and the dog's lead. I cut the image out using Labels 28 and inked through the die with Wild Honey.

I stamped the sentiment from the same stamp set using Jet Black Archival and embossed with Cosmic Shimmer Clear Embossing Powder. I cut it out using Spellbinders Scalloped Labels One and inked through the die with Wild Honey.

I tied a messy bow using Blue White American Seam Binding and added the flower I had made in the earlier show using the Creative Expressions Floral Embossing Folder. I also added a couple of White Pearl Decorative Stick Pins.

I assembled the card as shown adding some dots of Cosmic Shimmer Pearlescent PVA in White around the edges.

Thanks for stopping by.

Julia.
Tuesday 30 October 2012

Stamps back in stock again

Hi Bloggers. Just a quickie to let you know that I've popped some more stock of Sole Creations, Skateboard Silhouettes, Dandelion Wishes, Chicken Wire, Bubble Wrap and Newsprint stamps into my Amazon Store. Sorry I can't give you links but that's just too much for me to master on the ipad! All for now. Julia.

Life is too important

Hi Bloggers.

Well, I'm attempting to post this via my phone as my laptop is now over heating so I still don't have it back. It could be Thursday before I get it back! Nightmare! There's an awful lot of time and pain in this post!

I have now given up after about 3 hours of trying to do this on my phone so I have persuaded the other half to let me use his ipad again.

Anyway, finally, here's today's card from the shows last week (not a brilliant photo but at least there is one!).

So, the background is made using the bubblewrap stamp with Stormy Sky Distress Ink, the Chicken Wire stamp with Barn Door Distress Ink, the spray can stamp from the Urban Beats Stamp set with Forest Moss Distres Ink and the skateboarder from the Anything is Possible Stamp Set using Jet Black Archival. I distressed around the edges with my scissors and then inked with Forest Moss using Cut n Dry Foam.

The main skateboarder is from the Silhouette Skateboard stamp set and has been stamped using Jet Black Archival, cut out using Spellbinders Labels 28 and then inked through the die with Forest Moss. 

The sentiment is from the Urban Life Stamp Set and has also been stamped with Jet Black Archival and then cut out using Spellbinders Matting Basics A. I inked through the die with Forest Moss.

I assembled the card as shown adding some dots of Cosmic Shimmer Pearlescent PVA in black Pearl around the edges and a couple of Faux Screw Brads in Antique Copper in the top corners of the background.

Thanks for stopping by. Will do my best to post again tomorrow.
Julia.

Monday 29 October 2012

PC Update

Hi Bloggers.

Still no laptop - I'm typing this on Kathryn's MAC in Portsmouth. PC World are having trouble with my email account. Hoping I will get it back lunchtime Monday.

Kathryn & I have had a lovely day just doing what girlies do - lunch and shopping!

Will hopefully be back tomorrow with a card - don't forget to stop by!

All for now.

Julia.

Sunday 28 October 2012

Off to Portsmouth

Hi Bloggers.

I'm sorry, I am unable to share a card with you today as my laptop is still being cleared of Trojan Horses. Hopefully , I will have it back later today so I can resume normal service here.

 I'm off to see Kathryn again today. I'm really looking forward to it (obviously!).

 For those of you who have been asking, my next shows are a Spellbinders Pick of the Day starting 9pm on Ideal World on Tuesday 6th November. I will post the times as soon as I have them.

 Thanks for stopping by.

 Julia.

Saturday 27 October 2012

Never, Never Give Up

Hi Bloggers.

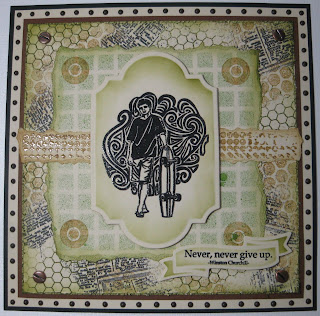
A quote from Winston Churchill on this card from Monday's shows.

For the main background, I randomly stamped the Newsprint Stamp using Jet Black Archival, the Bubblewrap stamp using Brushed Corduroy Distress Ink  and the Chicken Wire Stamp using Forest Moss Distress Ink. I distressed the edges with my scissors and then inked with Forest Moss using Cut n Dry Foam.

On a separate piece of card, I spritzed through the Grid Mask with the Soft Moss Misting Ink from the Winter Garden Set. I tore around the edges and inked with Forest Moss using Cut n Dry Foam. I stamped the small disk stamp from the Urban Beats Stamp Set in each corner using Brushed Corduroy.

I stamped the long border stamp from the Urban Beats Stamp Set on to another piece of card using Brushed Corduroy, added Cosmic Shimmer Clear Embossing Powder and heat set it. I tore down each side and inked with Brushed Corduroy. I cut it in two at the middle so it would be long enough to reach both sides of my main background behind the image panel.

I stamped the image from the Anything is Possible Stamp Set using Jet Black Archival and embossed with Cosmic Shimmer Clear Embossing Powder. I cut it out using Spellbinders Labels Twenty-Eight and inked through the die with Forest Moss Distress Ink.

I stamped the sentiment from the same stamp set using Jet Black Archival and embossed with clear powder. I cut it out using Spellbinders Ribbon Banners and inked through the die with Forest Moss.

I assembled to card as shown adding some dots of Cosmic Shimmer Pearlescent PVA in Choco Brown around the edges.

Apologies for the lack of product links in the latter part of this post - a couple of Trojan Horses are running around my laptop so I have had to finish this post off on my hubbie's ipad. You will find many of the products used in my Amazon Store if you wish to make a purchase.

Thanks for stopping by.

Julia.

Friday 26 October 2012

A Real Class Act

Hi Bloggers.

A girly card today.

For the background, I spritzed some Blue Lace Misting Ink from the Breeze Blush Set over some Coconut White Card. I then used the Eyelet Lace Mask and inked through with Stormy Sky Distress Ink moving it around so that the whole area was covered.

I stamped the image from the Stylish Ladies Stamp Set using Jet Black Archival and embossed with Cosmic Shimmer Clear Embossing Powder. I coloured in using Cosmic Shimmer Matt Drawing Inks. I also used some Pearl Shine from the Metallics Set for the necklace. I cut the image out using Spellbinders Card Creator Fancy Postage Edge and inked through the die with Stormy Sky.


I stamped the sentiment from the same stamp set using Jet Black Archival and embossed with clear powder. I cut it out using Spellbinders Matting Basics and inked through the die with Stormy Sky.

I tied a bow with some of the Light Blue Crochet Ribbon that was on the show and added a Frosted Blue Dazzler.

I assembled the card as shown adding a Pearl Swirl and some dots of Cosmic Shimmer Pearlescent PVA in White around the edges.

Some of the samples from the Stylish Ladies Stamp Set we made earlier this year. You can find the blog posts for them herehere and here.

Thanks for stopping by.

Julia.


Thursday 25 October 2012

Anything is Possible

Hi Bloggers.

Today I'm sharing an 8 x 8 scrapbook page featuring my son, Nathan, about to do a trick on his skateboard. It's a very simple layout and quite quick to achieve.

I started with my background. I placed the Grid Mask on to some Khaki Card at a jaunty angle and spritzed with Cosmic Shimmer Black Knight Misting Ink from the Winter Garden Set. When dry I randomly stamped some splats from the Silhouette Skateboards Stamp Set using Jet Black Archival.

I stamped the three silhouettes from the same stamp set down a strip of Khaki Card using the Jet Black Archival and matted it on to some black card.

I stamped the sentiment from the Anything is Possible Stamp Set and matted it on to black card. I matted the photo of Nathan onto some black card and assembled the page as shown. I added some dots of Cosmic Shimmer Pearlescent PVA in Black Pearl around the edges.

Simple!

Thanks for stopping by.

Julia.

Wednesday 24 October 2012

No. 1

Hi Bloggers.

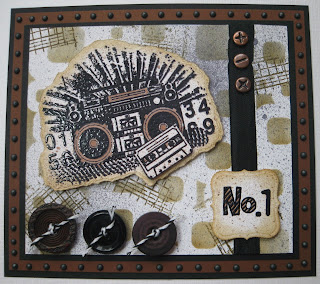
A boy card today from the shows on Monday. I will share as many of the cards from the shows as I can. Tracey Laughton made some of the samples for the Skateboard Silhouettes and Anything is Possible stamp sets. Sam Poole made a couple of the samples from the Urban Life and Urban Beats stamp sets.

For the background, I spritzed some Milk Card with Black Knight Acrylic Misting Ink from the Winter Garden Set. Once dry, I inked through the Retro Squares Mask with Brushed Corduroy Distress Ink using Cut n Dry Foam. I also stamped one of the stamps from Sam Poole's Urban Beats Stamp Set using the Brushed Corduroy. I wrapped some Black American Seam Binding around the card and added some Antique Copper Faux Screw Brads.

I spritzed some Milk Card with the Dark Spice Acrylic Misting Ink from the Winter Garden Set and dried it. I then dusted it with an anti-static bag and stamped the ghetto blaster image (from Urban Beats) using Jet Black Archival and embossed with Cosmic Shimmer Clear Embossing Powder. I tore around the image and then inked with Brushed Corduroy. I coloured part of the image in using Dark Spice Matt Drawing Ink from the Autumn Shades Set. I stamped the image agin and just cut out the cassette and mounted that onto the main image using 3d foam pads.

I stamped the 'No. 1' from the same stamp set again using Jet Black Archival and embossed with clear powder. I coloured in again using the Dark Spice Matt Drawing Ink and then cut out using Spellbinders Scalloped Labels One. I inked around the edges with Brushed Corduroy.

I tied some Black & White Baker's Twine through some buttons from my stash.

I assembled the card as shown adding some dots of Cosmic Shimmer Pearlescent PVA in Black Pearl around the edges.

Thanks for stopping by.

Julia.

Tuesday 23 October 2012

Always in Style

Hi Bloggers.

Thank you for all your comments and emails yesterday - much appreciated. Welcome to my new followers.

Today's card was the first demo yesterday.

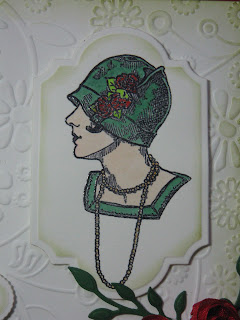
For the background, I ran the Couture Creations Ambrosia Embossing Folder through the Grand Calibur with some Coconut White Card. I ran it through a second time to extend the pattern. I wasn't too bothered about it lining up as my ribbon was going to cover it. I inked around the edges with Victorian Velvet Distress Ink using Cut n Dry Foam.

I stamped the image from the Stylish Ladies Stamp Set using Jet Black Archival and embossed with Cosmic Shimmer Clear Embossing Powder. I coloured her in using Cosmic Shimmer Matt Drawing Inks and added a little Pearl Shine from the Metallics Drawing Inks Set to the feather in her hair. I cut the image out using Spellbinders Scalloped Labels One and inked through the die with Victorian Velvet.


I ran some Rose Sheer Wrinkle Edge Ribbon down the length of my card and then added some White Crochet Ribbon on top (I have some for sale here on ebay). I tied a bow with the White Crochet Ribbon. I added a piece cut from the Spellbinders Ribbon Buckles Die Set, a Pink Dazzler and a couple of White Pearl Decorative Stick Pins.

I stamped the sentiment from the same stamp set again using Jet Black Archival and embossed with clear powder. I cut it out using Spellbinder Labels Twenty-Eight and inked through the die with Victorian Velvet.

I assembled the card as shown adding a Pearl Swirl and some dots of Cosmic Shimmer Pearlescent PVA in Vintage Pink around the edges.

Thanks for stopping by.

Julia.

Monday 22 October 2012

Dazzlers and stamps now in stock

Hi Bloggers.

Just to let you know that the coloured Dazzlers are now in stock in my Amazon Store here. I've also got some of the stamps from today's shows - Chicken Wire, Anything is Possible, Silhouette Skateboards, Stylish Ladies and Sole Creations. You can get Sam Poole's stamps direct from the lady herself here.

While I was in the warehouse today I spotted some Couture Creations Intrinsic Embossing Folders so I had a few, probably won't be able to get anymore - just saying!

Also check out the ribbon packs in my ebay store.

All for now.

Julia.

Accept What You Can't Change

Hi Bloggers.

As this post goes live I will be driving to Peterborough for my shows on Create & Craft. It looks like I have Leonie for my first show at 9am and then Jacqui at 5pm (that may change though!). Just a word of warning - the gorgeous Crochet Ribbon Pack I had on the girly shows earlier this month is back on this show but there is very limited stock so it may not even get to the counter!

I am hoping to do this card as a demo in my 5pm show.

The colours appear a bit dull in the photo - they're much brighter in real life. I did one of my fun backgrounds again. I randomly stamped Chicken Wire using Stormy Sky Distress Ink, Newsprint using Jet Black Archival and the barcode stamp from Sam's Urban Life Stamp Set using Forest Moss Distress Ink. I then edged the piece with Barn Door, Mustard Seed and Stormy Sky Distress Ink using Cut n Dry Foam.

I coloured a piece of card with Barn Door, Mustard Seed and Stormy Sky and then stamped the main image from the Urban Life Stamp Set using Jet Black Archival. I cut it out using Spellbinders Matting Basics B and popped it on to a black mat cut using Matting Basics A. I stamped the spray can image using Jet Black Archival and cut it out. I ran a black marker pen around the edges to hide any white bits.

I assembled the card as shown adding an Antique Gold Faux Screw Brad in each corner. I created my colourful mat using the same 3 distress inks as before and added some dots of Cosmic Shimmer Pearlescent PVA in Black Pearl around the edges.

Hope you can join me on the shows today. Please email in if you are loving the boy stamps as much as I am.

Thanks for stopping by.

Julia.

Sunday 21 October 2012

A real class act!

Hi Bloggers.

Today I have another card to share using the Creative Expressions Stylish Ladies Stamp Set.

I really like this colour combo - I've been using it a lot recently. I haven't inked through the dies on this one as I wanted to keep it clean.

For the background, I ran a piece of Coconut White Card through the Grand Calibur with the Couture Creations Damask Embossing Folder. I ran it through a second time. It didn't match up exactly but that didn't matter as I was using a large topper.

I stamped the image using Jet Black Archival and embossed with Cosmic Shimmer Clear Embossing Powder. I coloured in using Cosmic Shimmer Matt Drawing Inks. I added some Pearl Shine from the Metallics Drawing Ink Set to the edges of the fan and the feather in her hair. I cut the image out using Spellbinders Matting Basics B. I cut the largest of the Spellbinders Fancy Postage Edge dies out of black card.

I stamped the sentiment from the same stamp set again using the Jet Black Archival and embossed with the clear powder. I cut it out using Matting Basics B and added a black mat cut using Matting Basics A.

I made 3 ribbon flowers (as per Sue's tutorial) - all from American Seam Binding. I added them to the top of my card with some spare bits from some Self-Adhesive Black Swirls.

I assembled the card as shown adding some dots of Cosmic Shimmer Pearlescent PVA in Black Pearl around the edges.

Thanks for stopping by.

Julia.


Saturday 20 October 2012

Be not afraid

Morning Bloggers.

Just to clear up any confusion about the shows on Monday. It was supposed to be just a boy themed show but Ideal World weren't happy with that so I have had to add in some girly stuff too. The stamps on offer on the show are - Skateboard Silhouettes, Anything is Possible, Urban Beats, Urban Life, Bubblewrap, Newsprint, Chicken Wire, Sole Creations and Stylish Ladies. I am hoping to pick up some stock of some of the stamps between shows on Monday.

On to today's card -

I popped some Kraftcore through the Grand Calibur with the Creative Expressions Crackle Embossing Folder. I ran it through a second time to extend the pattern (the ribbon hides the join!). I then sanded it to reveal the core.

I stamped the image from the Creative Expressions Anything is Possible Stamp Set (also on Monday's shows) using Jet Black Archival and embossed with Cosmic Shimmer Clear Embossing Powder. I coloured it in using some Cosmic Shimmer Matt Drawing Inks. I cut it out using Spellbinders Labels Twenty-Eight and inked through the die with Stormy Sky Distress Ink and Cut n Dry Foam.

I stamped the sentiment from the Creative Expressions Skateboard Silhouettes Stamp Set using Jet Black Archival and embossed with clear powder. I cut it out using Spellbinders Ribbon Tags Trio Three and again inked through the die with Stormy Sky. I threaded some Black American Seam Binding Through it and secured it to the back.

I coloured a couple of Antique Silver Faux Screw Brads with a black promarker and added them to the top 2 corners.

I assembled the card as shown adding some dots of Cosmic Shimmer Pearlescent PVA in Black Pearl around the edges (it flattens a little on the Kraftcore).

Thanks for stopping by.

Julia.

Friday 19 October 2012

Simply Fabulous!

Hi Bloggers.

A card from the Creative Expressions Stylish Ladies Stamp Set today which will be included in the shows on Monday.

I figure this card could be used for any occasion including Christmas!

For the background, I ran a piece of Coconut White Card through the Grand Calibur with the Couture Creations Bouquet Embossing Folder. I ran it through a second time to extend the pattern, It doesn't match up exactly but that really isn't a problem. I edged it with Forest Moss Distress Ink using Cut n Dry Foam.

I stamped the image using Jet Black Archival and embossed with Cosmic Shimmer Clear Embossing Powder. I coloured her in using Cosmic Shimmer Matt Drawing Inks. I used the Garden Twist, Skin Tones and Autumn Shades sets. I also used the gold from the Metallics set to colour the necklace. I cut the image out using Spellbinders Labels Twenty-Eight and inked with Forest Moss while still in the die.

I ran a piece of White Sheer Wrinkle Edge Ribbon down the background and secured at the back. I then added a piece of White Crochet Ribbon on top. I stamped the sentiment from the same stamp set again using Jet Black Archival and embossed with the clear powder. I cut it out using Spellbinders Scalloped Labels One and inked through the die with Forest Moss.

I made a couple of flowers using Lipstick Red American Seam Binding as per Sue's Tutorial. I cut some leaves our of green card using the Spellbinders Botanical Swirls and Accents Die Set.

I assembled the card as shown adding some dots of Cosmic Shimmer Pearlescent PVA in White around the edges.

Thanks for stopping by.

Julia.


Thursday 18 October 2012

You're Awsome

Hi Bloggers.

Something a bit different today. I think that teenage boys are probably the most difficult demographic to make cards for unless they're in to football. Sue's Rubbernecker brand at Creative Expressions has just released 2 new stamp sets with Skateboarders featuring on them (they'll be on my shows on Monday). My son, Nathan, is 16 and he loves skateboarding - perfect for him!

Here's my first offering from the Skateboard Silhouettes Stamp Set -

The background is one of my random fun backgrounds.I randomly stamped the Newsprint stamp using Jet Black Archival, the Chicken Wire stamp using Pumice Stone Distress Ink and the large background from the Skateboard Silhouettes Stamp Set using Brushed Corduroy Distress Ink. I then edged the whole thing with Pumice Stone using Cut n Dry Foam.

On a separate piece of card, I stamped the Chicken Wire Stamp a couple of times lengthways using Pumice Stone. I then stamped the 3 silhouette images from the stamp set using Jet Black Archival. I trimmed the piece, edged it with Pumice Stone and matted it on to black card.

I stamped the sentiment from the same stamp set again using Jet Black Archival. I cut it out using Spellbinders Matting Basics B and edged it with Pumice Stone once out of the die. I cut a mat out of black card using Matting Basics A.

I assembled the card as shown adding a Faux Screw Brad in Antique Silver in each corner and some dots of Cosmic Shimmer Pearlescent PVA in Silver Lustre around the edges.

Thanks for stopping by.

Julia

Wednesday 17 October 2012

You go Girl

Hi Bloggers.

Another girly card today - very simple.

For the background, I popped some Coconut White Card with the Creative Expressions Floral Embossing Folder. I ran it through a second time to extend the pattern and then edged it with Mustard Seed Distress Ink.

I stamped the image from the Fashionista : A Day Shopping using Jet Black Archival and embossed with Cosmic Shimmer Clear Embossing Powder. I coloured her in using Cosmic Shimmer Matt Drawing Inks and then cut her out using Spellbinders Floral Ovals. I inked through the die with Mustard Seed Distress Ink using Cut n Dry Foam.

I stamped the sentiment from the same stamp set using Jet Black Archival and embossed with clear powder. I cut it out using Spellbinders Ribbon Banners and inked through the die with Mustard Seed.

I tied a messy bow with 3 lengths of Chalk White American Seam Binding. I spritzed it with water, scrunched it and dried it with my heat tool. I threaded some Baker's Twine through a button and tied a bow. I added it to my ribbon bow.

I assembled the card as shown adding some dots of Cosmic Shimmer Pearlescent PVA in White around the edges.

Thanks for stopping by.

Julia.

Tuesday 16 October 2012

Buy it in Every Colour!

Hi Bloggers.

A bright shoe card today.

For the background, I stamped one of the swirls from the Creative Expressions Beaded Elements Stamp Set (now back in stock) using Dried Marigold Distress Ink randomly over a piece of Coconut White Card. I dried the ink with my heat tool and then ran the piece through the Grand Calibur with the Couture Creations Bouquet Embossing Folder. I ran it through a second time to extend the pattern (it didn't line up exactly but that didn't matter as most of it would be covered by my topper. I inked around the edges with Wild Honey Distress Ink using Cut n Dry Foam.

I stamped the image from the Creative Expressions Sole Creations Stamp Set (also now back in stock) using Jet Black Archival and embossed with Cosmic Shimmer Clear Embossing Powder. I coloured it in using Cosmic Shimmer Matt Drawing Inks and then cut it out using Spellbinders Labels Twenty-Six. I inked through the die with Wild Honey.

I stamped the sentiment from the same stamp set again using the Jet Black Archival and embossed with the clear powder. I cut it out using Spellbinders Labels Fourteen.

I tied a messy bow using 3 lengths of Blue White American Seam Binding. I threaded some Baker's Twine through a yellow button and tied a bow. I added this to my bow.

I added a 8mm White Pearl to each corner and some dots of Cosmic Shimmer Pearlescent PVA in White around the edges.

Thanks for stopping by.

Julia.


Monday 15 October 2012

Stamps now back in stock

Hi Bloggers.

Just a quickie to let you know that the Sole Creations and Beaded Elements Stamp sets are now back in stock in my Amazon Store. I've also added a gorgeous new stamp set - Trees of Imagination which is also from Sue's Rubbernecker brand at Creative Expressions.

I'm still waiting for the new coloured dazzlers but I have some clear dazzlers in stock. I have also added some Self Adhesive Pearl and Black Swirls.

Finally, there are a few more Metal bits & pieces.

All for now.

Julia.

Shop Till Your Drop

Hi Bloggers.

Lovely to see so many of you at the Kettering Show over the weekend. I had a lovely time especially yesterday when Leonie arrived to demo on the table next to me. She is such an inspiration - so talented. Some fab samples on display. Of course, nowadays these shows are full of friends and it's so good to see them all. Sue Wilson, Sam Poole, Pam Smith, Hels Sheridan, Karen Lines, The Stamp Addicts Girls, The Glitter Glirls, Dawn Bibby, Leandra, Ali Reeve to name a few. Watch out for Ally Pally next year (13th & 14th April) when we'll all meet up again.

Another girly card today.

For the background, I spritzed a piece of Coconut White Card with Cosmic Shimmer Egyptian Blue Vintage Mister. I then inked through the Floral Lace Mask with Tumbled Glass Distress Ink using Cut n Dry Foam.

I stamped the image (Chloe) from the Fashionista : A Day Shopping Stamp Set using Jet Black Archival and embossed with Cosmic Shimmer Clear Embossing Powder. I coloured her in using Cosmic Shimmer Matt Drawing Inks and then cut her out using Spellbinders Labels Four Small. I inked through the die with Tumbled Glass. I cut a mat out of blue card using Labels Four.

I stamped the sentiment from the same stamp set using Jet Black Archival and embossed with clear powder. I cut it out using Spellbinders Ribbon Banners and inked through the die with Tumbled Glass.

I tied a bow using Blue Sheer Dots Ribbon and tied another bow with Light Blue Crochet Ribbon. I made a flower using the Creative Expressions Floral Embossing Folder (see my tutorial here). I added a couple of Crystal Decorative Stick Pins.

I assembled the card as shown adding some dots of Cosmic Shimmer Pearlescent PVA in Summer Blue around the edges and added a 5mm White Pearl in each corner.

Just a reminder that Sue is on Create & Craft various times over the next 4 days with a 4 Day Deal - Justrite & Heartfelt Creations dies and stamps. There's sure to be some fab demos.

Thanks for stopping by.

Julia.


Sunday 14 October 2012

Seasons Greetings

Hi Bloggers.

Lovely to meet some of you at the Kettering Show yesterday. I'll be there again today doing more of the same.

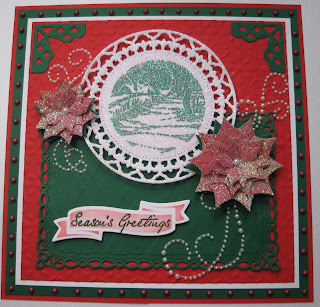
Another Christmas Card today.

 
For the background, I ran a piece of red card through the Grand Calibur with the Spellbinders Elite M-Bossabilities Folder  I ran it through a second time to extend the pattern.

I stamped the winter scene image from the Creative Expressions Christmas Post Stamp Set using Olive Archival.  I covered the card with a piece from a Self-Adhesive Sheet.  You can still see the image through the adhesive sheet.  I cut the image out using the largest of the Spellbinders Splendid Circles dies.  I removed the backing from the adhesive and sprinkled with Cosmic Shimmer Aurora Crystal Sparkle Glitter.

I cut the largest of the Spellbinders Romantic Rectangles out of green card.  At the emboss stage I added the Trellis Mask.  I cut  2 corners out of green card using the Spellbinders Lattice Accents Die Set.

I stamped the sentiment from the same stamp set using Olive Archival and embossed with Cosmic Shimmer Clear Embossing Powder.  I cut it out using one of the Spellbinders Ribbon Banners dies and inked through the die with Barn Door Distress Ink using Cut n Dry Foam.

I put some of the Self-Adhesive Sheet on to a piece of red card and cut 2 x each of the 3 smallest dies from the Spellbinders Layered Poinsettia die set – I didn't emboss them.  I peeled off the backing sheet and sprinkled with the Aurora Sparkle Glitter.  I cut 2 x largest of the dies used out of green card – I embossed these.  I assembled the poinsettia and added a 5mm White Pearl with Cosmic Shimmer Glue.  I repeated this using just the 2 smallest dies to make a smaller poinsettia.
 
I assembled the card as shown adding some dots of Cosmic Shimmer Pearlesent PVA in Berry Red around the edges and some Self Adhesive Pearl Swirls.

Thanks for stopping by.

Julia.

Saturday 13 October 2012

Happy Christmas

Hi Bloggers.

A Christmas card today.

    
I stamped the Christmas tree image from the Creative Expressions Christmas Swirl Stamp Set using Cobalt Archival and embossed with Cosmic Shimmer Aurora Crystal Embossing Powder.  I cut it out using the largest of the Spellbinders Fleur De Lys Rectangles and inked through the die with Chipped Sapphire Distress Ink using Cut n Dry Foam.  I cut another Fleur De Lys Rectangle out of cobalt card and offset it behind the image panel.

I stamped the sentiment from the same stamp set using Cobalt Archival and embossed with the clear powder.  I cut it out using Spellbinders Labels Twenty-Five and inked while still in the die with Chipped Sapphire.

For the background, I randomly stamped the snowflake from the same stamp set using Cobalt Archival.  I heated it with my heat tool to make sure that the ink was dry and then popped it through the Grand Calibur with the Spellbinders Regal M-Bossabilities Folder.  I put it through a second time to extend the pattern. and then inked around the edges with Chipped Sapphire. 

I ran a piece of 6mm Hi-Tack Tape along the bottom section of the background piece, overlapping the card at either side.  I then ruffled some Royal Blue American Seam Binding along it and wrapped the excess around the back.  I added another piece of Hi-Tack Tape along the side and ruffled some more ribbon down it.

I cut some snowflakes out of white and cobalt card using the Spellbinders Create-A-Flake die set.  I inked through the die with Chipped Sapphire on the white ones.  I layered the snowflakes up and added a 5mm White Pearl in the centre of each one.

I assembled the card as shown adding some dots of Cosmic Shimmer Pearlescent PVA in White around the edges. I also added a self adhesive pearl swirl.

Hope to see some of you at the Kettering Show today.

Thanks for stopping by.

Julia.