Sunday 31 August 2014

Happy Days

Hi Bloggers.

This is another demo card from Thursday's shows -

For the background, I started by randomly stamping the Ivy Corner Stamp (with the stamp in my hand) onto Milk Card using Stonewashed Adirondack Dye Ink. I repeated the process with the Botanical Spray Stamp and Gathered Twigs Distress Ink. I then spritzed with Arctic Blue Cosmic Shimmer Ink Spray Mist. Once dry, I popped it through the Grand Calibur with the Couture Creations Great Fubu Embossing Folder. I had to pass it through another twice to cover the background (this is quite a wide card!). I inked around the edges with Stonewashed Ink.

I masked off the frame on the Sunflower Delight Stamp and inked up with Jet Black Archival. I removed the masking tape and stamped, then embossed with Cosmic Shimmer Clear Embossing Powder. I coloured in using Arctic Blue and Soft Moss Cosmic Shimmer Ink Spray Mists and Chestnut Cosmic Shimmer Ink Spray Mist. I cut out using Spellbinders Classic Squares Large and inked through the die with Stonewashed Ink.

I cut a couple of Spellbinders Captivating Squares Dies out of Cobalt and Deep Blue Card.

I stamped the sentiment that comes with the Desert Daisies Stamp, again using Jet Black Archival and embossed with Cosmic Shimmer Clear Embossing Powder. I cut it out using a Spellbinders Devine Eleoquence Die and inked through the die with Stonewashed Ink. I cut another of the same die out of Cobalt Card. I cut it down the middle and glued the pieces behind the sentiment panel offsetting them slightly.

I tied a bow using Blue/Ivory Striped Grosgrain and added a Crystal Sparkler.

I assembled the card as shown adding Cream Pearls to the corners and some dots of Cosmic Shimmer Ivory PVA around the edges.

When I demoed this, I added a couple of dragonflies from the Couture Creations Dragonfly Set.

I'll be back tomorrow with a sneak peek from Tuesday's shows (quick turnaround this time). I'll still share the rest of my samples from last Thursday shows, don't worry. In the meantime, I've popped photos on Facebook here.

Thanks for stopping by.

Julia.

Saturday 30 August 2014

Every Moment

Hi Bloggers.

Oops - I was a bit tired when I wrote this last night and missed that it was scheduled for 5 past 8 this evening! Sorry folks!

Here's today's card -

For the background, I randomly stamped the Botanical Spray Stamp onto Milk Card using Latte Adirondack Dye Ink. I made sure the ink was dry and ran it through the Grand Calibur with the Creative Expressions Bark Embossing Folder. I ran it through a second time to extend the design and inked around the edges with Latte Ink.

I stamped the Regal Iris Stamp using Coffee Archival and embossed with Cosmic Shimmer Clear Embossing Powder. I coloured the frame in using Chestnut Cosmic Shimmer Ink Spray Mist. I coloured the flower using Cosmic Shimmer Watercolour Paints. I used Summer Grass and Orange Gold from the Brights Set and Pastel Yellow from the Pastels Set. I cut it out using Spellbinders Wonky Rectangles and inked through the die with Latte Ink.

I placed the middle sized die from Sue's Cordoba Die Set inside the largest die from Sue's Granada Die Set and cut out from Ginger Card. Using my trimmer, I cut out a trip from the middle section of the die cut. I joined the two pieces together again and hid the join with Champagne Silky Crush Ribbon.

I tied a bow using 2 lengths of Champagne Silky Crush Ribbon and added a Bronze Vintage Button.

I stamped the sentiment that comes with the Anemone Planter Stamp, again using Coffee Archival and embossed with Cosmic Shimmer Clear Embossing Powder. I cut it out using Spellbinders Ornate Squares and inked through the die with Latte Ink. I cut a Spellbinders Luscious Labels One out of Ginger Card.

I cut a Couture Creations Beautiful Butterfly Die out of Ginger Card, shaped it using my fingers and added some 3mm Cream Pearls.

I assembled the card as shown adding some Cream Pearls to the corners and some dots of Cosmic Shimmer Ivory PVA around the edges.

Thanks for stopping by.

Julia.

Friday 29 August 2014

To my Wonderful Friend

Hi Bloggers.

Thank you for your emails and comments here on the blog yesterday - much appreciated as always.

Here's today's card -

For the background, I spritzed a piece of Milk Card with Chestnut Cosmic Shimmer Ink Spray Mist. Once dry, I stamped some of the Ivy Corner Stamp in each corner using Gathered Twigs Distress Ink.

I stamped the Sunflower Delight Stamp using Coffee Archival and embossed with Cosmic Shimmer Clear Embossing Powder. I coloured in using Chestnut and Buttercup Cosmic Shimmer Ink Spray Mists and Soft Moss Cosmic Shimmer Vintage Ink Spray Mists. I cut it out using Spellbinders Marvelous Squares and inked through the die with Latte Adirondack Dye Ink. I cut the largest die in the same set out of Chestnut Card.

I stamped the sentiment that comes with the sunflower, again using Coffee Archival and embossed with Clear Powder. I cut it out using the smallest die in Sue's Cordoba Die Set and inked through the die with Latte Ink. I drew around the die with a pencil onto Chestnut Card. I cut it out using scissors. I smoothed out any rough edges with an emery board.

I tied a bow using Brown Silky Crush Ribbon and added a Vintage Metal Embellishment.

I assembled the card as shown adding dots of Cosmic Shimmer Ivory PVA around the edges.

Thanks for stopping by.

Julia.

Thursday 28 August 2014

Shows today on Create & Craft

Hi Bloggers.

I have shows today on Create & Craft at 9am with Martyn and 3pm with Dave. Hope you can join me - I hope to tempt you with some lovely goodies! As this post goes live I will be well on my way to the studios - early start for me!
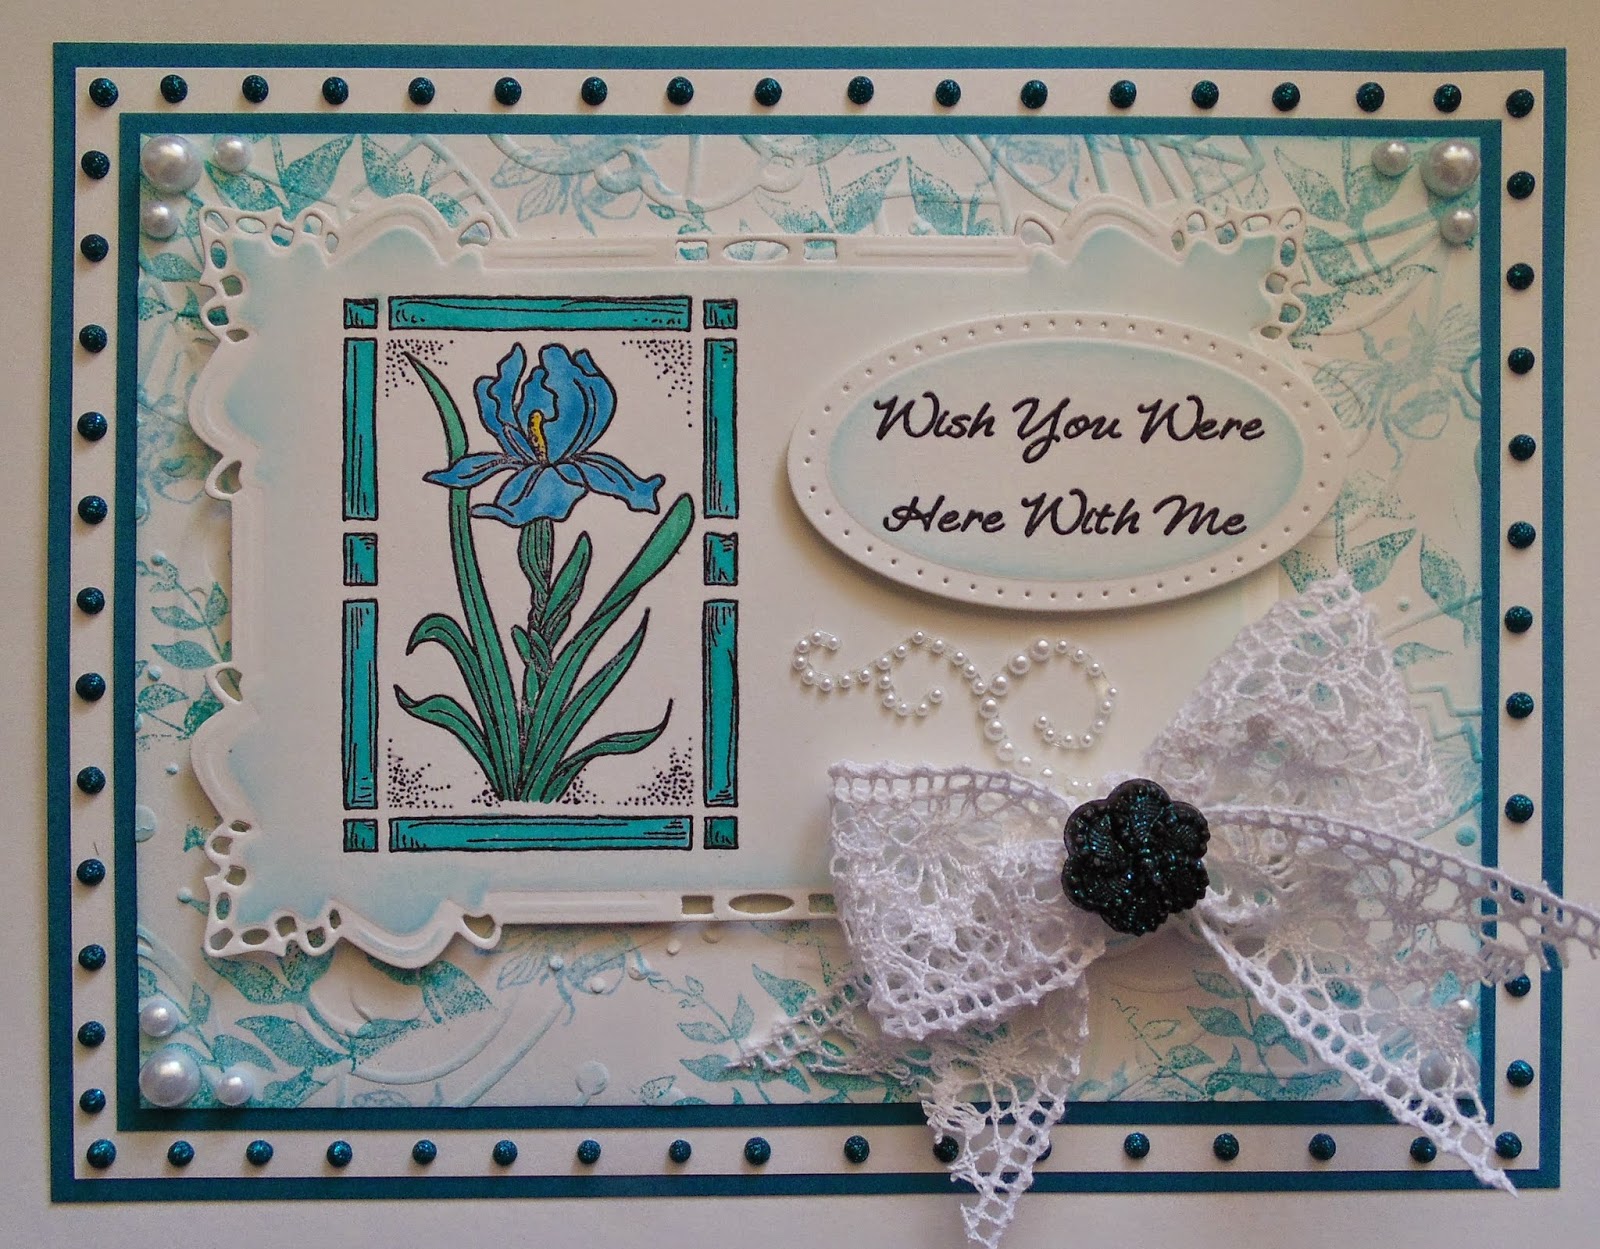
Here's today's card -

This is a really simple card but I wanted to share it today so that you could see the Couture Creations  Beautiful Butterfly Die that is on the show in a bundle with the Dragonfly Set.

Back to the card - For the background, I ran a piece of Coconut White Card through the Grand Calibur with the Creative Expressions Fauna Embossing Folder. I ran it through a second time to extend the design. I popped a little Pearl Cosmic Shimmer Shimmer Paint onto my Craft Sheet. I picked a little up onto a piece of Cut n Dry Foam and rubbed it over the embossed surface. This gives a pearl effect to the card and dries almost immediately. Not easy to see on the photo, I know, but hopefully the cameras will pick it up today.

I stamped the Desert Daisies Stamp 3 times onto Cobalt Card using Perfect Medium and embossed with Cosmic Shimmer True White Detail Embossing Powder. I trimmed them down using a trimmer leaving a border.

I stamped the sentiment that comes with the Daisies, using Perfect Medium and embossed with True White Detail Powder. I cut it out using the smallest die in Sue's Granada Die Set.

I cut a couple of the Couture Creations Beautiful Butterfly Die out of Coablt Card, shaped them and added some White 3mm Pearls to the bodies.


I assembled the card as shown adding some more White Pearls and some dots of Cosmic Shimmer Pearlescent PVA in Cosmic Pearl around the edges.

I have had some help with the samples on today's shows so I would like to take this opportunity to thank Tracy Heaton, Kerry Hicton and Neil Burley from the Creative Expressions Design Team. All of the Creative Expression Design Team have been blogging samples made with this range of stamps this month. For more inspiration, be sure to visit the Creative Expressions News Blog and scroll down to see all of their fabulous projects.

See you later!

Thanks for stopping by.

Julia.

Wednesday 27 August 2014

Sneak Peek

Hi Bloggers.

As promised, here's a Sneak Peek from tomorrow's shows -

For the background, with the stamp in my hand I randomly stamped a section of the Botanical Spray Stamp using Peacock Feathers Distress Ink. I used second generation so that the Peacock Feathers Ink wasn't so bright. I then filled in some of the gaps with the little Bee that comes with the Botanical Spray using Tumbled Glass Distress Ink. I made sure the ink was dry and then ran the background through the Grand Calibur with the Couture Creations Great Fubu Embossing Folder. I ran it through a second time to extend the design and inked around the edges with Peacock Feathers.

I stamped the Regal Iris Stamp using Jet Black Archival and embossed with Cosmic Shimmer Clear Embossing Powder. I cut it out using the largest die in Sue's Granada Die Set, positioning the image towards the left-hand side. I inked through the die with Peacock Feathers. I coloured the flower in using Cosmic Shimmer Watercolour Paints - I used Soft Grass, Persian Sea and Yellow Sun from the Brights Set. I coloured the frame in using Peacock Feathers Distress Ink.

I stamped the sentiment that comes with the Iris using Jet Black Archival and embossed with Clear Powder. I cut it out using the smallest die in Sue's Cordoba Die Set and inked through the die with Peacock Feathers.

I tied a bow using White Crochet Ribbon. I popped a little Cosmic Shimmer Teal Sparkle PVA onto my Craft Sheet. I added a little water and painted it onto a Black Vintage Button.

I assembled the card as shown adding a White Mini Pearl Swirl, some White Pearls in the corners and some dots of Cosmic Shimmer Teal Sparkle PVA around the edges.

All the stamps on tomorrow's shows are available now in my Amazon Store in the singles section here.

Thanks for stopping by.

Julia.

Tuesday 26 August 2014

Joy to the World

Hi Bloggers.

Here's today's blog post -

For the background, I stamped the Newsprint Stars A6 Background several times using Perfect Medium and then dusted Seasonal Silver Mica Powder from the Cosmic Shimmer Festive Brights Mica Spray Set all over. I removed the excess mica with a dry wet wipe.

I stamped the Joy to the World Stamp using Perfect Medium and embossed with Cosmic Shimmer Silver Shime Detail Embossing Powder. I cut it out using Spellbinders Matting Basics B.

I cut a Spellbinders Enchanted Labels 28. Leaving the card in the die I applied some Silver Cosmic Shimmer Shimmer Paint through the die using a Natual Sponge (the paint comes off the die easily with a Grime Boss).

I tied a bow using White Satin Edged Organza and added a Small Fancy Pearl Embellishment.

I assembled the card as shown addin some White Pearls to the corners and some dots of Cosmic Shimmer Pearlescent PVA in Silver Lustre around the edges.

I have decided that I will be closing my Amazon Store on Friday 26th September. There's very little activity on there, even with the August Sale. I have discovered that everytime I sell an item at 99p I actually lose money! It's also irritating me beyond belief that when I'm the first to load a product on to Amazon, another seller can come along and the name I've given to the product gets changed on my inventory to the name they've given it. Sometimes it's wrong and sometimes it seems really stupid like 'Pack of 1' on Sue's die sets and 'Beige' on Ali's Masks. Sometimes pictures are changed incorrectly too and I have to photograph them and take a photo of the barcode to prove to Amazon that my photo is correct. Drives me nuts!

I'm gradually moving some items over the ebay and I've had another clearout this weekend so lots on offer on there. The links to both Amazon and ebay are in the top menu of this blog (does not work on tablets or phones).

Phill Martin has shows on Create & Craft today at 10am and 3pm. Hope you're able to watch - he has some gorgeous new stamps.

I'll be back tomorrow with a sneak peek from Thursday's shows.

Thanks for stopping by.

Julia.

Monday 25 August 2014

Have you Heard the News?

Hi Bloggers.

Here's today's card -

Easy peasy card.

I used Sue's Scribble PVA technique on the panels - Silver Lustre. Olympic Gold and Black Pearl.

 The background is the Creative Expressions Checkerboard PinPoint Embossing Folder.

The image is from the Justrite Just Typed Clear Stamp Set - stamped in Jet Black Archival and embossed with Cosmic Shimmer Clear Embossing Powder.

The sentiment is from the same stamp set, again stamped with Jet Black Archival and embossed with Clear Powder. Cut out using Justrite Vintage Labels 8. I drew around the outside of the die onto Black Card to cut out a faux nestie.

I assembled the card as shown adding a Black 8mm Pearl to each corner and some dots of Cosmic Shimmer Black Pearl Pearlescent PVA around the edges.

Thanks for stopping by.

Julia.

Sunday 24 August 2014

Let it Snow

Hi Bloggers.

Another Black & White Card today - this one is a Christmas Card.

For the background, I ran a piece of Coconut White Card through the Grand Calibur with the Couture Creations New Year Dove Embossing Folder. I ran it through a second time to extend the design.

I stamped the Let it Snow Stamp using Jet Black Archival and embossed with Cosmic Shimmer Clear Embossing Powder. I popped a piece of Creative Expressions Double Sided Adhesive Sheet over the image and cut out the largest die from the Spellbinders Enchanted Labels 28 Die Set. I removed the backing and added Cosmic Shimmer Diamond Sprinkles.

I stamped the image again, this time using Perfect Medium and embossed with Cosmic Shimmer Black Sparkle Embossing Powder. I cut the snow panel and the snowman panel out on the inner box lines and added them to the original image using 3d Foam.


I added a Self Adhesive Pearl Snowflake.

I popped a piece of  Creative Expressions Double Sided Adhesive Sheet over a piece of Black Card and cut 2 Christmas Trees using the Spellbinders 2013 Holiday Trees Die Set. I peeled off the backing and added Cosmic Shimmer Glacier Ice Glitter Jewels.

I tied a bow using Black Crochet Ribbon and added a Small Fancy Pearl Embellishment.

I assembled the card as shown adding some White Pearls to the top corners and some dots of Cosmic Shimmer Pearlescent PVA in Cosmic Pearl around the edges.

Thanks for stopping by.

Julia.