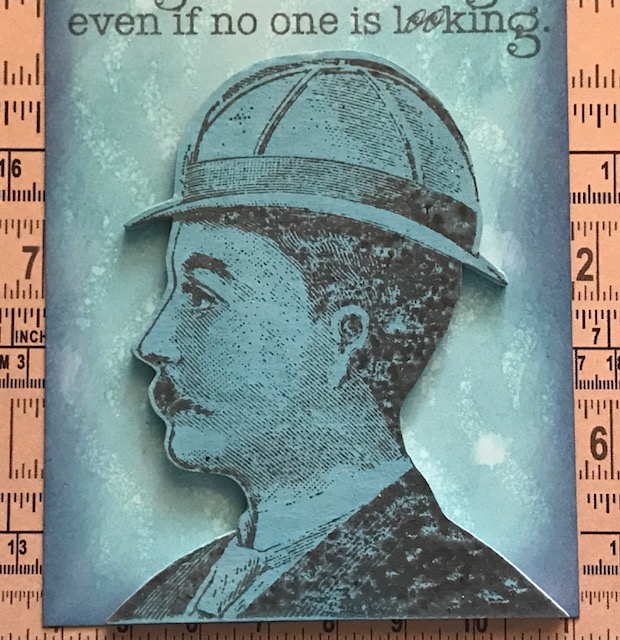
Showing posts with label Embossing Powder. Show all posts

Friday, 22 December 2017

Freebie Friday

Hi Bloggers.

We had a lovely day for yesterday for my parents anniversary. Service in the hotel was slow to say the least though and they didn't even have us booked in for lunch even though I had confirmation! We did have a bit of a giggle about it though - it was like a posh Fawlty Towers! And, yes, I did know about the message from the Queen. It was all arranged and should be waiting for them when they get back home today.

Here's the final Freebie Friday Card of 2017 -

You can read how this card was made in this post.

Leave a lovely comment below to go into the draw to win it. I will announce the winner on Christmas Day. Be sure to pop back to see if you have won.

Please note : Only comments left below will go into the draw. Comments made on the original post will not count. Information given on the original post was correct at the time that post was published.

I'll be back tomorrow with the first sneak peek from the One Day Special that I'm launching on Hochanda on Boxing Day.
Thanks for stopping by.

Julia.
www.juliawattscrafts.co.uk

Free card with all website orders over £10 (Add a note to your order in your cart).

Friday, 1 December 2017

Freebie Friday

Hi Bloggers.

It's Freebie Friday! Don't worry, I will share my samples from this week's One Day Special. As it's December 1st, I thought I would give away a Christmas Card - I will do this every Friday before Christmas in December.

Here's the card that is looking for a new home this week -

You can read how this card was made here.

Leave a lovely comment below to go into the draw to win it. I will announce the winner on Monday. Be sure to pop back to see if you have won.

Please note : Only comments left below will go into the draw. Comments made on the original post will not count. Information given on the original post was correct at the time that post was published.

I'll try my best to get as many website orders out today as I can. Orders containing special order items probably won't be posted out until Wednesday/Thursday next week as Creative Expressions are closed until Tuesday fot Stock Taking. Many apologies for any inconvenience caused.

Thanks for stopping by.

Julia.
www.juliawattscrafts.co.uk


Thursday, 23 November 2017

UTEE overlay

Hi Bloggers.

Our Black Friday Sale starts today over on our website. Enjoy 20% discount on all our products till midnight on Monday 27th November. Enter BLACKFRIDAY in the discount code at checkout to activate your discount. PLUS - the first 10 customers each day during the sale period will receive a FREE GIFT! Remember to use the Filter button to help you navigate around the site. Click here to go straight to our website.

Here's today's card -

I started by stamping the verse from the Wendy Vecchi Studio 490 3 Cheers for Art Stamp Set and the sentiment from the Wendy Vecchi Studio 490 Parisian Art Stamp Set using Garden Patina Archival onto Coconut White Card cut from Sue Wilson's Scalloped Lattice Frames Set B. I edged with Faded Jean Distress Oxide using a Smoothie. I matted onto Black Card and then another piece of Coconut White.

I set the Efcolor Stove up and added some CS Clear, Midnight Blue, Ocean Black and Tropic Pearl Ultra Thick Embossing Crystals to a Melt-It Case. I popped it onto the stove platform, added the lid and left to melt. I inked up the sentiment from the same set using Clear Perfect Medium. Once the crystals were molten I poured some onto my Craft Sheet and added the verse stamp to it.  I left it to set for a couple of minutes and then peeled away the stamp. I brushed CS Phill Martin Old Gold Mica Powder over it. I added my UTEE verse over the top of my stamped verse with a little Hi-Tack Tape and a little CS Glue.

I poured some more of my molten powder into a mould that I had made from a Wendy Vecchi Studio 490 embellishment and some Mould n Pour. After a couple of minutes, I removed it from the mould and added it to my card with a little Hi-Tack Tape and a little CS Glue.

 I completed my card by adding a 5mm Black Pearl to each corner.

Thanks for stopping by.

Julia.
www.juliawattscrafts.co.uk

Saturday, 11 November 2017

Wendy Vecchi Tag Topper with Ultra Thick Embossing Crystals

Hi Bloggers.

I have a tag for you today -

I started by inking a piece of Coconut White Card with Broken China Distress Oxide. I placed the Wavy Mask on top and lightly misted with water. I removed the mask and blotted with Kitchen Roll. I inked around the edges with Faded Jeans Distress Oxide.

I painted a Wendy Vecchi Studio 490 Tag Topper Art Part and a The Guys Art Part with CS White Gesso. Once dry, I added Broken China Distress Oxide to them both.

I stamped the gentleman from the Studio 490 3 Cheers for Art Stamp Set onto The Guys Art Part using Watering Can Archival. I heat set the ink.

I stamped the sentiment from the same stamp set using Watering Can Archival and then glued my gentleman in place.

I inked up the large text stamp from the same stamp set using Clear Perfect Medium. I added Clear Perfect Medium to the Tag Topper. I covered with CS Clear Ultra Thick Embossing Crystals and heat set using a Low Speed Heat Tool. Keeping the heat on, I sprinkled over some CS Tropic Pearl and Midnght Blue Embossing Crystals. Once all moulten, I added my stamp and left to set for a few minutes. I peeled away my stamp and added a little CS Phill Martin Chic Moss Mica Powder. I glued my Tag Topper to my card. I punched a hole using my Crop-a-dile.

I added some Broken China Distress Oxide to my Craft Sheet. I misted with water and dragged a piece of Blue White American Seam Binding through it. I dried it with my Heat Tool and repeated the process with Faded Jeans Distress Oxide. Once dry, I added it to my tag.

Thanks for stopping by.

Julia.
www.juliawattscrafts.co.uk

Friday, 10 November 2017

Freebie Friday

Hi Bloggers.

Here's this week's card that needs a new home - a demo card from shows earlier this year.

You can read how the original card was made here.

Leave a lovely comment below to go into the draw to win it. I will announce the winner on Monday. Be sure to pop back to see if you have won.

Please note : Only comments left below will go into the draw. Comments made on the original post will not count. Information given on the original post was correct at the time that post was published.

Some brand new Woodware Stamps have just been released. There are 24 sets including, for the first time, an A5 set. You can find them over on my website here. Below are a few of my faves (hard to choose though!).


Thanks for stopping by.

Julia.
www.juliawattscrafts.co.uk

Saturday, 4 November 2017

Stamping into Ultra Thick Embossing Crystals

Hi Bloggers.

Here's today's card -

I started with a square piece of Coconut White Card. I dabbed a little Faded Jeans Distress Oxide onto my Craft Sheet. I misted it with waterand then pricked it up onto my card. I repeated the process with Broken China Distress Oxide. I dried the ink with my Heat Tool and then edged with Faded Jeans Oxide using a Smoothie.

I stamped the gentleman from the Wendy Vecchi 3 Cheers for Art using Forget Me Not Archival.

I stamped the sentiment from the same set using Watering Can Archival.

I doodled around the edges of my card using a Pigma Micron Pen.

I matted onto Black Card and then onto Coconut White Card.

I set the Efcolor Stove up and added some CS Clear and Midnight Blue Ultra Thick Embossing Crystals to a Melt-It Case. I popped it onto the stove platform, added the lid and left to melt. I inked up the sentiment from the same set using Clear Perfect Medium. Once the crystals were moulten I poured some onto my Craft Sheet and added my sentiment stamp to it.  I left it to set for a couple of minutes and then peeled away the stamp. I brushed CS Phill Martin Chic Grey Blue Mica Powder over it. I added my sentiment to my card with a little Hi-Tack Tape and a little CS Glue.

I completed my card by adding 3 x 5mm Black Pearls.

Thanks for stopping by.

Julia.
www.juliawattscrafts.co.uk

Tuesday, 24 October 2017

One Day Special Shows on Hochanda today

Hi Bloggers.

I'm launching a new One Day Special on Hochanda today at 6pm with some lovely Sue Wilson Dies. I hope you can join me.

Here's today's card -

This card was a bit of a labour of love (no pun intended) so I thought I'd share it today so that it doesn't get overlooked.

I have some of Phill Martin's embossing powders on the show and all 3 of them are the really the focal point of this card.

I started by cutting dies from Sue Wilson's Jennifer Die Set out of Coconut White Card - dies #1 and #2 together and dies #3 and #4 together. I pressed them into Clear Perfect Medium. I added Chic Viola Embossing Powder to 2 of the opposite corners, Titanium Embossing Powder to the other 2 corners and Decadent Denim Embossing Powder to the centre. I heat set them both and then added more Perfect Medium, more powder as before and heat set again.

I cut die #2 and die #4 from the Jennifer Die Set out of Coconut White Card and added my embossed pieces to them using CS Glue.

I cut my letters for my sentiment out of Coconut White Card using Sue's Alphabet Grid Die Set. I double embossed the letters in the same 3 Embossing Powders, alternating the colours used. I cut a banner out of Coconut White Card using Sue's Stitched Flags Die Set - I made the banner longer and got points at both ends by keeping the straight edge outside of the cutting plates, turning the die around and slotting it back into place and cutting a second time still keeping that straight edge outside of the cutting plates.

I glued the letters in place using CS Glue, shaped my banner and added it to my Jennifer frame using Foam Pads in the centre and CS Glue at the ends.

I cut the outer and inner dies all 3 sizes of the flowers from Sue's Pinwheel Floral Die Set together out of Coconut White Card twice. I cut both of the leaves out of Coconut White Card twice. I double embossed the largest flowers with Chic Viola Embossing Powder.

I double embossed the middle sized flowers with Decadent Denim and the smallest ones with Titanium Embossing Powder.

For my background, I embossed a piece of Coconut White Card using the Creative Expressions Tulip Twist Embossing Folder. I matted onto Stone Card and then Coconut White Card.

I completed my card by adding some 8mm White Pearls to the centre of the flowers and to the corners.

I'm offering 10% discount on items on my website from the shows. You can find them here. Add JULIAWATTS to the discount code box at checkout to receive your discount. Offer applies till midnight tomorrow night or while stocks last.

I have loaded photos of the samples from the shows to the Gallery Section of this Blog and to my Julia Watts Crafts Facebook Page.

Just a reminder - shows are at 6pm and 8pm today and then 9am, 1pm and 5pm tomorrow.

Thanks for stopping by.

Julia.
www.juliawattscrafts.co.uk

Sunday, 15 October 2017

Clean and Simple

Hi Bloggers.

Here's today's card -

Products used -
Cosmic Shimmer Ultra Thick Embossing Crystals - Clear & Tarnished Gold
Arty Heart Pop-ems
Wendy Vecchi Studio 490 - 3 Cheers for Art
Onyx Black Versafine
3mm Black Pearls
Efcolor Stove
Card - Coconut White & Black


Lisa Horton is continuing with her One Day Special on Hochanda today with shows at 9am, 1pm and 5pm. She also have an hour at 11am with the new Advent Calendar Die Set. I'm offering 10% discount on items I have in stock on my website from the shows, You can find them here. You need to enter code LISAHORTON in the discount code box at checkout. Offer applies till midnight tonight or while stocks last.

Thanks for stopping by.

Julia.
www.juliawattscrafts.co.uk

Saturday, 14 October 2017

Jolly Tag with Clear Ultra Thick Embossing Crystals and Crystal Drops

Hi Bloggers.

A series of quickie posts over the next week or so as I'm heading off to Norfolk today for a workshop in Sheringham tomorrow, then I have 5 days beading and then head down to the New Forest for a workshop in Lyndhusrt next Saturday. I'm not sure if the Wifi will be kind where I am so I have scheduled quickie posts and will add more info if I get chance.

Please note : orders placed on my website during the next week will not be posted out until Monday 23rd October onwards. Special order items will take a little longer than usual. Apologies for any inconvenience caused.

Here's today's project -

Products used -
Wendy Vecchi Art Parts - Tag Toppers & The Guys, Studio 490 Stamp Set - Parisian Art
Distress Oxides - Faded Jeans & Broken China
Cosmic Shimmer - White Gesso, Acrylic Mixed Media Paint - Chelsea Blue, Glitterbitz - Turquoise, Diamond Frost - Sparkle Star, Clear Ultra Thick Embossing Crystals, Crystal Drops - Teal
That Special Touch Mask - Wavy
Lisa Horton - Christmas Wishes Die Set
Efcolor Stove
Coconut White Card
Blue White American Seam Binding


Lisa Horton is launching a new One Day Special on Hochanda today at 6pm with some lovely Sue Wilson dies. I'm offering 10% discount on items I have in stock on my website from the shows, You can find them here. You need to enter code LISAHORTON in the discount code box at checkout. Offer applies till midnight tomorrow night or while stocks last.

Thanks for stopping by.

Julia.
www.juliawattscrafts.co.uk

Thursday, 5 October 2017

Cheerio Chaps!

Hi Bloggers.

I have a tag for you today which features the gorgeous Tarnished Gold CS Ultra Thick Embossing Crystals -

I started with my background card which was a piece of Milk Card with some mopped up waste Vintage Photo Distress Oxide Ink on it. I dusted with an Anti-Staic Pad and stamped the image from the Wendy Vecchi Studio 490 3 Cheers for Art Stamp Set using Clear Perfect Medium. I added CS Gold Detail Embossing Powder and heat set. I stamped sentiment from the Wendy Vecchi Studio 490 Parisian Art Stamp Set using Potting Soil Archival. I edged with Vintage Photo Distress Oxide using a Woodware Blend-It Tool.

I edged a Tag Toppers Art Part with Antique Gold Shimmer Paint. I then applied a good coating of Clear Perfect Medium on the top. I added CS Tarnished Gold Ultra Thick Embossing Crystals and set using a Low Speed Heat Tool. It's best only to do one coat to keep the definition of the mixed crystals.

I glued the topper to the tag using CS Glue. I trimmed the ends of my card in line with the top of the Tag Topper. I used my Crop-a-Dile to punch the hole in my tag through the Tag Topper and added some London Tan American Seam Binding.

I set the Efcolor Stove up and added some CS Clear and Tarnished Gold Ultra Thick Embossing Crystals to a Melt-It Case. I popped it onto the stove platform, added the lid and left to melt. Once moulten, I poured it into a mould that I made from Ranger Mold-n-Pour (I usually fill a few in a session). After a couple of minutes I removed my embellishment from the mould and added it to my tag using a little Hi-Tack Tape and a little CS Glue.

Thanks for stopping by.

Julia.
www.juliawattscrafts.co.uk

Saturday, 16 September 2017

Simple Doodle Poinsettia

Hi Bloggers.

It's Day 1 of Ally Pally. If you're visiting today, please pop by the Creative Expressions stand and say Hi.

Here's today's card -

Products Used -
Woodware - Doodle Poinsettia, Merry Christmas From Our House to Yours, Anti-Static Pad
Onyx Black Versafine
Cosmic Shimmer - Clear Mirage Brilliant Sparkle Embossing Powder, Matt Clear Embossing Powder, Christmas Watercolour Palette
Sakura - Gold Stardust Pen, Large Tip Water Brush
Phill Martin - Snowflakes Paper Pad, Stamping Mat
Creative Expressions - 5mm White Pearls, Card : Coconut White, Rich Red, Brunswick Green

Thanks for stopping by.

Julia.
www.juliawattscrafts.co.uk
Free card with all website orders over £10 (ask for one in the comments box at checkout).


Monday, 11 September 2017

Paper Cuts Merry Christmas Santa Bauble

Hi Bloggers.

Here's today's card -

For the background, I cut 5 of the snowflakes from the Paper Cuts Snowflake Frame and the little snowflakes from the Paper Cuts Merry Christmas Santa Bauble out of Coconut White Card. I glued all of them (except one) to a piece of Midnight Blue Peal Card and put aside for a few minutes for the glue to dry.

I cut the outer die from the Merry Christmas Santa Bauble Die Set out of Rich Red Card. I cut the outer and inner die plus the Merry Christmas insert out of Coconut White and also the moustache piece. I kept the waste from the face, hat trim and hat bobble. I glued the white santa die cu tto the Rich Red die cut. I scribbled some Tattered Rose Distress Marker onto my Craft Sheet and picked the ink up using a Water Brush. I used this to paint the face and the nose. I glued the face in place.

I added Woodware Fluffy Stuff to the hat bobble, hat trim and moustache and heated. I glued these to my Santa and added 5mm Black Pearls for the eyes. I added my remaining snowflake to the hat and a Baker's Twine Bow.

Going back to my background, I ran it through the Spellbinders Platinum Machine with the Creative Expressions Nordic Tiles Embossing Folder. I matted onto Coconut White Card, Rich Red Card and then another piece of Coconut White Card and added my Santa.

I edged my background with CS Glue and added CS Apple Red Glitterbitz. I completed my card by adding some Apple Red CS Twinkles to the snowflakes.

The winner of the card (plus mystery card) from Freebie Friday on 8th September is.............

PharmacyMichele

Please email me at juliawattscrafts@gmail.com with your address and I'll pop your cards in the post.

I'll be back tomorrow with a sneak peek from my Woodware shows on Thursday.

Thanks for stopping by.

Julia.
www.juliawattscrafts.co.uk
Free card with all website orders over £10 (ask for one in the comments box at checkout).

Sunday, 10 September 2017

Let it Snow

Morning.

Here's today's card -

I cut the bottom section of the Paper Cuts Let it Snow Frame out of Coconut White Card and trimmed away the excess to just leave the sentiment. I also cut 3 of the snowflakes in the set and the snowflake corner from the Paper Cuts Jingle Bells Die Set 4 times. I pressed them all into Clear Perfect Medium, added CS Sea Turtle Embossing Powder and heat set. I added more ink, more powder and heat set again.

I popped a piece of Creative Expressions Double Sided Adhesive Sheet onto Coconut White Card and cut one of Sue Wilson's Double Pierced Background Rectangles from it. I peeled away the other backing sheet, added my sentiment and then added Snow White Opaque Micro Beads to the exposed adhesive. You may find that your sentiment may lift a little if there is embossing powder on the back - just lift it up from around the Micro Beads, add some CS Glue and seat back in place. I glued my extra snowflakes as shown. I matted onto Silver Shine Pearl Card cut from the next sized rectangle in the set.

For the background, I cut a piece of Coconut White Card using a larger die in the rectangles set and embossed using the CE Ice Crystals Embossing Folder. I matted onto Silver Shine Pearl Card cut using the next sized die in the set. I added my snowflake corners.

I added CS Glue around the edges of the sentiment panel and the background and sprinkled CS Iced Snow over. I added CS Polar White Twinkles to the centres of the snowflakes and corners.

Thanks for stopping by.

Julia.
www.juliawattscrafts.co.uk
Free card with all website orders over £10 (ask for one in the comments box at checkout).

Friday, 25 August 2017

Paper Cuts One Day Special today

Hi Bloggers.

Today's the day that I launch the new Paper Cuts One Day Special on Hochanda. It launches at 6pm, then there's another show at 8pm (not on Freeview but available on Sky, Freesat, online at hochanda.com and Facebook live). Shows continue at 7am (Netherlands and online at hochanda.nl and Favebook live - worth tuning in as they're different demos and I speak English all the time as I know no Dutch), 9am, 1pm and 5pm.

Here's today's card -

For the background, I embossed a piece of Coconut White Card using the Creative Expressions Nordic Tiles Embossing Folder. I matted onto Brunswick Green Card, then Rich Red Card and another piece of Coconut White Card.

I popped a piece of Creative Expressions Double Sided Self Adhesive Sheet onto a piece of Coconut White Card and cut the plain circle die and the decorative outer die together from the Paper Cuts Jingle Bells Die Set.

I cut the Jingle Bells Die and the plain circle die out of Brunswick Green Card. I trimmed my Double Sided Adhesive circle die cut, just a little. This makes it easier when adding to the decorative die cut. I added CS Apple Red Glitterbitz to the exposed adhesive.

I cut just the holly leaf section of the Jingle Bells die again. I trimmed it and shaped it and added it to my main die cut.

I removed the backing sheet from my outer frame and added CS Sahara Gold Glitterbitz.

I cut one of the corner dies from the Paper Cuts Turtle Doves Die Set out of Brunswick Card 4 times and added them to my card. There is a holly corner in the Jingle Bells Die Set but, obviously the corners can be used on anything. All the frames are interchangeable too. It's a very versatile bundle.

I completed my card by adding some CS Apple Red Twinkles to the holly and the frame.

I have uploaded photos of the samples to the Gallery Section of this Blog and to my Julia Watts Crafts Facebook Page.

I'm offering 10% discount on items I have on my website from the shows. You can find them here. Offer applies till midnight tomorrow night or While Stocks Last. Discount will be applied automatically at checkout. Please note : the Paper Cuts Dies are Special Order items and are subject to availability. Please allow 7-10 for dispatch of orders containing them.

Freebie Friday is having a break this week - it will be back next week.

See you later.

Julia.
www.juliawattscrafts.co.uk
Free card with all website orders over £10 (ask for one in the comments box at checkout).