Friday 31 October 2014

Good Luck

Hi Bloggers.

Here's today's card -

For the background, I ran a piece of Coconut White Card through the Grand Calibur with the Couture Creations Oriental Garden Embossing Folder. I ran it through a second time to extend the design and inked around the edges with Pink Sherbet Adirondack Dye Ink.

I stamped the sentiment from the Creative Expressions Everday Expressions Stamp Set using Perfect Medium and embossed with Cosmic Shimmer Pastel Pink Embossing Powder. I cut it out using Couture Creations Elegant Square Die and inked through the die with Pink Sherbet. I cut another Elegant Square Die out of Pink Card and used just the outer frame behind the sentiment.

I cut a Spellbinders Luscious Labels One Die out of Coconut White Card and inked through the die with Pink Sherbet. I cut a Spellbinders Marvelous Squares Die out of Pink Card.

I cut a couple of leaves out of Pink Card using the Couture Creations Ivy Die and added some White Organza Ribbon Roses.

I assembled the card as shown adding some White Pearls to the corners and some dots of Cosmic Shimmer Pastel Pink PVA around the edges.

Thanks for stopping by.

Julia.

Thursday 30 October 2014

Dance.......

Hi Bloggers.

A great day yesterday at Creative Expressions HQ in Kettering with 2 fun workshops with John Lockwood hindering - I mean helping!

My next workshops are on Tuesday 25th November. There are 3 different one and a half hour workshops using Sue Wilson's 3rd Release Dies which are due out mid November. Exciting!!

Here's today's card -

For the background, with the stamp in my hand, I randomly stamped Phill Martin's Vintage Sheet Music Background onto Milk Card using Black Soot Distress Ink. I repeated the process with Phill Martin's Vintage Script Background using Raisin Adirondack Dye Ink. I made sure the ink was dry and then ran it through the Grand Calibur with the Floral Brocade PinPoint Embossing Folder (I ended up debossing it but actually quite liked it). I inked around the edges with Raisin Ink.

I stamped the Jive Stamp using Perfect Medium and embossed with Cosmic Shimmer Lava Black Aurora Embossing Powder. I cut it out using Spellbinders Labels 29 and inked through the die with Raisin Ink. I cut a Spellbinders Devine Eleoquence Die out of Black Card.

I stamped the sentiment from the Step by Step Stamp Set using Perfect Medium and embossed with Lava Black Aurora. I cut it out using a Spellbinders Romantic Rectangles Two Die and inked through the die with Raisin Ink.

I assembled the card as shown adding some Small Black Circle Dazzlers to the corners and some dots of Cosmic Shimmer Black Pearl PVA around the edges.

Thanks for stopping by.

Julia.

Wednesday 29 October 2014

A Cheerful Hello

Hi Bloggers.

Here's today's card -

For the background, I started by stamped one of the stamps from the Love & Cherish Set towards the bottom of a piece of Milk Card using Perfect Medium and embossed with Cosmic Shimmer Pastel Blue Embossing Powder. I ran it through the Grand Calibur with the Couture Creations Peacock Fans Embossing Folder. I ran it through a second time to extend the design and inked around the edges with Stormy Sky Distress Ink.

I stamped the other stamp from the Love & Cherish Stamp Set twice, using Perfect Medium and embossed with Pastel Blue Powder. I cut them out using the Couture Creations Royal Oval Die and inked through the die with Stormy Sky.

I stamped the sentiment from the Creative Expressions Everyday Expressions Stamp Set using Perfect Medium and embossed with Pastel Blue Powder. I cut it out using the Royal Oval Die. I cut the die again out of Sky Blue Card and inked through the die with Stormy Sky. I used just the outer frame to surround the sentiment.

I assembled the card as shown adding some Cream Pearls to the corners and some dots of Cosmic Shimmer Pastel Blue PVA around the edges.

Thanks for stopping by.

Julia.

Tuesday 28 October 2014

Lacy 8

Hi Bloggers.

Here's today's card -

For the background, I stamped the Rose Corner Stamp in each corner using Peach Bellini Adirondack Dye Ink.

I cut the Couture Creations Lacy 8 Die out of Peach Card twice. I added the 2 outer frames to the background, offsetting them as shown. I cut a bunch of the Coutures Creations Ivy Die out of Coconut White Card, inking through the die with Peach Bellini. I glued these around the Lacy 8 frames.

I cut away the outer edges of the inner die cut from the Lacy 8 die and ended up with 2 flowers. I shaped them and glued them together.

I made a flower out of White Crochet Ribbon and added it to the centre.

I assembled the card as shown adding some White Pearls to the corners and some dots of Cosmic Shimmer Pearlescent PVA in Cosmic Pearl around the edges.

Thanks for stopping by.

Julia.

Monday 27 October 2014

Warn people first!

Hi Bloggers.

Here's today's card - a black & white number with just a hint of red.

For the background, I simply ran a piece of Coconut White Card through the Grand Calibur with the Checkerboard PinPoint Embossing Folder.

I stamped the Quick Step Stamp using Perfect Medium and embossed with Cosmic Shimmer Lava Black Aurora Embossing Powder. I cut it out using Spellbinders Labels 29. I cut a Spellbinders A2 Polka Dots Die out of Black Card.

I stamped the sentiment from the Step by Step Stamp Set using Perfect Medium and embossed with Aurora Black Aurora. I cut it out using Sue's Valencia Die Set. I cut another Valencia die out of Black Card. I cut it across the centre and glued the pieces offset at the back of the sentiment panel.

I made a flower out of White Crochet Ribbon. I added some Black Tulle. I cut some leaves out of Black Card using Sue's Petite Vinery Die Set.

I assembled the card as shown adding some Small Black Circle Dazzlers to the corners and some dots of Cosmic Shimmer Black Pearl PVA around the edges.

Thanks for stopping by.

Julia.

Sunday 26 October 2014

Happy Wedding Day

Hi Bloggers.

A very quick simple card today.

For the background, I simply ran a piece of Milk Card through the Grand Calibur with Chainmail Embossing Folder. I ran it through a second time to extend the design.

I stamped the Garden Frame Stamp using Perfect Medium and embossed with Cosmic Shimmer Gold Detail Embossing Powder. I cut it out using Spellbinders Grand Decorative Labels One and inked through the die with Antique Linen Distress Ink.

I stamped the sentiment from the All Occasions Sentiments Stamp Set using Perfect Medium and added Gold Detail Powder. I did not heat set just yet. I stamped one of the Mini Floral Frames around the sentiment (I had cut the excess rubber from the centre of the frame), added Gold Powder and heat set.

I tied a bow using 2 lengths of Champagne Silky Crush Ribbon.and added a Bronze Vintage Button.

I assembled the card as shown adding some Cream Pearls to the corners and some dots of Cosmic Shimmer Olympic Gold PVA around the edges.

Thanks for stopping by.

Julia.

Saturday 25 October 2014

No greater feeling

Hi Bloggers.

I'm demonstrating at the Stables Card Emporium in Habrough today. If you're in the area, please stop by.

Here's today's card -

For the background, with the stamp in my hand I randomly stamped Phill Martin's Vintage Sheet Music Background onto Coconut White Card using Stonewashed Adirondack Dye Ink. I repeated the process with Phill Martin's Vintage Script Background using Chipped Sapphire Distress Ink. I made sure the ink was dry and ran it through the Grand Calibur with the Couture Creations Feather Frenzy Embossing Folder. I ran it through a second time to extend the design and inked around the edges with Chipped Sapphire. I rubbed Pearl Moon Gilding Wax over the embossed surface. I left it to dry for a few minutes and then buffed it up using a dry wet wipe. I added Cosmic Shimmer Sky Blush Twinkles around the edges and out aside to dry.

I stamped the Senorita Stamp using Perfect Medium and embossed with Cosmic Shimmer Steel Blue Aurora Embossing Powder. I cut it out using Spellbinders A2 Matting Basics B and inked through the die with Chipped Sapphire. I cut a Spellbinders Floral Ribbon Threader Die out of Navy Card.

I stamped the sentiment from the Step by Step Stamp Set using Perfect Medium and embossed with Steel Blue Aurora. I cut it out using Spellbinders Fancy Postage Edge and inked through the die with Chipped Sapphire.
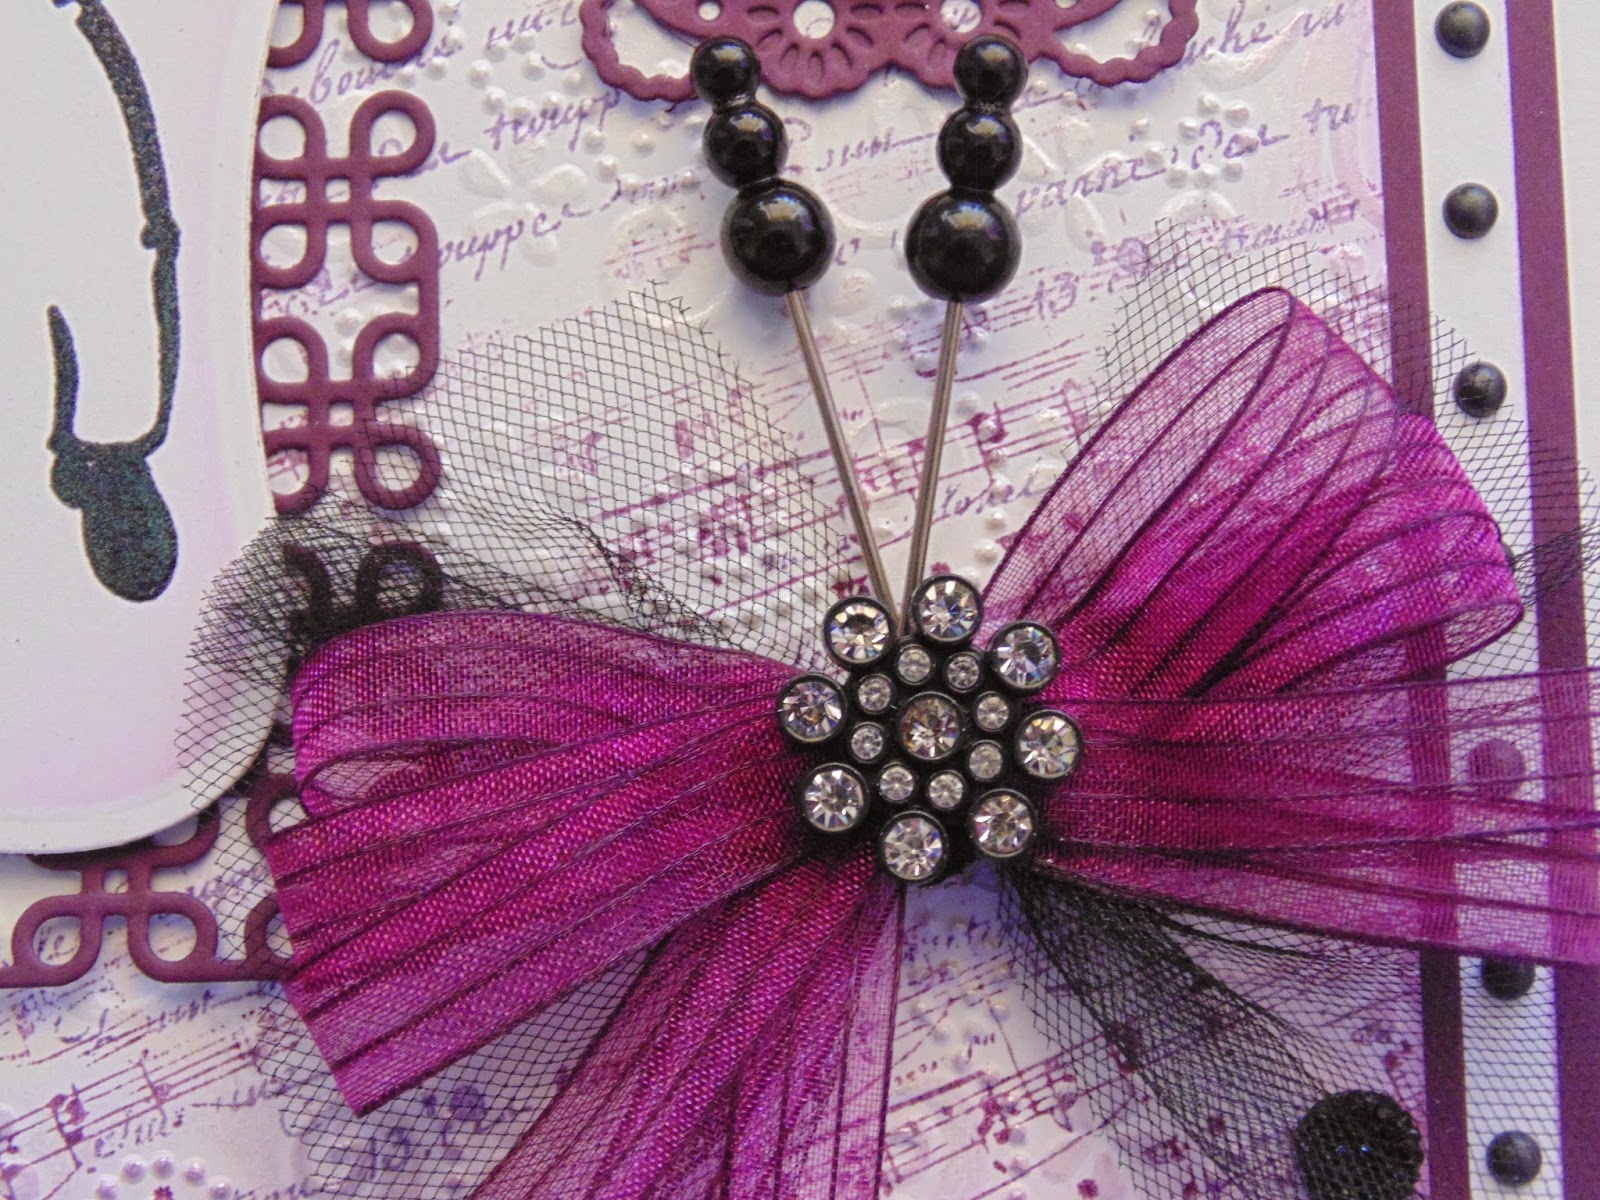
I tied a bow using Sheer Iridescent Ribbon, added some Silver Tulle and a Black Crystal Sparkler.

I made some flowers out of the same ribbon and cut some leaves out of Coconut White Card using Sue's Petite Vinery Die Set.

I assembled the card as shown adding a Small Black Circle Dazzler to each corner and some dots of Cosmic Shimmer Summer Blue Pearlescent PVA around the edges.

Thanks for stopping by.

Julia.

Friday 24 October 2014

Life is Better

Hi Bloggers.

I had an email yesterday telling me that I have been nominated in the Most Inspirational Craft Blog Category in the British Craft Awards 2015 in association with Craft, Hobby & Stitch International. Gobsmacked - I think that's the term I would use! I'm not expecting to win as Sue Wilson and Sam Poole have also been nominated but well chuffed to have been nominated. You can vote here.

Here's today's card -

For the background, I simply ran a piece of Coconut White Card through the Grand Calibur with the Creative Expressions Celtic Flower Embossing Folder.

I stamped the sentiment from the Uplifting Thoughts Stamp Set onto Coconut White Card using Jet Black Archival and embossed with Cosmic Shimmer Clear Embossing Powder. I stamped a Swirl from the Justrite Typewriter Sentiments Clear Stamp Set either side of the sentiment using Jet Black Archival. I cut it out using Spellbinders Matting Basics B.

I stamped the Wrought Iron Frame onto Black Card using Perfect Medium and embossed with Cosmic Shimmer True White Detail Embossing Powder. I cut it out using Spellbinders A2 Matting Basics B.

I cut 4 Justrite Heirloom Flourish Two out of Coconut White Card and attached them to the frame as shown.

I assembled the card as shown adding some Black Pearls to the corners and some dots of Cosmic Shimmer Pearlescent PVA in Black Pearl around the edges.

Thanks for stopping by.

Julia.

Thursday 23 October 2014

Eat Sleep Salsa

Hi Bloggers.

Here's todays card -

For the background, with the stamp in my hand, I randomly stamped Phill Martin's Vintage Sheet Music Background onto Coconut White Card using Seedless Preserves Distress Ink. I repeated the process with Phill Martin's Vintage Script Background using Dusty Concord Distress Ink. I made sure the ink was dry and then ran it through the Grand Calibur with the Floral Brocade PinPoint Embossing Folder. I inked around the edges with Seedless Preserves and rubbed Pearl Moon Gilding Wax over the embossed surface. I left it to dry for a few minutes and then buffed it up using a dry wet wipe.

I stamped the Salsa Stamp using Perfect Medium and embossed using Cosmic Shimmer Arctic Black Aurora Embossing Powder. I cut it out using Spellbinders Labels 8 and inked through the die with Seedless Preserves. I cut a Spellbinders Locking Loops Die out of Rich Plum Card.

I stamped the sentiment from the Step by Step Stamp Set using Perfect Medium and embossed with Cosmic Shimmer Arctic Black Aurora Embossing Powder. I cut it out using Justrite Vintage Labels Two Dies and inked through the die with Seedless Preserves. I cut a Spellbinders Floral Ribbon Threader Die out of Rich Plum Card.

I tied a bow using Sheer Iridescent Ribbon, added some Black Tulle, a Black Crystal Sparkler and a couple of Black Pearl Decorative Stick Pins.

I assembled the card as shown adding some Small Black Circle Dazzlers to the corners and some dots of Cosmic Shimmer Black Pearl PVA around the edges.

Thanks for stopping by.

Julia.