Hi Bloggers.
Here's today's card -
The background on this one is one of my favourite techniques with Pixie Powders. To recap - I used a piece of Heat Emboss Acetate. I added CS Glue, spritzed with water and spread the glue all over using my finger. I then added Cosmic Shimmer Pixie Powders in Aqua Lagoon, Golden Mint and Ancient Copper so that all the glue was covered. I spritzed with a little more water and then added CS Frosty Dawn Diamond Frost.
I scrunched up a piece of White Tissue Paper, opened it out and added
it to my background. I dabbed it down using a piece of Kitchen Roll and
put aside to dry.
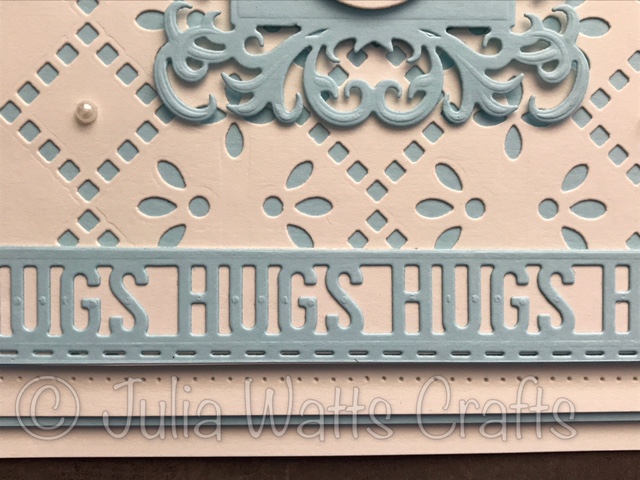
I cut dies #3 and #4 together from the Scattered Leaves Background into a piece of Coconut White Card. I added a die from the Pierced Background Rectangle Die Set and cut. I trimmed by background to fit behind the the die cut and glued into place. I waited a while for the glue to set and then slotted die #3 in the centre and cut. I matted onto a couple of pieces of Coconut White Card using a couple of layers of CE Mounting Cushion.
I cut dies #1 and #2 together out of Coconut White Card and added the remaining piece of my acetate background behind it. I glued it in place in the aperture of my frame.
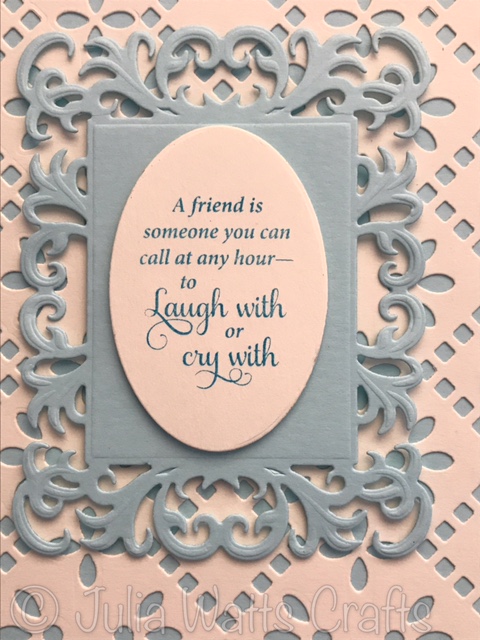
I stamped the sentiment from the Creative Expressions Petite Lavish Sentiments Stamp Set onto Coconut White Card using Vivid Chartreuse Archival Ink. I cut it out using Pierced Flags. I shaped it and tucked it into the side of my frame.
I have loaded the Milton Keynes Workshops for 2018 onto my website. Guests this year include Leonie Pujol, Lisa Horton, Francoise Read, Jane Gill and Phill Martin. I'll be doing a few workshops on my own including one purely on background techniques. You can find all the workshops here.
Yesterday, I added quite a few products to the pre-loved section of my website - you can find them here. Also, just to give you a heads up - out Big Sale ends tomorrow at 5pm. You can see hundreds of items at reduced prices here.
Thanks for stopping by.
Julia.
www.juliawattscrafts.co.uk
Showing posts with label Archival. Show all posts
Tuesday, 2 January 2018
Sunday, 24 December 2017
Christmas Eve Sneak Peek
Hi Bloggers.
Christmas Eve! Where has the year gone? I'm prepping today for my shows on 30th December but today I have another sneak peek from the One Day Special that I'm launching on Hochanda on Boxing Day at 6pm.
This is a really simple card to construct. It may not be apparent from the photo but the blue background actually contains a simple but cool technique with Cosmic Shimmer Acrylic Mixed Media Paint.
I painted a piece of Heat Emboss Acetate with Blue Boy CS Acrylic Mixed Media Paint and put aside to dry for a couple of minutes. I then gave it a 2nd coat and let dry again.
I cut the largest 2 dies in the New Zealand Background Die Set into a piece of Coconut White Card. I glue this to the side of my Acetate without the paint on it. I slotted die #4 into the aperture and cut to create a frame.
I then cut dies #1 and #3 into another piece of Coconut White Card. I glued my waste piece at the back of it. I added my large background piece to it using CE Mounting Cushion and added a frame cut from Coconut White Card using the Double Pierced Background Rectangle Die Set. I matted onto a couple of pieces of Coconut White Card.
I stamped my sentiment from the CE Petite Lavish Sentiments Stamp Set onto Coconut White Card using Manganese Blue Archival. I cut it out using the Pierced Flags Die Set.
I sprayed a piece of felt with CS Frosty Sky Ink Spray Mist. Once dry, I made a couple of flowers using the Classic Foldover Flowers Die Set.
I cut some foliage out of Coconut White Card using the Blossoming Branch Die Set. I painted a piece of Coconut White Card with Blue Boy Mixed Media Paint and cut the tiny flowers in the same die set out of it. I did try and use up my scraps of leftover Acetate but on this occasion it would not cut - the acetate will cut simple dies, it depends on what's on it. I added 3mm White Pearls to the centre of my tiny flowers.
I shall be trying to remember to go to bed with ear plugs in tonight to try and dampen out to noise of the brass band that plays outside my house every Christmas Day at 8am! Something I look forward to every year - not! Guaranteed to put me in a good mood if they wake me up!
I've scheduled another sneak peek for tomorrow at 6am - I hope you get a minute to pop by at some point. Have a lovely Christmas.
Thanks for stopping by.
Julia.
www.juliawattscrafts.co.uk
Free card with all website orders over £10 (Add a note to your order in your cart).
Christmas Eve! Where has the year gone? I'm prepping today for my shows on 30th December but today I have another sneak peek from the One Day Special that I'm launching on Hochanda on Boxing Day at 6pm.
This is a really simple card to construct. It may not be apparent from the photo but the blue background actually contains a simple but cool technique with Cosmic Shimmer Acrylic Mixed Media Paint.
I painted a piece of Heat Emboss Acetate with Blue Boy CS Acrylic Mixed Media Paint and put aside to dry for a couple of minutes. I then gave it a 2nd coat and let dry again.
I cut the largest 2 dies in the New Zealand Background Die Set into a piece of Coconut White Card. I glue this to the side of my Acetate without the paint on it. I slotted die #4 into the aperture and cut to create a frame.
I then cut dies #1 and #3 into another piece of Coconut White Card. I glued my waste piece at the back of it. I added my large background piece to it using CE Mounting Cushion and added a frame cut from Coconut White Card using the Double Pierced Background Rectangle Die Set. I matted onto a couple of pieces of Coconut White Card.
I stamped my sentiment from the CE Petite Lavish Sentiments Stamp Set onto Coconut White Card using Manganese Blue Archival. I cut it out using the Pierced Flags Die Set.
I sprayed a piece of felt with CS Frosty Sky Ink Spray Mist. Once dry, I made a couple of flowers using the Classic Foldover Flowers Die Set.
I cut some foliage out of Coconut White Card using the Blossoming Branch Die Set. I painted a piece of Coconut White Card with Blue Boy Mixed Media Paint and cut the tiny flowers in the same die set out of it. I did try and use up my scraps of leftover Acetate but on this occasion it would not cut - the acetate will cut simple dies, it depends on what's on it. I added 3mm White Pearls to the centre of my tiny flowers.
I shall be trying to remember to go to bed with ear plugs in tonight to try and dampen out to noise of the brass band that plays outside my house every Christmas Day at 8am! Something I look forward to every year - not! Guaranteed to put me in a good mood if they wake me up!
I've scheduled another sneak peek for tomorrow at 6am - I hope you get a minute to pop by at some point. Have a lovely Christmas.
Thanks for stopping by.
Julia.
www.juliawattscrafts.co.uk
Free card with all website orders over £10 (Add a note to your order in your cart).
Saturday, 23 December 2017
Saturday Sneak Peek
Hi Bloggers.
As promised, today I have a sneak peek for you from the One Day Special that I'm launching on Hochanda at 6pm on Boxing Day. I know it's a busy time with family and friends but I do hope that some of you can tune in.
The shows are all about backgrounds. The ODS bundle comprises of some Sue Wilson Background Dies and there are a few more background dies available outside of the bundle and some Finishing Touches Dies too. For me, the show is not just about the dies (which are all lovely!) but it's about the backgrounds you create to use with them and the mediums you can use to create those backgrounds. There are lots and lots of goodies on the shows and quite a few on pick & mix so hopefully, there'll be something for everyone. I've certainly had alot of fun creating the samples - I would have kept going if I hadn't another show on 30th December to prep for!
Anyhow, here's your sneak peek for today -
This is one of those cards that really does look better in real life. For the background, I have used Pixie Powders on felt! Who knew how fabulous it would look?
I used a piece of Ivory Felt. It comes in a pack of 10 sheets. Each sheet is 9" square. I've cut a sheet in half. I tend to do this when I' experimenting - if it doesn't work, I haven't wasted much and if it does work, I have a piece big enough to use.
Back to my felt, I misted it with water - quite alot of water, and then added Pixie Powders in the usual way. I used Plum Twist, Sun Yellow and Ancient Copper. You don't get such an immediate reaction as you do on card, it's a slow explosion. Cool though! Now, this isn't colour fast so if you do this, don't wash it unless you want the colour to come out.
Now, you may be wondering why you would do this on felt and not just on card as you would normally do? Well, you could, and it would look fabulous. However, here, it's all about the texture you get from using the felt. I have used every single scrap of my felt background, using the leftover bits on my foldover flowers and on the little flowers on my blossoming branch.
I made a frame out of Milk and Rich Plum Card using the Indian Ocean Background and the Double Pierced Background Rectangles. I added it to my felt background, trimming away the excess. I matted onto Milk Card, then Rich Plum and then onto another piece of Milk Card. The overall size falls just shy of A5.
I stamped a sentiment from the Creative Expressions Petite Lavish Sentiments Stamp Set onto Milk Card using Plum Archival. I cut it out using the Pierced Flags Die Set and cut the next sized die out of Rich Plum Card.
I made a couple of flowers from my leftover felt using the Classic Foldover Flowers Die Set.
I cut a pair of leaves out of Milk Card using the Blossoming Branch. I cut the tiny flowers out of my remaining scraps of felt and added a 3mm Cream Pearl to the centre of each tiny flower.
I'll be back tomorrow with another sneak peek.
Thanks for stopping by.
Julia.
www.juliawattscrafts.co.uk
Free card with all website orders over £10 (Add a note to your order in your cart).
As promised, today I have a sneak peek for you from the One Day Special that I'm launching on Hochanda at 6pm on Boxing Day. I know it's a busy time with family and friends but I do hope that some of you can tune in.
The shows are all about backgrounds. The ODS bundle comprises of some Sue Wilson Background Dies and there are a few more background dies available outside of the bundle and some Finishing Touches Dies too. For me, the show is not just about the dies (which are all lovely!) but it's about the backgrounds you create to use with them and the mediums you can use to create those backgrounds. There are lots and lots of goodies on the shows and quite a few on pick & mix so hopefully, there'll be something for everyone. I've certainly had alot of fun creating the samples - I would have kept going if I hadn't another show on 30th December to prep for!
Anyhow, here's your sneak peek for today -
This is one of those cards that really does look better in real life. For the background, I have used Pixie Powders on felt! Who knew how fabulous it would look?
I used a piece of Ivory Felt. It comes in a pack of 10 sheets. Each sheet is 9" square. I've cut a sheet in half. I tend to do this when I' experimenting - if it doesn't work, I haven't wasted much and if it does work, I have a piece big enough to use.
Back to my felt, I misted it with water - quite alot of water, and then added Pixie Powders in the usual way. I used Plum Twist, Sun Yellow and Ancient Copper. You don't get such an immediate reaction as you do on card, it's a slow explosion. Cool though! Now, this isn't colour fast so if you do this, don't wash it unless you want the colour to come out.
Now, you may be wondering why you would do this on felt and not just on card as you would normally do? Well, you could, and it would look fabulous. However, here, it's all about the texture you get from using the felt. I have used every single scrap of my felt background, using the leftover bits on my foldover flowers and on the little flowers on my blossoming branch.
I made a frame out of Milk and Rich Plum Card using the Indian Ocean Background and the Double Pierced Background Rectangles. I added it to my felt background, trimming away the excess. I matted onto Milk Card, then Rich Plum and then onto another piece of Milk Card. The overall size falls just shy of A5.
I stamped a sentiment from the Creative Expressions Petite Lavish Sentiments Stamp Set onto Milk Card using Plum Archival. I cut it out using the Pierced Flags Die Set and cut the next sized die out of Rich Plum Card.
I made a couple of flowers from my leftover felt using the Classic Foldover Flowers Die Set.
I'll be back tomorrow with another sneak peek.
Thanks for stopping by.
Julia.
www.juliawattscrafts.co.uk
Free card with all website orders over £10 (Add a note to your order in your cart).
Wednesday, 29 November 2017
One Day Special starts today at 6pm
Hi Bloggers.
I'm launching a new One Day Special on Hochanda at 6pm today with some lovely dies from the November release of Dies by Sue Wilson. There's another show today at 8pm and then more shows tomorrow at 9am, 1pm and 5pm. I hope you can join me.
Here's today's card -
For the background on this one, I have used my favourite background technique with Pixies Powders on Acetate. I have been asked to demo this on one of my shows so hopefully I will get time to show it again at some point (probably tomorrow at 9am).
So, to re-cap how it's done - I used a piece of Heat Emboss Acetate. I added CS Glue, spritzed with water and spread the glue all over using my finger. I then added Cosmic Shimmer Pixie Powders in Straw Yellow, Burnt Orange, Bronze Blush, Lava Red and Pale Olive so that all the glue was covered. I spritzed with a little more water and then added CS Frosty Dawn Diamond Frost. I scrunched up a piece of White Tissue Paper, opened it out and added it to my background. I dabbed it down using a piece of Kitchen Roll and put aside to dry.
I wanted to use the Linear Leaf Background over the top of my Acetate but I also wanted to add a frame made using the Stitched Square Peg Board Die Set so I needed to extend the Linear Leaf. It is a little bit tricky but it is possible. I cut it once and then slotted the left hand leaf column of the die into the right hand left column of the die cut. I've already cut this in the pic below and extended it lengthways but I wanted to show what I mean.
As you can see from the pic, I have already extended the background's length - it's just a little short for the largest frame you can cut from the Peg Board Die Set. This is a little trickier - the dies are hand drawn so do not line up perfectly. Below seems to be the best fit for the length I needed - leave the edge of the die where it's overlapping where you have already cut so that you son't get a line from the edge of the die.
I slotted the die back in once more to complete the piece.
Once my Acetate Pixie Powder background was dry, I added my Linear Leaf Background and my Frame. I matted onto a couple of pieces of Coconut White Card.
I cut the words for my sentiment out of Black Card using the Mix & Match Friendship Die Set. I glued them to my frame using CS Glue in a Fine Tip Glue Applicator.
I cut some sunflowers and leaves from the Sunflower Bouquet Die Set out of Coconut White Card. I painted the flowers with Straw Yellow Pixie Powder and the leaves using Pale Olive Pixie Powder. I shaped the flowers a little using a Woodware Shaping Tool on a Moulding Mat. I popped a little CE Double Sided Self Adhesive Sheet onto Coconut White Card and cut 3 sunflower centres. I removed the backing and added Dark Bronze Polished Silk Glitter.
I'm offering 10% discount on items from the shows on my website. You can find them here. Please enter JULIAWATTS in the discount code box at checkout to activate the discount. Offer applies till midnight tomorrow night or while stocks last.
I have loaded photos of the samples from the shows to the Gallery Section of this Blog and to my Julia Watts Crafts Facebook Page.
Thanks for stopping by.
Julia.
www.juliawattscrafts.co.uk
I'm launching a new One Day Special on Hochanda at 6pm today with some lovely dies from the November release of Dies by Sue Wilson. There's another show today at 8pm and then more shows tomorrow at 9am, 1pm and 5pm. I hope you can join me.
Here's today's card -
For the background on this one, I have used my favourite background technique with Pixies Powders on Acetate. I have been asked to demo this on one of my shows so hopefully I will get time to show it again at some point (probably tomorrow at 9am).
So, to re-cap how it's done - I used a piece of Heat Emboss Acetate. I added CS Glue, spritzed with water and spread the glue all over using my finger. I then added Cosmic Shimmer Pixie Powders in Straw Yellow, Burnt Orange, Bronze Blush, Lava Red and Pale Olive so that all the glue was covered. I spritzed with a little more water and then added CS Frosty Dawn Diamond Frost. I scrunched up a piece of White Tissue Paper, opened it out and added it to my background. I dabbed it down using a piece of Kitchen Roll and put aside to dry.
I wanted to use the Linear Leaf Background over the top of my Acetate but I also wanted to add a frame made using the Stitched Square Peg Board Die Set so I needed to extend the Linear Leaf. It is a little bit tricky but it is possible. I cut it once and then slotted the left hand leaf column of the die into the right hand left column of the die cut. I've already cut this in the pic below and extended it lengthways but I wanted to show what I mean.
As you can see from the pic, I have already extended the background's length - it's just a little short for the largest frame you can cut from the Peg Board Die Set. This is a little trickier - the dies are hand drawn so do not line up perfectly. Below seems to be the best fit for the length I needed - leave the edge of the die where it's overlapping where you have already cut so that you son't get a line from the edge of the die.
I slotted the die back in once more to complete the piece.
Once my Acetate Pixie Powder background was dry, I added my Linear Leaf Background and my Frame. I matted onto a couple of pieces of Coconut White Card.
I cut the words for my sentiment out of Black Card using the Mix & Match Friendship Die Set. I glued them to my frame using CS Glue in a Fine Tip Glue Applicator.
I cut some sunflowers and leaves from the Sunflower Bouquet Die Set out of Coconut White Card. I painted the flowers with Straw Yellow Pixie Powder and the leaves using Pale Olive Pixie Powder. I shaped the flowers a little using a Woodware Shaping Tool on a Moulding Mat. I popped a little CE Double Sided Self Adhesive Sheet onto Coconut White Card and cut 3 sunflower centres. I removed the backing and added Dark Bronze Polished Silk Glitter.
I'm offering 10% discount on items from the shows on my website. You can find them here. Please enter JULIAWATTS in the discount code box at checkout to activate the discount. Offer applies till midnight tomorrow night or while stocks last.
I have loaded photos of the samples from the shows to the Gallery Section of this Blog and to my Julia Watts Crafts Facebook Page.
Thanks for stopping by.
Julia.
www.juliawattscrafts.co.uk
Saturday, 4 November 2017
Stamping into Ultra Thick Embossing Crystals
Hi Bloggers.
Here's today's card -
I started with a square piece of Coconut White Card. I dabbed a little Faded Jeans Distress Oxide onto my Craft Sheet. I misted it with waterand then pricked it up onto my card. I repeated the process with Broken China Distress Oxide. I dried the ink with my Heat Tool and then edged with Faded Jeans Oxide using a Smoothie.
I stamped the gentleman from the Wendy Vecchi 3 Cheers for Art using Forget Me Not Archival.
I stamped the sentiment from the same set using Watering Can Archival.
I doodled around the edges of my card using a Pigma Micron Pen.
I matted onto Black Card and then onto Coconut White Card.
I set the Efcolor Stove up and added some CS Clear and Midnight Blue Ultra Thick Embossing Crystals to a Melt-It Case. I popped it onto the stove platform, added the lid and left to melt. I inked up the sentiment from the same set using Clear Perfect Medium. Once the crystals were moulten I poured some onto my Craft Sheet and added my sentiment stamp to it. I left it to set for a couple of minutes and then peeled away the stamp. I brushed CS Phill Martin Chic Grey Blue Mica Powder over it. I added my sentiment to my card with a little Hi-Tack Tape and a little CS Glue.
I completed my card by adding 3 x 5mm Black Pearls.
Thanks for stopping by.
Julia.
www.juliawattscrafts.co.uk
Here's today's card -
I started with a square piece of Coconut White Card. I dabbed a little Faded Jeans Distress Oxide onto my Craft Sheet. I misted it with waterand then pricked it up onto my card. I repeated the process with Broken China Distress Oxide. I dried the ink with my Heat Tool and then edged with Faded Jeans Oxide using a Smoothie.
I stamped the gentleman from the Wendy Vecchi 3 Cheers for Art using Forget Me Not Archival.
I stamped the sentiment from the same set using Watering Can Archival.
I doodled around the edges of my card using a Pigma Micron Pen.
I matted onto Black Card and then onto Coconut White Card.
I set the Efcolor Stove up and added some CS Clear and Midnight Blue Ultra Thick Embossing Crystals to a Melt-It Case. I popped it onto the stove platform, added the lid and left to melt. I inked up the sentiment from the same set using Clear Perfect Medium. Once the crystals were moulten I poured some onto my Craft Sheet and added my sentiment stamp to it. I left it to set for a couple of minutes and then peeled away the stamp. I brushed CS Phill Martin Chic Grey Blue Mica Powder over it. I added my sentiment to my card with a little Hi-Tack Tape and a little CS Glue.
I completed my card by adding 3 x 5mm Black Pearls.
Thanks for stopping by.
Julia.
www.juliawattscrafts.co.uk
Wednesday, 20 September 2017
Takeover Weekend Sneak Peek
Hi Bloggers.
I thought I would start sharing some sneak peeks of some of the projects I've made for my shows on the Takeover Weekend. I have 3 different shows over the weekend across 5 hours plus 2 hours to the Netherlands. One show is on UTEE (Ultra Thick Embossing Enamel) and this is your sneak peek for today -
Products used -
Wendy Vecchi - Art Parts : The Guys, Tag Toppers, Stamps : 3 Cheers for Art, Parisian Art, Archival : Potting Soil
Distress Oxides - Fossilized Amber, Vintage Photo, Walnut Stain
Clear Perfect Medium
Cosmic Shimmer - White Gesso, Clear UTEE
Creative Expressions - Blue White American Seam Binding, Milk Card
Low Speed Heat Tool
Website - update : Still not working 😩
Thanks for stopping by.
Julia.
www.juliawattscrafts.co.uk
Free card with all website orders over £10 (ask for one in the comments box at checkout).
I thought I would start sharing some sneak peeks of some of the projects I've made for my shows on the Takeover Weekend. I have 3 different shows over the weekend across 5 hours plus 2 hours to the Netherlands. One show is on UTEE (Ultra Thick Embossing Enamel) and this is your sneak peek for today -
Products used -
Wendy Vecchi - Art Parts : The Guys, Tag Toppers, Stamps : 3 Cheers for Art, Parisian Art, Archival : Potting Soil
Distress Oxides - Fossilized Amber, Vintage Photo, Walnut Stain
Clear Perfect Medium
Cosmic Shimmer - White Gesso, Clear UTEE
Creative Expressions - Blue White American Seam Binding, Milk Card
Low Speed Heat Tool
Thanks for stopping by.
Julia.
www.juliawattscrafts.co.uk
Free card with all website orders over £10 (ask for one in the comments box at checkout).
Tuesday, 1 August 2017
Spellbinders Graceful Eyelets Background
Hi Bloggers.
Here's today's card -
Products used -
Spellbinders - Graceful Eyelets (one available in my Pre-Loved Section here), Graceful Sweet Words, Iron Romance (one in my Pre-Loved Section here, Oval Ironwork (one in my Pre-Loved Section here)
Justrite - Special Gifts Vintage Labels 29 Stamp Set
Paradise Teal Archival
Craft Consortium Pearls
Card - Milk, Aqua
Tim Holtz Ruler
Pinflair Precision Probe
Self Healing Piercing Mat
Thanks for stopping by.
Julia.
www.juliawattscrafts.co.uk
Free card with all website orders over £10 (ask for one in the comments box at checkout).
Here's today's card -
Products used -
Spellbinders - Graceful Eyelets (one available in my Pre-Loved Section here), Graceful Sweet Words, Iron Romance (one in my Pre-Loved Section here, Oval Ironwork (one in my Pre-Loved Section here)
Justrite - Special Gifts Vintage Labels 29 Stamp Set
Paradise Teal Archival
Craft Consortium Pearls
Card - Milk, Aqua
Tim Holtz Ruler
Pinflair Precision Probe
Self Healing Piercing Mat
Thanks for stopping by.
Julia.
www.juliawattscrafts.co.uk
Free card with all website orders over £10 (ask for one in the comments box at checkout).
Friday, 28 July 2017
Freebie Friday, Hochanda shows and Workshop News
Hi Bloggers.
It's Friday again - here's this week's card that needs a new home -
You can read how this card was made here.
Leave a lovely comment below to go into the draw to win it. I will announce the winner on Monday. Be sure to pop back to see if you have won.
Please note : Only comments left below will go into the draw. Comments made on the original post will not count. Information given on the original post was correct at the time that post was published.
My next One Day Special launches on Hochanda on Wednesday 9th August at 6pm. The show contains some more of Sue Wilson's 2017 Festive Dies. If you would like to take part and send me some samples to be shown in the shows, please email me at juliawattscrafts@gmail.com and I'll give you details of the dies being used.
My next workshop in Milton Keynes is on Saturday 19th August with Lisa Horton. We've set the projects now. Attendees will spend half a day with Lisa doing her 3 projects and half a day with me doing my projects.
There are just a few spaces left - you can book via my website here.
Thanks for stopping by.
Julia.
www.juliawattscrafts.co.uk
Free card with all website orders over £10 (ask for one in the comments box at checkout).
It's Friday again - here's this week's card that needs a new home -
You can read how this card was made here.
Leave a lovely comment below to go into the draw to win it. I will announce the winner on Monday. Be sure to pop back to see if you have won.
Please note : Only comments left below will go into the draw. Comments made on the original post will not count. Information given on the original post was correct at the time that post was published.
My next One Day Special launches on Hochanda on Wednesday 9th August at 6pm. The show contains some more of Sue Wilson's 2017 Festive Dies. If you would like to take part and send me some samples to be shown in the shows, please email me at juliawattscrafts@gmail.com and I'll give you details of the dies being used.
My next workshop in Milton Keynes is on Saturday 19th August with Lisa Horton. We've set the projects now. Attendees will spend half a day with Lisa doing her 3 projects and half a day with me doing my projects.
There are just a few spaces left - you can book via my website here.
Thanks for stopping by.
Julia.
www.juliawattscrafts.co.uk
Free card with all website orders over £10 (ask for one in the comments box at checkout).
Wednesday, 26 July 2017
A bouquet of Good Wishes
Hi Bloggers.
Here's today's card -
For the background, I used a piece of Watercolour Card. I added some CS Inky Midnight Acrylic Mixed Media Paint to a mister bottle with some water and gave it a good mix. I misted some onto the Watercolour Card and also misted some Phill Martin CS Vintage Blue Mister. I blotted the excess off with Kitchen Roll.
Once dry, I trimmed it and stamped the Woodware Long Tall Flowers Stamp using Jet Black Archival. I added some Vintage Blue Mister to a Water Brush and used it to paint the flowers. When dry, I added some White Pen and some black lines around the edges using a Pigma Micron Pen. I matted onto Black Card and then a Coconut White Card blank.
I stamped the sentiment that comes in the same set onto some more of my background card using Jet Black Archival. I cut it out using Sue Wilson's Double Pierced Squares Set B and cut a mat out of Black Card using Sue's Double Pierced Squares. I added a little White Pen.
Phill Martin is continuing with his One Day Special on Hochanda today with shows at 9am, 1pm and 5pm. I'm offering 10% discount on items from the shows. You can find them here. Offer applies till midnight tonight or while stocks last. Discount will be applied automatically at checkout.
Thanks for stopping by.
Julia.
www.juliawattscrafts.co.uk
Free card with all website orders over £10 (ask for one in the comments box at checkout).
Here's today's card -
Once dry, I trimmed it and stamped the Woodware Long Tall Flowers Stamp using Jet Black Archival. I added some Vintage Blue Mister to a Water Brush and used it to paint the flowers. When dry, I added some White Pen and some black lines around the edges using a Pigma Micron Pen. I matted onto Black Card and then a Coconut White Card blank.
I stamped the sentiment that comes in the same set onto some more of my background card using Jet Black Archival. I cut it out using Sue Wilson's Double Pierced Squares Set B and cut a mat out of Black Card using Sue's Double Pierced Squares. I added a little White Pen.
Phill Martin is continuing with his One Day Special on Hochanda today with shows at 9am, 1pm and 5pm. I'm offering 10% discount on items from the shows. You can find them here. Offer applies till midnight tonight or while stocks last. Discount will be applied automatically at checkout.
Thanks for stopping by.
Julia.
www.juliawattscrafts.co.uk
Free card with all website orders over £10 (ask for one in the comments box at checkout).
Friday, 7 July 2017
Freebie Friday
Hi Bloggers.
Here's this week's card that needs a new home -
This was a workshop card so it has never been blogged. Unfortunately, it does have a dirty mark on the frame which I was gutted about as I love the fresh appearance of the card. Hopefully, the recipient can see past that and draw inspiration from the rest of the card.
Products used are -
Sue Wilson Dies - Double Pierced Squares (A & B), Orange Blossom (Complete Petals, Open Petals & Leaves), Pierced Flags
Creative Expressions - Pierced Flag Sentiments
Cobalt Archival
Cosmic Shimmer Pixie Powders - Mango Blaze & Peacock Green
That Special Touch Mask - Leaf Print
Self Adhesive Pearls - White 8mm
Leave a lovely comment below to go into the draw to win it. I will announce the winner on Monday. Be sure to pop back to see if you have won.
Thanks for stopping by.
Julia.
www.juliawattscrafts.co.uk
Free card with all website orders over £10 (ask for one in the comments box at checkout).
Deal of the Day today (7th July) - Woodware Clear Magic Single - Little Black Dress only £3.60!
Here's this week's card that needs a new home -
This was a workshop card so it has never been blogged. Unfortunately, it does have a dirty mark on the frame which I was gutted about as I love the fresh appearance of the card. Hopefully, the recipient can see past that and draw inspiration from the rest of the card.
Products used are -
Sue Wilson Dies - Double Pierced Squares (A & B), Orange Blossom (Complete Petals, Open Petals & Leaves), Pierced Flags
Creative Expressions - Pierced Flag Sentiments
Cobalt Archival
Cosmic Shimmer Pixie Powders - Mango Blaze & Peacock Green
That Special Touch Mask - Leaf Print
Self Adhesive Pearls - White 8mm
Leave a lovely comment below to go into the draw to win it. I will announce the winner on Monday. Be sure to pop back to see if you have won.
Thanks for stopping by.
Julia.
www.juliawattscrafts.co.uk
Free card with all website orders over £10 (ask for one in the comments box at checkout).
Deal of the Day today (7th July) - Woodware Clear Magic Single - Little Black Dress only £3.60!
Subscribe to:
Posts (Atom)