Saturday 31 December 2011

My 5 Favourite Cards from 2011

Hi Bloggers.

Debby is hosting My 5 Favourite Cards from 2011. Here's my 5 (really difficult choice) -

The first is using the Road Trip stamp set from Tim Holtz -


The next uses the 'All That' stamp from the Kenny K Collection at Whimsy Stamps -


This one uses Mr. Inventor in Black & White -


This is one of my favourite stamps from Sugar Nellie. She's called Tiffany and she's absolutely gorgeous -


Finally, I've chosen this Mother's Day card. I was really pleased with how this one turned out -


Hope you've enjoyed your visit.

Thanks for dropping by.

Hope you have a wonderful New Year.

Julia.

Spring is Back

Hi Bloggers,

Today I'm looking forward to Spring with this card made with the Sarah Kay image 'Spring is Back' from Stampavie.


This is a very simple layout. The image was stamped using Memento Tuxedo Black and coloured with promarkers.

I cut the image out using an oval nestie and made a faux nestie with dusky pink card. I cut a white mat out using a scalloped oval nestie.

The gingham backing paper is from Polka Doodles Sundae of Seasons. I punched some flowers out of dusty pink card and added my brads.

I'm entering this card into the following challenges -
Simon Says Stamp - Anything Goes
Make It Monday #69

Thanks for stopping by.

Julia.

Friday 30 December 2011

Pippi Pretty in Pink

Hi Bloggers,

Today I'm sharing this card -


The image is Pippi Longsocks from Sugar Nellie. She has been stamped using Memento Tuxedo Black and she has been coloured with Promarkers. I added some Sakura Stardust Clear Star on her wings to make her sparkle. I edged the image panel with Victorian Velvet Distress Ink.

For the patterned cardstock I used a piece of lavender card and inked through a That Special Touch Floral Lace Mask with Victorian Velvet.

I followed the sketch from Sunday Sketch & Stamp. The papers were a freebie from Papercraft Essentials Magazine.

I coloured some Woodware Plain Paper Flowers with Victorian Velvet and added roses and pearls from my stash.

I'm entering this card into the following challenges -
Sunday Sketch & Stamp
Simon Says Stamp - Anything Goes
Make It Monday #69

Thanks for stopping by.

Julia.

Thursday 29 December 2011

Blue & White Vintage Inventor

Hi Bloggers,

Today I'm sharing this card with you -


For the background on this one I've mixed some Faded Jeans Distress Ink Re-Inker (you can also use Distress Stain - the pads won't give you such an intense colour but if you only want a hint of colour you can use them) with some Eco Green Crafts Artist Spackle. I cut a square piece of white card and popped the That Special Touch Metal Effect Maskover it and dragged the Spackle mixture over the top using a tool which I think is called a squeegee.

Once I had scraped away the excess from the mask, I removed the mask from my card and popped  it together with my craft sheet and tool into some warm soapy water. This is important as the spackle is permanent when dry. It washes off easily using warm soapy water.

I put my background aside to dry.

I stamped the blank ledger image from the Creative Expressions Vintage Treasures stamp set using Chipped Sapphire Distress Ink and embossed it using Cosmic Shimmer Clear Embossing Powder.

I inked up some white card with Faded Jeans Distress Ink and stamped Mr. Inventor (Vintage Inventor) and the square image (Vintage Treasures) using Jet Black Archival Ink.

I stamped the 'Inventor' text (Vintage Inventor) using Chipped Sapphire Distress Ink and embossed with clear powder. I dabbed some Faded Jeans Distress Ink over the top.

I assembled the card as shown, securing the Inventor text with staples and adding a Creative Expressions Faux Screw Brad in Antique Silver in each corner. I also did some faux stitching using a Sakura Fine Liner Blue Pen.

I'm entering this card into the following challenges -
Simon Says Stamp - Anything Goes
Make It Monday #69

I hope you like the card.

Thanks for stopping by.

Julia.

Wednesday 28 December 2011

My 5 Favourite Christmas Cards 2011

Hi Bloggers,

Debby is hosting 'My Favourite Christmas Cards of 2011'.

Here are my 5 (I think!)-

The first is my fave Mr. Inventor with a sprig of holly on his hat

The second is a very traditional card made with the Tatty Button Poinsettias stamp set

The next one is a black and white

Another Tatty Button card - for this one I put the snowman stamp inside the bauble stamp and the background was made with alcohol inks

Finally, I really loved the colour combo on this one

I hope you've enjoyed looking at my 5. Why not pop over to Debby's Blog and join in the fun.

Thanks for stopping by.

Julia

Tuesday 27 December 2011

You Rock!

Hi Bloggers,

I hope you all had a very good Christmas and are enjoying your Bank Holiday. Today I have this card to share with you -


The image is Rock Chick from the Kenny K Collection at Whimsy Stamps. I stamped her in Memento Tuxedo Black and coloured her in using Promarkers. I cut her out using a Spellbinders Curved Rectangles die and inked around the edges with Faded Jeans Distress Ink while still in the die. I cut a faux nestie out of rust card.

The sentiment is from Inkadinkado Rock Star Clear Stamp set. I stamped it in Memento and inked around the edges with Faded Jeans.

For the background paper I used the Stamps by Judith Stubbie AAA-04 Dots available in the UK here or in the USA here. I stamped it randomly over my white card using Tumbled Glass, Faded Jeans and Chipped Sapphire Distress Inks. I edged it with Faded Jeans Distress Ink.

I inked 2 Woodware Plain Paper Flowers with Faded Jeans Distress Ink and splatted Faded Jeans Distress Stain in the centre of each one. I inked the edges of some roses from my stash with Chipped Sapphire Distress Ink and added them to the centres of my paper flowers.

I assembled the card as shown and added some blue gems top right.

I'm entering this card into the following challenges -
Simon Says Stamp - Bingo : Gems, No Designer Paper, Flowers
I love Promarkers - Anything Goes
Allsorts Challenge Blog - Blue and Brown
Charisma Cardz - Anything Goes
Sparkles Forum Challenge - Anything But Christmas
Make It Monday #69

Thanks for stopping by.

Julia.

Saturday 24 December 2011

Happy Christmas!

Hi Bloggers,

Today I have a very simple card to share with you -


It's made with a La Pashe Trinitage sheet that has been cut out and added to a Stepper Card. I added a little Cosmic Shimmer Aqua Twinkle to the snowy parts to make it sparkle.

I'm entering this card into the following challenges -
Joanna Sheen Challenge Blog - Christmas Wishes
Make It Monday #68

Taking a little break now from posting as family due in a couple of hours to join us for the festive season. Will be back Tuesday.

Happy Christmas to you all.

As always - thanks for stopping by.

Julia.

Friday 23 December 2011

Tulips for Mother's Day

Hi Bloggers,

Yes, I know it's early for Mother's day but I had this image lying around and I've been putting some cards together to send to Cazz for Operation Blue Witch Squadron so I thought I'd post this today.


The image is Joanna Sheen Messy Rabbit - Tulip. It's been stamped with Memento Tuxedo Black and has been coloured using Promarkers. I cut it out using a rectangle nestie and edged it with Barn Door Distress Ink. I cut a mat out of red card using a scalloped rectangle nestie.

For the background paper I used the Stamps by Judith Stubbie AAA-04 Dots available in the UK here or in the USA here. This is such a useful stamp - Love it! I stamped it randomly over my white card using Marvy Bending Blox in Shades of Red and in Shades of Pink. I edged it with Barn Door Distress Ink.

The sentiment is from Lili of the Valley. I stamped it with Memento Tuxedo Black and added a bit of colour with Promarkers. I cut a mat out of red card using a Spellbinders Eyelet Circle Die.

I mounted my dotty background paper onto some red card and ran some Hi-Tack Tape across it. I added some red polka dot ribbon and added a bow in the same. I added the image and sentiment as shown and glued some red gems top right using Cosmic Shimmer Dries Clear Glue.

I'm entering this card into the following challenges -
I Love Promarkers - Anything Goes
Sparkles Forum Challenge - Anything But Christmas
Make It Monday #68
Charisma Cardz - Anything Goes

Thanks for stopping by.

Julia

Thursday 22 December 2011

Create and Craft Show Date Change

Hi Bloggers,

Just to let you know that my next show has been moved from 5th January to Saturday 7th January at 12noon and 6pm.

Julia

Let Them Eat Cake

Hi Bloggers.

Today I'm back to purple again and I'm sharing this card with you -


The image is from Sugar Nellie and it's called 'Let Them Eat Cake'. I stamped the image using Tuxedo Black Memento Ink and coloured using Promarkers. I added some Sakura Stardust Clear Star to the wings to make them sparkle. I cut the image out using an oval nestie and inked around the edges with Dusty Concord Distress Ink.

I inked through That Special Touch Small Polka Dots Mask with Dusty Concord Distress Ink onto white card and then went around the edges with the same ink.

I cut a piece of Whitewash Colorcore with a lilac core and embossed it using the That Special Touch Polka Dots Mask. I sanded it to make the polka dots stand out more. I inked around the edges with Dusty Concord.

I matted the small polka dots background onto some purple card and then ran a strip of Hi-Tack Tape across the card and ruffled some Violet Vintage Ribbon along it leaving it un-ruffled where the Whitewash backing paper was to go.

I added the Whitewash backing paper to the card and mounted the image on top using foam pads.

I tied a messy bow using 2 lengths of Violet Vintage Ribbon and added it to my ruffled border using Cosmic Shimmer Dries Clear Glue. I tied some Baker's Twine through a Lavender Button and glued it to my bow.

I added a brad to each of the corners and then added my design to a Craftwork Cards 6" x 6" card.

I'm entering this card in to the following challenges -
The Sugar Bowl Maria Thereses Sketch plus Handmade Backing Papers
I love Promarkers - Anything Goes
Simon Says Stamp - Bingo : Ribbon/Twine, No Designer Paper, Brads
Sparkle Forum Challenge - Anything But Christmas
Make It Monday #68

Thanks for stopping by.

Julia

Wednesday 21 December 2011

Red & Green - But not for Christmas!

Hi Bloggers,

The Willow Sketchie Challenge this week is a sketch plus a red and green theme. Now, I'm done with Christmas Cards as I'm sure a lot of you are so I wanted to make a card that was red and green and nothing at all to do with Christmas. I think I've succeeded - what do you think?


I used the That Special Touch Metal Effect Mask and inked through it onto white card with Barn Door Distress Ink. I inked around the edges with Peeled Paint Distress Ink.

I stamped the Creative Expressions Plaid Stamp onto white card with Jet Black Archival Ink and cut it out using a rectangle nestie. I inked around the edges with Peeled Paint Distress Ink (out of the die) and cut a mat out of black card.

I stamped the wheel image from the Creative Expressions Vintage Illusion stamp set with Barn Door Distress Ink and embossed with Cosmic Shimmer Clear Embossing Powder. I cut this out using a Spellbinders Curved Rectangles die. I inked around the edges with Peeled Paint Distress Ink (again out of the die). I cut a faux nestie out of black card.

I stamped some cogs from the Vintage Illusion set - one in Jet Black Archival and one in Barn Door Distress Ink and embossed both of them using Cosmic Shimmer Clear Embossing Powder. I cut them out and inked them up using Peeled Paint Distress Ink. I added a Creative Expressions Faux Screw Brad in Antique Gold.

I inked up some American Seam Binding with Peeled Paint Distress Ink and Stamped the 'Illusion' text using Jet Black Archival. I frayed the edges a bit.

I assembled the card as shown and added 3 more screw brads top right.

Hope you like the card.

I'm entering this card into the following challenges -
Willow Sketchie Challenge - Red and Green
Sparkles Forum Challenge - Anything But Christmas
Make It Monday #68

Thanks for stopping by.

Julia.

Tuesday 20 December 2011

Vintage Inventor back at Sketch Saturday

Hi Bloggers,

Today I'm sharing one of the samples that I've made for my Vintage Inventor shows on January 5th.


I stamped Mr. Inventor (Creative Expressions Vintage Inventor Stamp Set) onto some white card using Jet Black Archival Ink and cut him out leaving a thin white border. I stamped the Creative Expressions Scattered Words stamp onto white card with the Jet Black Archival and cut it out using an oval nestie. I inked around the edges with Weathered Wood Distress Ink while still in the die. I cut a faux nestie out in black card.

I stamped the sentiment from the Creative Expressions Vintage Illusion stamp set again in Jet Black archival. I hadn't got quite the right size of oval nestie for this so I drew around the nearest size and cut it out. I inked around the edges with Weathered Wood. I cut a black mat out using an oval nestie.

I stamped the cogs (from Vintage Illusion) using Jet Black Archival and embossed them with Cosmic Shimmer Clear Embossing Powder and cut them out. I added a Creative Expressions Faux Screw Brad in Antique Silver to each one.

The background paper is Craft Creations. I stamped 'STEAMPUNK' from the Vintage Illusion set in Black Soot Distress Ink all over it to add a bit of interest.

For the black background panel I embossed some black card using the That Special Touch Cogs Mask and sanded it a little (Colorcore card would work really well here but I didn't have any).

For the grey background panel I simply inked through the That Special Touch Metal Effect Mask with Black Soot Distress Ink.

I assembled the card as shown adding some black ric-rac ribbon and some faux stitching.

Hope you like it.

I'm entering this card into the following challenges -
Sketch Saturday - Week 186
Sparkles Forum Challenge - Anything But A Christmas Card
Make It Monday #68

Thanks for stopping by.

Julia

Monday 19 December 2011

Happy Anniversary

Hi Bloggers.

Today I'm sharing a card that I've made for my Mom & Dad for their Anniversary which is later this week.


It's only a small card - just 12cm square but it seemed appropriate as I wanted the sentiment to be the focal point.

The sentiment is from Lili of the Valley which I stamped in Jet Black Archival and embossed with Cosmic Shimmer Clear Embossing Powder. I added a bit of colour with Summer Haze Cosmic Shimmer Drawing Ink. I cut it out using a circle nestie and inked around the edges with Dusty Concord Distress Ink. I cut a Spellbinders Picot Edged Circle from purple card and mounted the sentiment on to it.

I cut some leaves out of the Spellbinders Foliage Die Set. I inked through the die on the lighter card with Dusty Concord.

I made a flower using the Spellbinders Spiral Blossom and some felt that I bought from Sam Poole Creative Studios.

I tied a tatty bow using two lengths of Violet Vintage Ribbon.

I assembled the card as shown. The paper is from Polka Doodles Sundae of Seasons. I finished the card off with a couple of  Creative Expressions Decorative Stick Pins in White Pearl and added a purple gem in each corner.

I'm entering this card into the following challenges -
Sparkles Challenge - Anything But Christmas
Make It Monday #68

Hope you like the card.

Thanks for stopping by.

Julia.

Sunday 18 December 2011

Curvy Card for Dad

Hi Bloggers,

Today I'm sharing this card -

I used the WS Designs Curvy Card Template to make the card base from Navy card. I used the template again to create a smaller panel of bright blue card for the front. I did some faux stitching down the length of the bright blue card.

I stamped various images from the Woodware 'His Birthday' stamp set onto patterned paper and cut them out.

The letters are from the Woodware 'Tiny Frames' set. This is a really useful set as you get an alphabet and a set of different shaped frames to stamp your letters into.

I assembled the card as shown.

I'm entering this card into the following challenges -
Make It Monday #67
Allsorts Challenge - Blue and Brown
Penny Black & More Allsorts

Thanks for stopping by.

Julia.

Saturday 17 December 2011

Next Shows on Create & Craft

Hi Bloggers,

No card today - sorry. I'm beavering away making samples for my next shows on Create & Craft which will be on Thursday 5th January at 9am and 1pm Hope you can join me.

Julia.

Friday 16 December 2011

The Caterpillar and the Butterfly

Hi Bloggers.

Today I'm sharing this card with you -

Sorry about the poor quality of the photo - it's dark and the stamping is on glossy card so I can't have a light directly above it.

I used an Elusive Images stamp set (sorry - can't remember the name). I stamped the ornate design in Perfect Medium randomly all over some glossy card. Next I added some Peeled Paint and Dusty Concord Distress ink over the whole area. I removed the excess ink with kitchen roll.

The sentiment says - 'What the Caterpillar calls the end of the world the master calls a Butterfly'. I stamped this over the top of my design using the Dusty Concord Distress Ink. I put aside to dry.

I dusted some heat resistant acetate with my anti-static pad and stamped the butterfly with Perfect Medium. I added some Gold Detail embossing powder and heat set it. I then cut it out.

The background papers are made with the Peeled Paint and the Dusty Concord Distress Inks - you just need to ink around the edges of the card.

I assembled the card as shown.

Hope you like the card.

Thanks for stopping by.

Julia

Thursday 15 December 2011

Blog Candy up for grabs at Lili's Little Fairies


Hi Bloggers.

There's some great candy up for grabs at the new challenge blog Lili's Little Fairies. Why not pop over and have a look?

Julia

Christmas Milton

Hi Bloggers,

Today I'm sharing this card -

The stamp is Milton in Hat from Wild Rose Studio. I stamped him in Memento Tuxedo Black and coloured with Promarkers. I used a Quickie Glue Pen on the furry parts of the hat and added some Cosmic Shimmer Aurora Crystal Glitter. You can see it really catches the light.

I inked up a Craftwork Cards frame with Chipped Sapphire Distress Ink. I printed the sentiment using my labelling machine and matted it onto cobalt blue card.

I cut the poinsettia from the Spellbinders Layered Poinsettias die set and inked with Chipped Sapphire while still in the die. I put the poinsettia together using Cosmic Shimmer Dries Clear Glue and added an Eco Green Glass Glintz in blue to the centre.

I assembled the card as shown. The backing paper is from the Polka Doodles CD Jingle Jangle (I think!).

I'm entering this card into the following challenges -
Oldie But A Goodie - Christmas Animals
Make It Monday #67

Hope you like the card.

Thanks for stopping by.

Julia

Wednesday 14 December 2011

Vintage Photo Tatty Button

Hi Bloggers,

Today I'm sharing another of my samples from the Tatty Button Show.


I stamped the Tatty Button 'A Tatty Christmas To You' stamp on to ivory card with Vintage Photo Distress Ink. I pulled some of the colour our using a damp paint brush and then cut Tatty out leaving a small border around the edges.

I inked up a piece of ivory card using Vintage Photo Distress Stain and left it to dry. When dry I embossed the stained card with the Couture Creations Bauble Tree embossing folder. I then sanded it to make the design pop out more.

I stamped the cracker from the Tatty Button Accessories 2 stamp set around the edges of my card blank with Vintage Photo Distress Ink.

I stamped the sentiment from the Tatty Button Text 2 stamp set in Vintage Photo Distress Ink and then cut it out using the smallest of the Spellbinders Lattice Rectangles dies. I inked around the edges with Vintage Photo while still in the die.

The card was assembled as shown.

Thanks for stopping by.

Julia.

Tuesday 13 December 2011

Finally finished it!

Hi Bloggers,

Change from the usual sort of post from me. Here's a pic of a necklace that has taken me 5 months to make (though I haven't really spent that much time on it - other things to do).


The design is by my good friend Sue Stallard. I just need to buy a new top to go with it!

Hope you like it.

Julia.

Monday 12 December 2011

Just Chillin'

Hi Bloggers,

Today I have a card to share using the gorgeous Sugar Nellie stamp Chillax.


I stamped the image using Memento Tuxedo Black and coloured using promarkers. I cut the image out using the 'out of the box' technique and a circle nestability die. You can see that her foot is outside of the circle. I cut a mat out of marine blue card using a scallop nestie.

I coloured some Woodware Paper Flowers by splatting Faded Jeans Distress Stain in the centre and added some Faded Jeans Distress Ink around the edges. I added a brown American Crafts brad in the centre. I inked some white roses from my stash with the Faded Jeans Distress Ink. The leaves were cut using one of the Spellbinders Foliage dies.


I assembled the front of the card as shown using papers from Polka Doodles Sundae of Seasons CD. Before mounting it on my 8" x 8" Craftwork Cards blank, I ran some Woodware Hi-Tack Tape along the width of the design and ruffled some brown gingham ribbon along it. I did two lines of it. I added some Cosmic Shimmer Dries Clear Glue along the edges of the ruffles to secure them. I tied a messy bow two lengths of the ribbon and added it to the centre of the ruffled ribbon securing it with Cosmic Shimmer Dries Clear Glue.

I'm entering this card into the following challenges -
Allsorts Challenge - It Takes Two
The Sugar Bowl Challenge - 73 Cathy's Sketch
Make It Monday #67

I hope you like the card.

Thanks for stopping by.

Julia.

Sunday 11 December 2011

Mousey Winter Wishes

Hi Bloggers,

Continuing on from yesterday I have another Mousey card. This time the stars are the Tatty Button Mistletoe and Pipsqueak.


I stamped the image using Jet black Archival and embossed with Cosmic Shimmer Clear Embossing Powder. I coloured in using Cosmic Shimmer Drawing Inks. I cut the image out using a Scalloped Circle neastie and inked around the edges with Chipped Sapphire Distress Ink.

The polka dot paper is from the Polka Doodles Sundae Of Seasons CD. The other papers are Junkitz.

I cut the scalloped border using the Spellbinders Edgeabilities Classic Scallops dies. I distressed all the papers with my scissors and inked around the edges with Chipped Sapphire. I wrapped some blue Baker's Twine around the striped paper.

I stamped the sentiment from the Tatty Button Text 2 set in Jet Black Archival and embossed with Clear Powder. I cut it out using a Spellbinders Labels Twelve die.

I assembled the card as shown and added some Polka Dot buttons with Some Baker's Twine tied in a bow.

Hope you like the card.

Thanks for stopping by.

Julia

Saturday 10 December 2011

Stripey Mousey Birthday

Hi Bloggers,

There were so many samples that didn't get shown last week that I thought I'd share another with you today.


The image is Tatty Button Present Wrapping. This is such a versatile stamp - it can be used for any occasion really.

I stamped the image on to ivory card with Jet Black Archival and embossed with Cosmic Shimmer Clear Embossing Powder. I coloured using Cosmic Shimmer Drawing Inks - some mica and some matt.

I cut the image out using Spellbinders Labels Eight. I inked around the edges with Vintage Photo Distress Ink while still in the die. I cut another piece of patterned paper using Labels Eight again and inked all over the paper while still in the die with Vintage Photo.

I stamped the sentiment from Creative Expressions Flutter Florals stamp set in Jet Black Archival and embossed with clear powder. I cut it out using a Spellbinders Teardrop Circles die and inked around the edges with Vintage Photo while still in the die.

I cut borders using the Spellbinders Edgeabilities Classic Scallops and Parisian Accents in navy and orange card respectively.

The patterned papers are Junkitz.

I assembled the card as shown and added some blue buttons with Baker's Twine and did some faux stitching around the edges and the card was complete.

I'm sharing this card with Make It Monday.

Hope you like the card.

Thanks for stopping by.

Julia.

Friday 9 December 2011

Alcohol Inks and Snowman Card from Tuesday's Show

Hi Bloggers,

Today I thought I'd share the card that I demonstrated on the first show on Create & Craft on Tuesday.


This is my sample card and I think the demo card had the blue and purple layers reversed.

To create the background for the snowman and the larger background I put spots of Pool (it was Cloudy Blue in the demo), Stonewashed and Eggplant (it was Plum in the demo) Adirondack Alcohol Inks on a craft sheet and added a little Pearl Mixative. I then swirled a piece of glossy cardstock into the inks. I added more ink to the craftsheet and swirled again to fill in any gaps. I then poped some Silver Mixative onto the corner of my craft sheet and used the ink to stamp the crackle stamp randomly over my background. I blasted it with the heat gun to make sure it was dry.

I brushed the surface of the background with my Anti-Static Pad and then stamped the Tatty Button Snowman stamp in Jet Black Archival and embossed with Cosmic Shimmer Clear Embossing Powder.

I coloured the image with Cosmic Shimmer Matt Drawing Inks. I added 2-3 coats in each area making sure it was dry in between each coat.

The image was cut out using a Spellbinders Labels 23 die and I made a faux mat out of purple card in this case.

The circle accent is cut from a Spellbinders Teardrop Circles die and the snowflakes are from Spellbinders Create-A-Flake.

The card was assembled as shown and I did a little paper piercing with my Tim Holtz Ruler and a piercing tool all around the outside.

I'm sharing this card with Make It Monday.

Thanks for stopping by.

Julia.

Thursday 8 December 2011

Vintage Inventor Splat!

Morning Bloggers.

Today I'm back with my fave - Vintage Inventor by Sam Poole. I've made a tag and I've been splatting with the Distress Stains as Hels did on the show on Tuesday. Great fun!


I inked up a cream parcel tag with some Peeled Paint and Faded Jeans Distress Ink using my blending tool. Next I spritzed some water into my hands and clapped over the tag so the water dropped in spots onto it. The water bleaches out some of the colour and when you're happy just blot dry. Add some more spots if you like.

Then I splatted some Faded Jeans Distress Stain onto the tag by simply banging the stain down onto the tag - it's a good idea to check that the ink is running smoothly before doing this. Cool, eh? Thanks Hels!

Next I inked up the railway track stamp from the Vintage Inventor stamp set with Vintage Photo Distress Stain and stamped along one edge. I needed to stamp a second time to do the full length of the tag.

I distressed the edges of the tag with my scissors and then edged with Vintage Photo Distress ink.

I stamped the man himself onto Grungepaper, cut him out and coloured using the Faded Jeans Distress Stain. I coloured 3 Idea-ology mini pins and 3 Idea-ology washers with Lettuce Adirondack Alcohol Ink using my Alcohol Ink Applicator Tool. I added these to the hat on the image.

I glued the Inventor to the tag using Pinflair Glue Gel to give him a bit of height. I coiled some black wire using a cocktail stick and secured those poking out of the hat.

Finally, I dyed some American Seam Binding using some Peeled Paint and Vintage Photo Distress Stains, scrunched it up, dried it and added it to the top of my tag.

I had lots of fun making this - I hope you've enjoyed looking.

I'm sharing this with my friends over at Make It Monday

Thanks for stopping by.

Julia.

Wednesday 7 December 2011

Let It Snow Tatty

Hi Bloggers,

First I'd like to say thank everyone so much for your support on my first TV show yesterday. It was such fun.

So, today I'm sharing another of the samples from the show while I try and get my head around making something else.


I stamped the Tatty Button Let It Snow stamp in Jet Black Archival and embossed with Cosmic Shimmer Clear Embossing Powder. I coloured the image with Cosmic Shimmer Drawing Inks. I inked around the edges of the image with Black Soot Distress Ink.

The sentiment is from the Tatty Button Text 2 set. It's actually only 1 line of it as the saying appears 3 times on the stamp. I stamped it in Jet Black Archival and embossed in clear.

I embossed a piece of Dusky Pink Colorcore card with the Couture Creations Drink Me Embossing Folder and sanded it to highlight the pattern. I inked around the edges of some Polka Dot backing paper printed from the Polka Doodles Sundae of Seasons CD with Black Soot Distress Ink.

I cut a border using the Spellbinders Classic Scallops Edgeabilities die set.

The snowflakes are from the Spellbinders Create-A-Flake die set and have been inked with Black Soot while still in the die.

I assembled the card as shown and added Cosmic Shimmer White Pearlescent PVA all around the edge of my card, on the snowflakes and on the snow on the image.

I'm entering this card into the following challenges -
Charisma Cardz - Challenge 47 Seeing Spots
Make It Monday #66

Thanks for stopping by.

Julia

Tuesday 6 December 2011

So Many Ways to Use One Stamp

Hi Bloggers,

Today is the day of my first TV show for Creative Expressions on Create & Craft. I'm on Dawn Bibby & Friends 2pm till 4pm and 7pm - 8pm. I'll be showcasing Tatty Button Christmas Stamps and CD. Hels Sheridan will also be there demonstrating Studio 490 stamps and paper board. Hope you can join us.

So, today I thought I'd show you some different ways that you can use the Tatty Button Christmas Bauble Stamp. This is quite a long post so you may want to grab a cuppa. I'll start with this card -


I stamped the image in Jet Black Archival and embossed in Cosmic Shimmer Clear Embossing Powder. I stamped the image again onto some spare card and then cleaned the stamp and blotted it dry. Going back to the first image, I coloured it using a mix of Matt and Mica Cosmic Shimmer Drawing Inks. I cut the image out and went around the edges with a black promarker.

I created the background by dusting some card with my anti-static mat. Then I stamped the bow from the Tatty Button Christmas Accessories 2 set randomly all over the card in Perfect Medium. I embossed the images with Cosmic Shimmer Clear Embossing Powder. I then covered the whole area with Spun Sugar Distress Stain. The embossed images acted as a resist.

I cut a border from some pink card using the Spellbinders Classic Scalloped Edgeabilities die set.

I dyed some Ivory Vintage Ribbon with Spun Sugar Distress Stain. I dried it with my heat gun and then tied 2 messy bows with 3 lengths of the ribbon and I ruffled some more ribbon onto a strip of white card.

Using the spare stamped image, I cut the outside edges off and the bauble top leaving a mask to cover the Tatty Button Angel. I placed the mask over the angel and secured with a little masking tape rolled up underneath. I used card rather than a post-it as sometimes the ink bleeds through a post-it.

Then I inked up the visible sections of the stamp with Jet Black Archival, removed the mask and then stamped. I embossed with clear powder. I then stamped the text from the Tatty Button Text 2 set in Jet Black Archival centering it inside the bauble. I embossed in clear again. I then cut the bauble out.

The card was assembled as shown and I added some 'string' to make the bauble hang with a fineliner pen.

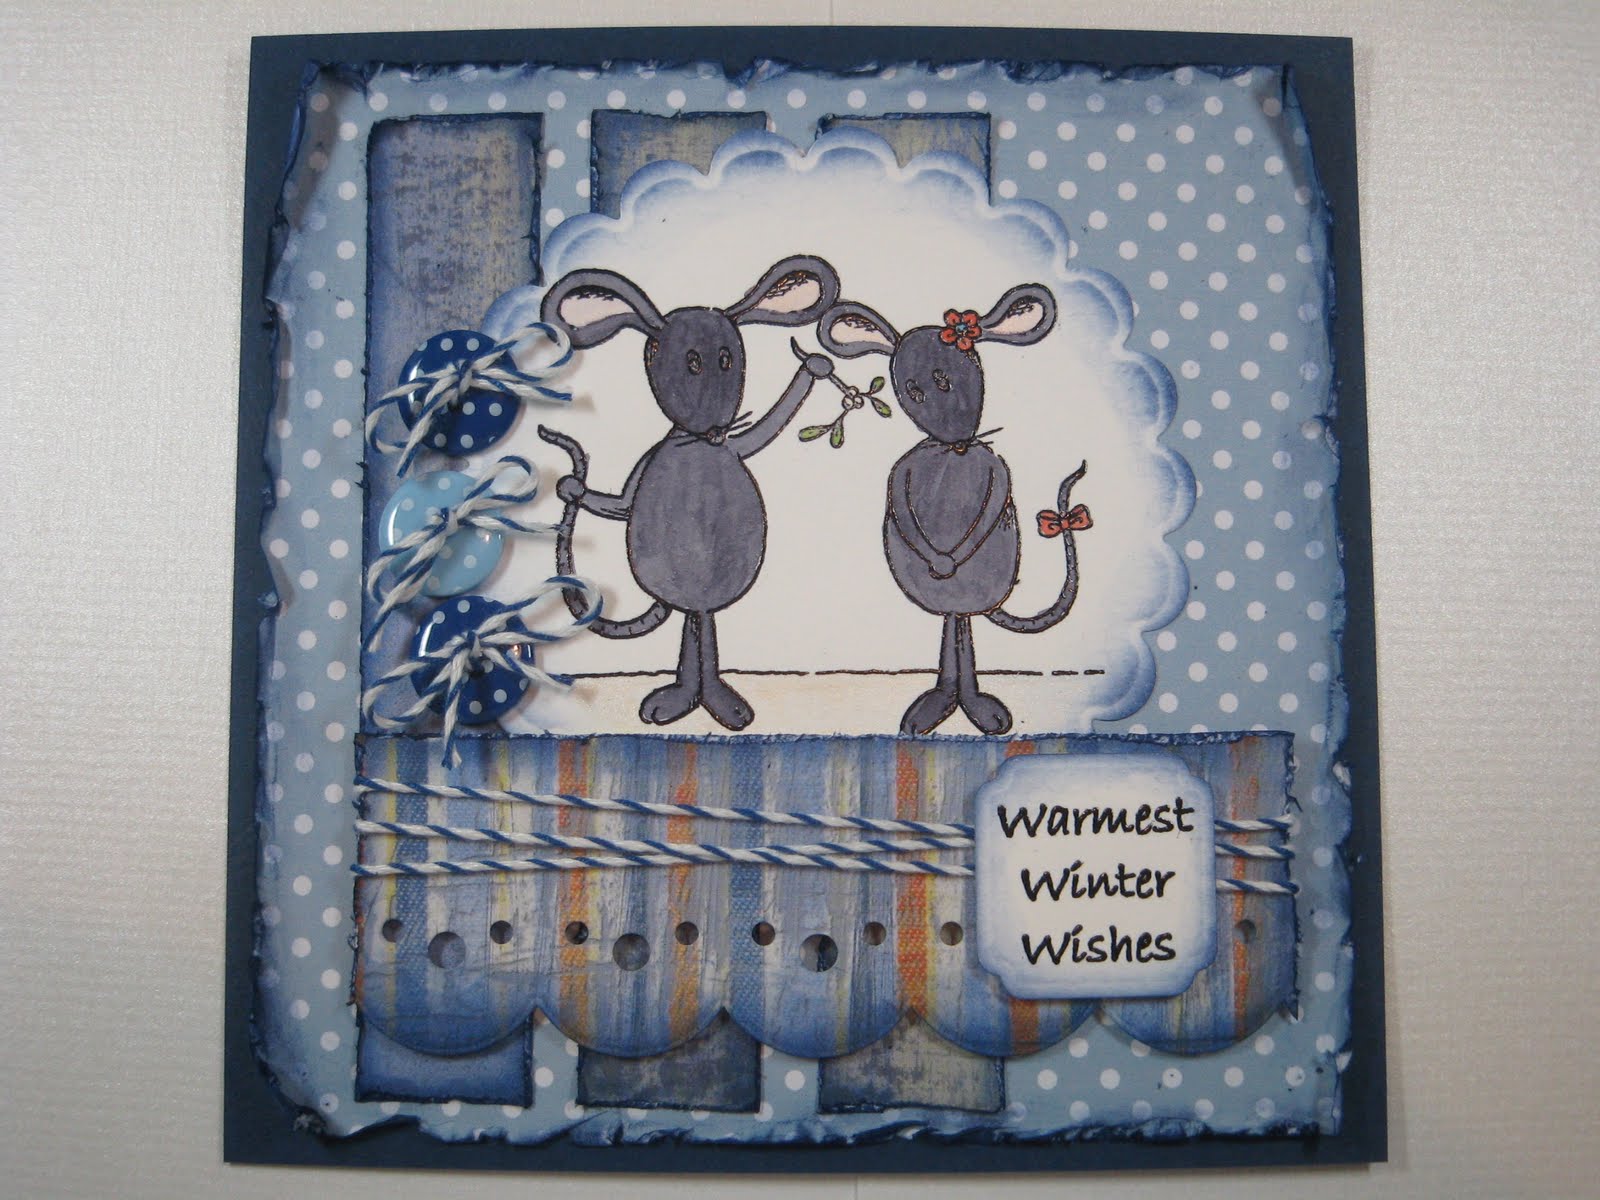
In this card I have masked the stamp as in the first card and then I have stamped the top of the Tatty Button Snowman stamp.


After colouring in the snowman and the bauble top I cut the image out and went around the edges with a black promarker. I added some spots of glue using my Quickie Glue Pen and sprinkled on some Cosmic Shimmer Aurora Crystal Glitter.

The background was made using Adirondack Alcohol Inks. I cut a square piece of acetate and added Pool, Stonewashed and Eggplant Alcohol Inks to a clean felt on my Applicator Tool. I blotted my acetate with the Applicator Tool re-inking when necessary. I then stamped a couple of stamps from Sam Poole's Winter Wonderland set from Creative Expressions in Jet Black Archival. I gave it a couple of minutes and then rubbed off the Archival Ink with a tissue.

I put a dot of Cosmic Shimmer Dries Clear Glue in each corner on the back of the acetate and popped on to the white card. I put another dot of glue on the front in each corner and added a blue glass glintz.

Finally I added a messy bow of Sulphur Blue Vintage Ribbon.

Here's another way you can use the stamp -


For this card I stamped the bauble 3 times in Jet Black Archival and embossed with Cosmic Shimmer Clear Embossing Powder. I coloured them all in with Cosmic Shimmer Drawing Inks. I then cut the bauble and halo away from all of them and went around the edges with my black promarker.

The background squares were created by putting squares of white card through the Couture Creations Drink Me Embossing Folder. I then inked the raised areas with Dusty Concord Distress Ink using Cut & Dry Foam.


The sentiment is again from the Tatty Button Text 2 set and was stamped in Jet Black Archival and embossed in clear powder. It was cut out using a Spellbinders Double-Ended Tag die and was inked with Dusty Concord while still in the die. I added a couple of faux pearls made with Cosmic Shimmer White Pearlescent PVA.

I assembled the card as shown and did a bit of faux stitiching around the edges with an Inkssentials White Pen.

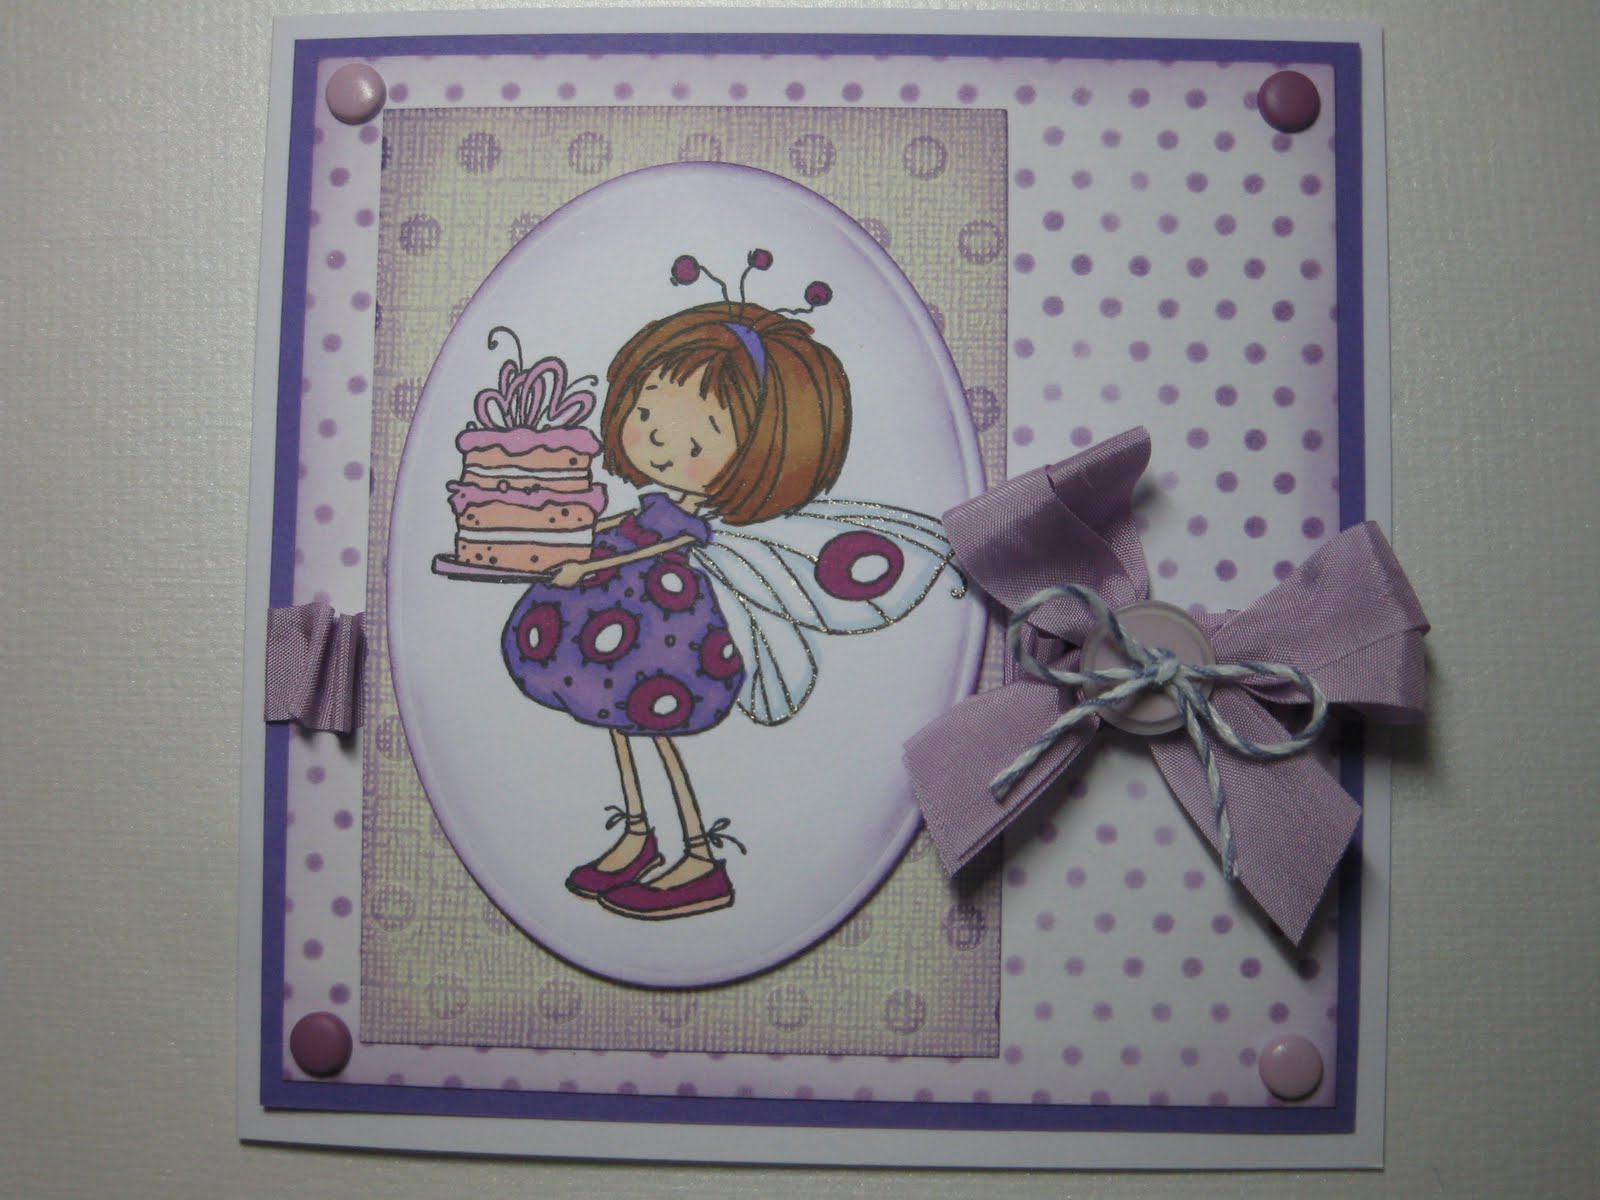
Finally, you can remove a bit more from the image and then Tatty is suitable for a birthday card -


Fairly simple this card but it does show that stamp can be used all year. As usual I stamped with Jet Black Archival and embossed in clear powder. I coloured with Cosmic Shimmer Drawing Inks. The papers are from the Wild Rose Studio Milton Paper Pack. The flowers are made from the Spellbinders Rose Creations die set and I inked through the die with Rusty Hinge Distress Ink. The sentiment is from the Creative Expressions Flutter Florals stamp set.

You can also use the stamp to make wrapping paper and as a gift tag using the method in the first card. You can either stamp a sentiment in the middle, write a message or add any image you like to your bauble.

Such a versatile stamp.

I'm sharing this with Make It Monday #66

Hope you've enjoyed this marathon post!

Thank you so much for taking the time to stop by and read.

Julia.

Monday 5 December 2011

Warm & Cozy Fireplace

Hi Bloggers,

Today I have another card to share using the Tatty Button Fireplace stamp from Creative Expressions.


I stamped the image using jet Black Archival ink and embossed with Cosmic Shimmer Clear Embossing Powder. I coloured in using Cosmic Shimmer Matt Drawing Inks plus the Pearl Shine from the Metallics set. I cut the image out using the largest of the Spellbinders Fleur de Lys Squares dies.

I stamped the poinsettia stamp from the Tatty Button Poinsettias set in Jet Black Archival and embossed with clear powder. I did this 3 times. I coloured the poinsettias in with Marigold Cosmic Shimmer Matt Drawing Ink and coloured the centres with Ancient Copper Cosmic Shimmer Mica Drawing Ink. I cut them out and went round the edges with a black promarker.

I stamped the sentiment with Jet Black Archival and embossed with clear powder. I cut it out using an oval nestie. I inked around the edge with Vintage Photo Distress Ink. I also pierced around the embossed line. I added some Tropic Wine Vintage Ribbon securing with some copper brads.

The backing papers are from My Mind's Eye. I pierced around the edge of the brown card with my Tim Holtz Ruler and my pricking tool before mounting on to ivory card.

Hope you like the card.

I'm entering this card into the following challenges -
Simon Says Stamp - Anything Goes
Make It Monday #66

Just a reminder to tune in to Create & Craft tomorrow at 2pm and 7pm when I will be joining Dawn Bibby and showcasing Tatty Button Christmas products.

Thanks for stopping by.

Julia

Sunday 4 December 2011

Get Well Wishes

Hi Bloggers,

Here I am again with a second post for today. I'm going for blue and brown with this card. Haven't used this colour combination before. I really like how it turned out.


The image is Lili of the Valley Little Nurse. I stamped with Memento Tuxedo Black and coloured with Promarkers. I cut the image out with a circle nestie and cut a mat out of brown card with a scalloped circle nestie.

The papers are from the Polka Doodles CD Sundae of Seasons. The gingham ribbon is Woodware. For some reason I ordered 6 rolls of that so I will be using it on quite a few of my cards!

I stamped the sentiment which is also Lili of the Valley and cut it out with a rectangle nestie and cut a mat out of brown card with rectangle scalloped nestie.

The card was assembled as shown.

I'm entering this card into the following challenges -
CES Challenge - Bear Necessities
Allsorts Challenge - Going Round in Circles
Lili of the Valley - Anything but a Christmas Card
Willow Sketchie Challenge - Anything Goes
Oldie But a Goodie - No Red or Green
Simon Says Stamp - Anything Goes

Hope you like the card.

Thanks for stopping by.

Julia

Grey and Lemon Christmas Card

Morning Bloggers,

When making Christmas cards I'm generally quite traditional and lean towards using red, green or blue. However, I really like yellow and grey together so I decided to use it on a Christmas card to see if it would work. I quite like how it turned out.


The stamp is Tatty's Christmas Tree from the Creative Expressions Tatty Button range. I stamped it in Memento London Fog. I just coloured in the stars on the tree with the Sunflower Cosmic Shimmer Matt Drawing Ink. I cut the image out using the largest of the Spellbinders Lattice Rectangles dies. I cut a faux nestie out using pale lemon card.

I stamped the sentiment from the Tatty Button Text 2 set in Memento London Fog and cut it out using a Spellbinders Labels Twenty-Three die and again made a faux nestie out of pale lemon card.

I cut a panel of grey card and embossed it using the Couture Creations Drink Me embossing folder. The backing paper is from Polka Doodles Sundae of Seasons CD.

I joined the embossed grey card and the yellow polka dot paper together with a piece of Nickle Mist Vintage Ribbon. I tied a messy bow using 2 lengths of the ribbon and added a Creative Expressions wooden button with some yellow Baker's Twine tied through it.

I cut 2 flourishes from the Tim Holtz Alterations Die Elegant Flourishes - one in pale lemon and one in grey and glued them in place with Cosmic Shimmer Dries Clear Glue as shown.

I'm entering this card in to the following challenges -
Make It Monday #65
Simon Says Stamp - Anything Goes
Charisma Cardz - Challenge 47 Seeing Spots

I hope you like the card.

Thanks for stopping by.

Julia

Saturday 3 December 2011

Snow Lady

Hi Bloggers,

Today I thought I'd share another sample for the Tatty Button Show on Tuesday. I've used the Creative Expressions Tatty Button Snowman stamp but he's become a 'her'.


I stamped the image in Jet Black Archival ink and embossed with Cosmic Shimmer Clear Embossing Powder. I coloured the image using Cosmic Shimmer Matt Drawing Inks. I punched a few mini flowers out of pink card and added a tiny spot of Cosmic Shimmer White Pearlescent PVA in the centre of each one. The handbag was made from a Woodware punch - really handy as it punches as 2 pieces so fits over my lady's arm nicely.

I cut the image out using a Spellbinders Labels Eight die and carefully inked around the edges with Spun Sugar Distress Ink and Cut & Dry Foam while the image was still in the die. I cut a mat out of pink card with the largest of the Spellbinders Lattice Rectangles dies. I really love that set.

All the backing papers are from the Polka Doodles Sundae of Seasons CD except for the long panel to the right of the image. This I made by randomly stamping the bow from the Tatty Button Accessories 2 set all over a piece of white card with Perfect Medium. I embossed the images with clear powder and then covered the card with Spun Sugar Distress Stain. The embossed images resisted the stain.

I stamped the sentiment from the Tatty Button Text 2 set in Jet Black Archival and embossed with clear powder. I cut it out using a circle nestie and cut a mat out of pink card using a scalloped circle nestie.

I stained a piece of cream lace with the Spun Sugar Distress Stain and added it to the back of my sentiment.

I added a couple of Creative Expressions White Pearl Stick Pins and some square gems to complete my card.

I'm entering this card into the following challenges -
Charisma Cardz - Challenge 47 Seeing Spots
Make It Monday #65
Simon Says Stamp - Anything Goes

Hope you like the card.

Thanks for stopping by.

Julia

Friday 2 December 2011

Festive Fireplace

Morning Bloggers,

Today I'm sharing a card made with the Creative Expressions Tatty Button Fireplace stamp.


I stamped the image in Jet Black Archival and embossed it with Cosmic Shimmer Clear Embossing Powder. I coloured it in using Cosmic Shimmer Matt Drawing Inks and used some Pearl Shine Cosmic Shimmer Mica Drawing Ink for the dripping wax on the candles. I cut the image out using Spellbinders Labels Two and edged it with Vintage Photo Distress Ink. I cut a faux nestie out of green card.

I stamped the sentiment from the Tatty Button Text 2 set in Jet Black Archival and embossed with clear powder. I cut it our using a circle nestie and again edged with Vintage Photo. I cut a scalloped circle nestie out of green card.

I assembled the main layers of the card as shown. The papers are My Mind's Eye and Basic Grey. I did some paper piercing along the edges of the largest piece of green card with my Tim Holtz Ruler and a pricking tool. I ran some Hi-Tack Tape down the side of the card and ruffled some Moss Green Vintage Ribbon along it. I tied a messy bow out of two lengths of the ribbon and added it to my ruffled ribbon border. I dyed a Creative Expressions Wooden Button with Vintage Photo Distress Stain, tied some Baker's Twine through it and added it to my messy bow.

I inked around the edges of an 8" x 8" card blank with Vintage Photo and then added my design to it. Finally, I cut some Elegant Flourishes using the Tim Holtz Alterations die from some green card and glued them in place on my card with Cosmic Shimmer Dries Clear Glue.

I'm entering this card into the following challenges -
Make It Monday #65
Simon Says Stamp - Anything Goes

Hope you like the card.

Thanks for stopping by.

Julia.

Thursday 1 December 2011

Blue and White Christmas Stepper Card

Hi Bloggers,

Today I have a Stepper Card to share -


I purchased a Hougie Board last weekend. The booklet that I got with it boasts that you can make the easiest stepper card with it. True! Making the blank for this card was easy peasy.

I stamped the Creative Expressions Tatty's Christmas Tree in Chipped Sapphire Distress Ink. I used a paint brush to draw some of the ink out around the edges of the layers of the tree, the pot and on some of the baubles. I used some Pearl Shine Cosmic Shimmer Drawing Ink on the garlands and the fairy.

I cut the image out using the largest of the Spellbinders Lattice Rectangles dies.

I cut some polka dot paper (from Polka Doodles Sundae of Seasons) to fit the large side panel and added my image with foam pads.


I cut a border using the Spellbinders Scalloped Edgeabilities dies and inked whilst still in the die with Chipped Sapphire Distress Ink. I added this to my front panel on the right.

I cut a panel to fit the middle section on the right of my card and popped it through my Cuttlebug with the Couture Creations Drink Me Embossing Folder. I inked the raised areas with Chipped Sapphire and added the panel to my card.

I added another piece of polka dot paper to my back panel. I stamped the sentiment from the Tatty Button Text 2 set using Chipped Sapphire Distress Ink and cut it out using a Spellbinders Labels Two die. I inked around the edges with Chipped Sapphire and added it to my card as shown.


Hope you like the card.

I'm entering this card into the following challenges -
Make It Monday #65
Simon Says Stamp - Anything Goes

Thanks for stopping by.

Julia.

Wednesday 30 November 2011

Tiffany in Blue

Hi Bloggers,

This is my second post today. Hope you've had a good day so far.

I wanted to share this card with you -


The image is called Tiffany and she's from Sugar Nellie. I've had her a while and have been putting off stamping her as there have been so many fab cards using her on The Sugar Bowl that I felt I may not be able to do her justice. Anyway, today I've taken the plunge and I'm pretty happy with the result.

I stamped Tiffany in Memento Tuxedo Black and coloured her with promarkers. She's in blue to follow the Ice and Snow theme on the Sugar Bowl Challenge this week.


I cut Tiffany out using the largest of the Spellbinders Lattice Rectangles dies. I cut some poinsettias out using the smallest 3 dies from the Spellbinders Layered Poinsettias die set and inked through the dies with Stormy Sky Distress Ink. I cut 2 of each size. I assembled the poinsettia and added a blue gem in the middle.


The sentiment is from Lili of the Valley. I didn't have quite the right size nestie for a mat for it so I used a Spellbinders Layered Poinsettias die to create the mat. Although I've made this card as a Birthday card, it could just as easily be a Christmas card instead if a different sentiment is used.


The backing papers are all from Polka Doodles Sundae of Seasons CD.

The card was assembled onto a Craftwork Cards 8" x 8" card blank as per Gayle's Sketch at The Sugar Bowl

I'm also entering this card into the following challenges -
Simon Says Stamp - Anything Goes
Make It Monday #65

Hope you like Tiffany as much as I do.

Thanks for stopping by.

Julia