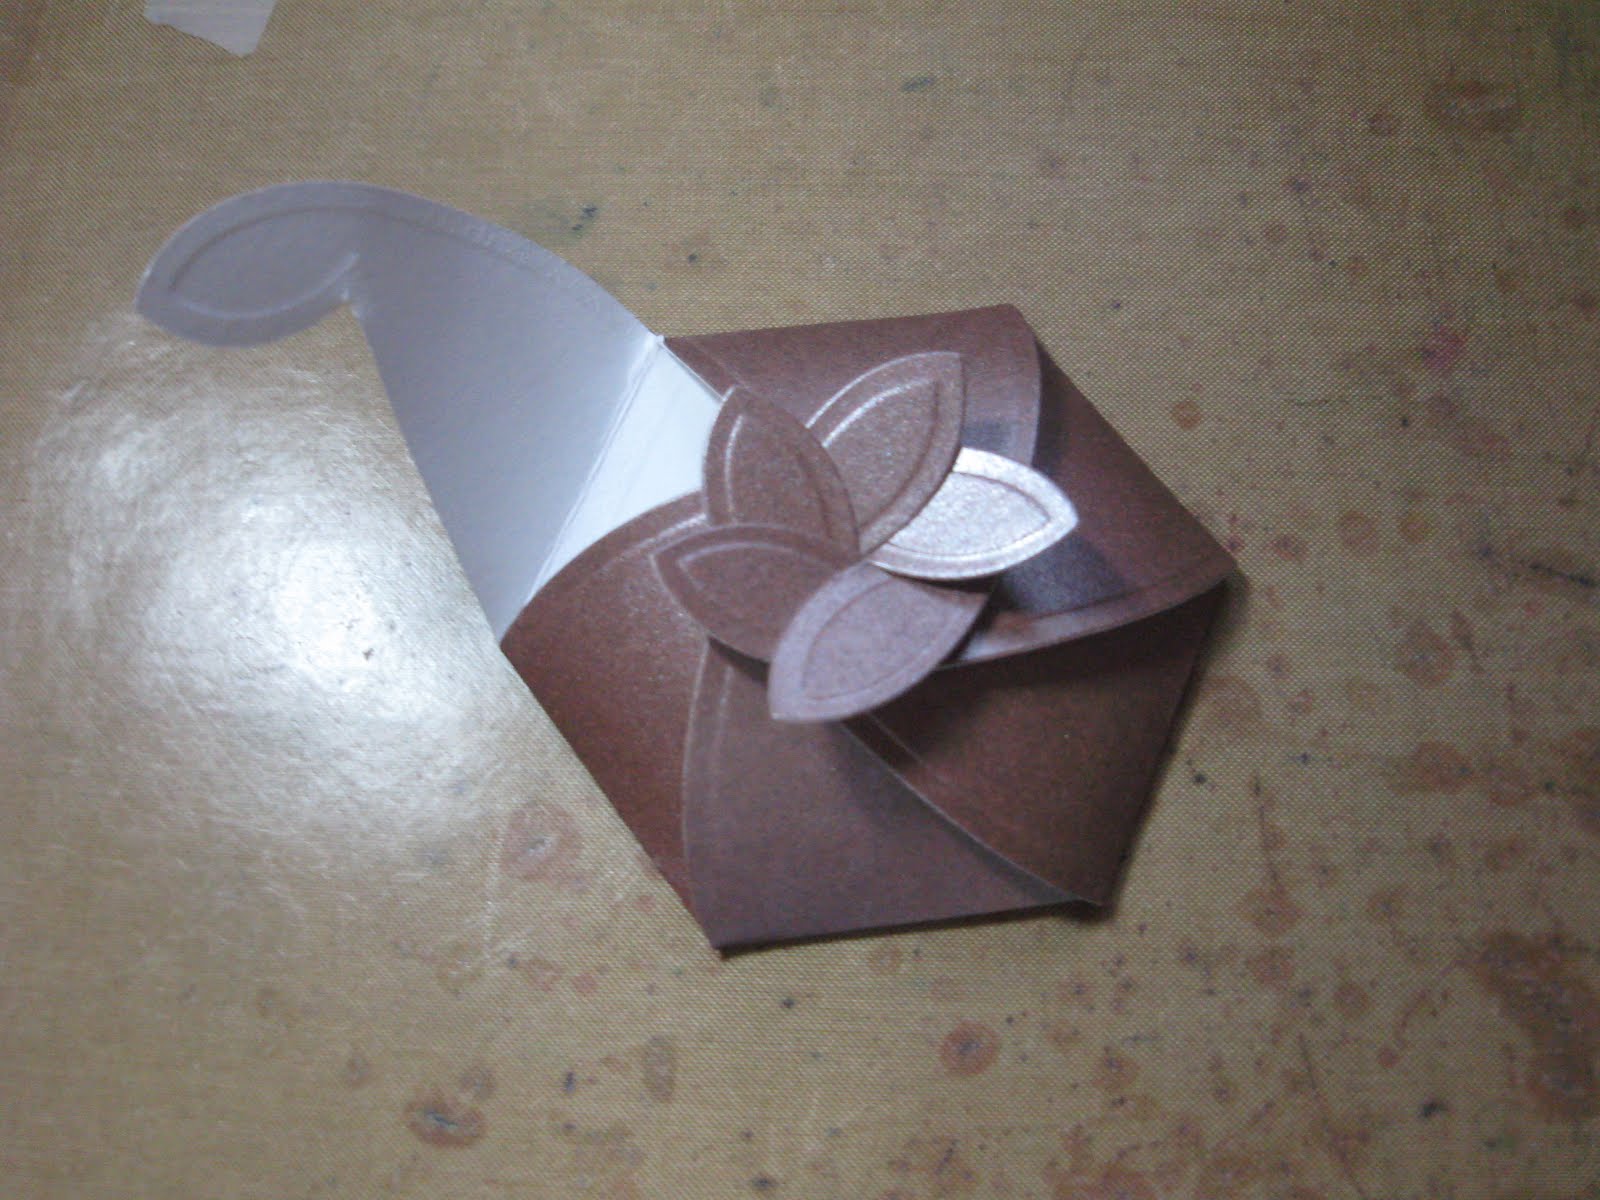
Today I thought I'd share some boxes with you. The Hexagon Pinwheel Top Box is on the shows tomorrow. I'm really quite fond of this box as it needs no glue in its simplest form.
When it comes out of the Grand Calibur, having been cut and then embossed, you just need to fold along all the embossed lines.

Hold two of the sides together

Then slot the 3rd piece under the 'petal' of the other 2

Slot the 4th piece under the 'petal' of the other 3

Slot the 5th piece under the 'petal of the other 4
Finally, slot the 6th piece under the petal of the other 5. Make sure the bottom part of this piece slides under the bottom part of the first piece.

So that's it in it's simplest form. I can see this being gorgeous in white or ivory pearlescent card for wedding favours. Can you image how much money you would save or earn if you made these for a wedding?
The die pack also comes with 6 panels to stick on each side and a tag.
Here's some other versions -

In the one above I used some Creative Expressions double-sided patterned paper. I cut the embellishment panels from the other side of the paper. Hoping to have this paper on my next stamping show on 25th June.

In the one above I added the Couture Creations Houndstooth Embossing Folder at the emboss stage for the embellishment panels.

On the last one I added panels of patterned paper (think it's Basic Grey - only had a scrap left) as the embellishment for a Christmas box. I also stamped a sentiment and used the little tag die in the set to cut it out. I finished it off with a little Moss Green Vintage Ribbon.
Hope you like this little box too. It measures approx 7.5cm across the base.
Thanks for stopping by.
Julia.
Hi Julia, cute little boxes, easy to make. I have the square boxes and am attempting to make the Advent calendar shown on Christine's c and c shows recently. The boxes are so quick to make.
ReplyDeleteWilma
Hi Julia, thanks for sharing these, more dies to add to my wish list. Bx
ReplyDeleteHi Julia,
ReplyDeleteThese boxes are great as you say would make great favour boxes.
Nancyd xx
Lovely boxes Julia, really do like all the boxes that spellbinders have brought out recently, just my budget has to yet stretch to them. lovely designs really like the bottom one very christmasy. xx hazel
ReplyDeleteI didn't think I would want these dies but I've changed my mind.
ReplyDeleteSomething else for my wish list.
xxx Sandra
Hi Julia, These are beautiful boxes, especially the last one, ideal for Christmas. Hadn't thought about buying these dies, but these have made me think again, they are lovely. Thank you for sharing with us. Lots of Love, Patricia Howarth xx
ReplyDeleteHi Julia i have these box dies and have used them several times.
ReplyDeleteThey are great as i have put money in them. so they can be used as an embelishment for cards. joyce.e
Morning Julia
ReplyDeleteThese are great little dies and look so pretty when they are made up
Great idea Joyce for putting on cards with money in
Sue xx
I love these little boxes. The dies are on my 'wish list'
ReplyDeleteCarolyn B x
Thank you for the detailed tutorial, I can now see that they could be quite useful from the comments left by others as I wasn't very impressed by them initially - as with all Spellbinders how wrong can you be!! Jackie D
ReplyDeleteHi Julia, I love this tutorial, the boxes are definitely very useful, so yet another item to be added to a very long wish list!..:)..xx
ReplyDeleteThanks Julia for the step by step for these boxes as on C+C we dont really get a good view of putting it together. I think that you could hang these on their sides from a xmas tree, just put some ribbon on one side.
ReplyDeleteEmma
Great idea. Will have to try that! Will hopefully show one tomorrow. Julia x
DeleteHiya Julia, yep i saw the box you did this morning on C+C, and it looked great with 2 joined together. And ive now had the idea that i could do 24 boxes + hang them on the tree as an advent calender for the children! So i thank you for the post as its inspired me to use these boxes. Emma
DeleteFab tutorial, thank you. This is a super box useful for so many occasions. Have just found your blog, been meaning to follow you for ages! xx
ReplyDeletewas tempted and bought this one on your last c+c show - just waiting for it to arrive so glad you have given more ideas for it. I bought it to use to put gift cards or lottery tickets in as gifts. Can't wait for it to arrive - hopefully today - fingers crossed!
ReplyDeleteHi Julia, haven't got these dies but from the above comments and great ideas think I need them. Thanks for the fabulous tutorial. From a very wet and windy Somerset xx
ReplyDeleteThankyou for your easy to follow tutorial, and variety of samples, I haven't go thesedies but was given a box and \i couldn't get it back together to hold tight.
ReplyDeleteHi Julia,
ReplyDeleteGreat demo, I don't have any of the box dies at the mo but they are on my wish list. I have to say that I thought the same as cornish Emma for hanging them from a tree for an alternative advent calender with treats inside for the kids.
have a great day
Caz x
Hi Julia, love the box dies. I have one of them and use it soooo much! Carole Z X
ReplyDelete