Hi Bloggers.
Hope you managed to catch the shows yesterday. I have more shows today at 9am, 1pm and 5pm - lots more techniques to share.
I wanted to share this card today to show how some of the smaller elements in the Background Die Sets can be used on their own.
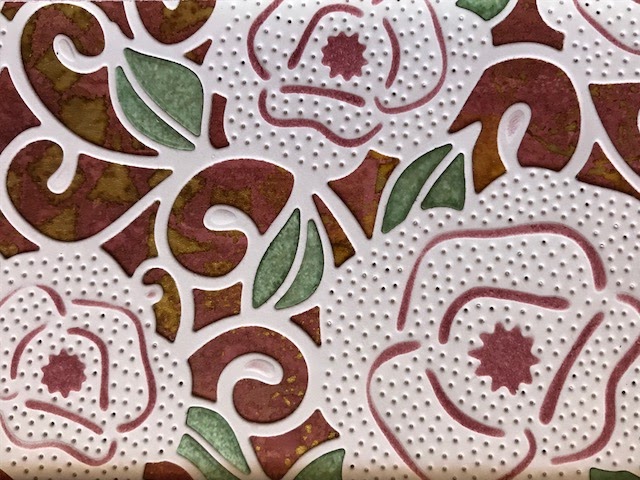
The background is actually a negative print from when I sprayed a piece of felt -
I sprayed half a sheet of Ivory Felt with Scarlet Sunrise CS Ink Spray Mist through the Beady Eyes Mask. I picked the mask up, turned it over and pressed it onto a piece of Coconut White Card. I put my felt aside to use in another project.
I inked around the edges of my negative background using Natural Rosewood Colour Cloud using a Smoothie. I matted onto Black Card and then another piece of Coconut White.
I sprayed a piece of Coconut White Card with Scarlet Sunrise Ink Spray Mist. Once dry, I cut die #2 from the New Zealand Background and die #2 from the Scattered Leaves Background out of it.
I cut dies #1 and #2 together from the New Zealand Background out of Black Card. I glued this to my Scarlet Sunrise die cut.
I cut dies #1 and #2 together from the Scattered Leaves Background out of Black Card. I glued this to my Scarlet Sunrise die cut.
I stamped one of the circles from the Woodware Vintage Circles Stamp Set onto Coconut White Card using Onyx Black Versafine, I added CS Clear Detail Embossing Powder and heat set. I cut it out using scissors leaving a tiny white border around it. I inked around the edges with Natural Rosewood Colour Cloud. I misted a little Scarlet Sunrise Ink Spray Mist onto my Craft Sheet. I picked it up using a Paint Brush and coloured in the butterfly and the little heart.
I stamped a little butterfly from the Woodware Vintage Pocket Watches Stamp Set onto Coconut White Card using Onyx Black Versafine, I added CS Clear
Detail Embossing Powder and heat set. I cut it out using scissors
leaving a tiny white border around it. I coloured it using Scarlet Sunrise Ink Spray Mist. I shaped it a little and added it to the corner of the New Zealand Background die cut.
I stamped the sentiment from the Woodware Vintage Pocket Watches Stamp Set onto Coconut White Card using Onyx Black Versafine and embossed with CS Clear
Detail Embossing Powder. I cut it out using the Pierced Flags Die Set and inked around the edges with Natural Rosewood Colour Cloud.
I sprayed a piece of Ivory Felt with Scarlet Sunrise Ink Spray Mist. Once dry, I made a flower using the Classic Foldover Flowers Die Set.
I completed my card by adding a 5mm Black Pearl to 3 of the corners of my background.
I'm offering 10% discount on items on my website from the shows. You can find them here.
Please enter JULIAWATTS in the discount code box at checkout to
activate your discount. Offer applies till midnight tonight or while stocks last.
Thanks for stopping by.
Julia.
www.juliawattscrafts.co.uk
Free card with all website orders over £10 (Add a note to your order in your cart).
Wednesday, 27 December 2017
Tuesday, 26 December 2017
One Day Special on Hochanda today
Hi Bloggers.
Hope you had a lovely Christmas Day. I'm launching a One Day Special on Hochanda at 6pm today with some lovely Background Dies by Sue Wilson. The shows will be packed with as many techniques as I can get into them so I hope you can tune in today or tomorrow. Shows are at 6pm and 8pm today and then 9am, 1pm and 5pm tomorrow.
Here's today's card -
I started by cutting the largest die in the New York Background into a piece of Black Card - it really doesn't matter what colour card it is as I've used it as a mask on this card.
I popped my mask on top of a piece of Coconut White Card. I picked some Blue Boy CS Acrylic Mixed Media Paint up onto a Stencil Brush and stencilled through my mask. Keeping my mask in place, I stencilled through the remaining areas with Twilight Purple CS Acrylic Mixed Media Paint.
I made a frame out of Coconut White Card using the Double Pierced Background Rectangle Die Set. I added it to my background using Woodware Foam Tape and trimmed away the excess. I matted onto Coconut White Card, Black Card and another piece of Coconut White Card.
I stampd the sentiment from the Woodware Bubble Bloom Border Stamp Set using Manganese Blue Archival. I cut if out using die #1 from the New York Background Die Set and cut the next sized die out of Black Card.
I sprayed a piece of felt with CS Frosty Sky Ink Spray Mist. Once dry, I made a couple of flowers using the Classic Foldover Flowers Die Set.
I cut some foliage out of Coconut White Card using the Blossoming Branch Die Set. I painted a piece of Coconut White Card with Purple Twilight Mixed Media Paint and cut the tiny flowers in the same die set out of it. I did try and use up my scraps of leftover Acetate but on this occasion it would not cut - the acetate will cut simple dies, it depends on what's on it. I added CS Crystal Sparkle PVA to the centre of my tiny flowers.
I'm offering 10% discount on items on my website from the shows. You can find them here. Please enter JULIAWATTS in the discount code box at checkout to activate your discount. Offer applies till midnight tomorrow night.
Hope to see you later!
Thanks for stopping by.
Julia.
www.juliawattscrafts.co.uk
Free card with all website orders over £10 (Add a note to your order in your cart).
Hope you had a lovely Christmas Day. I'm launching a One Day Special on Hochanda at 6pm today with some lovely Background Dies by Sue Wilson. The shows will be packed with as many techniques as I can get into them so I hope you can tune in today or tomorrow. Shows are at 6pm and 8pm today and then 9am, 1pm and 5pm tomorrow.
Here's today's card -
I started by cutting the largest die in the New York Background into a piece of Black Card - it really doesn't matter what colour card it is as I've used it as a mask on this card.
I popped my mask on top of a piece of Coconut White Card. I picked some Blue Boy CS Acrylic Mixed Media Paint up onto a Stencil Brush and stencilled through my mask. Keeping my mask in place, I stencilled through the remaining areas with Twilight Purple CS Acrylic Mixed Media Paint.
I made a frame out of Coconut White Card using the Double Pierced Background Rectangle Die Set. I added it to my background using Woodware Foam Tape and trimmed away the excess. I matted onto Coconut White Card, Black Card and another piece of Coconut White Card.
I stampd the sentiment from the Woodware Bubble Bloom Border Stamp Set using Manganese Blue Archival. I cut if out using die #1 from the New York Background Die Set and cut the next sized die out of Black Card.
I sprayed a piece of felt with CS Frosty Sky Ink Spray Mist. Once dry, I made a couple of flowers using the Classic Foldover Flowers Die Set.
I cut some foliage out of Coconut White Card using the Blossoming Branch Die Set. I painted a piece of Coconut White Card with Purple Twilight Mixed Media Paint and cut the tiny flowers in the same die set out of it. I did try and use up my scraps of leftover Acetate but on this occasion it would not cut - the acetate will cut simple dies, it depends on what's on it. I added CS Crystal Sparkle PVA to the centre of my tiny flowers.
I'm offering 10% discount on items on my website from the shows. You can find them here. Please enter JULIAWATTS in the discount code box at checkout to activate your discount. Offer applies till midnight tomorrow night.
Hope to see you later!
Thanks for stopping by.
Julia.
www.juliawattscrafts.co.uk
Free card with all website orders over £10 (Add a note to your order in your cart).
Monday, 25 December 2017
Christmas Day Sneak Peek
Hi Bloggers.
Happy Christmas to you all! I hope you all have a lovely day. I will be spending the day continuing with my prep for my shows on Hochanda on Saturday.
Back to the shows launching at 6pm tomorrow, here's today's sneak peek -
Behind the Pierced Roses Mini Background, I have created one of my favourite background techniques from Dyan Reaveley's Art Journaling Book. I used a piece of Watercolour Card. I misted it with a little water and then added Marigold, Vintage Sage and Vintage Rose CS Ink Spray Mists. I blotted off with a little Kitchen Roll and misted a little more until I was happy with the depth of colour. I added the Wired Mask and misted with water on one half of my background. I picked the mask up, turned it over and placed on the other side of my card to get a negative print. I blotted with Kitchen Roll. I then randomly misted through sections if the Beady Eyes Mask with Golden Mint CS Mister. I turned the mask over each time to get a negative print in other areas. I put aside to dry.
I only used half of my background for this card - here's the piece I haven't used yet -
I cut the Pierced Roses Mini Background into a piece of Coconut White Card. I poked out the the leaves, roughly placing them on my Craft Sheet where they were positioned in the die. I inked through the die with Natural Rosewood Colour Cloud using a Smoothie. I coloured the leaves on my Craft Sheet with Fresh Grass Colour Cloud and Vintage Sage Ink Spray Mist.
I glued my Pierced Roses Background to my misted background and glued my leaves in place.
I made a frame out of Coconut White Card using the largest 2 dies in the Indian Ocean Background Die Set. I coloured a piece of Coconut White Card with Natural Rosewood Colour Cloud. I glued my frame to it. I slotted die #6 from the set back into it's frame and ran through the Platinum Machine to remove the centre from my Rosewood card.
I added my frame to my Pierced Roses piece.
I completed my card by matting onto a couple of pieces of Coconut White Card. I haven't put a sentiment on this one - I didn't want to cover the design. You could add a sentiment inside your card or maybe add a Pierced Flag to the front.
I've popped photos of the samples from the shows into the Gallery Section of this Blog and onto my Julia Watts Crafts Facebook Page - there's loads of them! 😀
The Big Sale has already begun on my website - hundreds of products at reduced prices. You can find them here.
The winner of the card from Freebie Friday on 22nd December is ................................
Please email me with your address and I'll pop your card in the post early in the New Year.
Thanks for stopping by.
Julia.
www.juliawattscrafts.co.uk
Free card with all website orders over £10 (Add a note to your order in your cart).
Happy Christmas to you all! I hope you all have a lovely day. I will be spending the day continuing with my prep for my shows on Hochanda on Saturday.
Back to the shows launching at 6pm tomorrow, here's today's sneak peek -
Behind the Pierced Roses Mini Background, I have created one of my favourite background techniques from Dyan Reaveley's Art Journaling Book. I used a piece of Watercolour Card. I misted it with a little water and then added Marigold, Vintage Sage and Vintage Rose CS Ink Spray Mists. I blotted off with a little Kitchen Roll and misted a little more until I was happy with the depth of colour. I added the Wired Mask and misted with water on one half of my background. I picked the mask up, turned it over and placed on the other side of my card to get a negative print. I blotted with Kitchen Roll. I then randomly misted through sections if the Beady Eyes Mask with Golden Mint CS Mister. I turned the mask over each time to get a negative print in other areas. I put aside to dry.
I only used half of my background for this card - here's the piece I haven't used yet -
I cut the Pierced Roses Mini Background into a piece of Coconut White Card. I poked out the the leaves, roughly placing them on my Craft Sheet where they were positioned in the die. I inked through the die with Natural Rosewood Colour Cloud using a Smoothie. I coloured the leaves on my Craft Sheet with Fresh Grass Colour Cloud and Vintage Sage Ink Spray Mist.
I glued my Pierced Roses Background to my misted background and glued my leaves in place.
I made a frame out of Coconut White Card using the largest 2 dies in the Indian Ocean Background Die Set. I coloured a piece of Coconut White Card with Natural Rosewood Colour Cloud. I glued my frame to it. I slotted die #6 from the set back into it's frame and ran through the Platinum Machine to remove the centre from my Rosewood card.
I added my frame to my Pierced Roses piece.
I completed my card by matting onto a couple of pieces of Coconut White Card. I haven't put a sentiment on this one - I didn't want to cover the design. You could add a sentiment inside your card or maybe add a Pierced Flag to the front.
I've popped photos of the samples from the shows into the Gallery Section of this Blog and onto my Julia Watts Crafts Facebook Page - there's loads of them! 😀
The Big Sale has already begun on my website - hundreds of products at reduced prices. You can find them here.
The winner of the card from Freebie Friday on 22nd December is ................................
Pawprintx4
Please email me with your address and I'll pop your card in the post early in the New Year.
Thanks for stopping by.
Julia.
www.juliawattscrafts.co.uk
Free card with all website orders over £10 (Add a note to your order in your cart).
Sunday, 24 December 2017
Christmas Eve Sneak Peek
Hi Bloggers.
Christmas Eve! Where has the year gone? I'm prepping today for my shows on 30th December but today I have another sneak peek from the One Day Special that I'm launching on Hochanda on Boxing Day at 6pm.
This is a really simple card to construct. It may not be apparent from the photo but the blue background actually contains a simple but cool technique with Cosmic Shimmer Acrylic Mixed Media Paint.
I painted a piece of Heat Emboss Acetate with Blue Boy CS Acrylic Mixed Media Paint and put aside to dry for a couple of minutes. I then gave it a 2nd coat and let dry again.
I cut the largest 2 dies in the New Zealand Background Die Set into a piece of Coconut White Card. I glue this to the side of my Acetate without the paint on it. I slotted die #4 into the aperture and cut to create a frame.
I then cut dies #1 and #3 into another piece of Coconut White Card. I glued my waste piece at the back of it. I added my large background piece to it using CE Mounting Cushion and added a frame cut from Coconut White Card using the Double Pierced Background Rectangle Die Set. I matted onto a couple of pieces of Coconut White Card.
I stamped my sentiment from the CE Petite Lavish Sentiments Stamp Set onto Coconut White Card using Manganese Blue Archival. I cut it out using the Pierced Flags Die Set.
I sprayed a piece of felt with CS Frosty Sky Ink Spray Mist. Once dry, I made a couple of flowers using the Classic Foldover Flowers Die Set.
I cut some foliage out of Coconut White Card using the Blossoming Branch Die Set. I painted a piece of Coconut White Card with Blue Boy Mixed Media Paint and cut the tiny flowers in the same die set out of it. I did try and use up my scraps of leftover Acetate but on this occasion it would not cut - the acetate will cut simple dies, it depends on what's on it. I added 3mm White Pearls to the centre of my tiny flowers.
I shall be trying to remember to go to bed with ear plugs in tonight to try and dampen out to noise of the brass band that plays outside my house every Christmas Day at 8am! Something I look forward to every year - not! Guaranteed to put me in a good mood if they wake me up!
I've scheduled another sneak peek for tomorrow at 6am - I hope you get a minute to pop by at some point. Have a lovely Christmas.
Thanks for stopping by.
Julia.
www.juliawattscrafts.co.uk
Free card with all website orders over £10 (Add a note to your order in your cart).
Christmas Eve! Where has the year gone? I'm prepping today for my shows on 30th December but today I have another sneak peek from the One Day Special that I'm launching on Hochanda on Boxing Day at 6pm.
This is a really simple card to construct. It may not be apparent from the photo but the blue background actually contains a simple but cool technique with Cosmic Shimmer Acrylic Mixed Media Paint.
I painted a piece of Heat Emboss Acetate with Blue Boy CS Acrylic Mixed Media Paint and put aside to dry for a couple of minutes. I then gave it a 2nd coat and let dry again.
I cut the largest 2 dies in the New Zealand Background Die Set into a piece of Coconut White Card. I glue this to the side of my Acetate without the paint on it. I slotted die #4 into the aperture and cut to create a frame.
I then cut dies #1 and #3 into another piece of Coconut White Card. I glued my waste piece at the back of it. I added my large background piece to it using CE Mounting Cushion and added a frame cut from Coconut White Card using the Double Pierced Background Rectangle Die Set. I matted onto a couple of pieces of Coconut White Card.
I stamped my sentiment from the CE Petite Lavish Sentiments Stamp Set onto Coconut White Card using Manganese Blue Archival. I cut it out using the Pierced Flags Die Set.
I sprayed a piece of felt with CS Frosty Sky Ink Spray Mist. Once dry, I made a couple of flowers using the Classic Foldover Flowers Die Set.
I cut some foliage out of Coconut White Card using the Blossoming Branch Die Set. I painted a piece of Coconut White Card with Blue Boy Mixed Media Paint and cut the tiny flowers in the same die set out of it. I did try and use up my scraps of leftover Acetate but on this occasion it would not cut - the acetate will cut simple dies, it depends on what's on it. I added 3mm White Pearls to the centre of my tiny flowers.
I shall be trying to remember to go to bed with ear plugs in tonight to try and dampen out to noise of the brass band that plays outside my house every Christmas Day at 8am! Something I look forward to every year - not! Guaranteed to put me in a good mood if they wake me up!
I've scheduled another sneak peek for tomorrow at 6am - I hope you get a minute to pop by at some point. Have a lovely Christmas.
Thanks for stopping by.
Julia.
www.juliawattscrafts.co.uk
Free card with all website orders over £10 (Add a note to your order in your cart).
Saturday, 23 December 2017
Saturday Sneak Peek
Hi Bloggers.
As promised, today I have a sneak peek for you from the One Day Special that I'm launching on Hochanda at 6pm on Boxing Day. I know it's a busy time with family and friends but I do hope that some of you can tune in.
The shows are all about backgrounds. The ODS bundle comprises of some Sue Wilson Background Dies and there are a few more background dies available outside of the bundle and some Finishing Touches Dies too. For me, the show is not just about the dies (which are all lovely!) but it's about the backgrounds you create to use with them and the mediums you can use to create those backgrounds. There are lots and lots of goodies on the shows and quite a few on pick & mix so hopefully, there'll be something for everyone. I've certainly had alot of fun creating the samples - I would have kept going if I hadn't another show on 30th December to prep for!
Anyhow, here's your sneak peek for today -
This is one of those cards that really does look better in real life. For the background, I have used Pixie Powders on felt! Who knew how fabulous it would look?
I used a piece of Ivory Felt. It comes in a pack of 10 sheets. Each sheet is 9" square. I've cut a sheet in half. I tend to do this when I' experimenting - if it doesn't work, I haven't wasted much and if it does work, I have a piece big enough to use.
Back to my felt, I misted it with water - quite alot of water, and then added Pixie Powders in the usual way. I used Plum Twist, Sun Yellow and Ancient Copper. You don't get such an immediate reaction as you do on card, it's a slow explosion. Cool though! Now, this isn't colour fast so if you do this, don't wash it unless you want the colour to come out.
Now, you may be wondering why you would do this on felt and not just on card as you would normally do? Well, you could, and it would look fabulous. However, here, it's all about the texture you get from using the felt. I have used every single scrap of my felt background, using the leftover bits on my foldover flowers and on the little flowers on my blossoming branch.
I made a frame out of Milk and Rich Plum Card using the Indian Ocean Background and the Double Pierced Background Rectangles. I added it to my felt background, trimming away the excess. I matted onto Milk Card, then Rich Plum and then onto another piece of Milk Card. The overall size falls just shy of A5.
I stamped a sentiment from the Creative Expressions Petite Lavish Sentiments Stamp Set onto Milk Card using Plum Archival. I cut it out using the Pierced Flags Die Set and cut the next sized die out of Rich Plum Card.
I made a couple of flowers from my leftover felt using the Classic Foldover Flowers Die Set.
I cut a pair of leaves out of Milk Card using the Blossoming Branch. I cut the tiny flowers out of my remaining scraps of felt and added a 3mm Cream Pearl to the centre of each tiny flower.
I'll be back tomorrow with another sneak peek.
Thanks for stopping by.
Julia.
www.juliawattscrafts.co.uk
Free card with all website orders over £10 (Add a note to your order in your cart).
As promised, today I have a sneak peek for you from the One Day Special that I'm launching on Hochanda at 6pm on Boxing Day. I know it's a busy time with family and friends but I do hope that some of you can tune in.
The shows are all about backgrounds. The ODS bundle comprises of some Sue Wilson Background Dies and there are a few more background dies available outside of the bundle and some Finishing Touches Dies too. For me, the show is not just about the dies (which are all lovely!) but it's about the backgrounds you create to use with them and the mediums you can use to create those backgrounds. There are lots and lots of goodies on the shows and quite a few on pick & mix so hopefully, there'll be something for everyone. I've certainly had alot of fun creating the samples - I would have kept going if I hadn't another show on 30th December to prep for!
Anyhow, here's your sneak peek for today -
This is one of those cards that really does look better in real life. For the background, I have used Pixie Powders on felt! Who knew how fabulous it would look?
I used a piece of Ivory Felt. It comes in a pack of 10 sheets. Each sheet is 9" square. I've cut a sheet in half. I tend to do this when I' experimenting - if it doesn't work, I haven't wasted much and if it does work, I have a piece big enough to use.
Back to my felt, I misted it with water - quite alot of water, and then added Pixie Powders in the usual way. I used Plum Twist, Sun Yellow and Ancient Copper. You don't get such an immediate reaction as you do on card, it's a slow explosion. Cool though! Now, this isn't colour fast so if you do this, don't wash it unless you want the colour to come out.
Now, you may be wondering why you would do this on felt and not just on card as you would normally do? Well, you could, and it would look fabulous. However, here, it's all about the texture you get from using the felt. I have used every single scrap of my felt background, using the leftover bits on my foldover flowers and on the little flowers on my blossoming branch.
I made a frame out of Milk and Rich Plum Card using the Indian Ocean Background and the Double Pierced Background Rectangles. I added it to my felt background, trimming away the excess. I matted onto Milk Card, then Rich Plum and then onto another piece of Milk Card. The overall size falls just shy of A5.
I stamped a sentiment from the Creative Expressions Petite Lavish Sentiments Stamp Set onto Milk Card using Plum Archival. I cut it out using the Pierced Flags Die Set and cut the next sized die out of Rich Plum Card.
I made a couple of flowers from my leftover felt using the Classic Foldover Flowers Die Set.
I'll be back tomorrow with another sneak peek.
Thanks for stopping by.
Julia.
www.juliawattscrafts.co.uk
Free card with all website orders over £10 (Add a note to your order in your cart).
Friday, 22 December 2017
Freebie Friday
Hi Bloggers.
We had a lovely day for yesterday for my parents anniversary. Service in the hotel was slow to say the least though and they didn't even have us booked in for lunch even though I had confirmation! We did have a bit of a giggle about it though - it was like a posh Fawlty Towers! And, yes, I did know about the message from the Queen. It was all arranged and should be waiting for them when they get back home today.
Here's the final Freebie Friday Card of 2017 -
You can read how this card was made in this post.
Leave a lovely comment below to go into the draw to win it. I will announce the winner on Christmas Day. Be sure to pop back to see if you have won.
Please note : Only comments left below will go into the draw. Comments made on the original post will not count. Information given on the original post was correct at the time that post was published.
We had a lovely day for yesterday for my parents anniversary. Service in the hotel was slow to say the least though and they didn't even have us booked in for lunch even though I had confirmation! We did have a bit of a giggle about it though - it was like a posh Fawlty Towers! And, yes, I did know about the message from the Queen. It was all arranged and should be waiting for them when they get back home today.
Here's the final Freebie Friday Card of 2017 -
You can read how this card was made in this post.
Leave a lovely comment below to go into the draw to win it. I will announce the winner on Christmas Day. Be sure to pop back to see if you have won.
Please note : Only comments left below will go into the draw. Comments made on the original post will not count. Information given on the original post was correct at the time that post was published.
I'll be back tomorrow with the first sneak peek from the One Day Special that I'm launching on Hochanda on Boxing Day.
Thanks for stopping by.
Julia.
www.juliawattscrafts.co.uk
Free card with all website orders over £10 (Add a note to your order in your cart).
Julia.
www.juliawattscrafts.co.uk
Free card with all website orders over £10 (Add a note to your order in your cart).
Thursday, 21 December 2017
Diamond Wedding Anniversary
Hi Bloggers.
Today is my Mom & Dad's 60th Wedding Anniversary! Quite a milestone! They're staying at a lovely hotel near me in Milton Keynes for a couple of days. Kathryn is coming up from Hampshire today and we're all (including Nathan, hopefully) going out for a festive lunch at said lovely hotel.
I've made a couple of cards for them. Here's one -
This card is pretty straight forward to make so just an ingredients list today .
Products used -
Sue Wilson Dies - Indian Ocean Background, Classic Foldover Flower, Blossoming Branch
Phill Martin Dies - Scribbled Collection : Milestone Occasions, Milestone Anniveraries
Ivory Felt
Cosmic Shimmer Crystal Sparkle PVA
Card - Coconut White, Milk
Thanks for stopping by.
Julia.
www.juliawattscrafts.co.uk
Free card with all website orders over £10 (Add a note to your order in your cart).
Today is my Mom & Dad's 60th Wedding Anniversary! Quite a milestone! They're staying at a lovely hotel near me in Milton Keynes for a couple of days. Kathryn is coming up from Hampshire today and we're all (including Nathan, hopefully) going out for a festive lunch at said lovely hotel.
I've made a couple of cards for them. Here's one -
This card is pretty straight forward to make so just an ingredients list today .
Products used -
Sue Wilson Dies - Indian Ocean Background, Classic Foldover Flower, Blossoming Branch
Phill Martin Dies - Scribbled Collection : Milestone Occasions, Milestone Anniveraries
Ivory Felt
Cosmic Shimmer Crystal Sparkle PVA
Card - Coconut White, Milk
Julia.
www.juliawattscrafts.co.uk
Free card with all website orders over £10 (Add a note to your order in your cart).
Wednesday, 20 December 2017
Custard & White Intermediate & Striped Weave
Hi Blogers.
Here's today's card -
For the weave on this one, I cut the Intermediate Weaving Die out of Coconut White Card twice. I glued them together at the ends only, offsetting them to fill in the gaps. I cut the Striped Weaving Die out of Custard Card twice. I cut these die cuts into pieces 2 strips wide. I wove these through the Coconut White piece.
I made a frame out of Coconut White Card using the Scallopd Lattice Frames Set B Die Set. I added my frame to my weave using Woodware Foam Tape. I matted onto Coconut White, Custard and then another piece of Coconut White Card.
I cut the Thank You Die Set out of Coconut White and Custard Card.
I made some flowers out of Coconut White and Custard Card using the Striped Nasturtium Die Set. I added added a 5mm White Pearl to the centre of the flowers. I cut some foliage out of Coconut White Card using the Spring Foliage Die Set, adding some little Custard flowers cut using the same die set. I added a 3mm White Pearl to the centre of all the little flowers.
Thanks for stopping by.
Julia.
www.juliawattscrafts.co.uk
Free card with all website orders over £10 (Add a note to your order in your cart).
Here's today's card -
For the weave on this one, I cut the Intermediate Weaving Die out of Coconut White Card twice. I glued them together at the ends only, offsetting them to fill in the gaps. I cut the Striped Weaving Die out of Custard Card twice. I cut these die cuts into pieces 2 strips wide. I wove these through the Coconut White piece.
I made a frame out of Coconut White Card using the Scallopd Lattice Frames Set B Die Set. I added my frame to my weave using Woodware Foam Tape. I matted onto Coconut White, Custard and then another piece of Coconut White Card.
I cut the Thank You Die Set out of Coconut White and Custard Card.
I made some flowers out of Coconut White and Custard Card using the Striped Nasturtium Die Set. I added added a 5mm White Pearl to the centre of the flowers. I cut some foliage out of Coconut White Card using the Spring Foliage Die Set, adding some little Custard flowers cut using the same die set. I added a 3mm White Pearl to the centre of all the little flowers.
Thanks for stopping by.
Julia.
www.juliawattscrafts.co.uk
Free card with all website orders over £10 (Add a note to your order in your cart).
Tuesday, 19 December 2017
Garden Themed Shadow Box
Hi Bloggers.
Here's today's card -
Another workshop card so just an ingredients list again.
Products used -
Here's today's card -
Another workshop card so just an ingredients list again.
Products used -
Sue Wilson Dies – Celebrations Shadow Box, Stitched Square Peg Board, Wooden Garden Cart, Life is a Garden, Sycamore Branch
A4 Embossing Folder – Leafy Quad
Vintage Photo Distress Marker
Card – Coconut White, Slate Grey, Ginger
Lisa Horton is launching a new One Day Special at 6pm today with lots of Spellbinders dies. I only have the card in stock on my website from the shows but I am offering 10% off that. You can find it here.
Please enter LISAHORTON in the discount code box at checkout to
activate your discount. Offer valid till midnight tomorrow night or
while stocks last. Lisa has another show at 8pm tonight and then more
shows at 9am, 1pm and 5pm tomorrow.
Although we don't have the dies that Lisa is using on our website, we do have lots of other Spellbinders dies at reduced prices in our Clearance Section here and in our Pre-Loved Section here.
Thanks for stopping by.
Julia.
www.juliawattscrafts.co.uk
Free card with all website orders over £10 (Add a note to your order in your cart).
Julia.
www.juliawattscrafts.co.uk
Free card with all website orders over £10 (Add a note to your order in your cart).
Subscribe to:
Posts (Atom)


