Hi Bloggers.
Hope you managed to catch the shows yesterday. I have more shows today at 9am, 1pm and 5pm - lots more techniques to share.
I wanted to share this card today to show how some of the smaller elements in the Background Die Sets can be used on their own.
The background is actually a negative print from when I sprayed a piece of felt -
I sprayed half a sheet of Ivory Felt with Scarlet Sunrise CS Ink Spray Mist through the Beady Eyes Mask. I picked the mask up, turned it over and pressed it onto a piece of Coconut White Card. I put my felt aside to use in another project.
I inked around the edges of my negative background using Natural Rosewood Colour Cloud using a Smoothie. I matted onto Black Card and then another piece of Coconut White.
I sprayed a piece of Coconut White Card with Scarlet Sunrise Ink Spray Mist. Once dry, I cut die #2 from the New Zealand Background and die #2 from the Scattered Leaves Background out of it.
I cut dies #1 and #2 together from the New Zealand Background out of Black Card. I glued this to my Scarlet Sunrise die cut.
I cut dies #1 and #2 together from the Scattered Leaves Background out of Black Card. I glued this to my Scarlet Sunrise die cut.
I stamped one of the circles from the Woodware Vintage Circles Stamp Set onto Coconut White Card using Onyx Black Versafine, I added CS Clear Detail Embossing Powder and heat set. I cut it out using scissors leaving a tiny white border around it. I inked around the edges with Natural Rosewood Colour Cloud. I misted a little Scarlet Sunrise Ink Spray Mist onto my Craft Sheet. I picked it up using a Paint Brush and coloured in the butterfly and the little heart.
I stamped a little butterfly from the Woodware Vintage Pocket Watches Stamp Set onto Coconut White Card using Onyx Black Versafine, I added CS Clear
Detail Embossing Powder and heat set. I cut it out using scissors
leaving a tiny white border around it. I coloured it using Scarlet Sunrise Ink Spray Mist. I shaped it a little and added it to the corner of the New Zealand Background die cut.
I stamped the sentiment from the Woodware Vintage Pocket Watches Stamp Set onto Coconut White Card using Onyx Black Versafine and embossed with CS Clear
Detail Embossing Powder. I cut it out using the Pierced Flags Die Set and inked around the edges with Natural Rosewood Colour Cloud.
I sprayed a piece of Ivory Felt with Scarlet Sunrise Ink Spray Mist. Once dry, I made a flower using the Classic Foldover Flowers Die Set.
I completed my card by adding a 5mm Black Pearl to 3 of the corners of my background.
I'm offering 10% discount on items on my website from the shows. You can find them here.
Please enter JULIAWATTS in the discount code box at checkout to
activate your discount. Offer applies till midnight tonight or while stocks last.
Thanks for stopping by.
Julia.
www.juliawattscrafts.co.uk
Free card with all website orders over £10 (Add a note to your order in your cart).
Showing posts with label Classic Foldover Flowers Die Set. Show all posts
Wednesday, 27 December 2017
Saturday, 23 December 2017
Saturday Sneak Peek
Hi Bloggers.
As promised, today I have a sneak peek for you from the One Day Special that I'm launching on Hochanda at 6pm on Boxing Day. I know it's a busy time with family and friends but I do hope that some of you can tune in.
The shows are all about backgrounds. The ODS bundle comprises of some Sue Wilson Background Dies and there are a few more background dies available outside of the bundle and some Finishing Touches Dies too. For me, the show is not just about the dies (which are all lovely!) but it's about the backgrounds you create to use with them and the mediums you can use to create those backgrounds. There are lots and lots of goodies on the shows and quite a few on pick & mix so hopefully, there'll be something for everyone. I've certainly had alot of fun creating the samples - I would have kept going if I hadn't another show on 30th December to prep for!
Anyhow, here's your sneak peek for today -
This is one of those cards that really does look better in real life. For the background, I have used Pixie Powders on felt! Who knew how fabulous it would look?
I used a piece of Ivory Felt. It comes in a pack of 10 sheets. Each sheet is 9" square. I've cut a sheet in half. I tend to do this when I' experimenting - if it doesn't work, I haven't wasted much and if it does work, I have a piece big enough to use.
Back to my felt, I misted it with water - quite alot of water, and then added Pixie Powders in the usual way. I used Plum Twist, Sun Yellow and Ancient Copper. You don't get such an immediate reaction as you do on card, it's a slow explosion. Cool though! Now, this isn't colour fast so if you do this, don't wash it unless you want the colour to come out.
Now, you may be wondering why you would do this on felt and not just on card as you would normally do? Well, you could, and it would look fabulous. However, here, it's all about the texture you get from using the felt. I have used every single scrap of my felt background, using the leftover bits on my foldover flowers and on the little flowers on my blossoming branch.
I made a frame out of Milk and Rich Plum Card using the Indian Ocean Background and the Double Pierced Background Rectangles. I added it to my felt background, trimming away the excess. I matted onto Milk Card, then Rich Plum and then onto another piece of Milk Card. The overall size falls just shy of A5.
I stamped a sentiment from the Creative Expressions Petite Lavish Sentiments Stamp Set onto Milk Card using Plum Archival. I cut it out using the Pierced Flags Die Set and cut the next sized die out of Rich Plum Card.
I made a couple of flowers from my leftover felt using the Classic Foldover Flowers Die Set.
I cut a pair of leaves out of Milk Card using the Blossoming Branch. I cut the tiny flowers out of my remaining scraps of felt and added a 3mm Cream Pearl to the centre of each tiny flower.
I'll be back tomorrow with another sneak peek.
Thanks for stopping by.
Julia.
www.juliawattscrafts.co.uk
Free card with all website orders over £10 (Add a note to your order in your cart).
As promised, today I have a sneak peek for you from the One Day Special that I'm launching on Hochanda at 6pm on Boxing Day. I know it's a busy time with family and friends but I do hope that some of you can tune in.
The shows are all about backgrounds. The ODS bundle comprises of some Sue Wilson Background Dies and there are a few more background dies available outside of the bundle and some Finishing Touches Dies too. For me, the show is not just about the dies (which are all lovely!) but it's about the backgrounds you create to use with them and the mediums you can use to create those backgrounds. There are lots and lots of goodies on the shows and quite a few on pick & mix so hopefully, there'll be something for everyone. I've certainly had alot of fun creating the samples - I would have kept going if I hadn't another show on 30th December to prep for!
Anyhow, here's your sneak peek for today -
This is one of those cards that really does look better in real life. For the background, I have used Pixie Powders on felt! Who knew how fabulous it would look?
I used a piece of Ivory Felt. It comes in a pack of 10 sheets. Each sheet is 9" square. I've cut a sheet in half. I tend to do this when I' experimenting - if it doesn't work, I haven't wasted much and if it does work, I have a piece big enough to use.
Back to my felt, I misted it with water - quite alot of water, and then added Pixie Powders in the usual way. I used Plum Twist, Sun Yellow and Ancient Copper. You don't get such an immediate reaction as you do on card, it's a slow explosion. Cool though! Now, this isn't colour fast so if you do this, don't wash it unless you want the colour to come out.
Now, you may be wondering why you would do this on felt and not just on card as you would normally do? Well, you could, and it would look fabulous. However, here, it's all about the texture you get from using the felt. I have used every single scrap of my felt background, using the leftover bits on my foldover flowers and on the little flowers on my blossoming branch.
I made a frame out of Milk and Rich Plum Card using the Indian Ocean Background and the Double Pierced Background Rectangles. I added it to my felt background, trimming away the excess. I matted onto Milk Card, then Rich Plum and then onto another piece of Milk Card. The overall size falls just shy of A5.
I stamped a sentiment from the Creative Expressions Petite Lavish Sentiments Stamp Set onto Milk Card using Plum Archival. I cut it out using the Pierced Flags Die Set and cut the next sized die out of Rich Plum Card.
I made a couple of flowers from my leftover felt using the Classic Foldover Flowers Die Set.
I'll be back tomorrow with another sneak peek.
Thanks for stopping by.
Julia.
www.juliawattscrafts.co.uk
Free card with all website orders over £10 (Add a note to your order in your cart).
Monday, 14 November 2016
You're the Best
Hi Bloggers.
Thank you for your kind wishes for my Mom. My Dad fetched her home yesterday. She's much better than I expected and the doctors are hopeful that she'll be back to normal in a few weeks.
I spent yesterday catching up with all the website orders and all outstanding orders will be posted this morning.
Here's today's card -
I started by spreading some CS Phill Martin Chic Magenta Sparkle Texture Paste through the Spirelli Mask onto Black Gloss Card. I put it aside to dry (approx 2 hours). I cut a frame out of Black Card using Sue Wilson's Double Pierced Circles. I added to my STP background, once dry, using 3D Foam, trimming away the excess using scissors.
I embossed a piece of Coconut White using the Creative Expressions Jacobean Floral Embossing Folder. and added some White Pearl Corners.
I stamped the sentiment from Phill Martin's Butterfly Elegance Sentiments onto Coconut White Card using Jet Black Archival. I cut it out using Sue's Madeleine Die Set. I used the same die set to cut a black mat and a decorative white mat.
I covered a piece of Coconut White Card with CS Dark Cherry Gilding Polish. I cut solid flowers from it using Sue's Striped Nasturtium Die Set. I cut the open flowers from the set out of Black Card. I glued the flowers together in the centres only and added an 8mm White Pearl to the centres. I cut some leaves out of Coconut White Card using Sue's Olive Branch Die Set.
I assembled the card as shown piercing around the edges using my Tim Holtz Ruler, Precision Probe and Piercing Mat.
John Lockwood is launching a One Day Special on Hochanda this evening at 8pm with some more Sue Wilson Dies from the September release. I'm offering 10% discount on items I have on my website from the shows. You can find them here. Discount applies till midnight tomorrow night or while stocks last. Discount will be applied at checkout.
Now to the winners of the cards from the giveaways last week are -
Monday Giveaway - Littlelamb
Tuesday Giveaway - nattyboots
Wednesday Giveaway - Maria Illsley
Thursday Giveaway - Marion Scott
Freebie Friday - Rosie
Please email me at juliawattscrafts@gmail.com with your addresses and I'll pop your cards in the post.
Thanks for stopping by.
Julia.
www.juliawattscrafts.co.uk
Free card with all website orders (ask for one in the comments box at checkout).
Deal of the Day today (14th November) - Sue Wilson Classic Foldover Flowers Die Set only £7.99!
Thank you for your kind wishes for my Mom. My Dad fetched her home yesterday. She's much better than I expected and the doctors are hopeful that she'll be back to normal in a few weeks.
I spent yesterday catching up with all the website orders and all outstanding orders will be posted this morning.
Here's today's card -
I started by spreading some CS Phill Martin Chic Magenta Sparkle Texture Paste through the Spirelli Mask onto Black Gloss Card. I put it aside to dry (approx 2 hours). I cut a frame out of Black Card using Sue Wilson's Double Pierced Circles. I added to my STP background, once dry, using 3D Foam, trimming away the excess using scissors.
I embossed a piece of Coconut White using the Creative Expressions Jacobean Floral Embossing Folder. and added some White Pearl Corners.
I stamped the sentiment from Phill Martin's Butterfly Elegance Sentiments onto Coconut White Card using Jet Black Archival. I cut it out using Sue's Madeleine Die Set. I used the same die set to cut a black mat and a decorative white mat.
I covered a piece of Coconut White Card with CS Dark Cherry Gilding Polish. I cut solid flowers from it using Sue's Striped Nasturtium Die Set. I cut the open flowers from the set out of Black Card. I glued the flowers together in the centres only and added an 8mm White Pearl to the centres. I cut some leaves out of Coconut White Card using Sue's Olive Branch Die Set.
I assembled the card as shown piercing around the edges using my Tim Holtz Ruler, Precision Probe and Piercing Mat.
John Lockwood is launching a One Day Special on Hochanda this evening at 8pm with some more Sue Wilson Dies from the September release. I'm offering 10% discount on items I have on my website from the shows. You can find them here. Discount applies till midnight tomorrow night or while stocks last. Discount will be applied at checkout.
Now to the winners of the cards from the giveaways last week are -
Monday Giveaway - Littlelamb
Tuesday Giveaway - nattyboots
Wednesday Giveaway - Maria Illsley
Thursday Giveaway - Marion Scott
Freebie Friday - Rosie
Please email me at juliawattscrafts@gmail.com with your addresses and I'll pop your cards in the post.
Thanks for stopping by.
Julia.
www.juliawattscrafts.co.uk
Free card with all website orders (ask for one in the comments box at checkout).
Deal of the Day today (14th November) - Sue Wilson Classic Foldover Flowers Die Set only £7.99!
Thursday, 24 March 2016
Let there be love
Hi Bloggers.
Back from a very busy One Day Special. Hope you enjoyed the shows - they are really lovely dies and that paper pad! Well, I hope you got yours!
Today will be spent doing post, unpacking, washing and trying to sort out the huge amount of website stock that is currently sat in my lounge! I really need to get on with my next post for the Spellbinders Blog and I have a couple of projects to do for Making Cards Magazine. How many hours are there in a day??
Here's today's card -
When I was cutting the dies to go on the sample boards, I thought the waste from the little berries die in the Spellbinders Labels Fifty Decorative Accents looked like it would be good to ink through. So, in a moment of madness, I cut the die many times in a square of foundations card to make my own mask. I used my mask to create my background, first inking though it onto Milk Card with CS Rose Blush Colour Cloud applied using a Smoothie. I then rotated my mask and inked through it with CS Spring Bluebell Colour Cloud applied using a Smoothie. I ran my Rose Blush inked Smoothie around the very edges of the card.
I stamped the sentiment from Phill Martin's Mini Baroque Inspirational Sentiments Stamp Set onto Milk Card using Cobalt Archival. I cut it out using a Spellbinders Labels 50 Decorative Accents die and inked through the die with Rose Blush Colour Cloud.
I cut the largest die in the same set out of Milk Card and again inked through the die with Rose Blush Colour Cloud.
I cut the 4 flower die and the swag die from the Spellbinders Floral Berry Accents Die Set out of Milk Card and inked through the die with Rose Blush Colour Cloud. I popped some CS True White Detail Embossing Powder into a bag and added a little CS Phill Martin Chic Magenta Mica Powder and gave it a shake. I added Clear Perfect Medium, my embossing powder mix and heat set. I shaped the flowers and added them to the swag die cut.
I assembled the card as shown adding some Cream Pearls and piercing around the edges using my Tim Holtz Ruler, Precision Probe and Piercing Mat.
Pixie Powders are now in stock and any orders placed over the last few days will be sent out today. Here's a reminder of some of the cool backgrounds you can make with them - you can even paint with them. Any cards not yet seen here on the blog will be featured very soon!
You can find all 20 colours of Pixie Powders on my website here. £2.99 each.
Cosmic Shimmer Brilliant Sparkle Embossing Powders which sold out very quickly on last week's Justrite One Day Special are now in stock. You can find them here. Here's a reminder of a few of the cards I've made with them -
I have also received stock of the new CS Metallic Gilding Polishes as shown on Hochanda on John Lockwood's shows earlier this week. You can find them here. I have 9 of the 12 colours. I will watch out for stock of the 3 missing colours to become available.
I also have another brand new Cosmic Shimmer product called Diamond Dust. It's an ultra fine glitter that looks different on white and black card. You can find them here.
Thanks for stopping by.
Julia.
www.juliawattscrafts.co.uk
Free card with all website orders (ask for one in the comments box at checkout).
Deal of the Day today (24th March) - Sue Wilson Tessa Die Set only £12.99!
Back from a very busy One Day Special. Hope you enjoyed the shows - they are really lovely dies and that paper pad! Well, I hope you got yours!
Today will be spent doing post, unpacking, washing and trying to sort out the huge amount of website stock that is currently sat in my lounge! I really need to get on with my next post for the Spellbinders Blog and I have a couple of projects to do for Making Cards Magazine. How many hours are there in a day??
Here's today's card -
When I was cutting the dies to go on the sample boards, I thought the waste from the little berries die in the Spellbinders Labels Fifty Decorative Accents looked like it would be good to ink through. So, in a moment of madness, I cut the die many times in a square of foundations card to make my own mask. I used my mask to create my background, first inking though it onto Milk Card with CS Rose Blush Colour Cloud applied using a Smoothie. I then rotated my mask and inked through it with CS Spring Bluebell Colour Cloud applied using a Smoothie. I ran my Rose Blush inked Smoothie around the very edges of the card.
I stamped the sentiment from Phill Martin's Mini Baroque Inspirational Sentiments Stamp Set onto Milk Card using Cobalt Archival. I cut it out using a Spellbinders Labels 50 Decorative Accents die and inked through the die with Rose Blush Colour Cloud.
I cut the 4 flower die and the swag die from the Spellbinders Floral Berry Accents Die Set out of Milk Card and inked through the die with Rose Blush Colour Cloud. I popped some CS True White Detail Embossing Powder into a bag and added a little CS Phill Martin Chic Magenta Mica Powder and gave it a shake. I added Clear Perfect Medium, my embossing powder mix and heat set. I shaped the flowers and added them to the swag die cut.
I assembled the card as shown adding some Cream Pearls and piercing around the edges using my Tim Holtz Ruler, Precision Probe and Piercing Mat.
Pixie Powders are now in stock and any orders placed over the last few days will be sent out today. Here's a reminder of some of the cool backgrounds you can make with them - you can even paint with them. Any cards not yet seen here on the blog will be featured very soon!
You can find all 20 colours of Pixie Powders on my website here. £2.99 each.
Cosmic Shimmer Brilliant Sparkle Embossing Powders which sold out very quickly on last week's Justrite One Day Special are now in stock. You can find them here. Here's a reminder of a few of the cards I've made with them -
I have also received stock of the new CS Metallic Gilding Polishes as shown on Hochanda on John Lockwood's shows earlier this week. You can find them here. I have 9 of the 12 colours. I will watch out for stock of the 3 missing colours to become available.
I also have another brand new Cosmic Shimmer product called Diamond Dust. It's an ultra fine glitter that looks different on white and black card. You can find them here.
Thanks for stopping by.
Julia.
www.juliawattscrafts.co.uk
Free card with all website orders (ask for one in the comments box at checkout).
Deal of the Day today (24th March) - Sue Wilson Tessa Die Set only £12.99!
Monday, 1 February 2016
Wishing You a Beautiful Day
Hi Bloggers.
Here's today's card -
For the background, I ran a piece of Milk Card through the Spellbinders Platinum Machine with the Couture Creations Velvet Tea Lights Embossing Folder. I ran it through a second time to extend the design and inked around the edges with Scarlet Woman Colour Cloud using a Smoothie.
I stamped the sentiment from the Creative Expressions Fabulous Sentiments Stamp Set onto Milk Card using Jet Black Archival. I cut it out using middle sized die from the Couture Creations Scrolled Tomentosa Die Set and inked through the die with Scarlet Woman.
I cut the largest die in the Scrolled Tomentosa Die Set out of Black Card.
I cut the larger of the corner dies from the Couture Creations Malvoisie Corners Die Set out of Ruby Card 4 times and arranged them around the edges of the card as shown adding some 5mm Cream Pearls as shown.
I assembled the card as shown piercing around the edges using my Tim Holtz Ruler, Precision Probe and Piercing Mat.
New to my website are 2 gorgeous Craft Consortium 12 x 12 Paper Pads -
English Carden -
and Wild Rose -
Also a new Sentiments Stamp Set from Sue Wilson - Petite Lavish Sentiments
The winner of the card from Freebie Friday on 29th January is ...................
Please email me at juliawattscrafts@gmail.com with your address and I'll pop it in the post.
Thanks for stopping by.
Julia.
www.juliawattscrafts.co.uk
Free card with all website orders (ask for one in the comments box at checkout).
Deal of the Day today (1st February) - Sue Wilson Classic Foldover Flowers Die Set only £9.99!
Here's today's card -
For the background, I ran a piece of Milk Card through the Spellbinders Platinum Machine with the Couture Creations Velvet Tea Lights Embossing Folder. I ran it through a second time to extend the design and inked around the edges with Scarlet Woman Colour Cloud using a Smoothie.
I stamped the sentiment from the Creative Expressions Fabulous Sentiments Stamp Set onto Milk Card using Jet Black Archival. I cut it out using middle sized die from the Couture Creations Scrolled Tomentosa Die Set and inked through the die with Scarlet Woman.
I cut the largest die in the Scrolled Tomentosa Die Set out of Black Card.
I cut the larger of the corner dies from the Couture Creations Malvoisie Corners Die Set out of Ruby Card 4 times and arranged them around the edges of the card as shown adding some 5mm Cream Pearls as shown.
I assembled the card as shown piercing around the edges using my Tim Holtz Ruler, Precision Probe and Piercing Mat.
New to my website are 2 gorgeous Craft Consortium 12 x 12 Paper Pads -
English Carden -
and Wild Rose -
Also a new Sentiments Stamp Set from Sue Wilson - Petite Lavish Sentiments
The winner of the card from Freebie Friday on 29th January is ...................
Sue Macfall
Thanks for stopping by.
Julia.
www.juliawattscrafts.co.uk
Free card with all website orders (ask for one in the comments box at checkout).
Deal of the Day today (1st February) - Sue Wilson Classic Foldover Flowers Die Set only £9.99!
Monday, 17 August 2015
Not just for Christmas!
Hi Bloggers.
I hope your weekend was better than mine! I spent all day Saturday till 9pm doing my accounts - a job I absolutely hate and one of the perks of being self employed - NOT! Then I had a mad panic yesterday after making today's card I couldn't get it loaded off my camera on to my pc. I have upgraded to Windows 10 and, as it turns out, there isn't a driver for my camera yet on Windows 10. I discovered that after about an hour of digging around googling all over the place! Had a nice web chat with Ferdinand from Sony who suggested that I put my SD card from my camera directly into my PC! I felt like such an idiot - goodness knows why I didn't think of it. I'm just so used to my photos loading automatically when I plug my camera in. Anyway, at least I found a way around it and can continue my daily blog posts!
Today I'm up in Loughbrough at That's Really Crafty running a Christmas themed workshop. Should be a good day. Also today, my mate Phill Martin has shows on Create & Craft TV at 4pm and 7pm with some of his new Christmas range. I made this card yesterday to show that his new Frosty colours are not just for Christmas!
I started by spreading some PM Frosty Blossom Sparkle Texture Paste through the Criss Cross Mask onto a paper from Phill's Chic Floral Paper Pad. I put it aside to dry (about an hour).
For the main background, I ran a piece of Coconut White Card through the Grand Calibur with the new Creative Expressions Twinkle Twinkle Large Embossing Folder. I popped a White Pearl Corner in each corner.
I dusted a piece of Coconut White Card with my Anti Static Bag and popped it dusted side up onto my tan mat which was on my pink embossing plate. I then inked up the deboss die from Sue Wilson's Classic Adorned Design Noble Die Set using Perfect Medium and popped it inked side down onto my dusted card. I added my base plate and ran it through the Grand Calibur. I removed the die, added some PM Cosmic Shimmer Frosty Blossom Embossing Powder and heat set. I removed the excess mica using a dry wet wipe. I cut the frame out using the plain dies either side of the deboss die. I used Sue's Lavish Accented Design Noble Die Set to cut a mat from the plain side of a paper from one of Phill's Frosty Christmas Holly Paper Pad.
I stamped the sentiment from Phill Chic Floral Everyday Border Sentiments Stamp Set using PM Cosmic Shimmer Frosty Blossom Colour Cloud Blending Ink and a Smoothie (it's easier to see in the flesh!). I cut it out using Sue's Pierced Flags Die Set and cut a mat out of the waste of the Frosty Christmas Holly Paper.
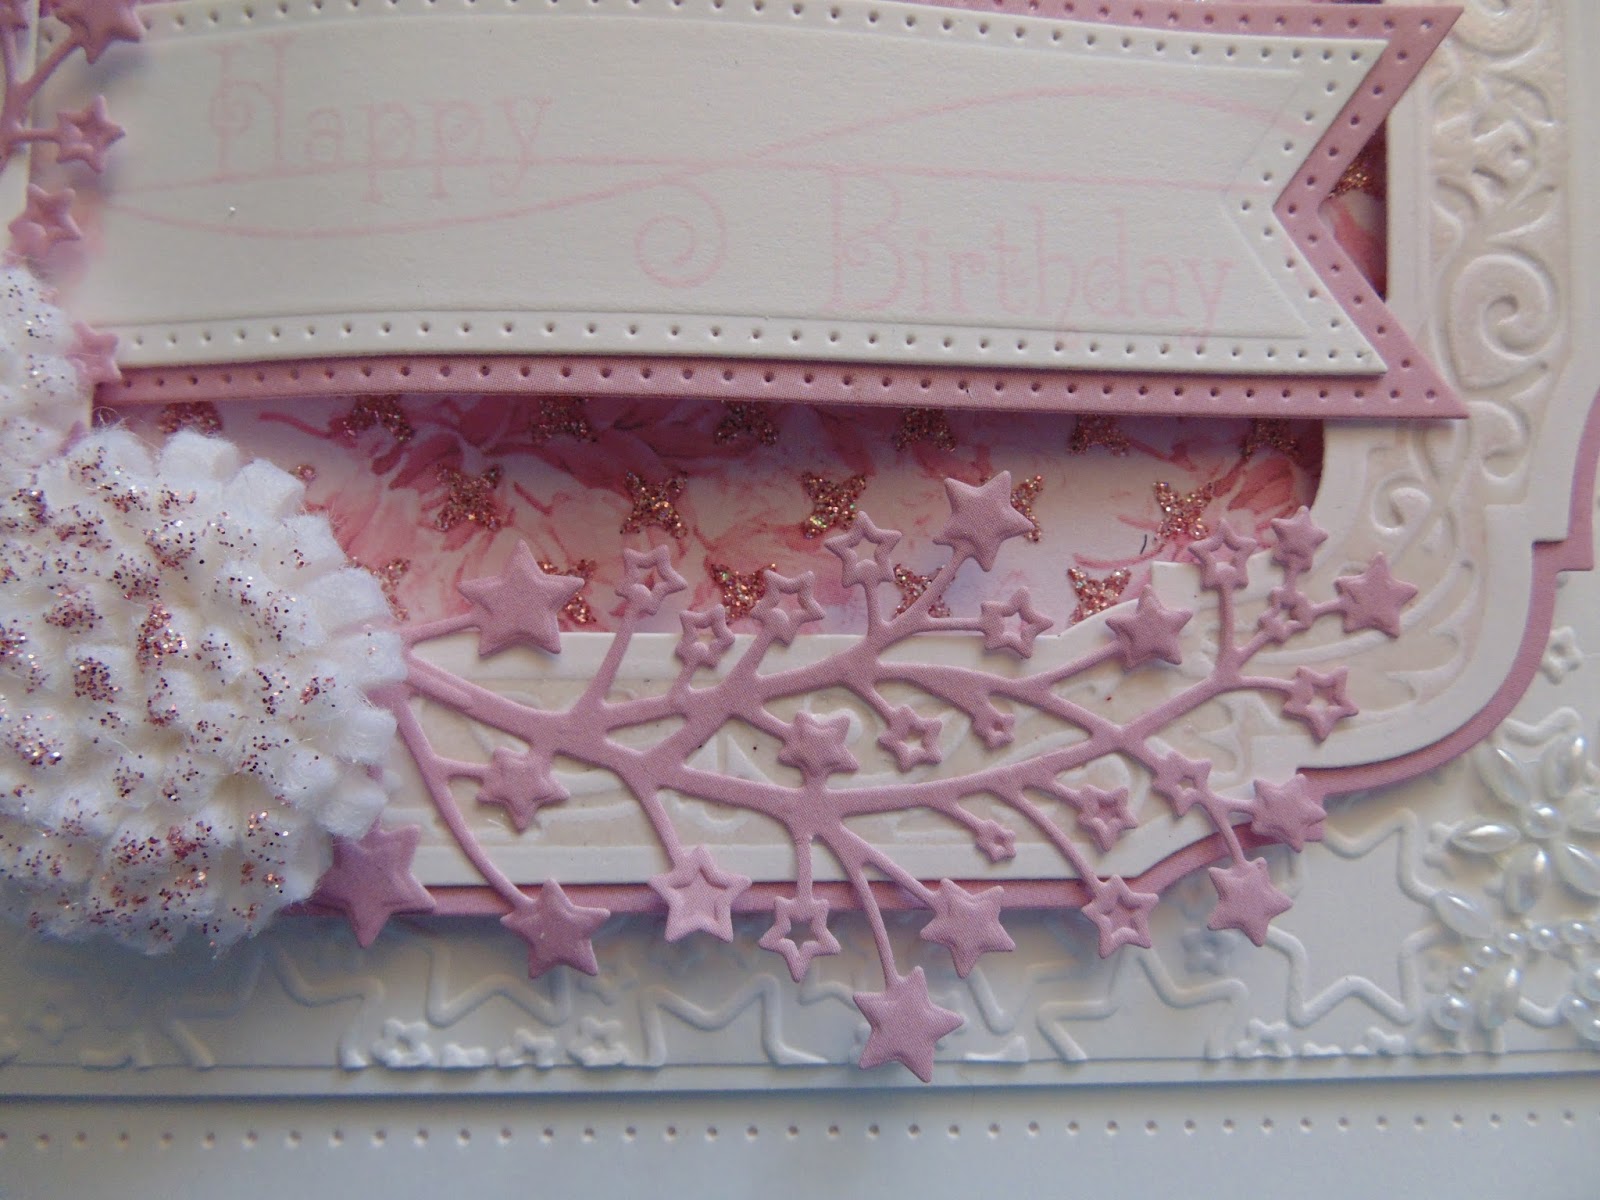
I made a flower out of felt from the Wedding Felt Pack using Sue's Classic Foldover Flower Die Set (see my video here). I popped a little PM Cosmic Shimmer Frosty Blossom Twinkles onto my Craft Sheet. I picked it up onto a piece of Cut n Dry Foam and dabbed it onto my flowers.
I cut a couple of Sue's Star Sprays out of Frosty Christmas Holly Paper.
I assembled the card as shown piercing around the edges using my Tim Holtz Ruler, Precision Probe and Piercing Mat. The pink mat is Coconut White Card - I've inked around the edges of it with Frosty Blossom Colour Cloud using a Smoothie.
As I'm out all day - I'll announce the winner of the card from Freebie Friday some time this evening. Also, as I'm out all day, any orders on my website placed this weekend and today won't be in the post till tomorrow - sorry about that.
Thanks for stopping by.
Julia.
www.juliawattscrafts.co.uk
Ask for a free card (in the order comments box at checkout) when you order in August!
I hope your weekend was better than mine! I spent all day Saturday till 9pm doing my accounts - a job I absolutely hate and one of the perks of being self employed - NOT! Then I had a mad panic yesterday after making today's card I couldn't get it loaded off my camera on to my pc. I have upgraded to Windows 10 and, as it turns out, there isn't a driver for my camera yet on Windows 10. I discovered that after about an hour of digging around googling all over the place! Had a nice web chat with Ferdinand from Sony who suggested that I put my SD card from my camera directly into my PC! I felt like such an idiot - goodness knows why I didn't think of it. I'm just so used to my photos loading automatically when I plug my camera in. Anyway, at least I found a way around it and can continue my daily blog posts!
Today I'm up in Loughbrough at That's Really Crafty running a Christmas themed workshop. Should be a good day. Also today, my mate Phill Martin has shows on Create & Craft TV at 4pm and 7pm with some of his new Christmas range. I made this card yesterday to show that his new Frosty colours are not just for Christmas!
I started by spreading some PM Frosty Blossom Sparkle Texture Paste through the Criss Cross Mask onto a paper from Phill's Chic Floral Paper Pad. I put it aside to dry (about an hour).
For the main background, I ran a piece of Coconut White Card through the Grand Calibur with the new Creative Expressions Twinkle Twinkle Large Embossing Folder. I popped a White Pearl Corner in each corner.
I dusted a piece of Coconut White Card with my Anti Static Bag and popped it dusted side up onto my tan mat which was on my pink embossing plate. I then inked up the deboss die from Sue Wilson's Classic Adorned Design Noble Die Set using Perfect Medium and popped it inked side down onto my dusted card. I added my base plate and ran it through the Grand Calibur. I removed the die, added some PM Cosmic Shimmer Frosty Blossom Embossing Powder and heat set. I removed the excess mica using a dry wet wipe. I cut the frame out using the plain dies either side of the deboss die. I used Sue's Lavish Accented Design Noble Die Set to cut a mat from the plain side of a paper from one of Phill's Frosty Christmas Holly Paper Pad.
I stamped the sentiment from Phill Chic Floral Everyday Border Sentiments Stamp Set using PM Cosmic Shimmer Frosty Blossom Colour Cloud Blending Ink and a Smoothie (it's easier to see in the flesh!). I cut it out using Sue's Pierced Flags Die Set and cut a mat out of the waste of the Frosty Christmas Holly Paper.
I made a flower out of felt from the Wedding Felt Pack using Sue's Classic Foldover Flower Die Set (see my video here). I popped a little PM Cosmic Shimmer Frosty Blossom Twinkles onto my Craft Sheet. I picked it up onto a piece of Cut n Dry Foam and dabbed it onto my flowers.
I cut a couple of Sue's Star Sprays out of Frosty Christmas Holly Paper.
I assembled the card as shown piercing around the edges using my Tim Holtz Ruler, Precision Probe and Piercing Mat. The pink mat is Coconut White Card - I've inked around the edges of it with Frosty Blossom Colour Cloud using a Smoothie.
As I'm out all day - I'll announce the winner of the card from Freebie Friday some time this evening. Also, as I'm out all day, any orders on my website placed this weekend and today won't be in the post till tomorrow - sorry about that.
Thanks for stopping by.
Julia.
www.juliawattscrafts.co.uk
Ask for a free card (in the order comments box at checkout) when you order in August!
Subscribe to:
Posts (Atom)