Showing posts with label Achival. Show all posts

Saturday, 28 July 2012

Wish

Hi Bloggers.

Another favourite card today from the Spellbinders Pick of the Week (I know I keep saying that - we'll come to the ones I don't like soon enough!). When I started this card I knew I wanted to include a glittered mask on top of a couple of the Venetian Motifs and that was it. Then I saw this post on Sue Wilson's Blog. I had forgotten all about the background technique Sue had taught me a couple of years ago - it was just what I wanted for this card.


To make the background you can either read about it on Sue's blog, watch her demo it on her DVD (if you're lucky enough to own it) or read my explanation here. You need a piece of acetate bigger than the size you want to end up with. Squiggle some Clear Crystal Lacquer over it. Then drop some Alcohol inks randomly all over. I used Pool, Stonewashed and Pitch Black. Then sprinkle some mica powder over - be generous - but you don't need to cover the whole area! I used Silver Lustre from the Metallics Set. Scrunch up a piece of white tissue paper (larger than the size of the acetate), open it out and pop in on top of the now coloured acetate. You can add more alcohol ink now if you wish if you have some gaps. Now leave it to dry for a couple of hours.

I cut a Venetian Motif out of white card and another out of black card - it's easier to use a piece of greaseproof paper between the die and the paper with this one. I put a piece of double-sided adhesive onto a piece of black card and cut out the mask from the Venetian Accents die set. I peeled off the backing sheet and dipped the mask into some Cosmic Shimmer Aurora Crystal Glitter.


I only wanted a small sentiment so I masked off the words 'make' and 'a' from the sentiment on the Creative Expressions Dandelion Wishes Stamp Set, stamped using Cobalt Archival and embossed with Cosmic Shimmer Clear Embossing Powder. I cut it out using the tag die in the Venetian Accents die set. I cut another tag out of black card. I cut it in half and then glued it to the back of the sentiment tag to create a shadow.


I assembled the card as shown adding some dots of Cosmic Shimmer Pearlescent PVA in Black Pearl around the edges.

Hope you try this one at home.

Thanks for stopping by.

Julia.

Friday, 27 July 2012

Cameras

Hi Bloggers.

Today I'm sharing a masculine card from the Pick of the Week.


I stamped the image from the Creative Expressions Vintage Photo Stamp Set using Coffee Archival. I cut it out using one of the Spellbinders Back to Basics Hexagons and inked through the die with Vintage Photo Distress Ink. I cut then next 2 sizes of Hexagon dies from rust and brown card.

I stamped the word 'CAMERAS' using Coffee Archival and cut it out using one of the dies from the Back to Basics Tags Die Set. I inked through the die with Vintage Photo.


For the background, I ran a piece of Milk Card through the Grand Calibur with the Spellbinders Kickin' Rubber M-Bossabilities Folder. I inked all over with Vintage Photo. I wrapped some Baker's Twine from the Earthtones Set around the bottom section of the background and added a Creative Expressions Watch Face Charm.


I assembled the card as shown adding an Idea-ology Hinge Clip to the tag and some dots of Cosmic Shimmer Pearlescent PVA in Choco Brown around the edges.

Thanks for stopping by.

Julia.

Thursday, 26 July 2012

Concertina

Hi Bloggers.

Bit of folding on this card from the Pick of the Week.


For the background, I popped some Coconut White card through the Grand Calibur with the Radiant Embossing Folder. I put it through a second time to extend the pattern. I inked around the edges with Victorian Velvet Distress Ink using Cut n Dry Foam.

I cut the smallest of the Spellbinders Grand Decorative Ovals One dies out of white card and inked through the die with Victorian Velvet. I cut the square motif from the Asian Accents die set out of pink card. I then cut 2 of the circles from the Asian Accents die set and inked through the die with Victorian Velvet. I scored across each of the circle die cuts, cut to the centre along one of the score lines and then folded. I joined the 2 circles together using Cosmic Shimmer Dies Clear Glue. I cut a little piece from white card using the Asian Accents die set, inking through the die with Victorian Velvet. I assembled the feature piece on top of the background as shown adding a Studio 490 Embellish Your Art Pink & Gold Flower Button.


I stamped the sentiment from the Creative Expressions Dandelion Wishes Stamp Set using Jet Black Archival and embossed with Cosmic Shimmer Clear Embossing Powder. I cut it out using Spellbinders Labels Twenty-Six and inked through the die with Victorian Velvet. I added an Idea-ology Memo Pin to it. I put a foam pad on the back of a Pink Zipper Rose and pushed the memo pin into it. I cut 2 'leaves' out of pink card using the Venetian Motifs die set and added them to my background. I popped the zipper rose sentiment piece on top.


I finished the card by adding some dots of Cosmic Shimmer Pearlescent PVA in Cosmic Pearl (white) around the edges.

Hope you like this one.

Thanks for stopping by.

Julia.

Wednesday, 25 July 2012

Wildflower

Hi Bloggers.

Here's another of my favourite samples from the Spellbinders Pick of the week.


For the background, I ran a piece of Kraftcore through the Grand Calibur with the Couture Creations Ornate Diamonds Embossing Folder. I popped it through a second time to extend the pattern. I then sanded it to reveal the core.

I stamped the sentiment from the Creative Expressions Dandelion Wishes Stamp Set onto Milk Card using Jet Black Archival and embossed with Cosmic Shimmer Clear Embossing Powder. I cut it out using Spellbinders Labels Twenty-Eight and inked through the die with Vintage Photo Distress Ink using Cut n Dry Foam. I cut the next size up in the Labels Twenty-Eight die set again from Milk Card and again inked though the die with Vintage Photo.


I cut 2 square motifs from the Spellbinders Asian Motifs die set out of Black Card. I cut a border from the Spellbinders Asian Accents die set again out of Black Card. I mounted the border on to a strip of Milk Card.

I stamped the wild flower from the Dandelion Wishes Stamp set along a slightly wider strip of Milk Card using Jet Black Archival and edged it with Cut n Dry Foam.


I assembled the background pieces onto a piece of black card and wrapped a piece of Black Silky Crush Ribbon around the bottom section. I pinched it together with a glue dot and then added a bow made from the same ribbon. I added an Idea-ology Fanciful Accoutrement to the centre.


I assembled the card as shown and added some faux stitching around the edges.

Thanks for stopping by.

Julia.

Monday, 23 July 2012

Learn from Yesterday

Hi Bloggers.

Thank you so much for your support over the weekend on the POTW shows and here on the blog. It's much appreciated. It's good to know that you love the new dies as much as I do. Hels Sheridan takes over today with her first show at 3pm with Dawn. Hels made some of the samples that have been shown and the lovely decorations that were made using the Grand dies that were in the show. For those who asked you can access her blog from my right-hand sidebar. You will also find Sue Wilson's, Christine Emberson's and Sam Poole's blog there.

Here's something a bit different from your Spellbinders Pick of the Week.


I started with a piece of Milk card. I popped the Grid Mask on top at a jaunty angle and ran it through the Grand Calibur. I removed the mask and inked all over with Black Soot Distress Ink using Cut n Dry Foam.

I stamped the sentiment from the Creative Expressions Time Flies Stamp Set using Jet Black Archival and embossed with Cosmic Shimmer Clear Embossing Powder. I cut it out using Spellbinders Labels Twenty-Eight and inked with Black Soot while still in the die.

I cut a mustache out of black card using the Spellbinders Dear Old Dad die set and added it to the top of the sentiment panel. I cut the pocket out of Kraftcore again from the Dear Old Dad Die Set. At the emboss stage I added the Metal Effect Mask. I sanded it to reveal some of the core.

I stamped the pocket watch from the same stamp set onto Grungepaper using Jet Black Archival. I cut it out and tied some black Baker's Twine from the Primary Set around the top.

I assembled the card as shown and added a Key Charm (secured with Cosmic Shimmer Glue) and some dots of Cosmic Shimmer Pearlescent PVA in Black Pearl around the edges.

Hope you like the card. I've really grown to like the Dear Old Dad die set. Here's another simple card made with it -


Thanks for stopping by.

Julia.

Sunday, 22 July 2012

At the Ballet

Hi Bloggers.

I can have a bit of a lie in today as my first Pick of the Week Show isn't till 4pm. This is another of my favourite samples from the show.


I stamped the image from the Creative Expressions At the Ballet Stamp Set on to Coconut White Card using Jet Black Archival and embossed with Cosmic Shimmer Clear Embossing Powder. I cut the image out using the largest of the Spellbinders Blossom Five dies and inked through the die with Faded Jeans Distress Ink using Cut n Dry Foam.

I cut the smallest of the Grand Decorative Circles One out of blue card and inked through the die with Faded Jeans.


For the background I ran some white card through the Grand Calibur with the Couture Creations Seedling Nouveau Embossing Folder. I popped it though a second time to extend the pattern. I edged it with Faded Jeans.

I cut the middle 3 sizes of the Blossom Five dies out of white card twice. I spritzed them with water to break down the fibres of the card and scrunched each piece up. I opened them up and layered them on top on one another and then pierced a hole in the centre and added a blue brad. I then scruched them up again. I added some Faded Jeans to the edges of the petals.

I cut some 'leaves' from the Spellbinders Venetian Motifs set and inked through the die with Faded Jeans.


I cut 4 corners out of blue card from the Spellbinders Venetian Accents die set and assembled the card as shown adding some dots of Cosmic Shimmer Pearlescent PVA in Cosmic Pearl (white) around the edges and in the centre of each corner.

Hope you can join me later on today at 4pm and 6pm.

Thanks for stopping by.

Julia.

Saturday, 21 July 2012

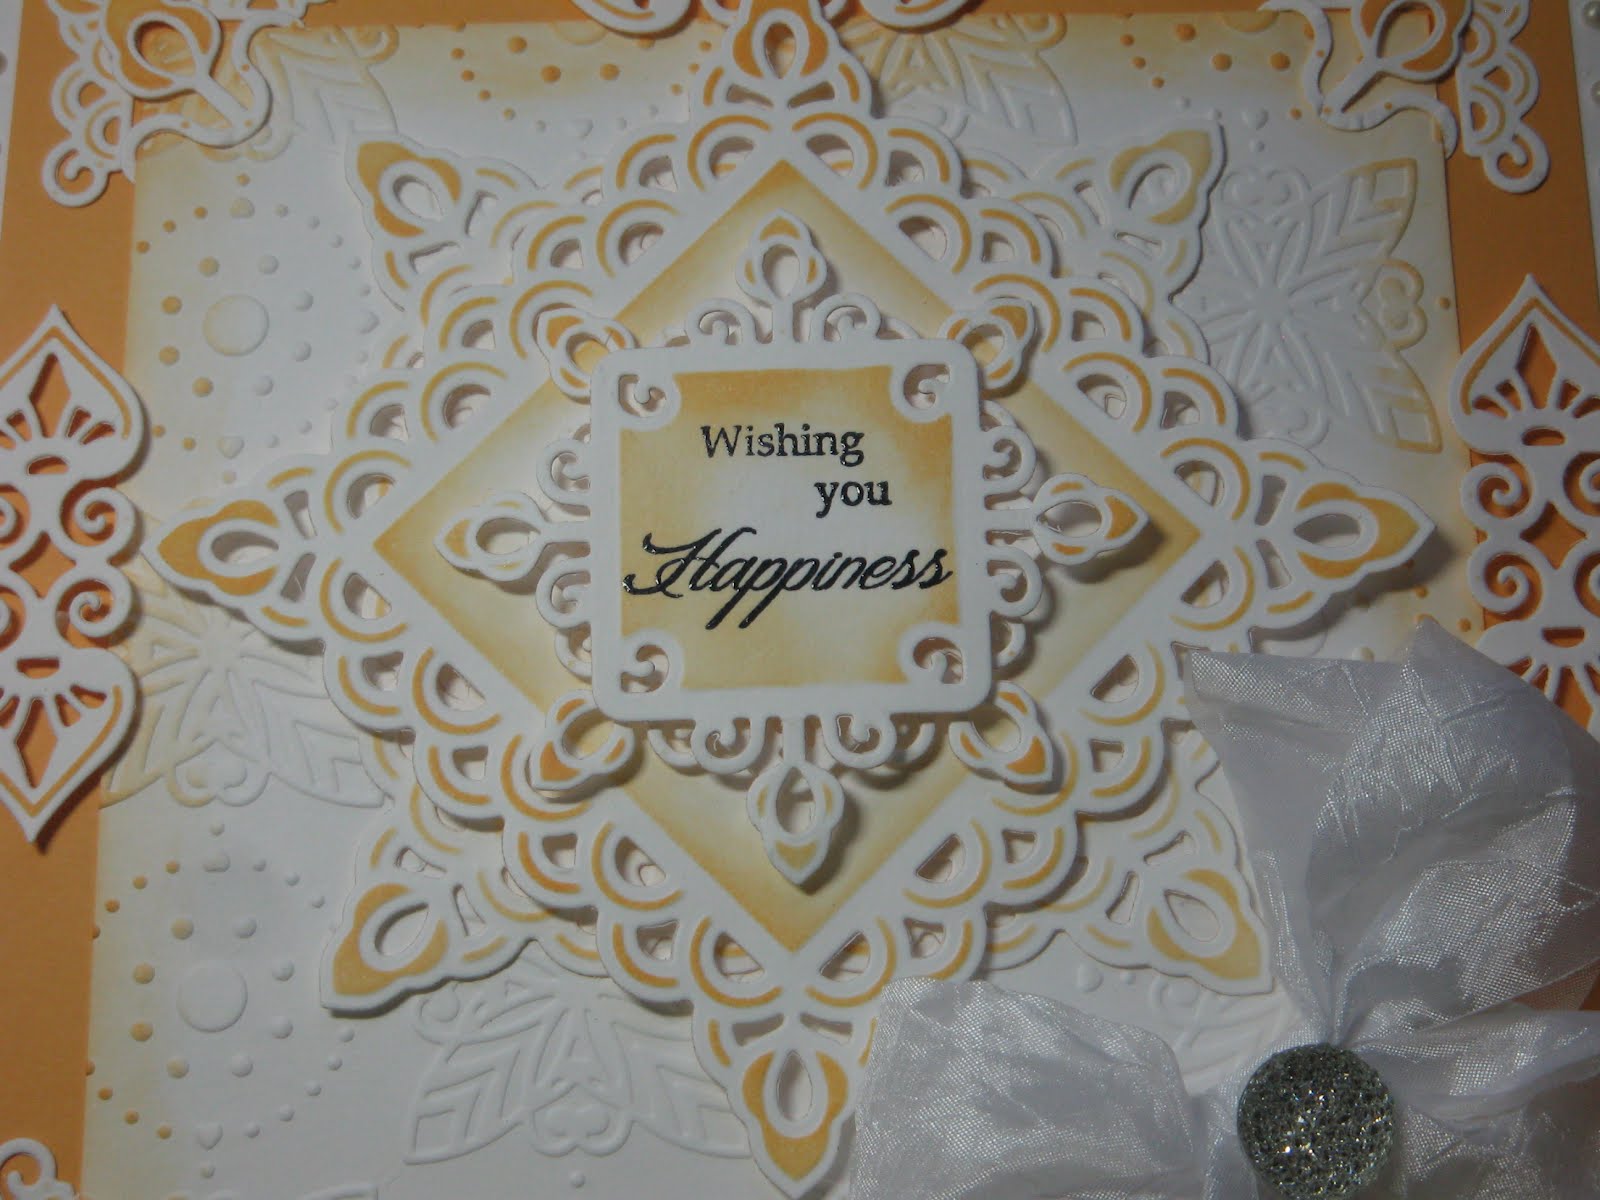
Wishing You Happiness

Hi Bloggers.

Hope you are enjoying the Pick of the Week shows.

Today's card features some more of my favourite dies. Quite a lot of cutting and inking on this one. Hopefully I will get to demo it before they sell out.


I stamped my sentiment from the Creative Expressions Dandelion Wishes Stamp Set using Jet Black Archival and embossed with Cosmic Shimmer Clear Embossing Powder. I cut it out using one of the new Spellbinders Asian Motifs dies and inked through the die with Dried Marigold Distress Ink using Cut n Dry Foam. I cut another of the same shape and 2 of the larger motifs from the same set. I inked with Dried Marigold on all of them.


For the background I ran a piece of Coconut White card through the Grand Calibur with the Couture Creations Radiant Embossing Folder (I really like that one). I popped it through a second time to extend the pattern. I inked around the edges with Dried Marigold using Cut n Dry Foam.


I cut 4 lots of of corners and 4 lots of little accents from the Asian Accents die set and 4 lots of small motifs from the Venetian Motifs die set. I inked through the die on all of them with Dried Marigold.


I tied a double bow out of white silky crush ribbon and added a medium Creative Expressions Dazzler.


I would have added a couple of stick pins but there are none on the show.

I assembled the card as shown adding some dots of Cosmic Shimmer Pearlescent PVA in Cosmic Pearl (White).

I think this might make a good wedding card, what do you think?

4 shows today starting at 8am.

Thanks for stopping by.

Julia.

Friday, 20 July 2012

Spellbinders Pick of the Week - Black & White

Hi Bloggers.

Here's a card that I'm hoping to demo on one of the shows today.


The spotty background has been created by inking through the Small Polka Dots Mask with Black Soot Distress Ink using Cut n Dry Foam.

I stamped the image from the Creative Expressions Gala Event Stamp Set using Jet Black Archival and embossed with Cosmic Shimmer Clear Embossing Powder. I cut the image out using the new Spellbinders Labels Twenty-Eight. This is such a useful labels shape. I think it's the die set that I've used the most when making the samples for the shows. I inked through the die with Black Soot using Cut n Dry Foam.


The gorgeous mask has been cut using the new Spellbinders Venetian Accents die set. The flower is the new Spiral Blossom Four. The 'leaves' are from the new Venetian Motifs die set. I do like it when there are dies that can be used as leaves.


The borders around the edges of the main section have been cut using the Venetian Accents die set. There are 'holding hands' pieces which can be used to hold onto the main panel. The little diamonds are from the waste on the borders. I finished the card by adding some Black Glass Glintz.


Lovely dies, aren't they?

Thanks for stopping by. See you at 12.

Julia.

Sunday, 15 July 2012

Fishin' You A Great Day

Hi Bloggers.

Does anyone remember this stamp set?


It's called Little Lovins 2 from Creative Expressions. It's an A4 stamp set. Sadly it's being discontinued so if you like it, grab it fast from a stockist as it won't be around for much longer. The images on this set are quite large and there's lots of useful sentiments included.

Here's a simple card made with the boy with the fishing rod.


I stamped the image using Jet Black Archival and embossed with Cosmic Shimmer Clear Embossing Powder. I coloured the image in using Cosmic Shimmer Matt Drawing Inks. I cut the image out using the Spellbinders Curved Rectangles. I inked through the die with Peeled Paint Distress Ink using Cut n Dry Foam. Then I made a faux nestie out of terracotta card by drawing around the die used and cut out with scissors.

I stamped the sentiment using Jet Black Archival and embossed with Cosmic Shimmer Clear Embossing Powder. I cut it out at a jaunty angle using a paper trimmer. I inked around the edges using Peeled Paint Distress Ink and Cut n Dry Foam.

I inked along the edges of some Cotton Hemp Ribbon with Peeled Paint and the Cut n Dry. I added a little ink to the centre of the ribbon too. I wrapped it around the backing paper (Junkitz) and secured at the back with tape. I then wrapped some Baker’s Twine from the Earthtones Set around the ribbon a few times and secured at the back as before.

I assembled the card as shown adding a few buttons from my stash and piercing around the edges with my Tim Holtz Design Ruler.

Thanks for stopping by.

Julia.

Saturday, 14 July 2012

Time May be a Great Healer

Hi Bloggers.

This is the last Ethel & Murray card that I have to share with you - for the moment at least. I do have some demo cards to give away so watch out for those.


For the background I popped some Coconut White Card through the Grand Calibur with the Creative Expressions Floral Embossing Folder. I popped it through a second time to extend the pattern. I inked all over with Mustard Seed Distress Ink using Cut n Dry Foam.

I stamped the image from the Creative Expressions Well Adjusted Women Stamp Set using Coffee Archival and embossed with Cosmic Shimmer Clear Embossing Powder. I coloured the image using Cosmic Shimmer Matt Drawing Inks and cut it out. I stamped the image again and cut out using Spellbinders Floral Ovals. I inked through the die with Mustard Seed. I popped the coloured image on top using 3d foam pads.


I stamped the sentiment from the same stamp set and inked round the edges of the panel with Mustard Seed.

I ran a strip of Foundations Floral Dream paper through the Grand Calibur with an inset from the Spellbinders Edgeabilities Classic Postage Stamp die set. I popped it onto some pale yellow card and put a dot of Cosmic Shimmer Pearlescent PVA in Golden Pearl in the centre of each flower.


I assembled the card as shown adding some dots of Golden Pearl PVA around the edges.

Hope you've enjoyed Ethel & Murray. Something different tomorrow - what will it be? Don't know myself yet!

Thanks for stopping by.

Julia.

Friday, 13 July 2012

New Set Of Golf Clubs

Hi Bloggers.

Another of my favourite cards from the shows last Friday.


For the background I ran a piece of Milk Card through the Grand Calibur with the Couture Creations Houndstooth Embossing Folder. I popped it through a second time to extend the pattern. I inked all over with Vintage Photo Distress Ink.

I stamped the image from the Creative Expressions Playing Through Stamp Set using Vintage Photo Distress Ink. I gave it a few minutes to dry and then using a slightly wet paint brush I 'pulled' some of the colour out adding some shade. I cut the image out using the Spellbinders Fleur De Lis Rectangles. I inked through the die with the Vintage Photo using Cut n Dry Foam.


I stamped the sentiment from the same stamp set using Coffee Archival and embossed with Cosmic Shimmer Clear Embossing Powder. I edged the panel with Vintage Photo.


I wrapped some Baker's Twine from the Earthtones Set around the card as shown and added some buttons from my stash.


I assembled the card as shown and added some dots of Cosmic Shimmer Pearlescent PVA in Choco Brown around the edge.

Hope you like this card as much as I do.

Just to let you know that I'm having a bit of a clearout and you'll find lots of bargains in my Amazon Store and on auction on eBay. Please see the right-hand side bar for the links.

Thanks for stopping by.

Julia.

Thursday, 12 July 2012

A Penny Saved

Hi Bloggers.

Not too sure about this card myself but I thought I'd share it anyway. I'm sure you will let me know what you think of it!


For the background I ran some Coconut White Card through the Grand Calibur with the Couture Creations Venus Crest Embossing Folder. I ran it through a second time to extend the pattern. This is such a beautiful design.

I stamped the image from the Creative Expressions Wrinkles Don't Hurt Stamp Set using Coffee Archival and embossed with Cosmic Shimmer Clear Embossing Powder. I coloured the image using Cosmic Shimmer Matt Drawing Inks except for the T-Shirt. I stamped the image onto some green Dot and Dash Foundations Paper with Coffee Archival and embossed with the clear powder. I cut out the T-Shirt and added it to the image using Cosmic Shimmer Dries Clear Glue.


I stamped the sentiment from the same stamp set using Coffee Archival and embossed with Clear Powder. I matted it onto some yellow and green card and then added some Baker's Twine from the Earthtones Set to make it look like a picture hanging on the wall.


I tied a bow using 2 lengths of Moss Green American Seam Binding. I added a Playhouse Posy and a button from my stash threaded with some Baker's Twine. I added a couple of Playhouse Pins to the back of the bow.


I assembled the card as shown.

Thanks for stopping by.

Julia.
Monday, 9 July 2012

Born to Golf

Hi Bloggers.

Today's card is another golfing one.


I stamped the image from the Creative Expressions Playing Through Stamp Set using Coffee Archival and embossed with Cosmic Shimmer Clear Embossing Powder. I coloured the image in using Cosmic Shimmer Matt Drawing Inks. I edged the panel with Faded Jeans Distress Ink using Cut n Dry Foam.

I stamped the sentiment from the same stamp set using the Coffee Archival and embossed with the clear powder. I cut it out using Spellbinders Labels Twenty-Five and inked through the die with Faded Jeans.

I cut a strip of grey card and ran it through the Grand Calibur with the Couture Creations Houndstooth Embossing Folder. I wrapped a piece of Sky Blue American Seam Binding around it.

I assembled the card as shown. The backing paper is from a 6 x 6 pad from Paper Cellar. I looped some Baker's Twine from the Vintage Set and added a button from my stash. I edged with dots of Cosmic Shimmer Pearlescent PVA in Summer Blue.

Thanks for stopping by.

Julia.

Sunday, 8 July 2012

Forced to Work

Hi Bloggers.

Here's a card that was a demo in the 7pm show on Friday.


For the background I popped a piece of Coconut White card through the Grand Calibur with the Creative Expressions Bark Embossing Folder. This is not a repeating pattern but it's possible to almost invisibly extend it by placing the embossed card at the edge of the pattern on the folder and run it through again. If it's a clearly visible join , you can always run a piece of ribbon along it.

I stamped the image from the Creative Expressions Playing Through Stamp Set using coffee archival and embossed with Cosmic Shimmer Clear Embossing Powder. I coloured it in using Cosmic Shimmer Matt Drawing Inks and cut it out. I stamped the image a second time and cut it out using Spellbinders Labels Eight. I inked through the die with Peeled Paint Distress Ink. I mounted the coloured image on top using 3d foam pads.


I wrapped some Moss Green American Seam Binding and some Baker's Twine from the Vintage Set around the card as shown.

I stamped the sentiment from the same stamp set again using coffee archival and embossed with clear powder. I cut it out using Spellbinders Labels Four and inked through the die with Peeled Paint. I popped it on the card as shown. On the show I added a couple of Playhouse Pins.

Simple card but I think any golfing man receiving this would love it.

Thanks for stopping by.

Julia.

Saturday, 7 July 2012

Black and White demo card from yesterday's shows

Hi Bloggers.

Many thanks for your support yesterday and to those of you who emailed in to the studio. Today's card is a demo card from the 7pm show. I wanted to try and show that the image can be in the background and the sentiment the focal piece.


I started with a square piece of Coconut White card. I stamped the image from the Creative Expressions Wrinkles Don't Hurt Stamp set randomly using Jet Black Archival. I then popped the piece into the Couture Creations Radiant Embossing Folder and ran it through the Grand Calibur. I put it through a second time to extend the pattern. I then inked all over with Black Soot Distress Ink using Cut n Dry Foam.

I stamped the sentiment from the same stamp set using Jet Black Archival and embossed with Cosmic Shimmer Clear Embossing Powder. I cut a frame out of black card using 2 dies from Spellbinders Labels Three die set. At the emboss stage I added the Creative Expressions Bark Embossing Folder.


I tied a bow using 2 lengths of Blue White American Seam Binding, spritzed it with water, scrunched it up and dried it with the heat gun. I made a flower out of black card using the Creative Expressions Floral Embossing Folder (see how in this tutorial).


I finished the card off by adding some Creative Expressions Black Rhinestone Swirls and some faux stitching round the edges.

Thanks for stopping by.

Julia.

Friday, 6 July 2012

Ethel & Murray on Create & Craft

Hi Bloggers.

The day has finally arrived. Ethel & Murray will be back on Create & Craft today at 1pm with Dawn and 7pm with Andy. I'm really looking forward to the shows, I hope you are too.

Today's card is the one of the demos I'll hopefully be doing in the 1pm show. This is one of my fave samples which is why it's a demo. Red & Green but not for Christmas!


I stamped the image from the Creative Expressions Fore Stamp Set using Coffee Archival and embossed with Cosmic Shimmer Clear Embossing Powder. I coloured the image in using Cosmic Shimmer Matt Drawing Inks (watch out for new skin tones set being launched today). I edged the image panel with Peeled Paint Distress Ink and popped it onto a piece of red card at a jaunty angle.


I stamped the sentiment from the same stamp set again using the Coffee Archival and embossed with the clear powder. I edged the panel with Peeled Paint and popped it onto some red card.


I put a piece of white card through the Grand Calibur with the Couture Creations Houndstooth Embossing Folder. I put it through a second time to extend the pattern. I then inked all over using Peeled Paint.


I ran 2 pieces of Moss Green American Seam Binding along the background as shown. I added some buttons from my stash and some Fashion Sense Playhouse Pins at the back of the sentiment. I finished the card off with some faux stitching.

Hope you can join me today for the shows.

Thanks for stopping by.

Julia.