Monday, 16 October 2017

Pretty Blue & White woven Christmas Card

Hi Bloggers.

Here's today's card -

I started by popping the Nordic Christmas Mask onto a piece of Sky Blue Card. I spread CS Phill Martin Platinum Sparkle Texture Paste through it. I removed the mask, cleaned it and put my background aside to dry (a couple of hours). I repeated the process on another piece of Sky Blue Card.

Once my backgrounds were dry, I cut the Sue Wilson's Classic Weaving Die from it. I cut Sue's Intermediate Weaving Die out of Coconut White Card twice. I wove single strips of the Intermediate Die Cut through the Sky Blue Classic One.

I made a frame out of Coconut White Card using Sue's Scalloped Lattice Frames Set B and added it to my woven background using 2mm Foam Tape, trimming away the excess using scissors. I matted onto Sky Blue Card and then Coconut White Card.

I popped a piece of CE Double Sided Self Adhesive Sheet onto a piece of Sky Blue Card. I cut the outer die from Sue's Snowman Snow Globe Scene. I trimmed a little from around the edges. I cut both of the dies out of Coconut White Card. I removed the backing sheet and put both die cuts together. I added Sparkle Star CS Diamond Frost to the exposed adhesive.

I cut some poinsettias out of my other background piece using Sue's Classic Poinsettia Die Set. I added CS Glue and CS Silver Chrome Glitterbitz to the centres.

I cut Sue's Holly Swirl out of Coconut White Card twice and both dies in the Berry Bough Set out of Sky Blue Card twice.


The winner of the card from Freebie Friday on 13th October is ...............

Jan on the Fosse

Please email me at juliawattscrafts@gmail.com with your address and I'll pop your card in the post next week.

Thanks for stopping by.

Julia.
www.juliawattscrafts.co.uk

Sunday, 15 October 2017

Clean and Simple

Hi Bloggers.

Here's today's card -

Products used -
Cosmic Shimmer Ultra Thick Embossing Crystals - Clear & Tarnished Gold
Arty Heart Pop-ems
Wendy Vecchi Studio 490 - 3 Cheers for Art
Onyx Black Versafine
3mm Black Pearls
Efcolor Stove
Card - Coconut White & Black


Lisa Horton is continuing with her One Day Special on Hochanda today with shows at 9am, 1pm and 5pm. She also have an hour at 11am with the new Advent Calendar Die Set. I'm offering 10% discount on items I have in stock on my website from the shows, You can find them here. You need to enter code LISAHORTON in the discount code box at checkout. Offer applies till midnight tonight or while stocks last.

Thanks for stopping by.

Julia.
www.juliawattscrafts.co.uk

Saturday, 14 October 2017

Jolly Tag with Clear Ultra Thick Embossing Crystals and Crystal Drops

Hi Bloggers.

A series of quickie posts over the next week or so as I'm heading off to Norfolk today for a workshop in Sheringham tomorrow, then I have 5 days beading and then head down to the New Forest for a workshop in Lyndhusrt next Saturday. I'm not sure if the Wifi will be kind where I am so I have scheduled quickie posts and will add more info if I get chance.

Please note : orders placed on my website during the next week will not be posted out until Monday 23rd October onwards. Special order items will take a little longer than usual. Apologies for any inconvenience caused.

Here's today's project -

Products used -
Wendy Vecchi Art Parts - Tag Toppers & The Guys, Studio 490 Stamp Set - Parisian Art
Distress Oxides - Faded Jeans & Broken China
Cosmic Shimmer - White Gesso, Acrylic Mixed Media Paint - Chelsea Blue, Glitterbitz - Turquoise, Diamond Frost - Sparkle Star, Clear Ultra Thick Embossing Crystals, Crystal Drops - Teal
That Special Touch Mask - Wavy
Lisa Horton - Christmas Wishes Die Set
Efcolor Stove
Coconut White Card
Blue White American Seam Binding


Lisa Horton is launching a new One Day Special on Hochanda today at 6pm with some lovely Sue Wilson dies. I'm offering 10% discount on items I have in stock on my website from the shows, You can find them here. You need to enter code LISAHORTON in the discount code box at checkout. Offer applies till midnight tomorrow night or while stocks last.

Thanks for stopping by.

Julia.
www.juliawattscrafts.co.uk

Friday, 13 October 2017

Freebie Friday

Hi Bloggers.

It's here again! Here's this week's card that needs a new home -

You can read how this card was made here.

Leave a lovely comment below to go into the draw to win it. I will announce the winner on Monday. Be sure to pop back to see if you have won.

Please note : Only comments left below will go into the draw. Comments made on the original post will not count. Information given on the original post was correct at the time that post was published.

Thanks for stopping by.

Julia.
www.juliawattscrafts.co.uk

Thursday, 12 October 2017

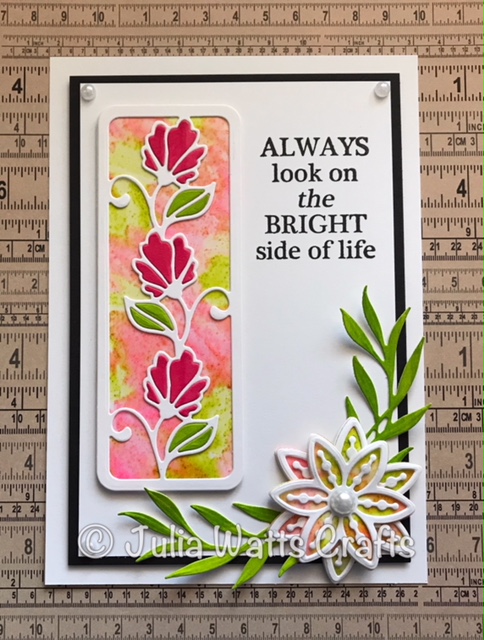
Petite Petal Striplet

Hi Bloggers.

Here's today's card -

I started by creating an acetate background. I popped a little CS Clear Varnish Lacquer onto my Craft Sheet. I added a drop of CS Rose Pink Intense Pigment Stain and a little CS Frosty Dawn Diamond Frost. I added it to a piece of  Heat Emboss Acetate in patches. I added some more Varnish Lacquer to my Craft Sheet and this time added Citrus Lime Intense Pigment Stain and Aurora Sparkle Diamond Frost. I added this to the gaps in my Acetate and then moved both colours around a little so that the while area was covered and put aside to dry (about 20 mins).

I cut both dies from Sue Wilson's Petite Petal Striplet out of Coconut White Card. I cut the outer die out of my Acetate background and out of Coconut White Card. I glued my decorative die cut on top of the acetate and then onto the Coconut White piece.

I popped a little Rose Pink Intense Pigment Stain onto my Craft Sheet and brushed it onto a piece of Coconut White Card. I did the same with Citrus Lime Intense Pigment Stain. I cut the striplet from the both and used the fall away pieces for the flowers and leaves on my striplet panel.

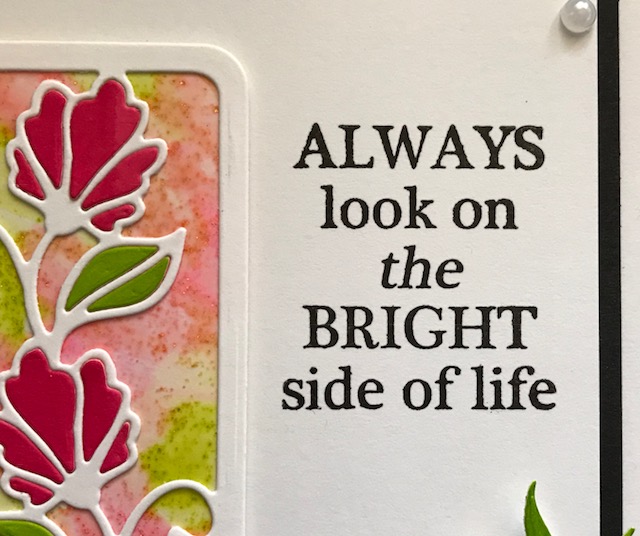
I stamped the sentiment from the Woodware On the Bright Side Stamp Set onto a Piece of Coconut White Card using Onyx Black Versafine Ink. I matted onto Black Card and then Coconut White Card. I added my striplet panel using CE Mounting Cushion.

I cut the largest 2 pairs of dies from Sue's Pinwheel Floral Die Set out of Coconut White Card. I cut the outer dies only out of my Acetate background and out of Coconut White Card. I glued the pieces for each size together and made my flower adding an 8mm White Pearl to the centre.

I cut a pair of leaves using Sue's Windswept Grasses Die Set out of my card that I coloured with the Citrus Lime Intense Pigment Stain.

I completed my card by adding a 5mm White Pearl to the corners.

Thanks for stopping by.

Julia.
www.juliawattscrafts.co.uk

Wednesday, 11 October 2017

Weaving without a Frame

Hi Bloggers.

Here's today's card -

For the background, I used a leftover middle piece of Coconut White Card that I'd cut a frame from using Sue Wilson's Double Pierced Squares. I swiped some Faded Jeans Distress Oxide onto my Craft Sheet. I misted it with water and picked it up onto my card. I dried it using a Heat Tool and repeated the process with Wilted Violet Distress Oxide. I edged with Faded Jeans Distress Oxide using a Smoothie. I matted onto Black Card using CS Glue and then onto Coconut White Card using CE Mounting Cushion.

I then stamped the large text stamp from the Wendy Vecchi Studio 490 Parisian Art Stamp a couple of times using Faded Jeans Oxide direct from the pad.

For my weave, I cut the Striped Weaving Die out of Sky Blue Card and the Intermediate Weaving Die out of Coconut White Card. I popped a piece of CE DS Self Adhesive Sheet onto a piece of Coconut White Card. I measured roughly how much I'd need to cut out the Classic Weaving Die. I trimmed it, added CS Lavender Glitterbitz and cut the Classic Weaving Die out of it.

Leaving the Intermediate die cut with it's ends intact, I wove the Classic and Striped strips through it as shown. Once I was happy with the amount woven, I secured my pieces on the back using DS Tape. I trimmed the Inermediate Die Cut away from it's ends as shown. I also trimmed the Classic and Striped pieces in a pleasing pattern. I added it to my background using CS Glue.

I set the Efcolor Stove up and added some CS Clear and Midnight Blue Ultra Thick Embossing Crystals to a Melt-It Case. I popped it onto the stove platform, added the lid and left to melt. I added Clear Perfect Medium to the same text stamp that I used before. I popped a metal heart-shaped cookie cutter onto the stamp. Once the Embossing Crystals were moulten, I poured them into the cookie cutter. After a couple of minutes I removed the cookie cutter and peeled my embellishment off the stamp. I dusted a little Chic Grey Blue Mica Powder on top. I added it to my weave using a little Hi-Tack Tape and a little CS Glue.


I cut Sue's Birthday Wishes Die out of a piece of Sky Blue Card. I used the negative piece for this card. I popped it onto a piece of CE DS Adhesive Sheet. I added CS Frosty Sparkle Glitterbitz to the exposed adhesive. I edged with Faded Jeans Oxide Ink using a Smoothie and popped it on my card using CE Mounting Cushion and a little CS Glue.

 Thanks for stopping by.

Julia.
www.juliawattscrafts.co.uk

Tuesday, 10 October 2017

Santa in Blue on a Pixie Textured Background

Hi Bloggers.

My favourite Santa is making an appearance on this card -

For the background, I popped the North Pole Mask onto a piece of Coconut White Card and secured it with some Low Tack Tape. I spread CS Clear Texture Paste through it. Leaving the mask in place, I worked quickly, sprinkling Aubergine Dream and Aqua Lagoon Pixie Powders over. I removed the mask and washed it under the tap and put my background aside to dry (approx 2 hours). Once dry, I edged it with Faded Jeans Distress Oxide using a Smoothie. I matted onto Black Card and then onto Coconut White Card.

I dusted a piece of Coconut White Card with an Anti-Static Pad. I stamped the elements from the Woodware Cheeky Santa Stamp Set using Onyx Black Versafine, added CS Matt Clear Embossing Powder and heat set. I coloured Santa's face by scribbling a little Tattered Rose Distress Marker onto my Craft Sheet and picking the colour up with a Water Brush. I coloured his furry bits on his hat using Opaque White Sakura Gelly Roll Pen adding CS Diamond Snow while the ink was still wet. I coloured hit hat using Sky, Blue and Silver Sakura Stardust Pens. I edged his beard with Silver Stardust Pen.

I coloured the parcels using Sky, Blue, Pink and Silver Stardust Pens.

I cut the sentiment out using a die from Sue Wilson's Essential Pierced Rectangles. Leaving the die in place, I drew around the inside line with the Blue Stardust Pen.

Jane Gill has shows on Hochanda today with shows at 8am, 11am and 2pm. I'm offering 10% discount on items on my website from the shows. You can find them here. Please Note : The discount is not automatic - you need to enter the code JANEGILL in the Discount Code Box at Checkout. Offer applies till midnight tonight or while stocks last.

Thanks for stopping by.

Julia.
www.juliawattscrafts.co.uk

Monday, 9 October 2017

Pretty Woven Birthday Card in Aqua & White

Hi Bloggers.

I'm busy prepping for my 3 workshops this month and my next shows on Hochanda on 24th October - once again, not enough hours in the day to get it all done!

Here's today's card -

This weave is achieved by only having one of the Intermediate Weaving Die Cuts going across (weft, I think) i.e.not cutting another and glueing it to fill in the gaps. Then weaving 1 strip at a time through cut from Aqua Card (you do need 2 of these). I've used the Striped Nasturtiums again for the flowers but used them in a slightly different way for a different look.


Products used -
Sue Wilson - Intermediate Weaving Die, Scalloped Lattice Frames Set B, Stitched Flags, Striped Nasturtium, Spring Foliage, Birthday Wishes
Card - Coconut White, Aqua
3mm White Pearls, CS Glue
Woodware - 2mm Foam Tape, Fine Tip Glue Applicators

The winner of the card from Freebie Friday on 6th October is...........................

June Smith

Please email me at juliawattscrafts@gmail.com with your address and I'll pop your card in the post.

Thanks for stopping by.

Julia.
www.juliawattscrafts.co.uk

Sunday, 8 October 2017

Easy Peasy Glitterbitz Snow Globe Scene

Hi Bloggers.

I had a great day yesterday with lots of good friends at Domino Crafts.

Here's today's card -

I started by popping a piece of CE Double Sided Self Adhesive Sheet onto Coconut White Card. I cut the outer die from Sue Wilson's Santa's Reindeer Snow Globe Scene from it. I trimmed just a little from around the edges. I cut both of the dies from the set out of Brunswick Green Card. I peeled away the backing from the adhesive on my plain die cut and added my decorative die cut. I added CS Apple Red Glitterbitz to the exposed adhesive.

I embossed a piece of card using the Creative Expressions Tied Holly Embossing Folder. I edged it with Fired Brick Distress Oxide using a Smoothie. I matted onto Brunswick Green Card and then Rich Red Card.

I wrapped a piece of Baker's Twine from the back of the card to the frontand then added my Snow Globe Scene. I tied a bow out of Baker's Twine and glued it to the top of the Scene to make it look loke a bauble. I added 3mm White Pearls to the snowflakes. I matted my card onto another piece of Coconut White Card.

I popped some more DS Adhesive Sheet onto some Coconut White Card. I peeled away the backing sheet and added Apple Red Glitterbitz. I cut the sentiment from Lisa Horton's Stylish Script Season's Greetings Die Set from it.

Thanks for stopping by.

Julia.
www.juliawattscrafts.co.uk

Saturday, 7 October 2017

Santa Claus is coming to town

Hi Bloggers.

I'm up and out early today as I'm demoing at Domino Crafts in Wolverhampton 10am till 4pm. If you're in the area, do stop by - there's usually cake!

Here's today's card -

For the background, I popped the Pine Needles Mask onto Watercolour Card. I sprinkled Peacock Green and Bronze Blush Pixie Powders over and then misted with water. I left the mask in place and popped another piece of Watercolour Card on top to get a negative print. I put them aside to dry.

Once my backgrounds were dry, I cut Sue Wilson's Classic Weaving Die into both of them. I cut the negative piece into strips and wove them through the other piece.

I made a frame using dies #6 and #8 from Sue's Double Pierced Rectangles Set B Die Set. I added the frame to my background using Woodware 2mm Foam Tape and trimmed away the excess. I matted onto Rich Red Card then Brunswick Green Card and finally onto a piece of Coconut White Card.

I dusted a piece of Coconut White Card with an Anti-Static Pad and stamped the santa from the Woodware Cheeky Santa Stamp Set using Onyx Black Verafine. I added CS Matt Clear Embossing Powder and heat set. I also stamped the parcel from the set twice and the sentiment. I also stamped the sack from the Woodware Long Tall Santa Stamp Set.

I coloured Santa's face by scribbling a little Tattered Rose Distress Marker onto my Craft Sheet and picking the colour up with a Water Brush. I coloured the rest of him and the parcels and sack using CS Christmas Watercolour Set. I cut them all out using scissors leaving a thin white border. I added them to my card using CE Mounting Cushion.


Sue Wilson is continuing with her One Day Special on Hochanda today with shows at 9am, 1pm and 5pm. I'm offering 10% discount on items on my website from the shows. You can find them here. Please Note : The discount is not automatic - you need to enter the code SUEWILSON in the Discount Code Box at Checkout. Offer applies till midnight tonight or while stocks last.

I'm pleased to report that shipping to Europe, Autralia & New Zealand and Canada & USA is now available on my website. 

Thanks for stopping by.

Julia.
www.juliawattscrafts.co.uk

Friday, 6 October 2017

Freebie Friday

Hi Bloggers.

It's that time of the week again! Here's this week's card that needs a new home -

You can read how this card was made here.

Leave a lovely comment below to go into the draw to win it. I will announce the winner on Monday. Be sure to pop back to see if you have won.

Please note : Only comments left below will go into the draw. Comments made on the original post will not count. Information given on the original post was correct at the time that post was published.

Sue Wilson is launching a new One Day Special on Hochanda today at 6pm with some of her September release dies. I'm offering 10% discount on items on my website from the shows. You can find them here. Please Note : The discount is not automatic - you need to enter the code SUEWILSON in the Discount Code Box at Checkout. Offer applies till midnight tomorrow night or while stocks last.

Thanks for stopping by.

Julia.
www.juliawattscrafts.co.uk

Thursday, 5 October 2017

Cheerio Chaps!

Hi Bloggers.

I have a tag for you today which features the gorgeous Tarnished Gold CS Ultra Thick Embossing Crystals -

I started with my background card which was a piece of Milk Card with some mopped up waste Vintage Photo Distress Oxide Ink on it. I dusted with an Anti-Staic Pad and stamped the image from the Wendy Vecchi Studio 490 3 Cheers for Art Stamp Set using Clear Perfect Medium. I added CS Gold Detail Embossing Powder and heat set. I stamped sentiment from the Wendy Vecchi Studio 490 Parisian Art Stamp Set using Potting Soil Archival. I edged with Vintage Photo Distress Oxide using a Woodware Blend-It Tool.

I edged a Tag Toppers Art Part with Antique Gold Shimmer Paint. I then applied a good coating of Clear Perfect Medium on the top. I added CS Tarnished Gold Ultra Thick Embossing Crystals and set using a Low Speed Heat Tool. It's best only to do one coat to keep the definition of the mixed crystals.

I glued the topper to the tag using CS Glue. I trimmed the ends of my card in line with the top of the Tag Topper. I used my Crop-a-Dile to punch the hole in my tag through the Tag Topper and added some London Tan American Seam Binding.

I set the Efcolor Stove up and added some CS Clear and Tarnished Gold Ultra Thick Embossing Crystals to a Melt-It Case. I popped it onto the stove platform, added the lid and left to melt. Once moulten, I poured it into a mould that I made from Ranger Mold-n-Pour (I usually fill a few in a session). After a couple of minutes I removed my embellishment from the mould and added it to my tag using a little Hi-Tack Tape and a little CS Glue.

Thanks for stopping by.

Julia.
www.juliawattscrafts.co.uk

Wednesday, 4 October 2017

Classic and Intermediate Weaving dies together

Hi Bloggers.

Here's today's card -

For this one, I cut the Classic Weaving Die out of Milk Card twice and the Intermediate Weaving Die out of Sky Blue Card twice. The strips in the Intermediate die are half the width of the strips in the Classic Die so the Intermediate strips sit nicely in the centre of the Classic strips. I glued the blue intermeidate die cut on top of the milk one, leaving the ends of the card in place to make life easier. I cut one die cut down into strips and wove it through the other.

I made a frame out of Milk Card using dies #2 and #4 from Sue Wilson's Scalloped Lattice Frames Set B.I added it to my woven background using Woodware 2mm Foam Tape and trimmed away the excess. I matted onto Milk Card and then Sky Blue Card and finally another piece of Milk Card.

I cut the sentiment out of Sky Blue Card using Sue's Birthday Wishes Die Set and popped it onto a flag cut from Milk Card using Sue's Stitched Flags Die Set.

The foliage is cut using Sue's Spring Foliage Die Set. The flower is made using just the complete petal dies from Sue's Striped Nasturtium Die Set with a little flower added to the centre from the Spring Foliage Die Set.


I completed my card by adding a 3mm Cream Pearl to the centre of all the little flowers.


Thanks for stopping by.

Julia.
www.juliawattscrafts.co.uk