Hi Bloggers.
Here's today's card -
I've been waiting for ages to share this card but the Pinwheel Floral has been out of stock since the Hochanda shows that I did in October. It's back in stock so a great reason to share it now.
The background on this one is quite cool. I used a piece of Heat Emboss Acetate. I popped some CS Clear Varnish Lacquer into 2 areas on my Craft Sheet. I added a drop of Deep Plum CS Intense Pigment Stain into one area and Citrus Lime CS Intense Pigment Stain into the other and mixed well. I added the Citrus Lime to my acetate first, in splonges randomly all over. I then added the Deep Plum, fillinf in the gaps and overlapping the Citrus Lime in some areas to give a blended colour. I then sprinkled some CS Golden Sand Glitterbitz over and put aside to dry (doesn't take long).
I then cut the inner dies only from all 3 sized of flowers from the Pinwheel Floral Die Set into a piece of Coconut White Card several times to create a background.
Once my acetate background was dry, I glued my Pinwheel Floral Background to it.
I made a frame out of Coconut White Card using dies #2 and #4 from the Stitched Square Peg Board Die Set. I added it to my backgrounds using Woodware Foam Tape.
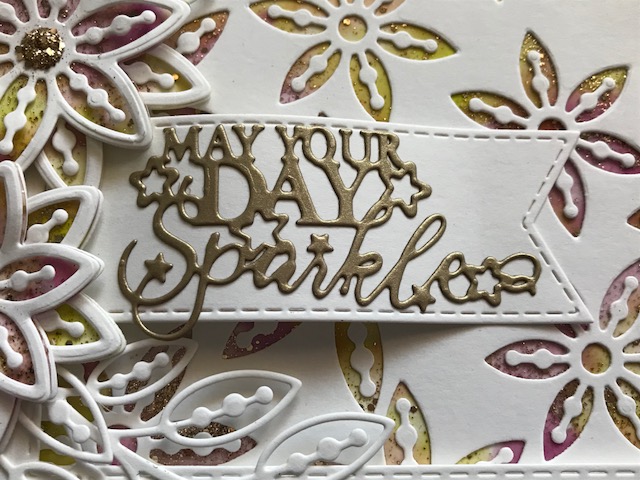
I cut a Stitched Flag out of Coconut White Card. I cut the sentiment from the Celebrations Shadow Box out of Antique Gold Pearl Card.
I cut some leaves out of Coconut White Card using the Pinwheel Floral Die Set. For the flowers, I cut the solid dies from the same set out of Coconut White Card and out of my acetate background. I cut both of the dies together in all the sizes out of Coconut White Card. I glued at the centre only - 1 solid Coconut White, then 1 solid acetate background and 1 Coconut White open die cut. I then stacked them up in pairs offesetting then slightly to create my flowers. I added CS Glue to the centres and sprinkled Golden Sand CS Glitterbitz over.
Phill Martin is launching a One Day Special on Hochanda at 6pm today. I'm offering 10% off items from the shows on my website. You can find them here.
Please enter PHILLMARTIN in the discount code box at checkout to
activate your discount. Offer valid till midnight tomorrow night or
while stocks last. Phill has another show at 8pm tonight and then more
shows at 9am, 1pm and 5pm tomorrow.
Thanks for stopping by.
Julia.
www.juliawattscrafts.co.uk
Showing posts with label Glitterbitz. Show all posts
Saturday, 9 December 2017
Thursday, 9 November 2017
21 Today Shadow Box
Hi Bloggers.
Here's today's card -
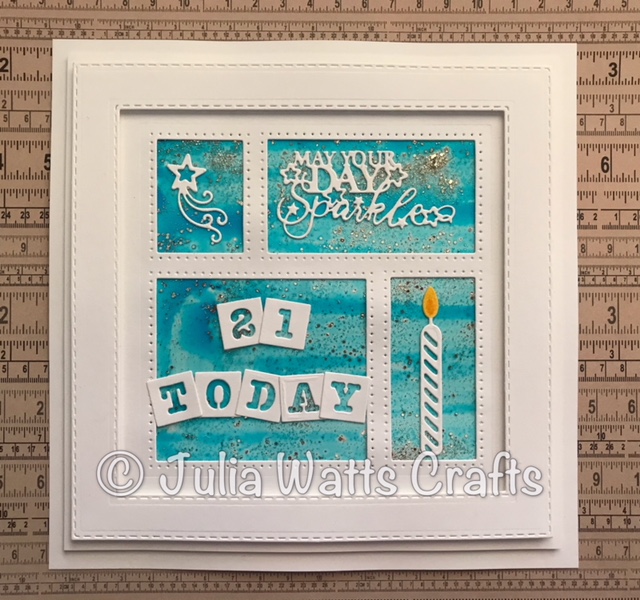
For the background, I used a piece of Heat Emboss Acetate. I popped some CS Clear Varnish Lacquer onto my Craft Sheet. I added a drop of Bluebell CS Intense Pigment Stain and mixed well. I painted it onto my Acetate using a Wide Brush. I then sprinkled some CS Golden Sand Glitterbitz over and put aside to dry (doesn't take long).
I cut the Celebrations Shadow Box out of Coconut White Card. I glued it to my background once it was dry. I made a frame using dies #3 and #5 from the Stitched Square Peg Board Die Set and added it to my Shadow Box using Woodware Foam Tape. I matted onto a couple of pieces of Coconut White Card.
I used tiles from the Alphabet Grid Die and elements from the Celebrations Shadow Box Die Set to decorate my card. I coloured the flame on the candle using Mustard Seed and Spiced Marmalade Distress Markers.
Here's the one I demoed on Hochanda with Rose Pink CS Intense Pigment Stain instead of Bluebell -
Thanks for stopping by.
Julia.
www.juliawattscrafts.co.uk
Here's today's card -
For the background, I used a piece of Heat Emboss Acetate. I popped some CS Clear Varnish Lacquer onto my Craft Sheet. I added a drop of Bluebell CS Intense Pigment Stain and mixed well. I painted it onto my Acetate using a Wide Brush. I then sprinkled some CS Golden Sand Glitterbitz over and put aside to dry (doesn't take long).
I cut the Celebrations Shadow Box out of Coconut White Card. I glued it to my background once it was dry. I made a frame using dies #3 and #5 from the Stitched Square Peg Board Die Set and added it to my Shadow Box using Woodware Foam Tape. I matted onto a couple of pieces of Coconut White Card.
I used tiles from the Alphabet Grid Die and elements from the Celebrations Shadow Box Die Set to decorate my card. I coloured the flame on the candle using Mustard Seed and Spiced Marmalade Distress Markers.
Here's the one I demoed on Hochanda with Rose Pink CS Intense Pigment Stain instead of Bluebell -
Thanks for stopping by.
Julia.
www.juliawattscrafts.co.uk
Wednesday, 11 October 2017
Weaving without a Frame
Hi Bloggers.
Here's today's card -
For the background, I used a leftover middle piece of Coconut White Card that I'd cut a frame from using Sue Wilson's Double Pierced Squares. I swiped some Faded Jeans Distress Oxide onto my Craft Sheet. I misted it with water and picked it up onto my card. I dried it using a Heat Tool and repeated the process with Wilted Violet Distress Oxide. I edged with Faded Jeans Distress Oxide using a Smoothie. I matted onto Black Card using CS Glue and then onto Coconut White Card using CE Mounting Cushion.
I then stamped the large text stamp from the Wendy Vecchi Studio 490 Parisian Art Stamp a couple of times using Faded Jeans Oxide direct from the pad.
For my weave, I cut the Striped Weaving Die out of Sky Blue Card and the Intermediate Weaving Die out of Coconut White Card. I popped a piece of CE DS Self Adhesive Sheet onto a piece of Coconut White Card. I measured roughly how much I'd need to cut out the Classic Weaving Die. I trimmed it, added CS Lavender Glitterbitz and cut the Classic Weaving Die out of it.
Leaving the Intermediate die cut with it's ends intact, I wove the Classic and Striped strips through it as shown. Once I was happy with the amount woven, I secured my pieces on the back using DS Tape. I trimmed the Inermediate Die Cut away from it's ends as shown. I also trimmed the Classic and Striped pieces in a pleasing pattern. I added it to my background using CS Glue.
I set the Efcolor Stove up and added some CS Clear and Midnight Blue Ultra Thick Embossing Crystals to a Melt-It Case. I popped it onto the stove platform, added the lid and left to melt. I added Clear Perfect Medium to the same text stamp that I used before. I popped a metal heart-shaped cookie cutter onto the stamp. Once the Embossing Crystals were moulten, I poured them into the cookie cutter. After a couple of minutes I removed the cookie cutter and peeled my embellishment off the stamp. I dusted a little Chic Grey Blue Mica Powder on top. I added it to my weave using a little Hi-Tack Tape and a little CS Glue.
I cut Sue's Birthday Wishes Die out of a piece of Sky Blue Card. I used the negative piece for this card. I popped it onto a piece of CE DS Adhesive Sheet. I added CS Frosty Sparkle Glitterbitz to the exposed adhesive. I edged with Faded Jeans Oxide Ink using a Smoothie and popped it on my card using CE Mounting Cushion and a little CS Glue.
Thanks for stopping by.
Julia.
www.juliawattscrafts.co.uk
Here's today's card -
For the background, I used a leftover middle piece of Coconut White Card that I'd cut a frame from using Sue Wilson's Double Pierced Squares. I swiped some Faded Jeans Distress Oxide onto my Craft Sheet. I misted it with water and picked it up onto my card. I dried it using a Heat Tool and repeated the process with Wilted Violet Distress Oxide. I edged with Faded Jeans Distress Oxide using a Smoothie. I matted onto Black Card using CS Glue and then onto Coconut White Card using CE Mounting Cushion.
I then stamped the large text stamp from the Wendy Vecchi Studio 490 Parisian Art Stamp a couple of times using Faded Jeans Oxide direct from the pad.
For my weave, I cut the Striped Weaving Die out of Sky Blue Card and the Intermediate Weaving Die out of Coconut White Card. I popped a piece of CE DS Self Adhesive Sheet onto a piece of Coconut White Card. I measured roughly how much I'd need to cut out the Classic Weaving Die. I trimmed it, added CS Lavender Glitterbitz and cut the Classic Weaving Die out of it.
Leaving the Intermediate die cut with it's ends intact, I wove the Classic and Striped strips through it as shown. Once I was happy with the amount woven, I secured my pieces on the back using DS Tape. I trimmed the Inermediate Die Cut away from it's ends as shown. I also trimmed the Classic and Striped pieces in a pleasing pattern. I added it to my background using CS Glue.
I set the Efcolor Stove up and added some CS Clear and Midnight Blue Ultra Thick Embossing Crystals to a Melt-It Case. I popped it onto the stove platform, added the lid and left to melt. I added Clear Perfect Medium to the same text stamp that I used before. I popped a metal heart-shaped cookie cutter onto the stamp. Once the Embossing Crystals were moulten, I poured them into the cookie cutter. After a couple of minutes I removed the cookie cutter and peeled my embellishment off the stamp. I dusted a little Chic Grey Blue Mica Powder on top. I added it to my weave using a little Hi-Tack Tape and a little CS Glue.
I cut Sue's Birthday Wishes Die out of a piece of Sky Blue Card. I used the negative piece for this card. I popped it onto a piece of CE DS Adhesive Sheet. I added CS Frosty Sparkle Glitterbitz to the exposed adhesive. I edged with Faded Jeans Oxide Ink using a Smoothie and popped it on my card using CE Mounting Cushion and a little CS Glue.
Thanks for stopping by.
Julia.
www.juliawattscrafts.co.uk
Sunday, 8 October 2017
Easy Peasy Glitterbitz Snow Globe Scene
Hi Bloggers.
I had a great day yesterday with lots of good friends at Domino Crafts.
Here's today's card -
I started by popping a piece of CE Double Sided Self Adhesive Sheet onto Coconut White Card. I cut the outer die from Sue Wilson's Santa's Reindeer Snow Globe Scene from it. I trimmed just a little from around the edges. I cut both of the dies from the set out of Brunswick Green Card. I peeled away the backing from the adhesive on my plain die cut and added my decorative die cut. I added CS Apple Red Glitterbitz to the exposed adhesive.
I embossed a piece of card using the Creative Expressions Tied Holly Embossing Folder. I edged it with Fired Brick Distress Oxide using a Smoothie. I matted onto Brunswick Green Card and then Rich Red Card.
I wrapped a piece of Baker's Twine from the back of the card to the frontand then added my Snow Globe Scene. I tied a bow out of Baker's Twine and glued it to the top of the Scene to make it look loke a bauble. I added 3mm White Pearls to the snowflakes. I matted my card onto another piece of Coconut White Card.
I popped some more DS Adhesive Sheet onto some Coconut White Card. I peeled away the backing sheet and added Apple Red Glitterbitz. I cut the sentiment from Lisa Horton's Stylish Script Season's Greetings Die Set from it.
Thanks for stopping by.
Julia.
www.juliawattscrafts.co.uk
I had a great day yesterday with lots of good friends at Domino Crafts.
Here's today's card -
I started by popping a piece of CE Double Sided Self Adhesive Sheet onto Coconut White Card. I cut the outer die from Sue Wilson's Santa's Reindeer Snow Globe Scene from it. I trimmed just a little from around the edges. I cut both of the dies from the set out of Brunswick Green Card. I peeled away the backing from the adhesive on my plain die cut and added my decorative die cut. I added CS Apple Red Glitterbitz to the exposed adhesive.
I embossed a piece of card using the Creative Expressions Tied Holly Embossing Folder. I edged it with Fired Brick Distress Oxide using a Smoothie. I matted onto Brunswick Green Card and then Rich Red Card.
I wrapped a piece of Baker's Twine from the back of the card to the frontand then added my Snow Globe Scene. I tied a bow out of Baker's Twine and glued it to the top of the Scene to make it look loke a bauble. I added 3mm White Pearls to the snowflakes. I matted my card onto another piece of Coconut White Card.
I popped some more DS Adhesive Sheet onto some Coconut White Card. I peeled away the backing sheet and added Apple Red Glitterbitz. I cut the sentiment from Lisa Horton's Stylish Script Season's Greetings Die Set from it.
Thanks for stopping by.
Julia.
www.juliawattscrafts.co.uk
Tuesday, 3 October 2017
Season's Greetings with a bit of sparkle
Hi Bloggers.
Here's today's card -
For my background, I spread some CS Phill Martin Platinum Sparkle Texture Paste through The Snow is Falling Mask and put aside to dry (under and hour).
I cut both of the dies from Sue Wilson's Here Comes Santa Snow Globe Scene together out of Coconut White Card. I popped a piece of Double Sided Self Adhesive Sheet onto Coconut White Card and cut the outer die only from it. I trimmed away just a little from the edges, peeled away the backing and added my decorative die cut. I added Midnight Sparkle CS Glitterbitz to the exposed adhesive. I cut a Double Pierced Circle out of Black Card which was just large enough to pop out behind my santa piece.
I cut the sentiment from Lisa Horton's Stylish Script : Season's Greetings Die Set out of Coconut White and Black Card. I glued them together, offsetting them slightly to create a drop shadow.
Once my background was dry, I matted onto Black Card and then Coconut White Card I edged my background with CS Glue and added CS Crystal Stars Glitter Jewels.
Thanks for stopping by.
Julia.
www.juliawattscrafts.co.uk
Here's today's card -
For my background, I spread some CS Phill Martin Platinum Sparkle Texture Paste through The Snow is Falling Mask and put aside to dry (under and hour).
I cut both of the dies from Sue Wilson's Here Comes Santa Snow Globe Scene together out of Coconut White Card. I popped a piece of Double Sided Self Adhesive Sheet onto Coconut White Card and cut the outer die only from it. I trimmed away just a little from the edges, peeled away the backing and added my decorative die cut. I added Midnight Sparkle CS Glitterbitz to the exposed adhesive. I cut a Double Pierced Circle out of Black Card which was just large enough to pop out behind my santa piece.
I cut the sentiment from Lisa Horton's Stylish Script : Season's Greetings Die Set out of Coconut White and Black Card. I glued them together, offsetting them slightly to create a drop shadow.
Once my background was dry, I matted onto Black Card and then Coconut White Card I edged my background with CS Glue and added CS Crystal Stars Glitter Jewels.
Thanks for stopping by.
Julia.
www.juliawattscrafts.co.uk
Sunday, 1 October 2017
Tag on a card with lovely Wendy Vecchi products
Hi Bloggers.
Had a brilliant time at my workshop yesterday. My next workshop is on October 15th in Sherringham with Sherringham Crafts, then the following Saturday in Lyndhurst with Emerald Crafts and my last one in October is on 28th when the lovely Leonie Pujol is coming over to Milton Keynes to join me. For the first 2, you need to contact the shops if you want to join in. For the one with Leonie, you can book here. Hurry though - only 5 spaces left!
Here's today's card -
I started by cutting a strip of Coconut White Card approx 3 1/8" wide by 6" in length to fit the width of the Wendy Vecchi Tag Toppers Art Part.
I swiped some Fired Brick Distress Oxide onto my Craft Sheet. I misted it with water and picked it up onto my card. I dried it and then inked all over with Spiced Marmalade Distress Oxide and added some Fired Brick Distress Oxide around the edges. Finally, I lightly went around the edges with Walnut Stain Distress Oxide.
I stamped the Crazy in Love text from the Wendy Vecchi Studio 490 3 Cheers for Art several times using Carnation Red Archival Ink from the Wendy Vecchi Mini Ink Pad Kit 1.
I covered a Tag Toppers Art Part and an Arty Hearts Pop-em with CS White Gesso. I then covered them with Fired Brick Distress Oxide. I edged them with Walnut Stain Oxide. I misted some water into my hand and clapped over them to create little splats. I blotted with Kitchen Roll.I stamped onto the Tag Toppers with a stamp from the 3 Cheers for Art Stamp set using Carnation Red Archival.
I added Clear Perfect Medium to the Art Part then Clear CS Ultra Thick Embossing Crystals and heat set using a Low Speed Heat Tool. I added some more ink and some more powder and heat set again. While still moulten, I sprinkled a little Tarnished Gold and Tropic Pearl CS Embossing Crystals and also a little CS Golden Sand Glitterbitz.
I stamped another stamp from the 3 Cheers for Art Stamp Set onto the Pop-em using Red Carnation Archival. I added Clear Perfect Medium, Clear CS Ultra Thick Embossing Crystals and heat set using a Low Speed Heat Tool. I added more ink and more powder, heat set and then sprinkled some Golden Sands Glitterbitz while still molten.
I set the Efcolor Stove up and added Clear and Blue Raspberry CS Ultra Thick Embossing Crystals to a Pie Case and added the lid. Once molten, I added it to a couple of moulds that I made during the shows I did last December. After a few minutes,I popped them out of their moulds. I added one to the Arty Hearts Pop-em.
I swiped some Spiced Marmalade Distress Oxide onto my Craft Sheet, misted it with water and picked it up onto another piece of card. I dried it and then repeated the process with Fired Brick. I cut a couple of leaves out of it using Sue Wilson's Spring Foliage Die Set and edged then with a little Walnut Stain Distress Oxide.
I cut the largest solid flower from Sue's Striped Nasturtium Die Set twice. I inked another piece of card with Fired Brick and cut the same sized open flower from the same die set twice. I glued them together, shaped them and added my other embellishment to the centre.
I swiped some Spiced Marmalade Distress Oxide onto my Craft Sheet, misted it with water and picked it up onto a piece of Blue White Ameerican Seam Binding. I dried it and then repeated the process with Fired Brick. I glued the Arty Hearts Pop-em and the Tag Topper Art Part to my tag. I trimmed my card to the shape of the tag using scissors. I used my Crop-a-dile to punch through the hole in the Art Part and through my card. I added my ribbon.
I decided to pop my tag onto a card. I embossed a piece of card using the Creative Expressions Brambled Rose Embossing Folder. I edged it with Fired Brick Distress Oxide using a Smoothie. I matted onto Antique Gold Pearl Card using CS Glue and then onto Coconut White Card using CE Mounting Cushion.
I completed my card by adding an 8mm White Pearl to each corner of my embossed background.
Thanks for stopping by.
Julia.
www.juliawattscrafts.co.uk
Had a brilliant time at my workshop yesterday. My next workshop is on October 15th in Sherringham with Sherringham Crafts, then the following Saturday in Lyndhurst with Emerald Crafts and my last one in October is on 28th when the lovely Leonie Pujol is coming over to Milton Keynes to join me. For the first 2, you need to contact the shops if you want to join in. For the one with Leonie, you can book here. Hurry though - only 5 spaces left!
Here's today's card -
I started by cutting a strip of Coconut White Card approx 3 1/8" wide by 6" in length to fit the width of the Wendy Vecchi Tag Toppers Art Part.
I swiped some Fired Brick Distress Oxide onto my Craft Sheet. I misted it with water and picked it up onto my card. I dried it and then inked all over with Spiced Marmalade Distress Oxide and added some Fired Brick Distress Oxide around the edges. Finally, I lightly went around the edges with Walnut Stain Distress Oxide.
I stamped the Crazy in Love text from the Wendy Vecchi Studio 490 3 Cheers for Art several times using Carnation Red Archival Ink from the Wendy Vecchi Mini Ink Pad Kit 1.
I covered a Tag Toppers Art Part and an Arty Hearts Pop-em with CS White Gesso. I then covered them with Fired Brick Distress Oxide. I edged them with Walnut Stain Oxide. I misted some water into my hand and clapped over them to create little splats. I blotted with Kitchen Roll.I stamped onto the Tag Toppers with a stamp from the 3 Cheers for Art Stamp set using Carnation Red Archival.
I added Clear Perfect Medium to the Art Part then Clear CS Ultra Thick Embossing Crystals and heat set using a Low Speed Heat Tool. I added some more ink and some more powder and heat set again. While still moulten, I sprinkled a little Tarnished Gold and Tropic Pearl CS Embossing Crystals and also a little CS Golden Sand Glitterbitz.
I stamped another stamp from the 3 Cheers for Art Stamp Set onto the Pop-em using Red Carnation Archival. I added Clear Perfect Medium, Clear CS Ultra Thick Embossing Crystals and heat set using a Low Speed Heat Tool. I added more ink and more powder, heat set and then sprinkled some Golden Sands Glitterbitz while still molten.
I set the Efcolor Stove up and added Clear and Blue Raspberry CS Ultra Thick Embossing Crystals to a Pie Case and added the lid. Once molten, I added it to a couple of moulds that I made during the shows I did last December. After a few minutes,I popped them out of their moulds. I added one to the Arty Hearts Pop-em.
I swiped some Spiced Marmalade Distress Oxide onto my Craft Sheet, misted it with water and picked it up onto another piece of card. I dried it and then repeated the process with Fired Brick. I cut a couple of leaves out of it using Sue Wilson's Spring Foliage Die Set and edged then with a little Walnut Stain Distress Oxide.
I cut the largest solid flower from Sue's Striped Nasturtium Die Set twice. I inked another piece of card with Fired Brick and cut the same sized open flower from the same die set twice. I glued them together, shaped them and added my other embellishment to the centre.
I swiped some Spiced Marmalade Distress Oxide onto my Craft Sheet, misted it with water and picked it up onto a piece of Blue White Ameerican Seam Binding. I dried it and then repeated the process with Fired Brick. I glued the Arty Hearts Pop-em and the Tag Topper Art Part to my tag. I trimmed my card to the shape of the tag using scissors. I used my Crop-a-dile to punch through the hole in the Art Part and through my card. I added my ribbon.
I decided to pop my tag onto a card. I embossed a piece of card using the Creative Expressions Brambled Rose Embossing Folder. I edged it with Fired Brick Distress Oxide using a Smoothie. I matted onto Antique Gold Pearl Card using CS Glue and then onto Coconut White Card using CE Mounting Cushion.
I completed my card by adding an 8mm White Pearl to each corner of my embossed background.
Thanks for stopping by.
Julia.
www.juliawattscrafts.co.uk
Tuesday, 26 September 2017
Glitterbitz and Weaving
Hi Bloggers.
Here's today's card -
I made this card at Ally Pally - I love the Glitterbitz with the Classic Weaving Die.
I added a piece of CE Double Self Adhesive Sheet to a piece of Coconut White Card. I measured the amount needed to cut the Classic Weaving Die, removed the backing and added Silver Chrome CS Glitterbitz. I then cut the Classic Weaving Die from it.
I cut the Intermediate Weaving Die from Coconut White Card twice and glued the 2 die cuts together at the ends only, offsetting them to fill in the gaps. I then wove these through the Classic die cut in pairs - remember 2 x Intermediate =1 x Classic in width so this ia a quick weave.
I added a frame made from Coconut White Card using dies #2 and #4 from Sue's Scalloped Lattice Frame Die Set B and Woodware 2mm Foam Tape. I trimmed away the excess and matted onto Silver Shine Pearl Card cut using die #5 from the Scalloped Lattice Frame set and then onto another piece of Coconut White.
I cut the outer die from Sue's Here Comes Santa Die Set from the DS Adhesive on card and then both dies together our of Coconut White Card. I trimmed the edge all around the DS die cut to make life easier and peeled away the backing sheet. I added my decorative die cut and then Silver Chrome Glitterbitz.
I added some foliage cut from Coconut White and Silver Shine Pearl Card using Sue's Pine Twig and Berry Bough Die Sets. I added a poinsettia made using Sue's Classic Poinsettia Die Set. I popped some CS Glue in the centre and added Silver Chrome Glitterbitz.
Thanks for stopping by.
Julia.
www.juliawattscrafts.co.uk
Free card with all website orders over £10 (ask for one in the comments box at checkout).
Here's today's card -
I made this card at Ally Pally - I love the Glitterbitz with the Classic Weaving Die.
I added a piece of CE Double Self Adhesive Sheet to a piece of Coconut White Card. I measured the amount needed to cut the Classic Weaving Die, removed the backing and added Silver Chrome CS Glitterbitz. I then cut the Classic Weaving Die from it.
I cut the Intermediate Weaving Die from Coconut White Card twice and glued the 2 die cuts together at the ends only, offsetting them to fill in the gaps. I then wove these through the Classic die cut in pairs - remember 2 x Intermediate =1 x Classic in width so this ia a quick weave.
I added a frame made from Coconut White Card using dies #2 and #4 from Sue's Scalloped Lattice Frame Die Set B and Woodware 2mm Foam Tape. I trimmed away the excess and matted onto Silver Shine Pearl Card cut using die #5 from the Scalloped Lattice Frame set and then onto another piece of Coconut White.
I cut the outer die from Sue's Here Comes Santa Die Set from the DS Adhesive on card and then both dies together our of Coconut White Card. I trimmed the edge all around the DS die cut to make life easier and peeled away the backing sheet. I added my decorative die cut and then Silver Chrome Glitterbitz.
I added some foliage cut from Coconut White and Silver Shine Pearl Card using Sue's Pine Twig and Berry Bough Die Sets. I added a poinsettia made using Sue's Classic Poinsettia Die Set. I popped some CS Glue in the centre and added Silver Chrome Glitterbitz.
Thanks for stopping by.
Julia.
www.juliawattscrafts.co.uk
Free card with all website orders over £10 (ask for one in the comments box at checkout).
Sunday, 24 September 2017
Takeover Shows on Hochanda today
Hi Bloggers.
Day 3 of the Creative Expressions Takeover at Hochanda. Hope you're enjoying the fun and learning lots!
I have 1 hour on Hochanda Netherlands at 9am today and 2 hours on Hochanda UK at 2pm and 4pm with Sue Wilson's Weaving Dies including the brand new Intermediate Die. There isn't enough time to share all the variations I've found so far but I will show as much as I can. I have a two-fer for you today with 2 completely different cards.
This one is made by cutting out the Intermediate Die twice in Coconut White Card and gluing them together to fill in the gaps. I then cut the Intermediate Die out of Lilac and Sky Blue Card. I cut the blue one in half lengthways and glued them toghether to fill in the gaps as before. I then wove 1 lilac then 2 sky blue until complete. The scrunched up flowers are from the Nasturtium Die Set.
Products used -
Sue Wilson Dies - Intermediate Weaving Die, Thank You, Spring Foliage, Striped Nasturtium, Scalloped Lattice Frames Set B
Craft Consortium - Rhinestone Gems
Creative Expressions - Card : Coconut White, Sky Blue, Lilac
Woodware - 2mm Foam Tape
Here's your second card -
This card came about after a conversation I had with Sue Wilson over dinner at Ally Pally last weekend. I've always made woven backgrounds into cards with a frame. She thought it would be good to show one outside of a frame so here you are!
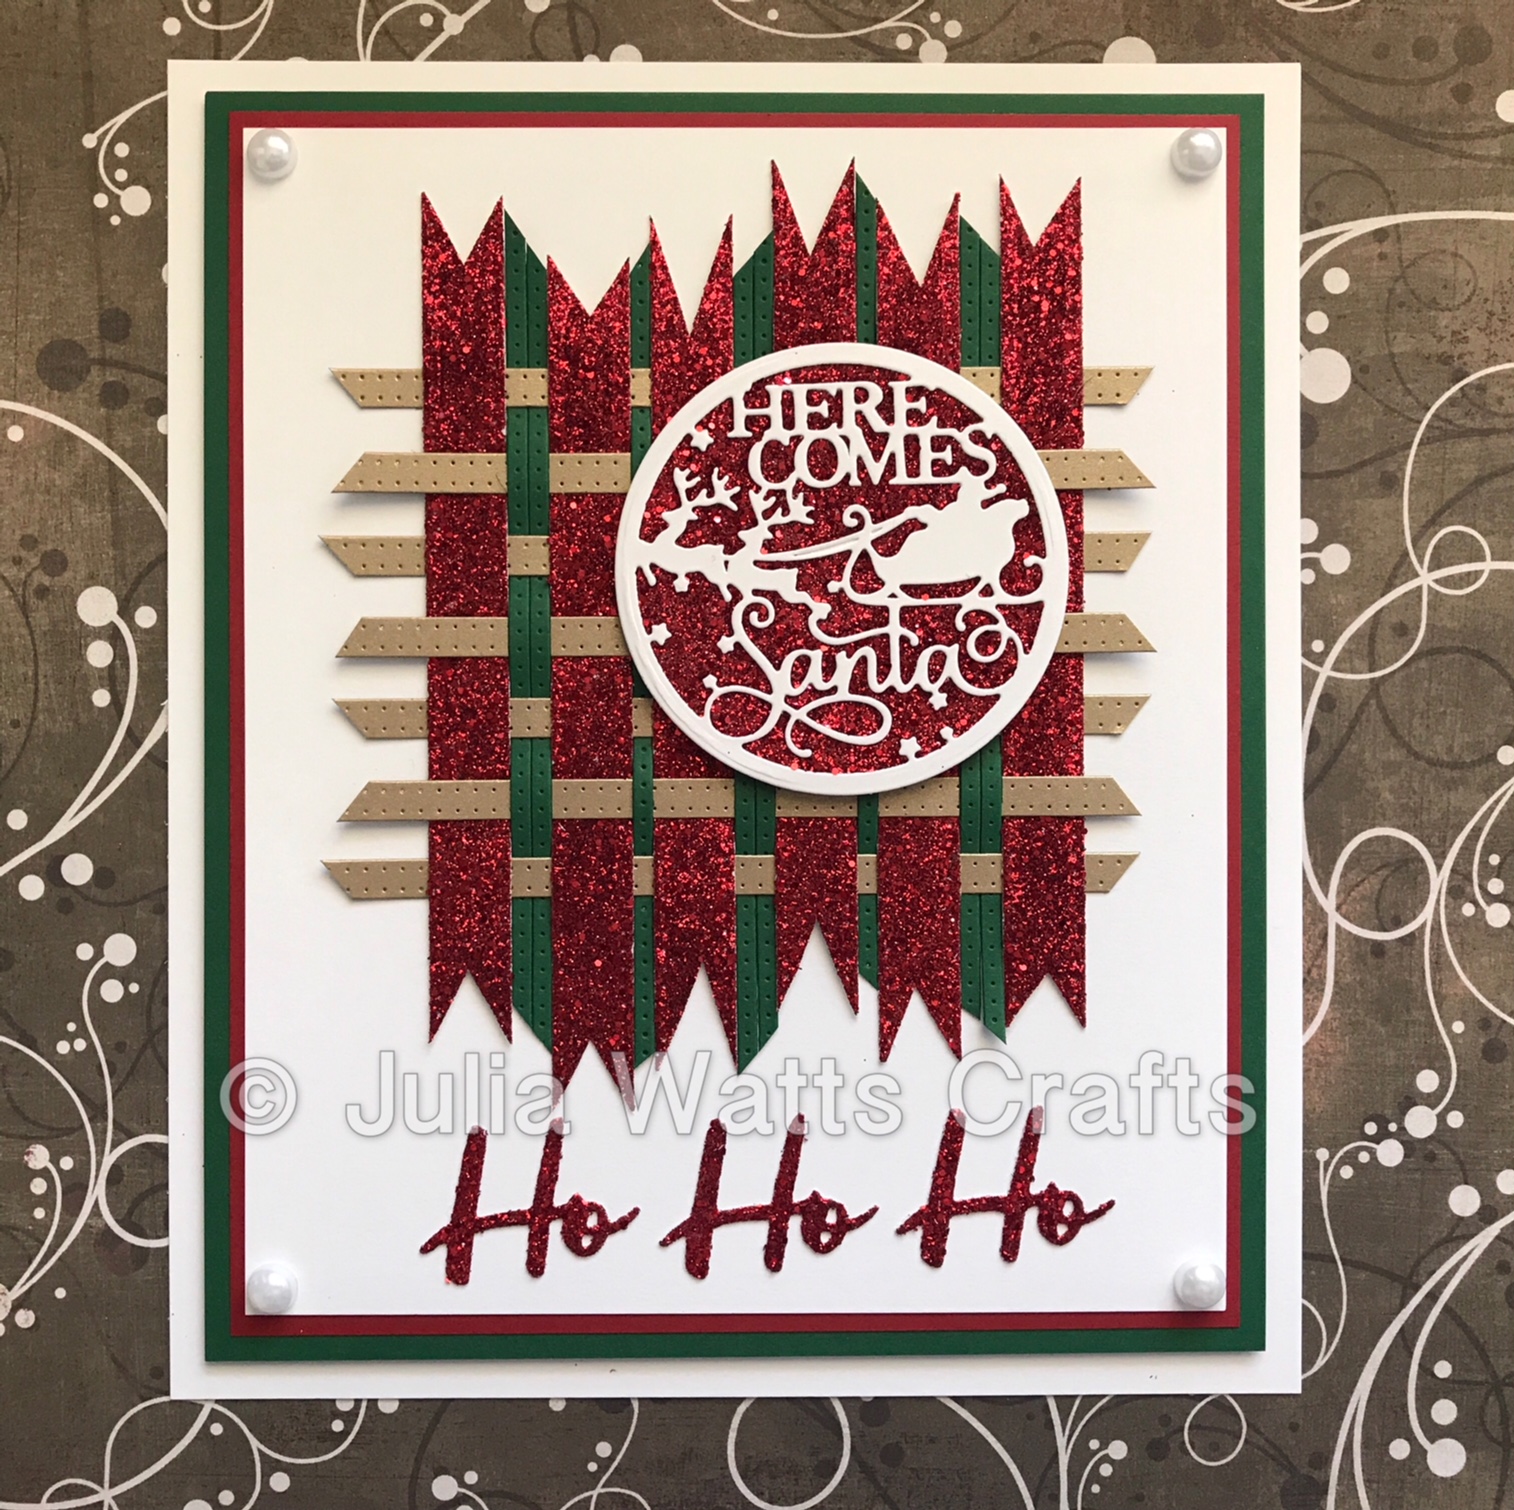
I've cut the Classic Weaving Die out of Glitterbitz on Self Adhesive Sheet on Coconut White Card. I've cut the Intermediate Weaving Die out of Antique Gold Pearl Card and the Striped Weaving Die out of Forest Green Card. I kept the Gold Intermediate intact on it's outer card and wove strips from the other die cuts through it. I trimmed the ends as shown, secured the weave at the back with tape and then trimmed the gold die cut away from it's outer card.
I've added CS Apple Red Glitterbitz to the Here Comes Santa Snow Globe Scene with DS Adhesive Sheet and I've cut Lisa Horton's Ho die from Apple Red Glitterbitz on DS Adhesive on Coconut White Card with her Stylish Script Season's Greetings Die Set.
My Website is up and running again! Yay! It's not perfect but it already looks much better, I think so anyway. I have added a section for the Takeover weekend. You can find it here. Please note - prices are shown as ex-VAT (sigh!) - it will be added at checkout.
You can enjoy 10% discount on products in this section but it's NOT automatic - you will need to enter TAKEOVER in the discount box at checkout. Please don't ask me to amend your order if you forget - I have tested it and it does work. Offer applies till midnight tonight.
You may want to read the Shipping and New Website Info pages at the bottom as navigation is not brilliant just yet and I'm not shipping outside UK at the moment.
Any problems - shout but be patient as I'm a bit busy!
See you later!
Thanks for stopping by.
Julia.
www.juliawattscrafts.co.uk
Free card with all website orders over £10 (ask for one in the comments box at checkout).
Day 3 of the Creative Expressions Takeover at Hochanda. Hope you're enjoying the fun and learning lots!
I have 1 hour on Hochanda Netherlands at 9am today and 2 hours on Hochanda UK at 2pm and 4pm with Sue Wilson's Weaving Dies including the brand new Intermediate Die. There isn't enough time to share all the variations I've found so far but I will show as much as I can. I have a two-fer for you today with 2 completely different cards.
This one is made by cutting out the Intermediate Die twice in Coconut White Card and gluing them together to fill in the gaps. I then cut the Intermediate Die out of Lilac and Sky Blue Card. I cut the blue one in half lengthways and glued them toghether to fill in the gaps as before. I then wove 1 lilac then 2 sky blue until complete. The scrunched up flowers are from the Nasturtium Die Set.
Products used -
Craft Consortium - Rhinestone Gems
Creative Expressions - Card : Coconut White, Sky Blue, Lilac
Woodware - 2mm Foam Tape
Here's your second card -
This card came about after a conversation I had with Sue Wilson over dinner at Ally Pally last weekend. I've always made woven backgrounds into cards with a frame. She thought it would be good to show one outside of a frame so here you are!
I've cut the Classic Weaving Die out of Glitterbitz on Self Adhesive Sheet on Coconut White Card. I've cut the Intermediate Weaving Die out of Antique Gold Pearl Card and the Striped Weaving Die out of Forest Green Card. I kept the Gold Intermediate intact on it's outer card and wove strips from the other die cuts through it. I trimmed the ends as shown, secured the weave at the back with tape and then trimmed the gold die cut away from it's outer card.
I've added CS Apple Red Glitterbitz to the Here Comes Santa Snow Globe Scene with DS Adhesive Sheet and I've cut Lisa Horton's Ho die from Apple Red Glitterbitz on DS Adhesive on Coconut White Card with her Stylish Script Season's Greetings Die Set.
My Website is up and running again! Yay! It's not perfect but it already looks much better, I think so anyway. I have added a section for the Takeover weekend. You can find it here. Please note - prices are shown as ex-VAT (sigh!) - it will be added at checkout.
You can enjoy 10% discount on products in this section but it's NOT automatic - you will need to enter TAKEOVER in the discount box at checkout. Please don't ask me to amend your order if you forget - I have tested it and it does work. Offer applies till midnight tonight.
You may want to read the Shipping and New Website Info pages at the bottom as navigation is not brilliant just yet and I'm not shipping outside UK at the moment.
Any problems - shout but be patient as I'm a bit busy!
See you later!
Thanks for stopping by.
Julia.
www.juliawattscrafts.co.uk
Free card with all website orders over £10 (ask for one in the comments box at checkout).
Friday, 22 September 2017
Creative Expressions Takeover Weekend today
Hi Bloggers.
The Creative Expressions Takeover Weekend at Hochanda starts today at 6pm when Sue Wilson Launches a new One Day Special. Lisa Horton is on at 7pm and then Sue is on again at 8pm. I have listed the weekend schedule in the left hand side bar of this blog.
I have 2 projects to share with you today. The first is from my Weaving Die shows on Sunday -
Products used -
Sue Wilson - Intermediate Weaving Die, Scalloped Lattice Frames Set B, Striped Nasturtium, Spring Foliage, Thank You
Woodware 2mm Foam Tape
Creative Expressions - 3mm Black Pearls, Card : Black, Coconut White
Lisa's show tonight features some new MDF so I made this while at Ally Pally last weekend -
Products used -
Creative Expressions - MDF Festive Media Boards, Double Sided Self Adhesive Sheet
Cosmic Shimmer - Acrylic Mixed Media Paint : Chelsea Blue and Caactus Leaf, Silver Moon Sparkle Texture Paste, Apple Red Glitterbitz
Lisa Horton - Stitched Collection : Sleigh, Stylish Script : Season's Greetings
Sue Wilson - Here Comes Santa Snow Globe Scene
Phill Martin Sentimentally Yours Stencil - Twinkle Twinkle
Obviously, no Freebie Friday this week - it'll be back next week.
My website is still not available 😞 It looked like it was getting somewhere but there were no images so the whole migration was started again. It looks like the drop down category menus will take some time to get sorted so I may go live with a less than perfect system but at least the search button works and the payment system should be more reliable. Also the prices shown are ex-VAT, VAT will be added at checkout. I'll try and get that sorted as a priority. Nothing is ever as easy as it appears to be!
Don't forget to tune in at 6pm!
Thanks for stopping by.
Julia.
www.juliawattscrafts.co.uk
Free card with all website orders over £10 (ask for one in the comments box at checkout).
The Creative Expressions Takeover Weekend at Hochanda starts today at 6pm when Sue Wilson Launches a new One Day Special. Lisa Horton is on at 7pm and then Sue is on again at 8pm. I have listed the weekend schedule in the left hand side bar of this blog.
I have 2 projects to share with you today. The first is from my Weaving Die shows on Sunday -
Products used -
Sue Wilson - Intermediate Weaving Die, Scalloped Lattice Frames Set B, Striped Nasturtium, Spring Foliage, Thank You
Woodware 2mm Foam Tape
Creative Expressions - 3mm Black Pearls, Card : Black, Coconut White
Lisa's show tonight features some new MDF so I made this while at Ally Pally last weekend -
Products used -
Creative Expressions - MDF Festive Media Boards, Double Sided Self Adhesive Sheet
Cosmic Shimmer - Acrylic Mixed Media Paint : Chelsea Blue and Caactus Leaf, Silver Moon Sparkle Texture Paste, Apple Red Glitterbitz
Lisa Horton - Stitched Collection : Sleigh, Stylish Script : Season's Greetings
Sue Wilson - Here Comes Santa Snow Globe Scene
Phill Martin Sentimentally Yours Stencil - Twinkle Twinkle
Obviously, no Freebie Friday this week - it'll be back next week.
My website is still not available 😞 It looked like it was getting somewhere but there were no images so the whole migration was started again. It looks like the drop down category menus will take some time to get sorted so I may go live with a less than perfect system but at least the search button works and the payment system should be more reliable. Also the prices shown are ex-VAT, VAT will be added at checkout. I'll try and get that sorted as a priority. Nothing is ever as easy as it appears to be!
Don't forget to tune in at 6pm!
Thanks for stopping by.
Julia.
www.juliawattscrafts.co.uk
Free card with all website orders over £10 (ask for one in the comments box at checkout).
Labels:
Christmas,
Cosmic Shimmer,
Creative Expressions,
Die Cutting,
Festive,
Francoise Read,
Glitterbitz,
Hochanda,
Lisa Horton,
MDF,
Phill Martin,
Sue WIlson,
Takeover,
Weaving Dies
Subscribe to:
Posts (Atom)