Hi Bloggers.
Today I'm back to purple again and I'm sharing this card with you -
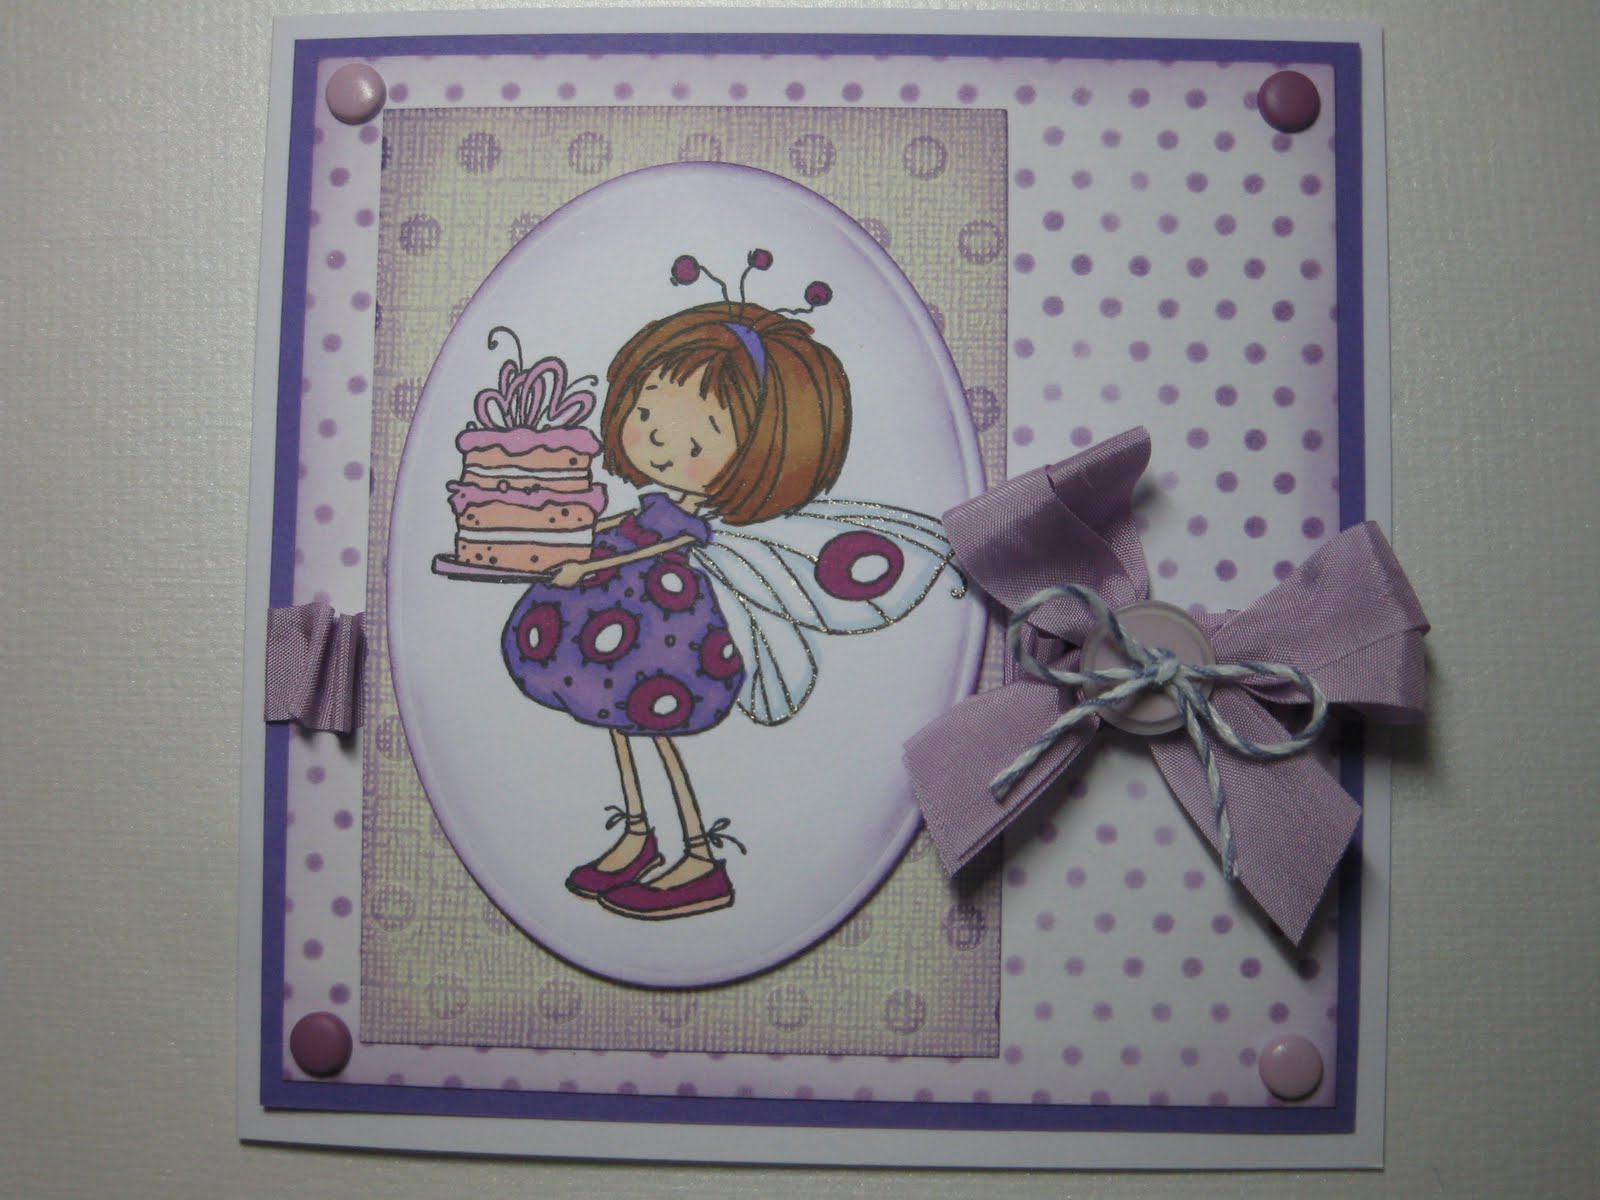
The image is from Sugar Nellie and it's called 'Let Them Eat Cake'. I stamped the image using Tuxedo Black Memento Ink and coloured using Promarkers. I added some Sakura Stardust Clear Star to the wings to make them sparkle. I cut the image out using an oval nestie and inked around the edges with Dusty Concord Distress Ink.
I inked through That Special Touch Small Polka Dots Mask with Dusty Concord Distress Ink onto white card and then went around the edges with the same ink.
I cut a piece of Whitewash Colorcore with a lilac core and embossed it using the That Special Touch Polka Dots Mask. I sanded it to make the polka dots stand out more. I inked around the edges with Dusty Concord.
I matted the small polka dots background onto some purple card and then ran a strip of Hi-Tack Tape across the card and ruffled some Violet Vintage Ribbon along it leaving it un-ruffled where the Whitewash backing paper was to go.
I added the Whitewash backing paper to the card and mounted the image on top using foam pads.
I tied a messy bow using 2 lengths of Violet Vintage Ribbon and added it to my ruffled border using Cosmic Shimmer Dries Clear Glue. I tied some Baker's Twine through a Lavender Button and glued it to my bow.
I added a brad to each of the corners and then added my design to a Craftwork Cards 6" x 6" card.
I'm entering this card in to the following challenges -
The Sugar Bowl Maria Thereses Sketch plus Handmade Backing Papers
I love Promarkers - Anything Goes
Simon Says Stamp - Bingo : Ribbon/Twine, No Designer Paper, Brads
Sparkle Forum Challenge - Anything But Christmas
Make It Monday #68
Thanks for stopping by.
Julia
Showing posts with label Craftwork Cards. Show all posts
Thursday, 22 December 2011
Thursday, 15 December 2011
Christmas Milton
Hi Bloggers,
Today I'm sharing this card -
The stamp is Milton in Hat from Wild Rose Studio. I stamped him in Memento Tuxedo Black and coloured with Promarkers. I used a Quickie Glue Pen on the furry parts of the hat and added some Cosmic Shimmer Aurora Crystal Glitter. You can see it really catches the light.
I inked up a Craftwork Cards frame with Chipped Sapphire Distress Ink. I printed the sentiment using my labelling machine and matted it onto cobalt blue card.
I cut the poinsettia from the Spellbinders Layered Poinsettias die set and inked with Chipped Sapphire while still in the die. I put the poinsettia together using Cosmic Shimmer Dries Clear Glue and added an Eco Green Glass Glintz in blue to the centre.
I assembled the card as shown. The backing paper is from the Polka Doodles CD Jingle Jangle (I think!).
I'm entering this card into the following challenges -
Oldie But A Goodie - Christmas Animals
Make It Monday #67
Hope you like the card.
Thanks for stopping by.
Julia
Today I'm sharing this card -
The stamp is Milton in Hat from Wild Rose Studio. I stamped him in Memento Tuxedo Black and coloured with Promarkers. I used a Quickie Glue Pen on the furry parts of the hat and added some Cosmic Shimmer Aurora Crystal Glitter. You can see it really catches the light.
I inked up a Craftwork Cards frame with Chipped Sapphire Distress Ink. I printed the sentiment using my labelling machine and matted it onto cobalt blue card.
I cut the poinsettia from the Spellbinders Layered Poinsettias die set and inked with Chipped Sapphire while still in the die. I put the poinsettia together using Cosmic Shimmer Dries Clear Glue and added an Eco Green Glass Glintz in blue to the centre.
I assembled the card as shown. The backing paper is from the Polka Doodles CD Jingle Jangle (I think!).
I'm entering this card into the following challenges -
Oldie But A Goodie - Christmas Animals
Make It Monday #67
Hope you like the card.
Thanks for stopping by.
Julia
Monday, 12 December 2011
Just Chillin'
Hi Bloggers,
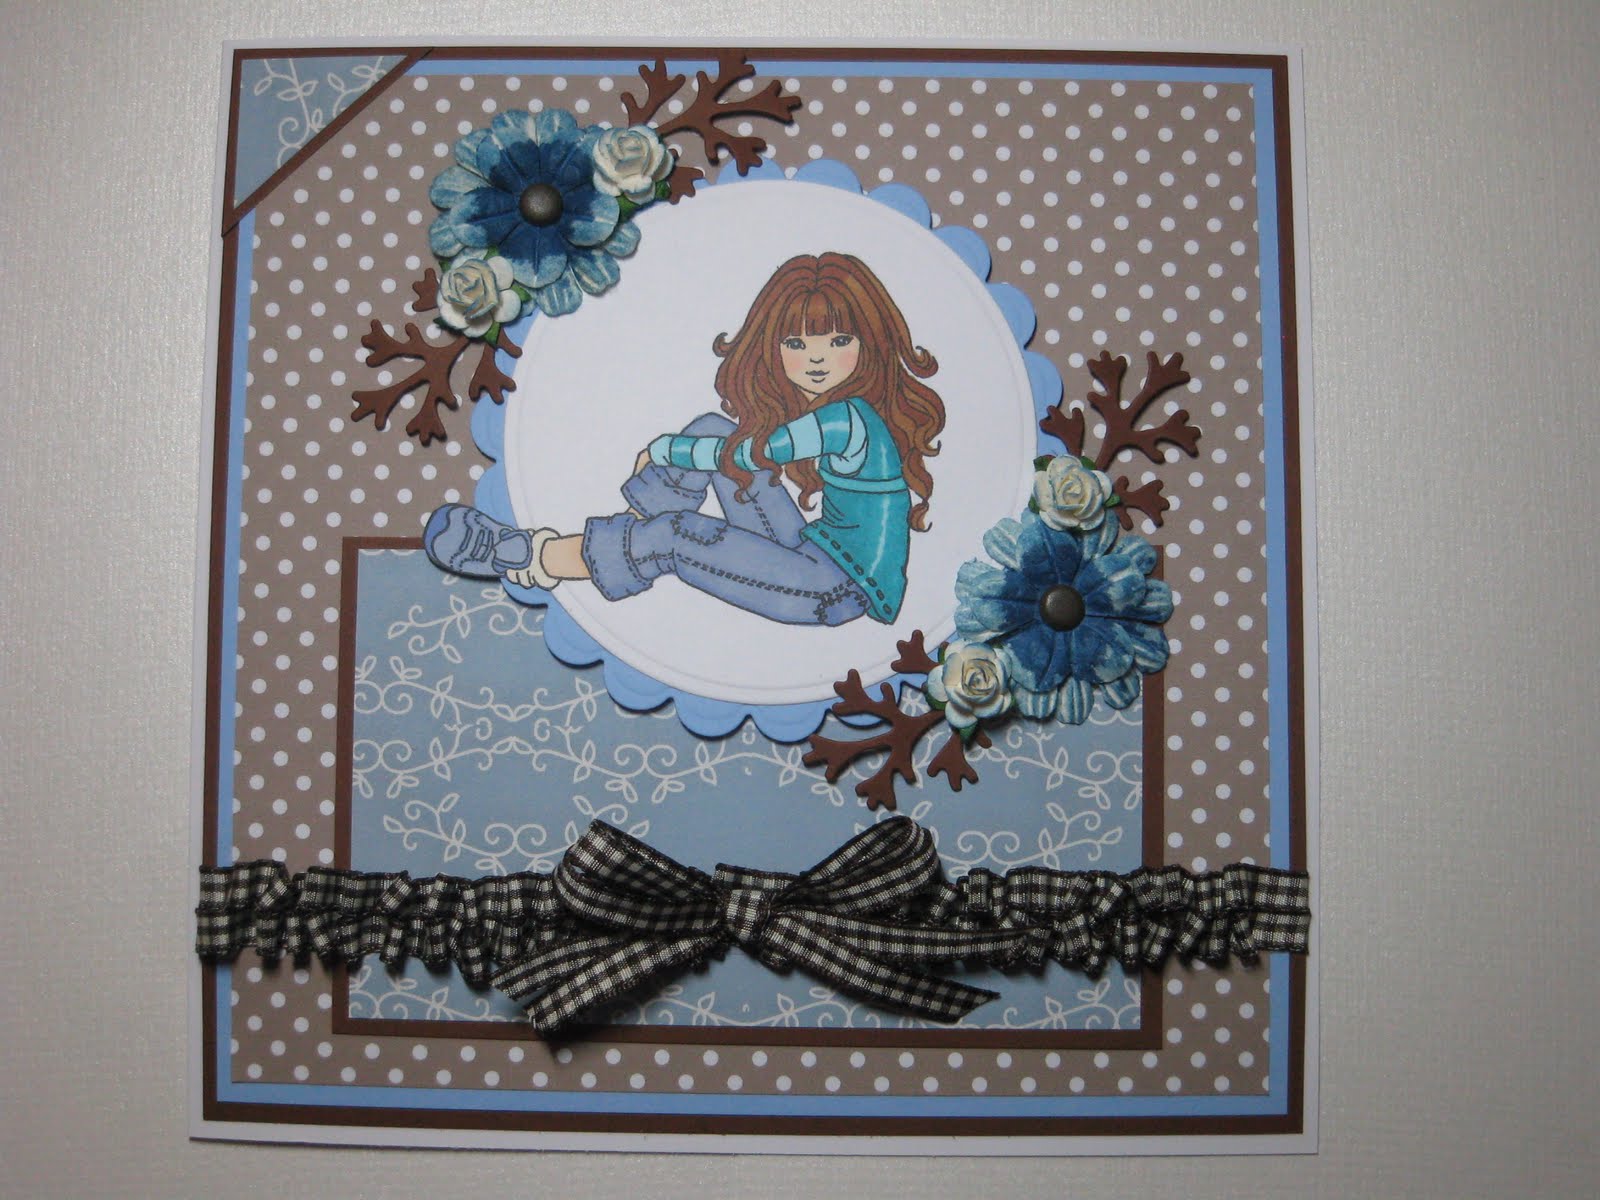
Today I have a card to share using the gorgeous Sugar Nellie stamp Chillax.
I stamped the image using Memento Tuxedo Black and coloured using promarkers. I cut the image out using the 'out of the box' technique and a circle nestability die. You can see that her foot is outside of the circle. I cut a mat out of marine blue card using a scallop nestie.
I coloured some Woodware Paper Flowers by splatting Faded Jeans Distress Stain in the centre and added some Faded Jeans Distress Ink around the edges. I added a brown American Crafts brad in the centre. I inked some white roses from my stash with the Faded Jeans Distress Ink. The leaves were cut using one of the Spellbinders Foliage dies.
I assembled the front of the card as shown using papers from Polka Doodles Sundae of Seasons CD. Before mounting it on my 8" x 8" Craftwork Cards blank, I ran some Woodware Hi-Tack Tape along the width of the design and ruffled some brown gingham ribbon along it. I did two lines of it. I added some Cosmic Shimmer Dries Clear Glue along the edges of the ruffles to secure them. I tied a messy bow two lengths of the ribbon and added it to the centre of the ruffled ribbon securing it with Cosmic Shimmer Dries Clear Glue.
I'm entering this card into the following challenges -
Allsorts Challenge - It Takes Two
The Sugar Bowl Challenge - 73 Cathy's Sketch
Make It Monday #67
I hope you like the card.
Thanks for stopping by.
Julia.
Today I have a card to share using the gorgeous Sugar Nellie stamp Chillax.
I stamped the image using Memento Tuxedo Black and coloured using promarkers. I cut the image out using the 'out of the box' technique and a circle nestability die. You can see that her foot is outside of the circle. I cut a mat out of marine blue card using a scallop nestie.
I coloured some Woodware Paper Flowers by splatting Faded Jeans Distress Stain in the centre and added some Faded Jeans Distress Ink around the edges. I added a brown American Crafts brad in the centre. I inked some white roses from my stash with the Faded Jeans Distress Ink. The leaves were cut using one of the Spellbinders Foliage dies.
I assembled the front of the card as shown using papers from Polka Doodles Sundae of Seasons CD. Before mounting it on my 8" x 8" Craftwork Cards blank, I ran some Woodware Hi-Tack Tape along the width of the design and ruffled some brown gingham ribbon along it. I did two lines of it. I added some Cosmic Shimmer Dries Clear Glue along the edges of the ruffles to secure them. I tied a messy bow two lengths of the ribbon and added it to the centre of the ruffled ribbon securing it with Cosmic Shimmer Dries Clear Glue.
I'm entering this card into the following challenges -
Allsorts Challenge - It Takes Two
The Sugar Bowl Challenge - 73 Cathy's Sketch
Make It Monday #67
I hope you like the card.
Thanks for stopping by.
Julia.
Wednesday, 30 November 2011
Tiffany in Blue
Hi Bloggers,
This is my second post today. Hope you've had a good day so far.
I wanted to share this card with you -
The image is called Tiffany and she's from Sugar Nellie. I've had her a while and have been putting off stamping her as there have been so many fab cards using her on The Sugar Bowl that I felt I may not be able to do her justice. Anyway, today I've taken the plunge and I'm pretty happy with the result.
I stamped Tiffany in Memento Tuxedo Black and coloured her with promarkers. She's in blue to follow the Ice and Snow theme on the Sugar Bowl Challenge this week.
I cut Tiffany out using the largest of the Spellbinders Lattice Rectangles dies. I cut some poinsettias out using the smallest 3 dies from the Spellbinders Layered Poinsettias die set and inked through the dies with Stormy Sky Distress Ink. I cut 2 of each size. I assembled the poinsettia and added a blue gem in the middle.
The sentiment is from Lili of the Valley. I didn't have quite the right size nestie for a mat for it so I used a Spellbinders Layered Poinsettias die to create the mat. Although I've made this card as a Birthday card, it could just as easily be a Christmas card instead if a different sentiment is used.
The backing papers are all from Polka Doodles Sundae of Seasons CD.
The card was assembled onto a Craftwork Cards 8" x 8" card blank as per Gayle's Sketch at The Sugar Bowl
I'm also entering this card into the following challenges -
Simon Says Stamp - Anything Goes
Make It Monday #65
Hope you like Tiffany as much as I do.
Thanks for stopping by.
Julia
This is my second post today. Hope you've had a good day so far.
I wanted to share this card with you -
The image is called Tiffany and she's from Sugar Nellie. I've had her a while and have been putting off stamping her as there have been so many fab cards using her on The Sugar Bowl that I felt I may not be able to do her justice. Anyway, today I've taken the plunge and I'm pretty happy with the result.
I stamped Tiffany in Memento Tuxedo Black and coloured her with promarkers. She's in blue to follow the Ice and Snow theme on the Sugar Bowl Challenge this week.
I cut Tiffany out using the largest of the Spellbinders Lattice Rectangles dies. I cut some poinsettias out using the smallest 3 dies from the Spellbinders Layered Poinsettias die set and inked through the dies with Stormy Sky Distress Ink. I cut 2 of each size. I assembled the poinsettia and added a blue gem in the middle.
The sentiment is from Lili of the Valley. I didn't have quite the right size nestie for a mat for it so I used a Spellbinders Layered Poinsettias die to create the mat. Although I've made this card as a Birthday card, it could just as easily be a Christmas card instead if a different sentiment is used.
The backing papers are all from Polka Doodles Sundae of Seasons CD.
The card was assembled onto a Craftwork Cards 8" x 8" card blank as per Gayle's Sketch at The Sugar Bowl
I'm also entering this card into the following challenges -
Simon Says Stamp - Anything Goes
Make It Monday #65
Hope you like Tiffany as much as I do.
Thanks for stopping by.
Julia
Wednesday, 9 November 2011
Christmas Bauble
Morning Bloggers.
Today I have card to share with you featuring the bauble from the Creative Expressions Christmas Swirl stamp set.
I stamped the bauble onto cream card using Jet Black Archival ink and quickly embossed it with clear powder. I coloured it in using Cosmic Shimmer Drawing Inks - I used some matt and some mica ones. I cut the image out using a rectangle nestie and inked around the edges with Vintage Photo Distress Ink and Cut & Dry Foam. I cut a gold mat out using a scalloped rectangle nestie.
I cut a longer piece of cream cardstock and randomly stamped one of the poinsettias from the Tatty Button Poinsettias stamp set in perfect medium all over the piece and on a triangle piece of card. I embossed these with clear embossing powder. I then added some Vintage Photo Distress Stain. The embossed images resisted the ink. I like the way it almost looks like I've stamped on wood. It's more effective in real life. Have a go - it's so easy! I matted these two pieces and a square piece of red card onto some gold.
I assembled the pieces as per the layout at Sketch Saturday this week but did not add it to my card blank.
I ran some super sticky tape along the appropriate place on the card and ruffled some Basque Red Vintage Ribbon along it. I wrapped the ends around the back and then fixed the design to a 6" x 6" Craftwork Cards card blank.
I'm entering this card into the following challenges -
Sketch Saturday - Week 180
Make It Monday #62
Papertake Weeky Challenge - Christmas
Thanks for stopping by today.
Julia.
Today I have card to share with you featuring the bauble from the Creative Expressions Christmas Swirl stamp set.
I stamped the bauble onto cream card using Jet Black Archival ink and quickly embossed it with clear powder. I coloured it in using Cosmic Shimmer Drawing Inks - I used some matt and some mica ones. I cut the image out using a rectangle nestie and inked around the edges with Vintage Photo Distress Ink and Cut & Dry Foam. I cut a gold mat out using a scalloped rectangle nestie.
I cut a longer piece of cream cardstock and randomly stamped one of the poinsettias from the Tatty Button Poinsettias stamp set in perfect medium all over the piece and on a triangle piece of card. I embossed these with clear embossing powder. I then added some Vintage Photo Distress Stain. The embossed images resisted the ink. I like the way it almost looks like I've stamped on wood. It's more effective in real life. Have a go - it's so easy! I matted these two pieces and a square piece of red card onto some gold.
I assembled the pieces as per the layout at Sketch Saturday this week but did not add it to my card blank.
I ran some super sticky tape along the appropriate place on the card and ruffled some Basque Red Vintage Ribbon along it. I wrapped the ends around the back and then fixed the design to a 6" x 6" Craftwork Cards card blank.
I'm entering this card into the following challenges -
Sketch Saturday - Week 180
Make It Monday #62
Papertake Weeky Challenge - Christmas
Thanks for stopping by today.
Julia.
Wednesday, 2 November 2011
Tatty Button Snowman and Seasonal Distress Inks
Hi Bloggers!
Well, guess what the postie delivered to me this morning? The title of this post should be a big hint - yep, the seasonal distress ink sets as featured on Tim Holtz's blog.
It was really hard for me to finish my chores (there weren't many of them) before I could have a play.
For this card I've used Iced Spruce and Evergreen Bough from the Winter set.
I stamped the Creative Expressions Tatty Button Snowman with the Iced Spruce Distress Ink. I coloured him in with Grey Green and Tea Green promarkers. I really like the way they toned in with the distress ink. I cut the image out with an Oval nestie and inked around the edges with the Iced Spruce.
The back mat is an 8" x 8" piece of Colorcore Whitewash which is stuck onto a Craftwork Cards card blank. The scalloped oval mat has also been cut from the whitewash and so has the Doily Lace border using a Martha Stewart punch.
The Polka Dot backing paper is from Polka Doodles Sundae of Seasons CD. It's been distressed with scissors and inked with the Iced Spruce.
The long backing panel on the left has been made by stamping the snowflake from the Creative Expressions Christmas Swirl set with Perfect Medium and then embossing it with Clear embossing powder. I then inked the area with the Iced Spruce and Evergreen Bough distress inks using Cut & Dry foam. I wrapped some fluffy white yarn around it.
I made some background paper by inking with the Iced Spruce and the Evergreen Bough and then spritzed lightly with water. I then blotted with some kitchen roll. This gave a nice mottled effect. I cut some snowflakes out using the Spellbinders Create a Flake die set from the inked backing paper I had created and from the whitewash. I layered them up and added Woodware Snowflake brads to two of them and Craftime buttons to the other two. The pearly stringy embellishment is meant to be used for a wedding piece of some sort (I've had it years!).
The lettering that I used for the sentiment is chipboard - I think it's Maya Road. I inked up the letters with the Evergreen Bough Distress Ink and once dry I painted them with Cosmic Shimmer Glitter Paint Aurora Sparkle.
The card was assembled as per the Sunday Sketch and Stamp Challenge this week.
I'm also entering this card into the following challenges -
Bunny Zoe's Crafts Challeng 17 - Lace it up
I love Promarkers Challenge 90 - Glitter & Glitz
Crafters Companion Challenge 18 - Let it Snow
Hope you like the card.
Thanks for stopping by.
Julia.
Well, guess what the postie delivered to me this morning? The title of this post should be a big hint - yep, the seasonal distress ink sets as featured on Tim Holtz's blog.
It was really hard for me to finish my chores (there weren't many of them) before I could have a play.
For this card I've used Iced Spruce and Evergreen Bough from the Winter set.
I stamped the Creative Expressions Tatty Button Snowman with the Iced Spruce Distress Ink. I coloured him in with Grey Green and Tea Green promarkers. I really like the way they toned in with the distress ink. I cut the image out with an Oval nestie and inked around the edges with the Iced Spruce.
The back mat is an 8" x 8" piece of Colorcore Whitewash which is stuck onto a Craftwork Cards card blank. The scalloped oval mat has also been cut from the whitewash and so has the Doily Lace border using a Martha Stewart punch.
The Polka Dot backing paper is from Polka Doodles Sundae of Seasons CD. It's been distressed with scissors and inked with the Iced Spruce.
The long backing panel on the left has been made by stamping the snowflake from the Creative Expressions Christmas Swirl set with Perfect Medium and then embossing it with Clear embossing powder. I then inked the area with the Iced Spruce and Evergreen Bough distress inks using Cut & Dry foam. I wrapped some fluffy white yarn around it.
I made some background paper by inking with the Iced Spruce and the Evergreen Bough and then spritzed lightly with water. I then blotted with some kitchen roll. This gave a nice mottled effect. I cut some snowflakes out using the Spellbinders Create a Flake die set from the inked backing paper I had created and from the whitewash. I layered them up and added Woodware Snowflake brads to two of them and Craftime buttons to the other two. The pearly stringy embellishment is meant to be used for a wedding piece of some sort (I've had it years!).
The lettering that I used for the sentiment is chipboard - I think it's Maya Road. I inked up the letters with the Evergreen Bough Distress Ink and once dry I painted them with Cosmic Shimmer Glitter Paint Aurora Sparkle.
The card was assembled as per the Sunday Sketch and Stamp Challenge this week.
I'm also entering this card into the following challenges -
Bunny Zoe's Crafts Challeng 17 - Lace it up
I love Promarkers Challenge 90 - Glitter & Glitz
Crafters Companion Challenge 18 - Let it Snow
Hope you like the card.
Thanks for stopping by.
Julia.
Tuesday, 1 November 2011
Christmas Bells
Good Afternoon.
Today I have a card to share using the Creative Expressions Christmas Swirl stamp set.
I stamped the Bells using Jet Black Archival ink and quickly embossed using clear powder. The image was coloured in using Cosmic Shimmer Drawing Inks - I used some matte and some mica ones. I used a circle nestie to cut out the image and edged with Vintage Photo Distress Ink. I cut a mat out for it using a scalloped circle nestie.
I don't know who the papers are by as they've been in my stash for years. I edged each piece with Vintage Photo Distress Ink. The poinsettias were made using the Spellbinders Layered Poinsettias dies. I inked them with a little Black Soot Distress ink prior to assembly.
The card was assembled as per the Sweet Stop Sketch this week. I added a couple Craftwork Cards card candi which I inked with a little Black Soot Distress Ink.
I'm entering this card into the following challenges -
The Sweet Stop SSS132
Simon Says Stamp Challenge - Anything Goes
Hope you like the card.
Thanks for stopping by.
Julia.
Today I have a card to share using the Creative Expressions Christmas Swirl stamp set.
I stamped the Bells using Jet Black Archival ink and quickly embossed using clear powder. The image was coloured in using Cosmic Shimmer Drawing Inks - I used some matte and some mica ones. I used a circle nestie to cut out the image and edged with Vintage Photo Distress Ink. I cut a mat out for it using a scalloped circle nestie.
I don't know who the papers are by as they've been in my stash for years. I edged each piece with Vintage Photo Distress Ink. The poinsettias were made using the Spellbinders Layered Poinsettias dies. I inked them with a little Black Soot Distress ink prior to assembly.
The card was assembled as per the Sweet Stop Sketch this week. I added a couple Craftwork Cards card candi which I inked with a little Black Soot Distress Ink.
I'm entering this card into the following challenges -
The Sweet Stop SSS132
Simon Says Stamp Challenge - Anything Goes
Hope you like the card.
Thanks for stopping by.
Julia.
Monday, 31 October 2011
Another Candle Christmas Card
Hi Bloggers.
Here's another card made with the Creative Expressions Tatty Button Poinsettias Stamp set.
The layout of the card follows the current sketch at Sweet Sketch Wednesday .
It's an A5 card blank. The paper is from Basic Grey from a couple of years ago.
The candle was stamped in Jet Black Archival and then then embossed very quickly with clear embossing powder. I stamped the bottom part of the stamp with the holly leaves a second time. I coloured in using the Cosmic Shimmer Drawing Inks. I used all mica ones this time. They give a lovely shimmer. I cut the image out using a Spellbinders Circle nestie and inked around the edge with Antique Linen Distress Ink and Cut & Dry foam. I coloured in the extra set of leaves in the same way, cut them out and went around the edges with a black promarker to hide any white bits. I mounted these on top of the full image with foam pads.
I made a poinsettia using the two smallest dies in the Spellbinders Layered Poinsettias die set. I inked them with Black Soot Distress Ink and added some little gems.
The sentiment is from the Creative Expressions Christmas Swirl stamp set. It's been stamped with Jet Black Archival and embossed with clear embossing powder. It's been inked around the edges with Antique Linen Distress Ink.
The card was assembled as per the sketch, piercing around all of the mats with my Tim Holtz ruler. The circle mat was pierced freehand using the embossed edge as a guide.
I wrapped some Cosmic Shimmer ribbon around the card before adding the image which was mounted onto foam pads for dimension. I added a couple of red Craftwork Cards Card Candi which were inked with the Black Soot Distress Ink to tone them in with the rest of the card to the sentiment strip and them mounted it onto foam pads.
I'm entering this card into the following challenges -
Sweet Sketch Wednesday
Simon Says Stamp Challenge - Anything Goes
Thanks for stopping by.
Julia
Here's another card made with the Creative Expressions Tatty Button Poinsettias Stamp set.
The layout of the card follows the current sketch at Sweet Sketch Wednesday .
It's an A5 card blank. The paper is from Basic Grey from a couple of years ago.
The candle was stamped in Jet Black Archival and then then embossed very quickly with clear embossing powder. I stamped the bottom part of the stamp with the holly leaves a second time. I coloured in using the Cosmic Shimmer Drawing Inks. I used all mica ones this time. They give a lovely shimmer. I cut the image out using a Spellbinders Circle nestie and inked around the edge with Antique Linen Distress Ink and Cut & Dry foam. I coloured in the extra set of leaves in the same way, cut them out and went around the edges with a black promarker to hide any white bits. I mounted these on top of the full image with foam pads.
I made a poinsettia using the two smallest dies in the Spellbinders Layered Poinsettias die set. I inked them with Black Soot Distress Ink and added some little gems.
The sentiment is from the Creative Expressions Christmas Swirl stamp set. It's been stamped with Jet Black Archival and embossed with clear embossing powder. It's been inked around the edges with Antique Linen Distress Ink.
The card was assembled as per the sketch, piercing around all of the mats with my Tim Holtz ruler. The circle mat was pierced freehand using the embossed edge as a guide.
I wrapped some Cosmic Shimmer ribbon around the card before adding the image which was mounted onto foam pads for dimension. I added a couple of red Craftwork Cards Card Candi which were inked with the Black Soot Distress Ink to tone them in with the rest of the card to the sentiment strip and them mounted it onto foam pads.
I'm entering this card into the following challenges -
Sweet Sketch Wednesday
Simon Says Stamp Challenge - Anything Goes
Thanks for stopping by.
Julia
Thursday, 27 October 2011
Vintage Christmas Button Tree
Hi Bloggers.
Today I have a card made with the Creative Expressions Tatty Button Tree stamp. I wanted to put real buttons on the tree but only had a good supply of brown ones so that's why I've used these colours. I quite like the way it turned out.
I'm entering this card into the IC Sketches Challenge this week.
I stamped the Tatty Button Tree in Coffee Archival ink and quickly embossed it with clear powder. I cut the image out using Spellbinders Labels Eight and inked around the edges with Vintage Photo Distress Ink while still in the die. I used a little of the Vintage Photo to paint the pot the tree is in. I added some brown buttons securing them with Cosmic Shimmer Dries Clear Glue.
The border at the top was made using just the top section of the tree stamped with Vintage photo. I tore the edges and coloured using Antique Linen Distress Ink and some Cut & Dry Foam and then some more Vintage Photo just along the torn edges.
I coloured some netted ribbon with Vintage Photo Distress Stain.
The background card was stamped with the snowflake from the Creative Expressions Christmas Swirl stamp set in Perfect Medium and embossed with clear powder. I also added some stars from the Sam Poole's Stylish Christmas set but left those as a watermark instead of embossing.
The ribbon was made from some American Seam Binding and inked with Antique Linen Distress Ink. I love its tatty look.
The sentiment is from the Christmas Swirl set and it was stamped in Coffee Archival and them embossed. I cut it using Spellbinders Doubled Ended Tags die and inked using Vintage Photo while still in the die.
The card was assembled onto an 8" x 8" Craftwork Cards card blank as per the sketch. I used Pinflair Glue Gel to raise the image and the sentiment. Finally, I added some faux pearls using Cosmic Shimmer White Pearl PVA all around the edge of the card and a couple of Creative Expressions White Pearl Stick Pins into the bow.
Hope you like the card.
Thanks for stopping by.
Julia
Today I have a card made with the Creative Expressions Tatty Button Tree stamp. I wanted to put real buttons on the tree but only had a good supply of brown ones so that's why I've used these colours. I quite like the way it turned out.
I'm entering this card into the IC Sketches Challenge this week.
I stamped the Tatty Button Tree in Coffee Archival ink and quickly embossed it with clear powder. I cut the image out using Spellbinders Labels Eight and inked around the edges with Vintage Photo Distress Ink while still in the die. I used a little of the Vintage Photo to paint the pot the tree is in. I added some brown buttons securing them with Cosmic Shimmer Dries Clear Glue.
The border at the top was made using just the top section of the tree stamped with Vintage photo. I tore the edges and coloured using Antique Linen Distress Ink and some Cut & Dry Foam and then some more Vintage Photo just along the torn edges.
I coloured some netted ribbon with Vintage Photo Distress Stain.
The background card was stamped with the snowflake from the Creative Expressions Christmas Swirl stamp set in Perfect Medium and embossed with clear powder. I also added some stars from the Sam Poole's Stylish Christmas set but left those as a watermark instead of embossing.
The ribbon was made from some American Seam Binding and inked with Antique Linen Distress Ink. I love its tatty look.
The sentiment is from the Christmas Swirl set and it was stamped in Coffee Archival and them embossed. I cut it using Spellbinders Doubled Ended Tags die and inked using Vintage Photo while still in the die.
The card was assembled onto an 8" x 8" Craftwork Cards card blank as per the sketch. I used Pinflair Glue Gel to raise the image and the sentiment. Finally, I added some faux pearls using Cosmic Shimmer White Pearl PVA all around the edge of the card and a couple of Creative Expressions White Pearl Stick Pins into the bow.
Hope you like the card.
Thanks for stopping by.
Julia
Monday, 24 October 2011
Poinsettias Christmas Card
Hi Bloggers.
I have another card for you this evening. I'm entering this card into Sweet Sketch Wednesday 124 Challenge this week.
I used a Craftwork Cards 6" x 6" card blank. The papers are from the Wild Rose Studio Christmas Milton Paper Pack. The images are from the Creative Expressions Tatty Button Poinsettias stamp set. They were stamped in Jet Black Archival and quickly embossed with clear powder. They were coloured using Cosmic Shimmer Drawing Inks - I used some matt ones and some with mica.
I used the 'out of the box' technique to cut the oval nestie around the image. The two panels were embossed using the Creative Expressions Lattice embossing folder.
The card was assembled as per the sketch.
Hope you like it.
Julia.
I have another card for you this evening. I'm entering this card into Sweet Sketch Wednesday 124 Challenge this week.
I used a Craftwork Cards 6" x 6" card blank. The papers are from the Wild Rose Studio Christmas Milton Paper Pack. The images are from the Creative Expressions Tatty Button Poinsettias stamp set. They were stamped in Jet Black Archival and quickly embossed with clear powder. They were coloured using Cosmic Shimmer Drawing Inks - I used some matt ones and some with mica.
I used the 'out of the box' technique to cut the oval nestie around the image. The two panels were embossed using the Creative Expressions Lattice embossing folder.
The card was assembled as per the sketch.
Hope you like it.
Julia.
IC Sketches and Milton
Hi.
This evening I have a Christmas card to share with you. I am entering this card into the IC Sketches Challenge 136
I used a Craftwork Cards 6" x 6" card blank. The stamp is Christmas Milton from Wild Rose Studio. He has been coloured using Promarkers. I used Flower Soft Polar White on the furry bits on his hat.
The paper is Making Memories. I used the Spellbinders Fleur de Lis Square die and did some faux stitching with an Inkssentials white pen.
Thanks for stopping by.
Julia
This evening I have a Christmas card to share with you. I am entering this card into the IC Sketches Challenge 136
I used a Craftwork Cards 6" x 6" card blank. The stamp is Christmas Milton from Wild Rose Studio. He has been coloured using Promarkers. I used Flower Soft Polar White on the furry bits on his hat.
The paper is Making Memories. I used the Spellbinders Fleur de Lis Square die and did some faux stitching with an Inkssentials white pen.
Thanks for stopping by.
Julia
Vintage Inventor meets Sketch Saturday
Morning Bloggers.
Today I have a card featuring Sam Poole's Vintage Inventor stamp set again. I'm always looking for something new to do with this stamp set and this time I decided to make a card with it using the Sketch Saturday challenge this week.
Here's the sketch -
And here's the card -
I used a Craftwork Cards 8" x 8" card blank. I cut a piece of card 18.5cm square and used masking tape, Pumice Distress Ink and clear embossing powder to create a faux leather technique.
I cut a piece of cream card 18.5cm square and inked it with Antique Linen, Pumice and Brushed Corduroy Distress Ink. I added some water splats and stamped some cogs and springs in Walnut Stain, Pumice and Vintage Photo Distress ink.
I inked up some strips of card with Brushed Corduroy, added some water splats, some lemon juice splats and stamped the rail tracks in Pumice.
I then inked up a piece of American Seam Binding with Vintage Photo Distress Ink and stamped 'Thingamajig' in Black Archival ink.
I stamped the Creative Expressions Scattered Words stamp onto a piece of cream card and cut out an oval nestie. I inked around the edge while still in the die using Antique Linen Distress Ink. I also made a faux nestie with contrasting card.
I stamped the Vintage Inventor onto some Grungepaper with Black Archival ink and coloured with Pumice using Cut & Dry foam. I also stamped the spring and the bolt (from Vintage Illusion stamp set) in Coffee Archival and again coloured with Pumice.
The cog was cut using the Sizzix Tim Holtz Alterations Die - Gadget Gears. I just used a piece of packing card. I painted it with Eco Green Black Acrylic Paint and then dabbed on a little of the Eco Green Aged Gold Acrylic Paint. I added a black button and an Antique Gold Faux Screw Brad (I cut the fasteners off with some nail cutters).
The sentiment (from Vintage Illusion) was stamped onto some card inked with Brushed Corduroy Distress Ink. The edges were distressed and then inked with Pumice.
The card was then assembled as per the sketch.
Thanks for stopping by.
Julia
Today I have a card featuring Sam Poole's Vintage Inventor stamp set again. I'm always looking for something new to do with this stamp set and this time I decided to make a card with it using the Sketch Saturday challenge this week.
Here's the sketch -
And here's the card -
I used a Craftwork Cards 8" x 8" card blank. I cut a piece of card 18.5cm square and used masking tape, Pumice Distress Ink and clear embossing powder to create a faux leather technique.
I cut a piece of cream card 18.5cm square and inked it with Antique Linen, Pumice and Brushed Corduroy Distress Ink. I added some water splats and stamped some cogs and springs in Walnut Stain, Pumice and Vintage Photo Distress ink.
I inked up some strips of card with Brushed Corduroy, added some water splats, some lemon juice splats and stamped the rail tracks in Pumice.
I then inked up a piece of American Seam Binding with Vintage Photo Distress Ink and stamped 'Thingamajig' in Black Archival ink.
I stamped the Creative Expressions Scattered Words stamp onto a piece of cream card and cut out an oval nestie. I inked around the edge while still in the die using Antique Linen Distress Ink. I also made a faux nestie with contrasting card.
I stamped the Vintage Inventor onto some Grungepaper with Black Archival ink and coloured with Pumice using Cut & Dry foam. I also stamped the spring and the bolt (from Vintage Illusion stamp set) in Coffee Archival and again coloured with Pumice.
The cog was cut using the Sizzix Tim Holtz Alterations Die - Gadget Gears. I just used a piece of packing card. I painted it with Eco Green Black Acrylic Paint and then dabbed on a little of the Eco Green Aged Gold Acrylic Paint. I added a black button and an Antique Gold Faux Screw Brad (I cut the fasteners off with some nail cutters).
The sentiment (from Vintage Illusion) was stamped onto some card inked with Brushed Corduroy Distress Ink. The edges were distressed and then inked with Pumice.
The card was then assembled as per the sketch.
Thanks for stopping by.
Julia
Sunday, 16 October 2011
Pippi Longsocks with Lavender and Lace
Hi,
Today I have a card to share with you featuring Pippi Longsocks from Sugar Nellie. I must say that I have really enjoyed making this card. Hope you like it.
I started with the current challenge sketch from Sketch Saturday . I stamped Pippi Longstocks with Memento and coloured her with promarkers. I added some Sakura Clear Star to her wings to give her a bit of sparkle. I edged the image with some Dusty Concord Distress Ink using Cut & Dry foam. I mounted Pippi onto a purple frame made from a Spellbinders Lattice Rectangles die.
The papers used for the backing are all from the Polka Doodles CD Sundae of Seasons. The sentiment is from Lili of the Valley. The card blank is 8" x 8" from Craftwork Cards.
The backing for the sentiment was created from some lace. The lace was actually cream but I wanted lavender so I dyed it using the Dusty Concord Distress Ink. I added a couple of Creative Expressions Pins and the card was finished.
I'm entering this card into the following challenges -
Sketch Saturday Week #177 15th October
Allsorts Challenge 125 Lavender and Lace
Thanks for taking the time to stop by.
Julia.
Today I have a card to share with you featuring Pippi Longsocks from Sugar Nellie. I must say that I have really enjoyed making this card. Hope you like it.
I started with the current challenge sketch from Sketch Saturday . I stamped Pippi Longstocks with Memento and coloured her with promarkers. I added some Sakura Clear Star to her wings to give her a bit of sparkle. I edged the image with some Dusty Concord Distress Ink using Cut & Dry foam. I mounted Pippi onto a purple frame made from a Spellbinders Lattice Rectangles die.
The papers used for the backing are all from the Polka Doodles CD Sundae of Seasons. The sentiment is from Lili of the Valley. The card blank is 8" x 8" from Craftwork Cards.
The backing for the sentiment was created from some lace. The lace was actually cream but I wanted lavender so I dyed it using the Dusty Concord Distress Ink. I added a couple of Creative Expressions Pins and the card was finished.
I'm entering this card into the following challenges -
Sketch Saturday Week #177 15th October
Allsorts Challenge 125 Lavender and Lace
Thanks for taking the time to stop by.
Julia.
Friday, 14 October 2011
Polka Doodles Challenge Week 40 - Handmade Flowers
Hi,
This if the card that I've entered into the Polka Doodles Challenge this week - Handmade Flowers.
I stamped Beviboo and coloured her in using Promarkers. I added Milled Lavender and Tumbled Glass Distress Ink to the Craftwork Cards frame using Cut & Dry foam. I blended some Milled Lavender around the outside of the frame too. The flowers were made using a Marianne Designs Die and the leaves are cur from the Foliage Spellbinders Die. I stapled a few scraps of baby blue gingham ribbon to the edge of the card.
Thanks for stopping by.
Julia
This if the card that I've entered into the Polka Doodles Challenge this week - Handmade Flowers.
I stamped Beviboo and coloured her in using Promarkers. I added Milled Lavender and Tumbled Glass Distress Ink to the Craftwork Cards frame using Cut & Dry foam. I blended some Milled Lavender around the outside of the frame too. The flowers were made using a Marianne Designs Die and the leaves are cur from the Foliage Spellbinders Die. I stapled a few scraps of baby blue gingham ribbon to the edge of the card.
Thanks for stopping by.
Julia
Monday, 19 September 2011
Tissues
Hi,
I spotted a technique in the August edition of Craft Stamper Magazine which involved stamping onto a tissue. Thought I'd give it a go and this is what I came up with :
It doesn't matter if you use 2 ply or 3 ply tissues as you only use the top layer on your card. I stamped some images from the Creative Expressions stamp set Wine Label onto my tissue using a Black Archival ink pad. I tore around each image and then removed the extra layers - just keeping the stamped layer. I painted some Eco-Green paint in Lake, Lilac and Periwinkle onto a square piece of white card.
Once the pain was dry I covered the surface with some watered down school PVA. I then placed the tissue images where I wanted them. I covered these with another layer of watered down PVA and put aside to dry.
I stamped the script text from the stamp set all over the two blue pieces of card I was using as a matt and cut 4 purple borders using the Spellbinders Parisian Accents die set.
Once dry, I trimmed off any overhanging pieces of tissue from my topper and highlighted the creases with some silver metallic rub on. I edged the whole thing with Black Soot Distress Ink.
The layers were then assembled onto a Craftwork Cards 8 x 8 card blank and some Creative Expressions Screw brads added to each corner.
It's a fun technique - why not give it a try?
Thanks for stopping by.
Julia
I spotted a technique in the August edition of Craft Stamper Magazine which involved stamping onto a tissue. Thought I'd give it a go and this is what I came up with :
It doesn't matter if you use 2 ply or 3 ply tissues as you only use the top layer on your card. I stamped some images from the Creative Expressions stamp set Wine Label onto my tissue using a Black Archival ink pad. I tore around each image and then removed the extra layers - just keeping the stamped layer. I painted some Eco-Green paint in Lake, Lilac and Periwinkle onto a square piece of white card.
Once the pain was dry I covered the surface with some watered down school PVA. I then placed the tissue images where I wanted them. I covered these with another layer of watered down PVA and put aside to dry.
I stamped the script text from the stamp set all over the two blue pieces of card I was using as a matt and cut 4 purple borders using the Spellbinders Parisian Accents die set.
Once dry, I trimmed off any overhanging pieces of tissue from my topper and highlighted the creases with some silver metallic rub on. I edged the whole thing with Black Soot Distress Ink.
The layers were then assembled onto a Craftwork Cards 8 x 8 card blank and some Creative Expressions Screw brads added to each corner.
It's a fun technique - why not give it a try?
Thanks for stopping by.
Julia
Subscribe to:
Posts (Atom)