Saturday, 23 November 2013

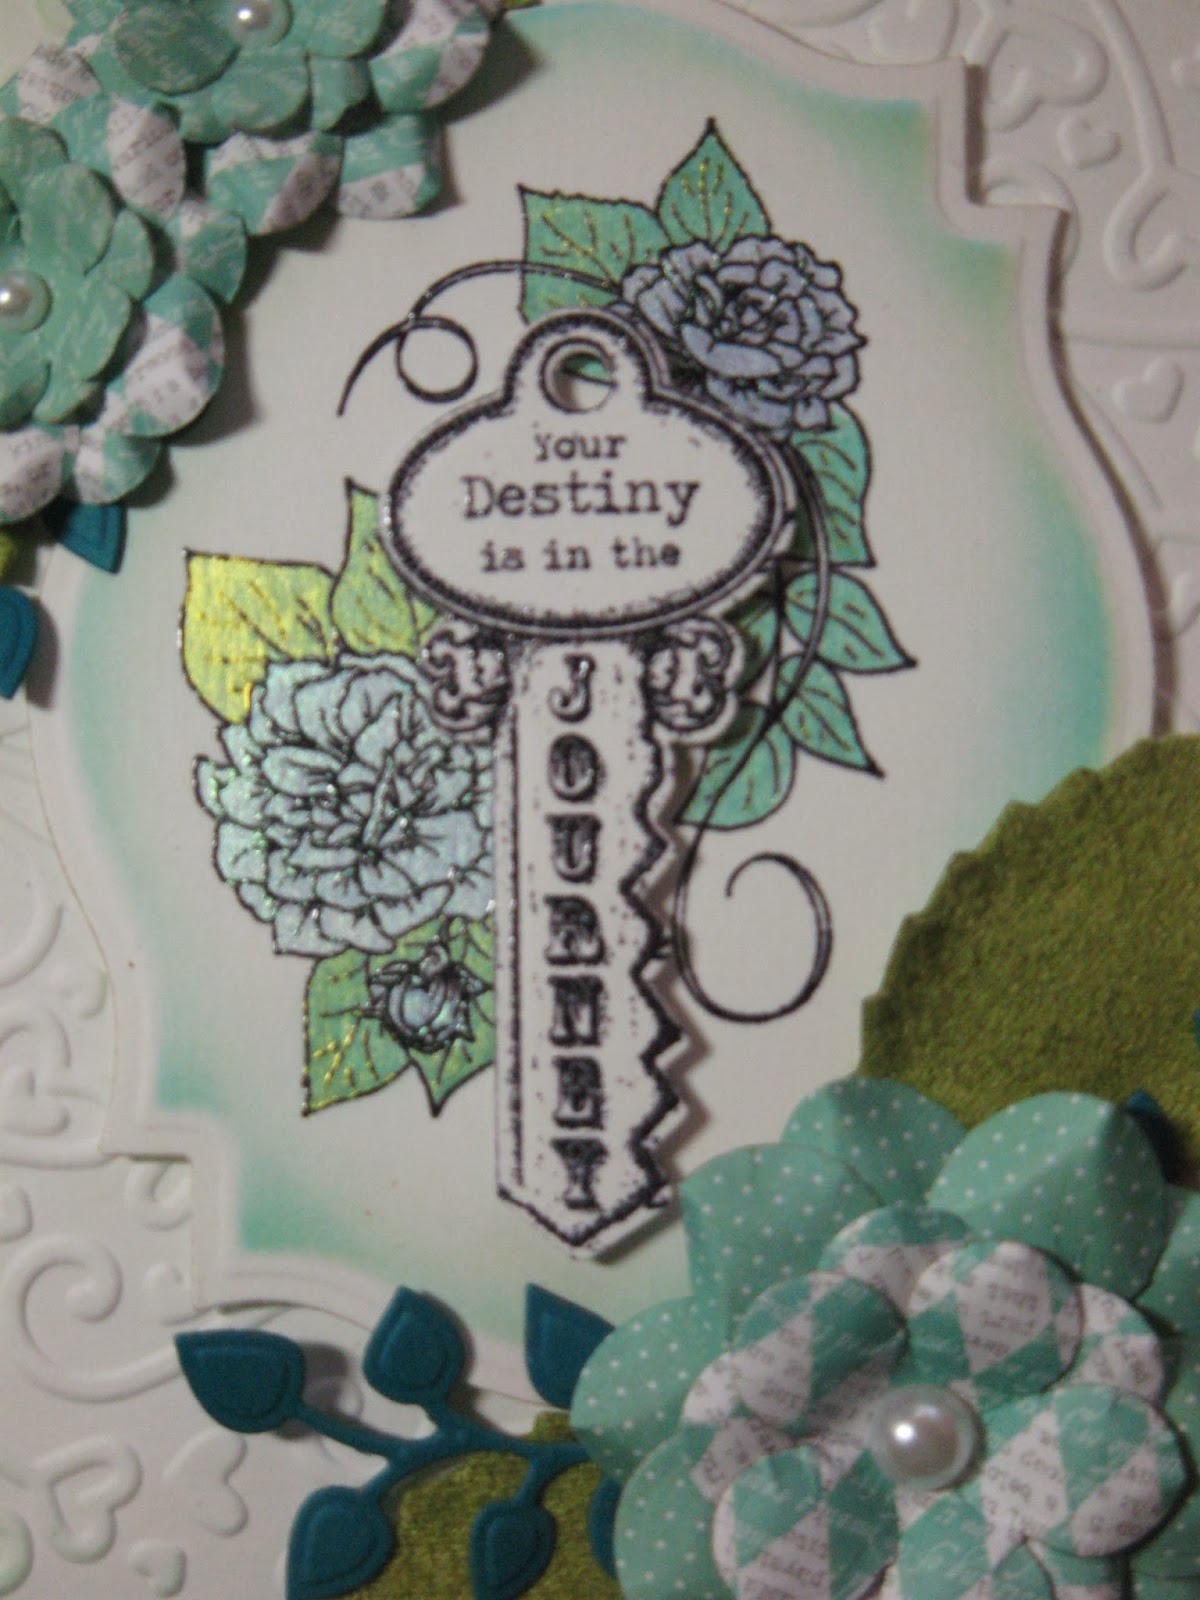
Your Destiny

Hi Bloggers.

Here's today's card featuring the Floral Key Collection from Heartfelt Creations -

For the background, I ran a piece of Coconut White Card through the Grand Calibur with the Spellbinders Twisted Hearts M-Bossabilities Folder. I ran it through a second time to extend the design. I then inked around the edges with Bundled Sage and Peacock Feathers Distress Ink using Cut n Dry Foam.

I stamped the image from the Heartfelt Creations Journey of Love Keys Stamp Set using Jet Black Archival and embossed with Cosmic Shimmer Clear Embossing Powder. I cut it out using Spellbinders Labels 18 and inked through the die with Peacock Feathers and Bundled Sage. I coloured the flowers in using Cosmic Shimmer Marine Ultra and Emerald Ultra Mica Powders from the Shimmering Luxury Set.

I stamped the Heartfelt Creations Burnished Key Stamp using Jet Black Archival and embossed with Cosmic Shimmer Clear Embossing Powder. I used the Heartfelt Creations Burnished Key Die to cut all of the keys out. I used the matching key to the one in the stamped image and used 3d Foam to layer it on top.

I cut some flowers out of the Teresa Collins 8 x 8 Paper Pad using the Heartfelt Creations Posy Patch Dies. I shaped them, layered them up and added a White Pearl to the centre of each. I cut some leaves out using the Heartfelt Creations Sweet Juliet Die Set and added some Faux Suede Leaves.


 I assembled the card as shown adding some Victorian Metal Corners and some dots of Cosmic Pearl Cosmic Shimmer Pearlescent PVA around the edges.

Thanks for stopping by.

Julia.

Friday, 22 November 2013

Sneak Peak

Hi Bloggers.

I thought I'd start sharing some cards from the shows I have this coming Sunday. I have 2 lovely collections from Heartfelt Creations on the shows - Sweet Juliet and Floral Key. You can see these collections on the Heartfelt Creations Blog by clicking these links - Sweet Juliet, Floral Key.

Here's todays card -

My background was in 2 pieces. For the top section I stamped the flower spray from the Heartfelt Creations Recovery Wishes Stamp Set using Victorian Velvet Distress Ink. I inked around the edges with a little Bundled Sage Distress Ink.

For the bottom section, I ran the piece of card through the Grand Calibur with the Couture Creations Cheerful Embossing Folder. I inked all over with Bundled Sage Distress Ink using Cut n Dry Foam to make the design pop. Then I rubbed Pearl Moon Gilding Wax all over. Once dry, I buffed it up a little and inked a round the edges with Bundled Sage.

I glued the 2 pieces onto a piece of Soft Gold Card. I hid the join by wrapping a piece of Blue White American Seam Binding and then a piece of White Crochet Ribbon around the centre.

I stamped the Sentiment from the Heartfelt Creations Beautiful Juliet Stamp Set using Perfect Medium and embossed with Cosmic Shimmer True White Detail Embossing Powder. I inked all over using Victorian Velvet Distress Ink and then cut it out using scissors, cuttin right along the Thinking of You section. I cut a Spellbinders Splendid Circle. I cut a Spellbinders Stately Circle and inked through the die on this one with Victorian Velvet.

I tied a bow using White Crochet Ribbon. I made a flower out of felt from the Vintage Pack using both of the dies from the Heartfelt Creations Sweet Juliet Die set and added a sparkly brad from my stash.
I assembled the card as shown adding some White Pearls in the right corners and some dots of Cosmic Shimmer Pearlescent PVA in White around the edges.

I'll be back tomorrow with a Sneak Peak from the Floral Key collection.

Thanks for stopping by.

Julia.

Thursday, 21 November 2013

Life is better with you in it!

Hi Bloggers.

Easy Peasy card today using the Couture Creations Ornate Frame 3 in 1 set -

I rubbed a Plum Archival ink pad all over the large stamp in the set (I did not want the colour to be dark) and stamped it onto some Milk Card. Then, using the ink pad in the usual way, I stamped 3 tiny butterflies. I made sure the ink was dry and then ran it through the Grand Calibur with the embossing folder from the set. I inked around the edges of the background with Seedless Preserves Distess Ink using Cut n Dry Foam.

I stamped the 2 largest butterflies using Plum Archival and cut them out using the dies in the set. I added some Seedless Preserves to the edges of the wings, shaped them and added them to the card as shown.

I stamped the sentiment from the Creative Expressions Gratitudes Stamp Set using Plum Archival and embossed with Cosmic Shimmer Clear Embossing Powder. I cut it out using Spellbinders Labels 28 and inked through the die with Seedless Preserves.

I tied a bow using 3 lengths of Blue White American Seam Binding and added a Clear Sparkler.

I assembled the card as shown adding a 5mm White Pearl in each corner and some dots of Cosmic Shimmer Pearlescent PVA in White around the edges.

Thanks for stopping by.

Julia.

Wednesday, 20 November 2013

Sending my thanks

Hi Bloggers.

Hope you're enjoying the Creative Expressions Blog Hop. If you haven't joined in, you can start here.

Here's today's card -

For the background, I first stamped the large stamp from the Couture Creations Butterfly Notes 3 in 1 set twice using Cobalt Archival. I popped it through the Grand Calibur twice with the embossing folder from the set, lining it up with the stamped flower and butterfly each time. I added some Pearl Moon Gilding Wax over the embossed areas. I then stamped some notes and butterflies as shown, again using Cobalt Archival. I inked around the edges of the piece with Faded Jean Distress Ink using Cut n Dry Foam.

I stamped the flower from the Creative Expressions Floral Silhouette Stamp Set using Cobalt Archival. I cut it out using Spellbinders Fancy Postage Edge and inked through the die with Faded Jeans.

I cut out the largest of the Spellbinders Fancy Ribbon Threader dies. At the emboss stage I added the embossing Folder from the Couture Creations Party Time 3 in 1 set. I threaded some Blue White American Seam Binding through the slits in the die cut. I tied a bow using 3 lengths of the same ribbon and added a Heart Dazzler.

I stamped the butterfly with the notes stamp twice more using Cobalt Archival. I cut one out using the butterfly die from the set and the other out using the top wings die from the set. I inked around the edges a little with Faded Jeans, shaped them and added them on top of the butterfly that was poking out of the ribbon threader die cut.

I assembled the card as shown adding some White Pearls to the corners and some dots of Cosmic Shimmer Cosmic Pearl Pearlescent PVA around the edges.

Thanks for stopping by.

Julia.

Tuesday, 19 November 2013

Creative Expressions Blog Hop

Hi Bloggers.

Just a reminder that the Creative Expressions Design Team Blog Hop is now on - just follow this link to get started

http://blog.creative-expressions.uk.com/2013/11/creative-expressions-blog-hop-let-fun.html

Good luck everyone!

Please scroll down to the previous post to see today's card.

All for now.

Julia

You're the Best! and Amazon Shop Stock Updates

Hi Bloggers.

Here's the card I demoed really badly on the 5pm show on Sunday! Hope you have all learned from my messup!

OK, so here's what supposed to happen in the demo! I popped a little Cosmic Shimmer Flake & Glitter Glue on my Craft Sheet. Using a piece of Cut n Dry Foam, I applied the glue all over the large stamp in the Couture Creations Floral Wreath 3 in 1 Set. I stamped onto a piece of Rich Red Card. Now, don't apply the Gilding Flakes to the glue until the glue is clear. If it's still blue then you will make a mess like I did on live tv! I used Persian Dawn Gilding Flakes which are lovely. I added some more Flake & Glitter Glue to the top of the stamp, used a piece of paper to mask off the already stamped section and added the image to the bottom of the card. Once again, wait till the glue is clear before adding the flakes. Make sure you clean the glue off the stamp before it dries. I find the rough side of a Grime Boss is best. Next, I did some shadow stamping (got this technique from Sue). I inked up the stamp with Jet Black Archival. I stamped it very slightly to the right of my original stamping. I inked up just the top part of the stamp again and then stamped the bottom of the frame in the same way.

I stamped the sentiment from the Creative Expressions Gratitudes Stamp Set using Jet Black Archival and embossed with Cosmic Shimmer Clear Embossing Powder. I cut it out using Spellbinders Labels 28.

I wrapped a piece of Black American Seam Binding around the area where the join in my stamping showed, I stamped the bottom section of the large stamp again using Jet Black Archival and embossed with Cosmic Shimmer Clear Embossing Powder. I used one of the dies in the pack to cut out the motif (easiest if you make yourself a template).

For the background, I stamped the square motif from the set around the sides of a piece of Rich Red Card using Perfect Medium. I then added some Copper, Pale Gold and Silver Mica Powder (available in the Metallics Set or in bigger pots on the show) and brushed off the excess. I misted with some water and heat set.

I tied a bow using 3 lengths of Black American Seam Binding and added a Crystal Sparkler to the centre.

I assembled the card as shown adding some 8mm Black Pearls in the corners and some dots of Cosmic Shimmer Pearlescent PVA in Black Pearl around the edges.

New additions and re-stocks in my Amazon Store are as follows -

Your Carriage Awaits Single Stamp
Classic Rose Stem
Belle of the Ball


Small Fancy Pearl Embellishments
Crystal Sparklers
Medium Circle Dazzlers
Medium Heart Dazzlers
Cosmic Shimmer Morning Sunlight Mica Spray Set
Cosmic Shimmer Dries Clear Glue - Large Pot
CS Flake & Glitter Glue
CS Clear Varnish Lacquer
I've also re-stocked many ribbons.

All for now. Thanks for stopping by.

Julia.

Monday, 18 November 2013

Thank You for Being There

Hi Bloggers.

Here's today's card -

A bit of a messy background on this one. I used Peach Card. I stamped the wider border from the Couture Creations Pattern Quilt 3 in 1 set randomly across the card using Dried Marigold Distress Ink. Then I randomly stamped some of the flowers from the same set using Coffee Archival. I made sure the ink was dry and then san it through the Grand Calibur with the embossing folder that comes in the Party Time set. I rubbed Enchanted Gold Gilding Wax all over. Once dry I inked around the edges with Dried Marigold.

I cut 3 strips of Apricot Card and ran them through the Grand Calibur one at a time in the second section down of the Pattern Quilt folder. I dusted them with my anti static bag and then stamped the other border from the set using Perfect Medium. I mixed a little Cosmic Shimmer Copper Mica Powder with some Cosmic Shimmer Clear Embossing Powder, added this to the stamped images and heat set.

I stamped the sentiment from the Creative Expressions Gratitudes Stamp Set using Coffee Archival and embossed with Clear Powder. I cut it out using Spellbinders Fancy Ribbon Threader and inked through the die with Dried Marigold Distress Ink. I threaded some Blue White American Seam Binding through the slots in the die cut. I tied a bow using 3 lengths of the Seam Binding.

I stamp 1 small flower and 2 large flowers from the Pattern Quilt set using Coffee Archival. I cut them out using the corresponding dies and added a Cream Pearl to the centres.

I assembled the card as shown adding some more cream pearls to the corners and some dots of Cosmic Shimmer Pearlescent PVA in Golden Pearl around the edges.

Thanks for stopping by.

Julia.

Sunday, 17 November 2013

What's new with you?

Hi Bloggers.

I have shows today on Create & Craft at 12noon for 2 hours with Nigel and at 5pm with Genevieve. Hope you can join me.

Here's today's card, based on a sample that Sue Wilson made for the show.

The background is a piece of Coconut White Card run through the Grand Calibur with the embossing folder that comes in the Party Time Couture Creations 3 in 1 set. I ran it through a second time to extend the design.

I stamped the Doilies Stamp from the 3 in 1 set of the same name, using Perfect Medium and embossed with Cosmic Shimmer True White Detail Embossing Powder. I then popped it inside the the embossing folder from the same set and ran it through the Grand Calibur. 

I wrapped some Black American Seam Binding around towards the right hand side and added a bow 3 lengths of the same. I added a Crystal Sparkler to the centre of the bow.

I cut some little doilies out of red and black card using the dies from the set, stacked them up and added some White Pearls to the centres.

I stamped the sentiment from the Creative Expressions Gratitudes Stamp Set using Jet Black Archival and embossed with Cosmic Shimmer Clear Embossing Folder. I cut it out using Spellbinders Labels 28 and inked through the die with Aged Mahogany Distress Ink.

I assembled the card as shown adding some Black Pearls to the corners.

Thanks for stopping by.

Julia.

Saturday, 16 November 2013

Party Time

Hi Bloggers.

I have shows today on Create & Craft at 12noon and 4pm - both scheduled with Leonie.

Today's card features the Party Time 3 in 1 Set from Couture Creations -

For the background, I used the embossing folder that comes in the set and ran it through the Grand Calibur with some Coconut White Card. It is possible to extend the design neatly - I'll try to show that in a demo. I inked around the edges with Dusty Concord Distress Ink. Using some of the cupcake stamps in the set, I used Dusty Concord to stamp them in some of the circles in the embossed design.

I stamped the main image from the set using Perfect Medium and embossed with Cosmic Shimmer True White Detail Embossing Powder. I cut it out using the die from the set. I stamped some more cupcakes using the Perfect Medium and embossed with the True White Detail Powder. I cut a Spellbinders Fancy Postage Edge die out of Rich Plum Card.

I stamped the sentiment from the set onto some Mauve Card using Perfect Medium and embossed with the True White Detail Powder. I cut it out using Spellbinders Distressed Edges.

I stamped some of the bunting stamps from the set onto Rich Plum and Mauve Card. Some I stamped using Perfect Medium and embossed with True White Detail Powder, others I stamped using Dusty Concord Distress Ink and embossed with Cosmic Shimmer Clear Embossing Powder. I cut them out using the appropriate dies in the set. I folded each one around a length of Baker's Twine as shown, gluing the front to the back with Cosmic Shimmer Dries Clear Glue.

I assembled the card as shown adding some 5mm White Pearls and some dots of Cosmic Shimmer Pearlescent PVA in White around the edges.

Thanks for stopping by.

Julia.

Friday, 15 November 2013

Launching Couture Creations 3 in 1 sets

Hi Bloggers.

So, this morning at 9am I'm launching a new range from Couture Creations. They're called 3 in 1 and you get some clear stamps, a co-ordinating embossing folder and a set of co-ordinating dies in each pack. There are 6 packs on the show.

I've had a lot of help with samples for the show. My thanks go to Sue Wilson, Nikki Payne and all 10 members of the Creative Expressions Design Team. I should perhaps mention now that Creative Expressions are holding a blog hop featuring the Design Team and some of their 3 in 1 creations starting on Tuesday - full details can be found here.

You'll see from the samples on the shows that the sets are very versatile - suitable for any level of expertise. Today's card is a very simple one to get you warmed up.


This card uses the set called Butterfly Notes. I used Kraftcore card so the stamping is a bit distressed on this one (my excuse!). I stamped the large stamp from the set towards the bottom of the card using Coffee Archival. This stamp matches the embossing folder that comes in the set. I lined it up within the folder and ran it through the Grand Calibur. I then sanded the image a little to reveal some of the core.

I stamped some of the other stamps from the set at the top of the card, again using Jet Black Archival. I stamped the butterfly with the notes twice on a piece of Kraft Card using Coffee Archival. I used the co-ordinating dies in the set to cut out a whole butterfly and the top set of wings (it's easiest if you make yourself a template for this). I edged them with Victorian Velvet Distress Ink, shaped them and glued them on top of the butterfly stamped on the Kraft Core.

I cut a Justrite Vintage Labels Four Die out of Kraftcore and sanded it. I stamped the sentiment that comes in the Floral Wreath Set using Coffee Archival. I cut it out using a Spellbinders Fancy Postage Edge Die and inked through the die with Victorian Velvet. I added a couple of brads from my stash.

I stamped the flower onto Kraftcore using Coffee Archival and cut it out using the co-ordinating die.

I assembled the card as shown adding some dots of Cosmic Shimmer Pearlescent PVA in Dark Bronze around the edges.

I'll see you at 9 with Debbie.

Thanks for stopping by.

Julia.

Thursday, 14 November 2013

Love, Peace & Joy

Hi Bloggers.

Another slight change in plans this weekend. I'm still doing shows on Saturday and Sunday but will actually be launching the new Couture Creations products in an extra show tomorrow (Friday) at 9am. That'll be me - up at stupid o'clock again! I hope to be able to post a sneak peak from the shows tomorrow but I'm really up against it so please bear with me.

Here's today's card -

Justrite Stamps - Christmas Vintage Labels Four, Festive Poinsettia
Justrite Dies - Vintage Labels Three Dies
CE Stamps - Newsprint Holly
Spellbinders - Holly Motifs, Layered Poinsettia, Holiday Magic M Boss
Olive Archival
CS Golden Green Sparkle Embossing Powder
Distress Ink Pads - Peeled Paint & Forest Moss
That Special Touch - Tree and Angels
Self Adhesive Sheet
CS Polished Silk Glitter - Dark Emerald
Green/Ivory Striped Grosgrain Ribbon
Cream Pearls - 3mm & 5mm
CS PVA - Vintage Golden Green


Thanks for stopping by.

Julia.

Wednesday, 13 November 2013

The Greatest of Gifts

Hi Bloggers.

Completely bogged down with prep for the weekend so just some pics and ingredients list today - sorry. Will be like this for a couple of days - sorry again!

Justrite Stamp Sets - Inner Thoughts, Holiday Magic, Festive Poinsettia
Justrite Dies - Vintage Labels Two, Vintage Labels Four
Spellbinders - Layered Poinsettia, Holiday Magic M Boss
Jet Black Archival
CS Clear Embossing Powder
Aged Mahogany Distress Ink
Burgundy/Ivory Grosgrain
5mm Cream Pearl
Victorian Metal Corners
CS Berry Red PVA


Thanks for stopping by.

Julia.

Tuesday, 12 November 2013

Peace on Earth

Hi Bloggers.

It's all change with my shows this weekend. On Saturday and Sunday I'll be launching some brand new Couture Creations products (times in left hand sidebar of this blog) and my Heartfelt Creations shows have been moved back a week to Sunday 24th November. All this is subject to change of course!

Here's today's card -

Simple, quick & easy Christmas card today.

For the background, I ran a piece of Cobalt Card through the Grand Calibur with the Spellbinders Holiday Magic M-Bossabities Folder. I rubbed some Enchanted Gold Gilding Wax over the surface.

 I stamped 3 of the images/sentiments from the Justrite Oh Holy Night Stamp Set using Cobalt Archival and embossed with Cosmic Shimmer Clear Embossing Powder. I cut them out using Spellbinders Heirloom Ornaments 2013 and inked through the die with Faded Jeans Distress Ink.

I ran some blue/white Baker's Twine down the card to each bauble and added a bow tied from 2 lengths of the same twine.

I assembled the card as shown adding some dots of Cosmic Shimmer Pearlescent PVA in Olympic Gold around the edges.

Thanks for stopping by.

Julia.