Showing posts with label MDF. Show all posts

Friday, 22 September 2017

Creative Expressions Takeover Weekend today

Hi Bloggers.

The Creative Expressions Takeover Weekend at Hochanda starts today at 6pm when Sue Wilson Launches a new One Day Special. Lisa Horton is on at 7pm and then Sue is on again at 8pm. I have listed the weekend schedule in the left hand side bar of this blog.

I have 2 projects to share with you today. The first is from my Weaving Die shows on Sunday -

Products used -
Sue Wilson - Intermediate Weaving Die, Scalloped Lattice Frames Set B, Striped Nasturtium, Spring Foliage, Thank You
Woodware 2mm Foam Tape
Creative Expressions - 3mm Black Pearls, Card : Black, Coconut White


Lisa's show tonight features some new MDF so I made this while at Ally Pally last weekend -

Products used -
Creative Expressions - MDF Festive Media Boards, Double Sided Self Adhesive Sheet
Cosmic Shimmer - Acrylic Mixed Media Paint : Chelsea Blue and Caactus Leaf, Silver Moon Sparkle Texture Paste, Apple Red Glitterbitz
Lisa Horton - Stitched Collection : Sleigh, Stylish Script : Season's Greetings
Sue Wilson - Here Comes Santa Snow Globe Scene
Phill Martin Sentimentally Yours Stencil - Twinkle Twinkle

Obviously, no Freebie Friday this week - it'll be back next week.

My website is still not available 😞 It looked like it was getting somewhere but there were no images so the whole migration was started again. It looks like the drop down category menus will take some time to get sorted so I may go live with a less than perfect system but at least the search button works and the payment system should be more reliable. Also the prices shown are ex-VAT, VAT will be added at checkout. I'll try and get that sorted as a priority. Nothing is ever as easy as it appears to be!

Don't forget to tune in at 6pm!

Thanks for stopping by.

Julia.
www.juliawattscrafts.co.uk
Free card with all website orders over £10 (ask for one in the comments box at checkout).

Sunday, 16 July 2017

MDF and Cosmic Shimmer Chalk Clouds

Hi Bloggers.

Something a little different today - I thought I'd share the MDF samples that I made for the Chalk Cloud Shows on Hochanda last month.

I used a pack of MDF Hexagons and Frame. I painted some with White Gesso, some with Black Gesso and I left some untreated. The one above is painted with White Gesso. Once the Gesso was dry, I added Cozy Clay Chalk Cloud to the front of the Hexagon and Sweet Violet Chalk Cloud on the back, sides and the frame.

I misted the Woodware Crazy Mosaic Background Stamp with water and stamped it onto the Cozy Clay front of the MDF. The water bleached out the ink to reveal the stamp design. I glued the frame to it using CS Glue.

I stamped a couple of the cacti images from the Woodware Succulents Stamp Set onto Coconut White Card using Onyx Black Versafine Ink. I coloured in using Chalk Clouds by dabbing some ink into the lids of the pots and picking the colour up with a Water Brush. I used Blue Lagoon, Terracotta, Subtle Sage, Pink Princess and Sweet Violet. I cut them out using scissors and glued them onto my Hexagon.

Now, I wanted to use this as a coaster so, I thought, I should seal it as water would leave marks on it. So, I started covering it with CS Matt Glue, Seal & Glaze - big mistake! This moved the ink around so my Crazy Mosaic Background almost disappeared and there are blotches on the back of my piece. Lesson learned 😞 However, it did not move the colour painted on the images. 😊

Apologies - it's hard to see this one with the reflection. This one was painted with Black Gesso. I inked up the Woodware Vintage Fabric Background with Blue Lagoon Chalk Cloud and stamped onto my Hexagon. I didn't stamp it particularly well as I forgot to use my Stamping Mat but you can just see a very light stamping which actually turned out to be just right 😊

I then stamped one of the eyes from the Woodware Eyes Stamp Set, again using Blue Lagoon. I applied Clear Perfect Medium and CS Clear Ultra Thick Embossing Crystals and heat set using a Low Speed Heat Tool. I added more Perfect Medium, more Ultra Thick and heat set again. There were a couple of areas where it wasn't perfectly smooth so I added more ink and more Ultra Thick and heat set one more time.

I added Blue Lagoon Ink the the frame and added it to my piece using CS Glue.

This is another one with Black Gesso on it. This time I have pounced through the Celtic Vine Mask with Sweet Violet Chalk Cloud using a Smoothie. I haven't added anything on top of this one.

This one is using untreated MDF i.e. no Gesso. I added 2 coats of Blue Lagoon Chalk Cloud, allowing the first coat to dry before adding the second coat. I masked off the area around one hand on the Handy Mask using Low Tack Tape and then pounced through the mask with Gentle Lavender Chalk Cloud using a Smoothie. I then used the Every Child Mask and masked off the areas around the words I chose using Scotch Removable Tape. I pounced through the mask with Gentle Lavender Chalk Cloud again. I covered the frame with 2 coats of Gentle Lavender and added it to my piece using CS Glue.

Thanks for stopping by

Julia.
www.juliawattscrafts.co.uk
Free card with all website orders over £10 (ask for one in the comments box at checkout).
Deal of the Day today (16th July) - J
ustrite - Meadow Circles Clear Stamp Set only £8.99!

Sunday, 5 March 2017

Happy Accident

Hi Bloggers.

Here's today's card -

For the background, (if you can see it!), I stamped the Creative Expressions Alpha Writing A6 Background using the Heritage Crafts Lilac Pigment Ink Pad onto Coconut White Card. I matted onto Black Card and onto a Coconut White Card blank.

I covered a MDF Mini Tag with White Gesso. I added a little CS Chic Aubergine Mister to my Craft Sheet and mixed in a little CS Warm White Chalk Paint. I used this to paint my tag. I then covered it with Clear Perfect Medium, added CS Clear Ultra Thick Embossing Crystals and heat set using a Low Speed Heat Tool. I added more Perfect Medium and more Clear Powder. Before heat setting, I inked up the Creative Expressions Silhouette Leaf A6 Background Stamp with Jet Black Archival. I heat set the powder and sprinkled on some CS Ultra Thick Embossing Crystals in Bright Gold, Magestic Purple and Lapis Pearl. While the still moulten, I pressed the Silhouette Leaf stamp into it. Unfortunately, the stamp slipped so the result wasn't brilliant. I almost turned it over and started again but, instead, I re-heated it. The powder re-melted and flattened out and I really liked the result - Happy Accident!

I lit the tea lights in the EFCO Enamel Pot. I added some CS Clear Ultra Thick Embossing Crystals to a pie dish and popped it on the hot plate. Once moulten, I added Chic Viola Mica Powder and mixed well. I poured it into a mould made from a cheap button and Ranger Mold n Pour. After a couple of minutes, I removed it from the mould and added it to my tag.

I mixed a little Chic Aubergine Mister with Warm White Chalk Paint and painted onto a piece of Coconut White Card. I used this to make a flower using Sue Wilson's Exquisite Poppy Die Set. I used  a Pigma Micron Pen to draw in the veins in the petals through the die. I cut a leaf out of Black Card using Sue's Curled Vines Die Set.

I completed my card by adding some 5mm White Pearls.

Thanks for stopping by.

Julia.
www.juliawattscrafts.co.uk
Free card with all website orders over £10 (ask for one in the comments box at checkout).

Deal of the Day today (5th March) - Spellbinders 5 x 7 Flourished Frame only £9.99!

Sunday, 22 January 2017

Letters

Hi Bloggers.

Here's today's card -

Another proper card! This was was from my shows 22nd/23rd December with the lovely Tim Holtz stamps and CS Ultra Thick Embossing Crystals.

I have lots of pierced pieces of Coconut White Card from cutting frames and I used one on this card. I stamped the main image from the Tim Holtz Classics 8 Stamp Collection using Jet Black Archival. I stamped the sentiment from the Tim Holtz Classics 4 Stamp Collection, again using Jet Black Archival.

I matted onto Black Card and then onto Coconut White Card that I spritzed with Phill Martin's CS Chic Magenta Ink Spray Mist. I popped these onto a Coconut White Card blank.

I covered a Mini MDF Tag with CS White Gesso. I misted a little Chic Magenta Ink Spray Mist onto my Craft Sheet and then mixed in a little CS Warm White Chalk Paint. I used this to paint my tag. Once dry, I stamped the image from the Tim Holtz Classics 8 Stamp Collection onto my tag using Jet Black Archival. I added Clear Perfect Medium then CS Clear Ultra Thick Embossing Crystals and heat set. I added more ink, more Crystals and heat set again.

I lit the tea lights in the EFCO Enamel Pot. I added some Clear and some Black Ultra Thick Embossing Crystals to a pie dish and popped it on the hot plate. Once moulten, I poured it into a mould made from a Wendy Vecchi embellishment. After a couple of minutes, I removed it from the mould and added it to my tag using CS Glue.

I completed my card by adding White 5mm Pearl to the corners.

Thanks for stopping by.

Julia.
www.juliawattscrafts.co.uk
Free card with all website orders over £10 (ask for one in the comments box at checkout).

Deal of the Day today (22nd January) - Phill Martin Sentimentally Yours - Chic Floral 'Everyday' Border Sentiments only £8.99!

Sunday, 8 January 2017

Glory of Art

Hi Bloggers.

I have an MDF piece from that ODS that I did last month featuring the Ultra Thick Embossing Crystals and Tim Holtz stamps. Good to do something different sometimes.

I painted both pieces of the MDF Baroque Square Photo Frame with CS White Gesso.

Once dry, I popped the back panel into a large box and misted with Phill Martin's CS Chic Aubergine Ink Spray Mist. While it was still wet, I used a brush to spread the colour around. Once this was dry, I stamped one of the stamps from the Tim Holtz Classics 4 Stamp Set using Jet Black Archival.

I spritzed a little of the Chic Aubergine Mister onto my Craft Sheet and added some CS Warm White Chalk Paint. I mixed it using a brush and painted the frame with it. Once dry, I stamped the heads stamp from the Tim Holtz Classics 4 Stamp Set and the sentiment from the Tim Holtz Classics 8 Stamp Set using Jet Black Archival.

I stamped the Creative Expressions Vintage Tapestry A6 Background Stamp onto Coconut White Card several times  using Lilac Heritage Crafts Pigment Ink. I cut Sue Wilson's Stitched Doodled Flowers from it and also a pair of leaves using Sue's Trailing Ivy Die Set (hard to see in the photos, I know).  I also cut some flowers and leaves out of Black Card. I pressed the black leaves into Clear Perfect Medium, added CS Clear Ultra Thick Embossing Crystals and heat set.

I made a mould using a cheap button and Ranger Mold n Pour. I lit the Tea Lights in the Efco Enamel Pot, popped a foil dish onto the metal plate, added some CS Clear Ultra Thick Embossing Crystals and popped the lid over. Once the Clear had melted, I added some CS Majestic Purple Embossing Crystals to the dish and popped the lid on again. Once moulton, I poured it into my mould and returned the dish to the stove. After a few minutes the UTEE was set and I removed my button from the mould. I repeated the process until I had 4 button embellishments. I glued them to the top of my flowers using CS Glue.


All orders placed on Thursday were posted out yesterday. The rest will be sent out tomorrow, latest Tuesday.

I've ordered more stock of the dies that I had on the Weaving shows. Unfortunately, the Star Flower Cluster is out of stock at CE. You can find everything here. Stock due in Tues/Wednes.

Thanks for stopping by.

 Julia.
www.juliawattscrafts.co.uk
Free card with all website orders over £10 (ask for one in the comments box at checkout).
Deal of the Day today (8th January) - S
tampendous Cling Rubber Stamp - Seashells only £8.99!

Thursday, 22 December 2016

One Day Special on Hochanda this evening

Hi Bloggers.

I'm launching a One Day Special on Hochanda this evening at 8pm. The bundle includes some Tim Holtz Stamps, Ultra Thick Embossing Crystals, some Ink Pads and some Embossing Folders - a great mix of items.

I have a two-fer for you today comprising a couple of cards (proper ones!).

I've used a waste piece of 
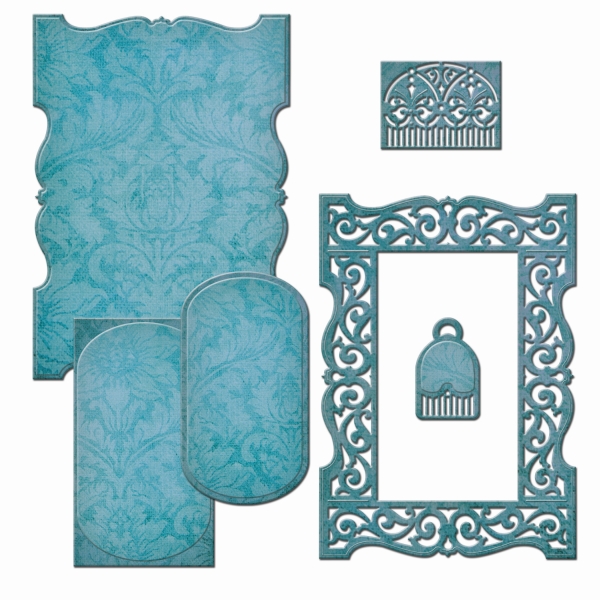
Coconut White Card left over from making a frame - it's made from Sue Wilson's Double Pierced Rectangles Set B. I stamped the image from the Tim Holtz Classics 8 Stamp Collection using Jet Black Archival.

I stamped the sentiment from Phill Martin's Timeless Everyday Sentiments Banners, again using Jet Black Archival.

The lit the Tea-Lights in the Efco Enamel Pot. I added some Clear and some Black Ultra Thick Embossing Crystals to a Foil Dish and popped the lid on. I had previously made a mould from an embellishment using Melt Art Mold-n-Pour.

Once my embossing crystals had melted, I added them to my mould.

I painted a MDF Mini Tag with White Gesso. I spritzed some CS Phill Martin Chic Aubergine Ink Spray Mist onto my Craft Sheet. I added some CS Warm White Chalk Paint and gave it a good mix. I painted the Tag. Once dry, I covered it with Clear Perfect Medium, added CS Clear Ultra Thick Embossing Crystals and heat set using a Low Speed Heat Tool. Keeping the heat on the tag, I sprinkled over some CS Ultra Thick Embossing Crystals in Bright Gold, Majestic Purple and Lapis Pearl. While still molten, I added the Creative Expressions Vintage Tapestry A6 Stamp. I left the stamp in place for a minute or so then peeled it away.

Hopefully, the studio cameras will show this off better!

Here's your second card for today -

There are some lovely Heritage Crafts Pigment Ink Pads on the show. I don't normally like pigment ink pads but these are actually really lovely giving a good print and they're nice colours too. They are perfect for letter pressing with embossing folders - I'll share a card with that on it tomorrow.

For the backgound, I embossed a piece of Coconut White Card using the Creative Expressions Sea Garden Embossing Folder. I edged with Pumpkin Orange Pigment Ink applied using a Smoothie.

I stamped the Creative Expressions Hexagon Script A6 Stamp Set onto Coconut White Card twice using the Pumpkin Orange Ink Pad. I cut it into 3 strips (I have 1 left over for another card) and matted on to Black Card.

I stamped the sentiment (just lovely!) from the Tim Holtz Classics 8 Stamp Collection using the same ink pad (I think there was some Jet Black Archival still on the stamp but that's ok, I quite like it with a hint of black!). I trimmed it and matted onto Black Card and added some 5mm Black Pearls.

I've spent a few day doing a bit of  'I wonder if' and I wondered if I could use the Pigment Ink Pad to create a paint so, I swiped some onto my Craft Sheet and added a little CS Warm White Chalk Paint. I gave it a little mix and created a pale peach paint. I painted this onto Coconut White and used it to cut out Sue Wilson's Stitched Doodle Flowers.

I made a mould using Melt Art Mold-n-Pour and a Craft Consortium Pearl & Diamante Circle. The lit the Tea-Lights in the Efco Enamel Pot. I added some Clear and some Black Ultra Thick Embossing Crystals to a Foil Dish and popped the lid on. Once my embossing crystals had melted, I added them to my mould. I added my embellishment to the centre of my flower.

I cut a couple of leaves out of Black Card using Sue's Trailing Ivy Die Set.

I assembled my card as shown, adding an 8mm Black Pearl to the corners of my background and popping it onto a Coconut White Card Blank (I was itching to mat and layer again and pierce! lol).

I don't have many of the products from the shows in stock on my website but I'm offering 10% discount on items I do have. You can find them here. Offer applies till midnight tomorrow night or while stocks last. Discount will be applied at checkout.

I won't be posting any orders out now until 28th December.

See you later!

Thanks for stopping by.

Julia.
www.juliawattscrafts.co.uk
Free card with all website orders (ask for one in the comments box at checkout).


Wednesday, 21 December 2016

Sneak Peek

Hi Bloggers.

Today I have a sneak peek from the One Day Special that I'm launching tomorrow night at 8pm on Hochanda. The ODS is a great bundle with some really great products at a brilliant price. There's a lovely mix of items on the show - some are new to me so it's been a bit of a learning curve this week but great fun.

I used a Pronty MDF Photo Frame. I painted it with White Gesso. I spritzed the back panel with Phill Martin CS Decadent Teal Ink Spray Mist. While the ink was still wet, I used a brush to spread it evenly over the piece.

For the front panel, I spritzed some Decadent Teal Mister onto my Craft Sheet. I added some CS Warm White Chalk Paint and gave it a good mix. I painted the front panel. Once dry, I covered it with Clear Perfect Medium, added CS Clear Ultra Thick Embossing Crystals and heat set using a Low Speed Heat Tool. I repeated the process to give a beautiful tiled effect (hard to capure on camera unfortunately).

I have the Efco Enamel Pot on the show and some lovely CS Ultra Thick Embossing Crystals. I lit the Tea Lights, popped a foil dish onto the metal plate, added some CS Clear Ultra Thick Embossing Crystals and popped the lid over. Years ago, I learned that you can make your lovely coloured crystals go further if you start with clear first and then add colour to it. Once the Clear was melted, I added some Bright Gold, Lapis Pearl and Majestic Purple in clear lines across the dish.  I used this to create the hearts in the frame. I've had a set of heart cookie cutters for years - I used the largest in the set and starting with the heart in the top left, I popped it onto the Creative Expressions Vintage Tapestry A6 Background. I poured some of the melted crystals into the mould. After a few minutes, I removed the cutter and stamp. I rubbed a little Phill Martin Old Gold Gilding Wax over.

I repeated the process with the other 3 hearts, adding more crystals to the dish when necessary. For the top right-hand one, I used the Creative Expressions A6 Feather Swirl Background.

For the bottom left-hand one, I used the Creative Expressions A6 Silhouette Leaf Background.

For the bottom right-hand one, I used the Creative Expressions A6 Alpha Writing Background.

I cut some leaves out of Black Card using Sue Wilson's Curled Vines Die Set. I spritzed a piece of Coconut White Card with Decadent Teal Ink Spray Mist. I used it to create a couple of flowers with Sue's Exquisite Poppy Die Set, I drew the veins on the petals through the dies using a Pigma Micron Pen.


I have Melt Art Mold-n-Pour on the shows - this is great stuff. I'm looking forward to showing how to use this. Basically you can make a mould out of pretty much anything. I've made a mould from a cheap plastic button and I've used it loads. I've made 2 gold buttons out of Clear/Bright Gold Ultra Thick Embossing Crystals.

Job done! I'm really pleased with this, hope you like it too.

I'll be back tomorrow with a couple of cards that I've made for the shows.

Thanks for stopping by.

 Julia.
www.juliawattscrafts.co.uk
Free card with all website orders (ask for one in the comments box at checkout).

Sunday, 23 October 2016

ART

Hi Bloggers.

I have a canvas for you today -

I've actually used a Dina Wakley Media Board. These are pre-treated so no need to apply a layer of Gesso.

I made this a while ago so I'll try and describe how I made it as best as I can remember.

I started my mixing some CS Multi-Tex Powder with water on my Craft Sheet. I added a little CS Glue to the mix and then spread it through the Basketweave Mask all along the right-hand side of the board. I had to move it to extend the design, drying the Multi-Tex mixture in between using a Heat Tool. I then used the Knitted Mask and applied Multi-Tex through it down the left-hand side of the board. I dried it and then extended the design down the side.

I added some Cream Crochet Ribbon and some Cream Guipure Lace securing with Matte Distress Collage Medium.

I cut the Spellbinders Cascading Butterflies Die out of Coconut White Card (can be any colour!). I also cut both the dies in the Spellbinders Medallion Three Die Set. I added them to my design plus a bunch of embellishments - Dazzlers, Dazzler Settings, Satin Roses, Watch Face Charms, Metal Corners, Vintage Buttons, Mini Pearl Swirls and a Zipper Rose.

I ran some of the butterflies from the inside of my Cascading Butterflies die cut through the Spellbinders Platinum Machine with the Creative Expressions Butterfly Dreams Embossing Folder. I shaped them and added them to the die cut on my board. I cut a couple of leaves using the Spellbinders Romantic Vines Die Set and slotted them in around the ribbon roses.

I painted the MDF 'ART' word with White Gesso and added it to the bottom right-hand corner.

I put my piece aside to dry for a few hours - it's easier to let it dry before the next bit.

Once dry, I painted the whole thing with CS White Gesso. Some areas needed a couple of coats.

I then sprayed with CS Misters - I used Phill Martin's Platinum and Decadent Teal. Once dry, I rubbed Phill's New Gold Gilding Wax over the embellishments to make them pop.

I finished by painting some CS Glue in various places and adding some Snow White Micro Beads.

Here's a few close ups -

I'm off the the second part of the beading workshop I went to last week. This doesn't mean that I will finish my piece - I expect it'll take me about 12 months to finish it! The accounts will just have to wait until this evening.

Thanks for stopping by.

 Julia.
www.juliawattscrafts.co.uk
Free card with all website orders (ask for one in the comments box at checkout).
Deal of the Day today (23rd October) -  Sue Wilson F
estive Collection - Wise Men Mini Striplet only £5.99!