Saturday, 12 May 2012

Little box to go with yesterday's card and some Candy!

Hi Bloggers,

Today I have a little box to match yesterday's card. We often make cards but forget about how we present a gift. I had some of the plaid paper left over so I thought a matching gift box would be a great way to use it.

I used the Spellbinders Square Bracket Edge Box. I cut the top from the Cat Plaid paper and the bottom from lime green card. I also cut 2 ribbon buckles from the Spellbinders Ribbon Buckles Die Set to co-ordinate with the card from yesterday. All the dies fitted onto my Grand Calibur base plate.


I embossed the base with the Small Polka Dots Mask. Just to confirm - the sandwich you need with your Grand Calibur is base plate, tan mat, die with card in it with the cutting edge going into your tan mat, mask, pink embossing plate. I do it this way so I can see where the pattern of the mask is going to be on my die cut. It doesn't matter if the base plate or the pink plate is on the bottom. You must make sure the cutting edge of the die is away from your mask and going into the tan mat.


I embossed the other die cuts in the usual way with no embossing additions.

Here's all the components ready for assembly -


Assembly is really easy. You can see from the photo where the embossed folding lines are. Just fold and fix with Cosmic Shimmer Dries Clear Glue and you're done! Easy Peasy!


Now, before I go - I've noticed that this little blog is approaching 100 followers. So, I thought I'd better mark the occasion with some candy. When we reach 100 followers, I will draw a name at random and the lucky winner will receive a set of Spellbinder Wavy Rectangles.


Good Luck!

Thanks for stopping by.

Julia.

Friday, 11 May 2012

Being Happy

Hi Bloggers.

A Spellbinders card to share today. Lots of embossing while still in the die which is great because it gives me a chance to explain the sandwiches for those of you that struggle to remember.

Such a great saying on this card. Don't know how Sue finds such good ones.


The background paper is Cat Plaid from Cloud9Design. I found it at Colemans Warehouse in Rushden. I had popped up to see my friend, Paul Church, doing a demo and this paper just popped into my hands. Well, would have been rude not to buy anything!

Anyway, back to the card. I cut the largest of the Spellbinders Labels Twenty-Five out of black card. At the emboss stage I added the Basket Weave Mask from That Special Touch. The sandwich you need with your Grand Calibur is base plate, tan mat, die with card in it with the cutting edge going into your tan mat, mask, pink embossing plate. I do it this way so I can see where the pattern of the mask is going to be on my die cut. It doesn't matter if the base plate or the pink plate is on the bottom. You must make sure the cutting edge of the die is away from your mask and going into the tan mat.

Next, I cut the largest of the Spellbinders Fleur de Lis Rectangles out of dark green card. At the emboss stage I added the Couture Creations Wild Poinsettia Embossing Folder. The sandwich you need for this is base plate, approx 15 sheets of copy paper, embossing folder - MUST BE OPEN, die with card in it with the cutting edge UP, tan mat, Creative Expressions Embossing Plate. Do not close the folder as the die will cut into it and do make sure the cutting edge is face up away from the folder and into the tan mat.

I stamped the sentiment from the Creative Expressions Sincere Sentiments Stamp Set using Jet Black Archival and embossed with Cosmic Shimmer Clear Embossing Powder. I popped the largest of the Spellbinders Large Labels on top and cut it out. At the emboss stage I added the Small Polka Dots Mask. The sandwich you need for this is described above with the black Labels Twenty-Five die cut.

Here's a close-up so you can see the embossed detail -


I cut 2 lime green corners and 1 black using the Spellbinders Antique Frames and Accents Die Set. I cut a dark green and a lime green buckle from the Spellbinders Ribbon Buckles Die Set.

I assembled the card as shown adding a big bow made with the Ivory/Black Striped Grosgrain Ribbon and a couple of Black Decorative Stick Pins.

Hope you like the card.

Thanks for stopping by.

Julia.

Thursday, 10 May 2012

For a Special Couple

Hi Bloggers.

All peachy today for today's post. This could easily be an anniversary card as well a wedding card.


For the background, I stamped one of the images from the Creative Expressions Design Elements Stamp Set using Eco Green Paris Trunk Dye Ink Pad in Peach Satin.


I popped 3 panels of white card through the Grand Calibur with the Heart Confetti Mask. I inked around the edges with the Peach Satin ink.


I stamped the sentiment from the Creative Expressions Mr & Mrs Stamp Set again using the Peach Satin ink and then stamped the frame from the same stamp set over it. I embossed it with Cosmic Shimmer Clear Embossing Powder. I cut it out using Spellbinders Labels Fourteen which fits perfectly. I made a faux nestie by drawing around the die and cutting out with scissors.


I made 3 ribbon flowers - 1 from White Crochet Ribbon dyed with the Peach Satin Ink, 1 from Peach Fizz Vintage Ribbon and White Wrinkle-Edge Ribbon and 1 from White Silky Crush Ribbon (cut in half length-ways but both pieces used). I cut some leaves out using the Spellbinders Foliage Die Set.

I assembled the card as shown,

Hope you like it.

Thanks for stopping by.

Julia.

Wednesday, 9 May 2012

May Your Day Be Filled With Happiness

Hi Bloggers.

Today's card has been made using the Creative Expressions Mr and Mrs Stamp Set but I think it could be used for any occasion. By the way, none of the cards I'm showing at the moment are demos for Monday. I'm keeping those as a surprise!


For the background, I popped the Ivy Background Mask through the Grand Calibur and then inked through the mask with Lavender Organza Eco Green Dye Ink. I then added some Cosmic Shimmer Aurora Crystal Sparkle Embossing Powder and heat set.


I stamped the sentiment from the Mr and Mrs Stamp set using the Lavender Organza Ink and then stamped the frame from the same stamp set around it. I added some Cosmic Shimmer Clear Embossing Powder and heat set it (sorry it doesn't show up very well in the photo - it's much brighter in real life). I cut out using Spellbinders Labels Fourteen which matches perfectly.


I cut a piece of white crochet ribbon in half length ways and dyed it with the Lavender Organza Ink Pad. I used it to make a flower. I cut some leaves using the Spellbinders Foliage Die Set.

I assembled the card as shown adding some faux stitching with a White Inkssentials Pen.

Hope you like the card.

Thanks for stopping by.

Julia.

Tuesday, 8 May 2012

May Today Be The Beginning

Hi Bloggers,

Another wedding card today. It's the theme for my stamping shows on Create & Craft next Monday so there's going to be a few of these featured over the next week or so. Hope you don't mind.


For the background, I stamped some champagne glasses from the Creative Expressions Mr & Mrs Stamp Set using the Eco Green Paris Trunk Parchment Dye Ink Pad. I gave it a quick blast with my heat gun to make sure it was dry. I then popped it through the Grand Calibur inside the Couture Creations Cultivated Embossing Folder. I ran it through a second time to extend the pattern. I edged it with the Parchment Ink and Cut & Dry Foam.


I stamped the sentiment from the Creative Expressions Bride & Groom Stamp set using Eco Green Paris Trunk Black Dye Ink Pad. I then stamped the frame from the same stamp set so the sentiment was within it. I added some Cosmic Shimmer Clear Embossing Powder and heat set. I cut out using Spellbinders Labels Thirteen.


I made some flowers out of cream crochet ribbon, white crochet ribbon and ivory vintage ribbon together with white wrinkle-edge ribbon - I'm liking the two ribbons in one flower. You'll be seeing me do that quite often, I think. I cut the crochet ribbon and ruffle-edge ribbon in half lengthways before using. I cut some 'leaves' from the Spellbinders Damask Accents Die Set and inked with the Parchment Ink while still in the die.

I assembled the card as shown added a Creative Expressions Self Adhesive Pearl Swirl, some dots of Cosmic Shimmer Golden Pearl Pearlescent PVA and a few punched leaves for contrast.

Hope you like the card.

Thanks for stopping by.

Julia.

Monday, 7 May 2012

Home Sweet Home

Hi Bloggers.

Today I'm sharing this card made with Spellbinder dies that were on the recent Pick of the Week.


The background was made using the Spellbinders Elegance M-Bossability Folder. I ran it through the Grand Calibur a second time to extend the pattern. I inked around the edges using Worn Lipstick Distress Ink and Cut & Dry Foam.


I stamped the sentiment from the Creative Expressions Warmest Wishes Stamp Set using Jet Black Archival and embossed with Cosmic Shimmer Clear Embossing Powder. I cut it out using the second largest of the Spellbinders Floral Ovals and inked with the Worn Lipstick while still in the die.


I cut the smallest of the Spellbinders Cut, Fold and Tuck dies from the Spectacular Spin, Angle Approach and Round About sets. I inked through all the dies with the Worn Lipstick Distress Ink and then folded as per instructions on the pack.

I assembled the card as shown adding - a bow made from 2 lengths of pink vintage ribbon, a rose from my stash, a pearl in the centre of each cut, fold and tuck die cut and some dots of Cosmic Shimmer Vintage Pink Pearlescent PVA.

Hope you like the card.

Thanks for stopping by.

Julia

Sunday, 6 May 2012

Banner Basics

Hi Bloggers.

Hope you're enjoying your Bank Holiday weekend.

Today I'm sharing an alternative way to use the Spellbinders Banner Basics One die set.

Flowers!


I love to try and make flowers out of as many die sets as possible! Here I have cut each die 3 times out of felt (that I bought from Sam here) to make each flower. I have used the same technique as in Sue's Ribbon Flower Tutorial. I lined the 3 lengths of die-cut felt together and then adhered super sticky tape to them and then continued as per the tutorial.

Here's a picture of the flowers with the die set.


The large flower on the left has been made with the middle die, the middle flower has been made with the top die and the flower on the right has been made with the bottom die.

Cool, eh? Have a good look at your Spellbinder dies - you'll be amazed how many can be used to make different flowers.

Thanks for stopping by.

Julia

Saturday, 5 May 2012

Big Stripey Purple Bow

Hi Bloggers,

Today I'm sharing a card that I didn't get time to demo on Thursday. It features a big bow made with Ivory/Purple Grosgrain Ribbon - my fave of the striped grossgrains.


I ran a piece of milk card through the Grand Calibur with the Spellbinders Hearts M-Bossabilities Folder. I inked around the edges with Dusty Concord Distress Ink.

I cut the largest of the Spellbinder Angle Approach Cut, Fold and Tuck dies out of purple card and did the folding as per the instructions on the pack.

I stamped my sentiment from the Creative Expressions Warmest Wishes Stamp Set using Jet Black Archival and embossed with Cosmic Shimmer Clear Embossing Powder. I cut it out using a motif from the Spellbinders Moroccan Motifs Die Set and inked with Dusty Concord while still in the die. I cut another motif out of purple card that was slightly lighter than the one I used for the Angle Approach.


I cut 2 borders out of purple felt using the Spellbinders Moroccan Accents Die Set. I ran some 12mm Super Sticky Tape along the bottom of one of the borders and started to make a flower as per Sue's Ribbon Flower Tutorial. When I had used up all of the first border, I added some super sticky tape to the other felt border and continued adding that to my flower. Once finished I cut off the excess rolled-up tape. I cut the tag accent out of the same die set out of green card and used this as my 'leaves'.


I cut 2 tiny stars from the Moroccan Accents Die set out of purple card and added a dot of Cosmic Shimmer Golden Pearl Pearlescent PVA in the centres of each one.

I assembled the card as shown adding some dots of Golden Pearl PVA around the edges.

Hope you like the card.

Thanks for stopping by.

Julia.

Friday, 4 May 2012

Spectacular Spin

Hi Bloggers.

Many thanks to those of you who tuned in to the Spellbinders Shows yesterday. Your support is greatly appreciated.

Today I'm sharing a card that I demonstrated in the 7pm show yesterday.


I made the rosette for the centre first as it needed time for the glue to set. I cut 2 borders out of pink card using the Spellbinders Moroccan Accents die set. I did not bother to emboss them. I then scored at every mountain point and every valley point and folded with all the mountain point folds being the mountain folds (hope that makes sense). I then glued the folded borders together overlapping at each end. I cut a motif from the same die set out of milk card and inked the edges with Worn Lipstick Distress Ink. I added some super sticky tape to the centre of the motif. I bunched the folded borders up so that the fancy edges were all in the centre making a rosette shape and then placed onto the super sticky tape. I then added some Cosmic Shimmer Dries Clear Glue and put aside to dry.

I cut the largest and the smallest of the Spellbinders Spectacular Spin Cut, Fold and Tuck dies out of pink card. I inked through the die with Worn Lipstick. I then folded as per instructions on the pack. (In the show I used Carnival Dreams as the bundle with Spectacular Spin had sold out.)


I stamped the sentiment from the Creative Expressions Warmest Wishes Stamp Set using Jet Black Archival and embossed with Cosmic Shimmer Clear Embossing Powder. I cut it out using a small motif from the Moroccan Motifs die set and inked with Worn Lipstick while still in the die.


I cut 2 corners out of pink card using the Moroccan Accents die set and inked through the die with Worn Lipstick. I also cut another border out of pink card (this time I embossed it).

For the background, I ran a piece of milk card though the Grand Calibur with the Elegance M-Bossability Folder. I ran it through a second time to extend the pattern. I inked around the edges with Worn Lipstick.

I assembled the card as shown adding a Creative Expressions Pearly Swirly, a rose from my stash and some American Seam Binding in Chalk White.

Hope you like the card.

Thanks for stopping by.

Julia.

Thursday, 3 May 2012

Have a Bloomin' Great Day

Hi Bloggers.

I will be doing the Spellbinders Pick Of The Week shows today on Create & Craft at 12noon and 7pm - that's as long as there's some stock left! So, today I thought I'd share one of the cards I'm hoping to demonstrate.


For the background, I ran a piece of white card through the Grand Calibur with the Spellbinders Flora M-Bossability Folder. My card was slightly longer than the folder so I had a plain border at the end. I inked all around the edges with Dried Marigold Distress Ink. I cut a border out of peach card using the Spellbinders Moroccan Accents die set and added it to the plain strip at the end of my background. I ruffled some American Seam Binding in Blue White along the border.


I cut the largest of the Spellbinders Floral Ovals out of some Creative Expressions Foundations Paper. I stamped the sentiment from the Creative Expressions Warmest Wishes Stamp Set using Jet Black Archival and embossed with Cosmic Shimmer Clear Embossing Powder. I cut it out using the second largest of the Floral Ovals and inked with Dried Marigold Distress Ink while still in the die.


I made the rosette in a similar way to the one in this post. I cut 4 of the motifs from the Moroccan Accents set out of the Foundations Paper and another out of plain peach card for the base.

I assembled the card as shown adding a couple of White Pearl Stick Pins and some dots of Cosmic Shimmer White Pearl Pearlescent PVA around the edges.

Hope you can join me on Create & Craft today.

Thanks for stopping by.

Julia

Wednesday, 2 May 2012

Monochromatic Wedding Card

Hi Bloggers.

As we head into what is traditionally the start of the wedding season, today I'm sharing another simple but effective wedding card.


I dusted a square piece of card with my anti-static pad and stamped the feather from the Creative Expressions Design Elements Stamp Set (on the Create & Craft Pick of the Week with Sue at the moment) using Perfect Medium. I added some Cosmic Shimmer Black Sparkle Embossing Powder and heat set it.


I stamped the image of the Bride & Groom (from the Creative Expressions Bride & Groom Stamp Set) using Eco Green Black Dye Ink Pad. I popped some Cosmic Shimmer Clear Embossing Powder on top and heat set. I did the same with the sentiment which is from the same stamp set.

I cut the Bride & Groom out using Spellbinders Labels Seventeen and used Spellbinders Labels Thirteen for the sentiment. I made a faux nestie for each using black card.


I assembled the card as shown adding a large bow made with black Silky Crush Ribbon with a button I got from Sam here. I added a black rhinestone swirl either side of the image panel and some Cosmic Shimmer Black Pearl PVA all around the edges.

Hope you like the card.

Thanks for stopping by.

Julia.

Tuesday, 1 May 2012

A Simple Wedding Card

Hi Bloggers.

Today I'm sharing a wedding card with you.


For the background I popped a piece of white card through the Grand Calibur with the Couture Creations Constellations embossing folder. I had to pop it through a second time to extend the pattern.


The sentiment and the pretty frame around it are both from the Creative Expressions Bride & Groom Stamp Set. I stamped the frame using Eco Green Lavender Organza Dye Ink Pad and the sentiment with the Eco Green Black Dye Ink Pad. I then popped some Cosmic Shimmer Clear Embossing Powder on top and heat set. The frame on the stamp set co-ordinates perfectly with the largest but one of the Spellbinders Labels Thirteen dies and that's what I used to cut it out.


I made a flower using the large motif from the Spellbinders Morrocan Accents. I made it with 4 1/2 of the motifs in pretty much the same way as the standard 6 petal flower is made - just with a little extra as there are 8 petals. It's made with white card inked with the Lavender Organza Ink Pad.

I cut a couple of leaves out using the Spellbinders Nested Leaves set and added the Ivy Background Mask at the emboss stage to add a bit of interest.

I assembled the card as shown adding some Cosmic Shimmer White Pearl PVA dots around the edges.

Hope you like the simplicity of this card.

Thanks for stopping by.

Julia.

Monday, 30 April 2012

Winner of the Demo Tag

Hi Bloggers.

The winner of the tag from this post is Number 3 - Bea. Many congrats. Please email your snail mail address to me at juliawattscrafts@gmail.com and I'll pop it in the post to you.

I'll be back tomorrow with a card.

Julia.

Sunday, 29 April 2012

Purple and Blue

Hi Bloggers.

Today's card has a very similar layout to this post but there are a couple of different techniques on it.


I stamped the shoe from the Creative Expressions Steampunk Shoes Stamp Set using Blue Violet Archival Ink and embossed with Cosmic Shimmer Clear Embossing Powder. I inked around the edges of the panel with Dusty Concord Distress Ink and matted it on to some purple card.

For the larger background behind the shoe, I inked up a square piece of white card with Dusty Concord and Faded Jeans Distress Ink. I distressed the edges with my scissors and inked again with the Faded Jeans. I popped some Midnight Blue Mica Powder from the Cosmic Shimmer Dark Dusks Mica Powder Setinto a clean chinese container and added a good amount of water. I then popped a couple of beads into it a shook it around a bit to pick up the paint. I put the inked card into a larger container and dropped the beads on top and swirled them around. I repeated the process with the Antique Lilac Mica Powder from the same set.

Next I made the grid background. I inked up the Grid Mask with Perfect Medium. I popped a piece of purple card on top and ran it through my Grand Calibur. The ink transferred to the debossed pattern. I dusted some of the Midnight Blue mica powder over the top and. I tore the edges of the panel and added a little more perfect medium using Cut & Dry foam and again dusted with the mica powder.

I stamped the sentiment from the same stamp set again using the Blue Violet Archival and embossed with the clear powder. I cut it out using Spellbinders Fancy Tags and inked with Dusty Concord while still in the die.

I dipped some screw brads into the Perfect Medium and then the clear embossing powder (it's handy if you have tool with a crocodile clip). Then I dipped it into the mica powder and heated again. The mica sunk below the embossing powder. I repeated again until I was happy with the colour. I did 4 with Midnight Blue and 2 with Antique Lilac.

I assembled the card as shown. Hope you like it.

Thanks for stopping by.

Julia.

Saturday, 28 April 2012

Demo Tag to Give Away

Hi Bloggers,

Today I'm sharing the final demo piece from the shows on Tuesday. It's a tag and I made it so I could demo the techniques used in this post.


For the background, I used the Grid Mask. I inked through it with Rusty Hinge and Mustard Seed Distress Ink using Cut & Dry Foam. I really love the mosaic effect you get from this mask. I then randomly stamped some circles using a mister bottle top and the Rusty Hinge Distress Ink.

I stamped the stem of the flower with the chain from the Steampunk Shoes Stamp Set using Sepia Archival. I did not emboss it.

I stamped 2 of each of the 4 different small tickets from the Creative Expressions Tickets Stamp Set using Perfect Medium and embossed with Cosmic Shimmer Bright Gold Metallic Embossing Powder. I coloured the edges of the tickets with the Copper Mica Powder from the Cosmic Shimmer Metallics Mica Spray Set. I cut them all out.

I stacked the tickets up and pierced a hole through them all. I added a Creative Expressions Faux Screw Brad in Antique Gold and fanned the tickets out to look like a flower. I added 3D foam pads of the back and added the flower to the top of a chain stem.

I stamped some keys from the Creative Expressions Mechanical Handbags Stamp Set onto some card, which had been spritzed with Cosmic Shimmer Acrylic Misting Inks, using Perfect Medium and I embossed them with the gold powder. I cut them out and added them to the chain stems to make my 'leaves'.

I stamped the sentiment from the Steampunk Shoes Stamp Set using Sepia Archival. I did not emboss it. I cut it out line by line and glued it to my tag using Cosmic Shimmer Dries Clear Glue.


I dyed some American Seam Binding first with Mustard Seed and then with Rusty Hinge Distress Ink (drying after each one). I added a little copper mica powder to the Rusty Hinge to give it a little sparkle. I added this to my tag.

Hope you enjoyed this demo if you watched. I didn't finish the tag during the show but I've finished it now and it's up for grabs. If you'd like to be in with a chance of winning it, simply become a follower (if you're not already) and leave a comment on this post. I'll draw a winner on Monday morning.

Thanks for stopping by.

Julia

Friday, 27 April 2012

Paper Rosette Tutorial

Hi Bloggers,

I've had a request from a lady who attended the Creative Expressions Workshop we did at the Create & Craft weekend at Hayling Island. She asked if I could remind her how we made the flower rosette that was on our card. So, I've made another video tutorial. The die set we used was from Spellbinders Parisian Accents.

This is the card that Maria and Lynne designed for the workshop. It's gorgeous, isn't it?


We used two of Sam Poole's new stamp sets - Steampunk Dreams and Steampunk Flowers.

I hope you find the tutorial useful.


Thanks for stopping by.

Julia

Thursday, 26 April 2012

Steampunk Mask

Hi Bloggers.

Today I'm sharing another demo card from the shows on Tuesday.


For the background, I ran the Steampunk Mask through the Grand Calibur with a piece of ivory card. I then inked all over with Rusty Hinge Distress Ink and Cut & Dry Foam. I stamped some cogs from the Creative Expressions Mechanical Handbags Stamp Set using Sepia Archival and embossed with Cosmic Shimmer Clear Embossing Powder. I cut them out using a craft knife and added them to the steampunk background with Creative Expressions Faux Screw Brads in Antique Copper and some Idea-ology Mini Fasteners.

I stamped the shoe image from the Creative Expressions Steampunk Shoes Stamp Set using Sepia Archival and embossed with Creative Expressions Clear Embossing Powder. I cut the image out using scissors and a craft knife.

I cut a mat out of rust card using Spellbinders Labels Thirteen. At the emboss stage I added the Couture Creations Replacements Embossing Folder. I did not close the folder as the die would damage it. However, the sandwich is too thin with the folder open so I added some sheets of copy paper to bulk it out. In the show I used Idea-ology Kraft Glassine Paper instead of the rust card.

I assembled the card as shown (no sentiment on this one) and added some dots of Cosmic Shimmer Pearlescent PVA in Choco Brown (love this new colour!).

Hope you like the card and enjoyed the demo if you watched.

Thanks for stopping by.

Julia.

Wednesday, 25 April 2012

A demo card from yesterday

Hi Bloggers.

Thanks to everyone who watched the shows yesterday. They were really fun. Today I'm sharing the card I did as the first demo in the 5pm show yesterday.


I started with a square piece of ivory card. I scrunched it up and opened it out again. I ran a Tea Dye Distress Ink Pad over the top. It settled on the peaks. I then spritzed with some water, waited a few minutes and then ironed flat with my encaustic iron. I picked this technique up from Tim Holtz. Next I splatted some Old Paper, Tea Dye and Pumice Stone Distress Stains. I remembered seeing Dawn Bibby once stamping a large background stamp without using an acrylic block so I did this with the Creative Expressions Clocks Stamp and the Creative Expressions Scattered Words Stamp using Sepia Archival. I then spritzed the background with Dark Bronze Mica Powder (from the Cosmic Shimmer Metallics Mica Spray Set) which I had mixed with some water in the spritzer bottle provided in the set.


I stamped the image from the Creative Expressions Mechanical Handbags Stamp Set using Sepia Archival and embossed with Cosmic Shimmer Clear Embossing Powder. I coloured it using the Pumice Stone Distress Stain and then cut it out.

I scrunched up a piece of Idea-ology Kraft Glassine Paper, opened it out and then tore it to a size suitable to put the handbag on.


I stamped 3 of the small tickets from the Creative Expressions Tickets Stamp Set using the Sepia Archival and embossed with the clear powder. I coloured the edges of the tickets in with Cosmic Shimmer Dark Bronze Mica Powder. I dyed some silver staples with Latte Alcohol Ink and used then to attach the tickets to the background.


I inked up the sentiment with Perfect Medium and brushed some Pale Gold Mica Powder from the Metallics set onto the inked stamp. I melted some Cosmic Shimmer Vintage Metal Ultra Thick Embossing Powder and poured it onto my craft sheet. I then stamped into the UT with the sentiment stamp. I left it for a little while and then removed the stamp.

I assembled the card as shown adding a Creative Expressions Faux Screw Brad in Antique Copper in each corner. In the demo card I had added some dots of Cosmic Shimmer Golden Pearl Pearlescent PVA.

Hope you like the card.

Thanks for stopping by.

Julia

Tuesday, 24 April 2012

Ist Demo Card today

Hi Bloggers.

As the title suggests this should be my first demo today on Create & Craft at 11am with Lottie.


This card uses a bunch of techniques that I've just before. I thought it would be cool to show them in little snippets in a demo.

I stamped the shoe from the Creative Expressions Steampunk Shoes Stamp Set using Plum Archival and embossed with Cosmic Shimmer Clear Embossing Powder. I coloured it in using Dark Cherry Mica Powder from the Cosmic Shimmer Dark Dusks Mica Spray Set. It looks quite messy in the photo but in the correct light it really shines.

For the background immediately behind the shoe I inked up a 4" square piece of white card with Barn Door and Aged Mahogany Distress Ink. I dusted all over with Silver Lustre Mica Powder from the Cosmic Shimmer Metallics Mica Spray Set. I then stamped the bolts from the same stamp set using Perfect Medium. It's important to clean and dry the stamp between each use so that the ink pad does not become contaminated. I repeated stamping randomly over the areas that would be visible. I then dusted over the stamped bolts with Deep Plum Mica Powder from the Dark Dusks set. I distressed the edges of the panel with my scissors and then inked with Aged Mahogany Distress Ink - I may decide to do that first in the demo as it removes the mica from around the edges of the panel and ends up on the Cut & Dry Foam and the ink pad!

For the burgundy background panel, I inked up the Woodgrain Mask with Perfect Medium. I placed the burgundy card on top and then ran it through the Grand Calibur. The ink transferred to the debossed pattern. I then dusted with Dusky Pink Mica Powder from the Dark Dusks det. I tore the card till it was the required size.

For the large white background, I ran a piece of white card through the Grand Calibur with the Couture Creations Houndstooth Embossing Folder. I ran it through a second time to extend the pattern. I inked around the edges with Aged Mahogany Distress Ink.

I stamped the sentiment using Plum Archival and embossed with clear powder. I cut it out using Spellbinder Fancy Tags and inked with Aged Mahogany while still in the die.

I assembled the card as shown adding a few Creative Expressions Faux Screw Brads in Antique Silver and some dots of Cosmic Shimmer Pearlescent PVA in Silver Lustre around the edges.

Hope you like the card.

Thank for stopping by and I hope you'll tune in to Create & Craft at 11am and 5pm today. Emails welcome.

Julia

Monday, 23 April 2012

Handbag shaped card

Hi Bloggers.

I'm off to Peterborough early tomorrow to do Create & Craft Shows at 11am with Lottie and 5pm with Dean.

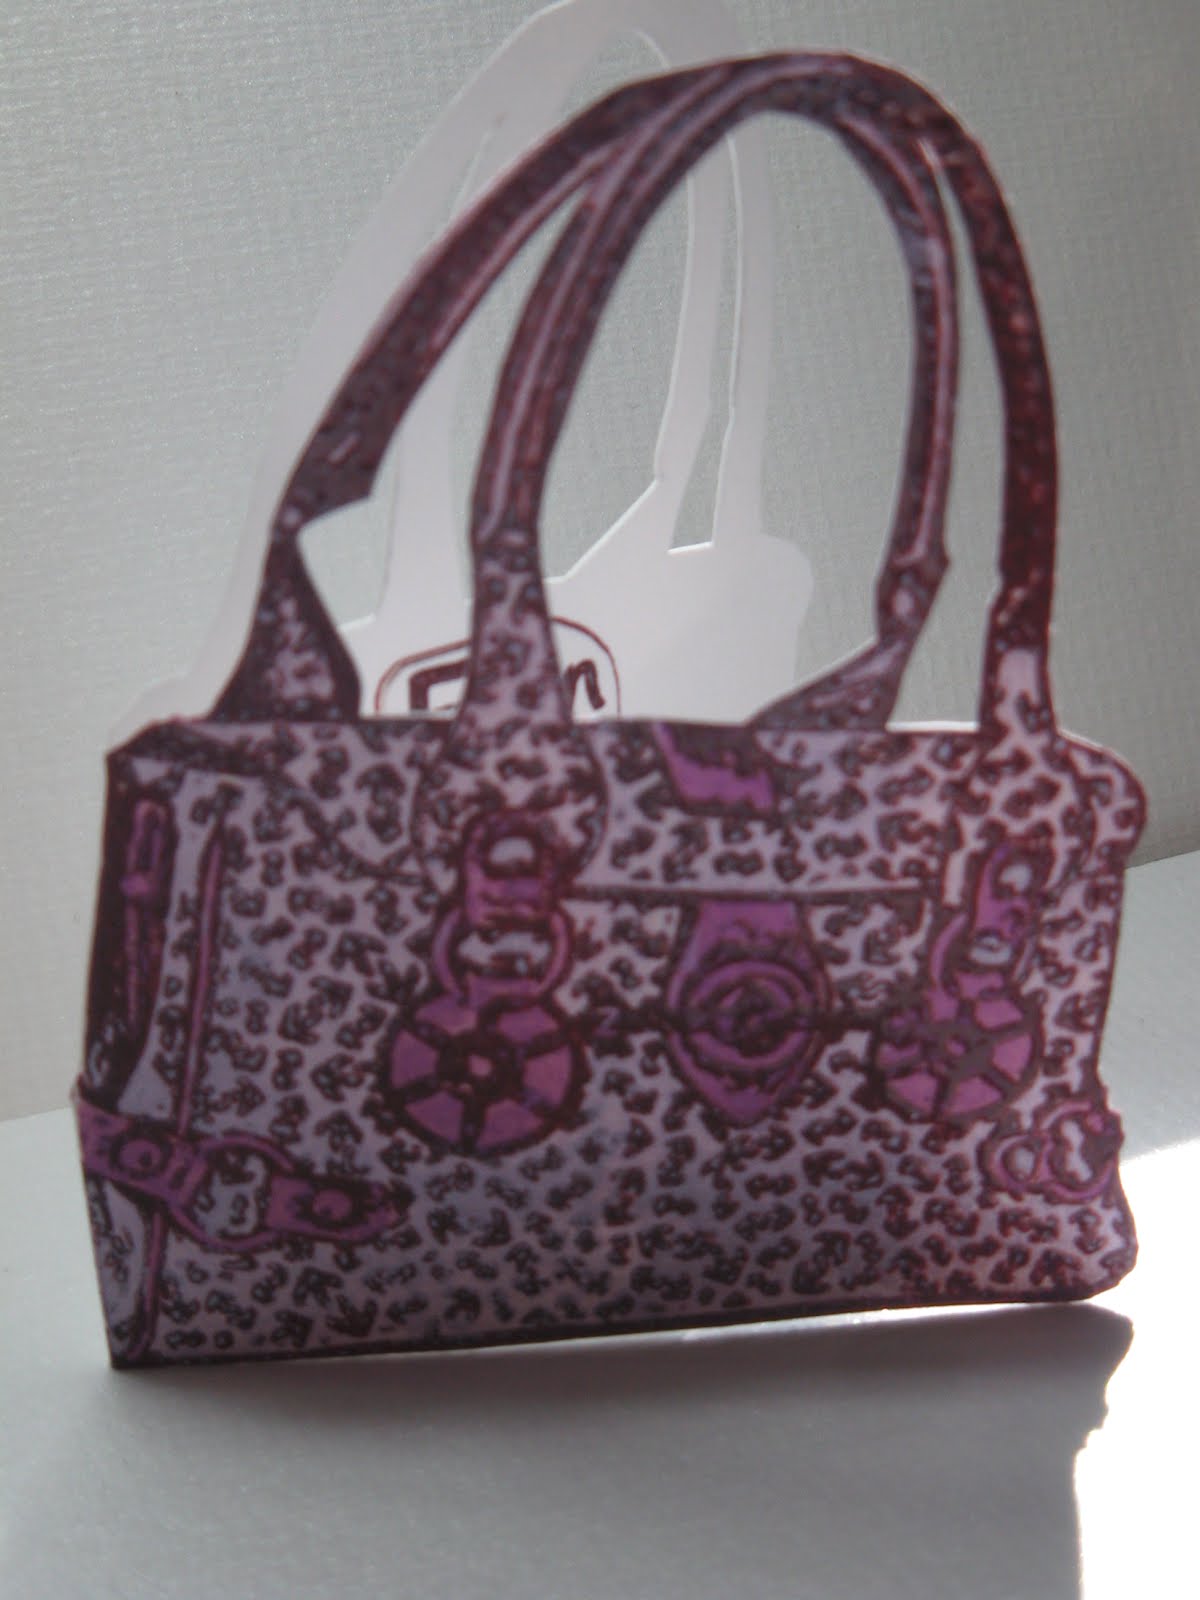
I couldn't resist sharing this diddy little shaped card made with the Creative Expressions Mechanical Handbags stamp set. Such a cute little card for a note or a little invite.


I folded a piece of A5 white card in half and then stamped the handbag just over the fold so the very left-hand side of it was missing. I stamped using Plum Archival and embossed using Cosmic Shimmer Clear Embossing Powder. I cut out the handbag through both pieces of card with scissors and a craft knife.

I coloured the image in with Dusky Pink and Dark Cherry mica powders from the Cosmic Shimmer Dark Dusks Mica Spray Set.


I stamped the sentiment from the same stamp set on a separate piece of card again using the Plum Archival and embossed with the clear powder. I cut it out and edged it with a fine liner.

Hope you like this little offering. Sorry for the poor quality of the photos on this - the sun was shining into my craft room when they were taken.

Thanks for stopping by.

Julia.