Hi Bloggers.
Thanks for all your emails yesterday - there were loads! As always, your support is much appreciated. I did make a bit of a mess of the last demo though - worst demo I've done on tv so far, I think. I know what went wrong with the snowflake though (I think). I assumed that the double-sided adhesive sheet was stuck on the card. However, I think it had just attached itself at the corners to fool me and the backing of one side hadn't actually been removed which meant that it was harder for me to cut and when I took it out of the die, it wasn't stuck to the card. I was quite tired by then so didn't think to double check it. Pity as I think that's the show that was scheduled to be repeated over night.
Today's card is another from the Card Creator shows.
For the background, I simply ran a piece of Coconut White Card through the Grand Calibur with the Spellbinders Ornamental Iron M-Bossabilities Folder. I ran it through a second time to extend the pattern and then inked around the edges with Dried Marigold Distress Ink.
I cut the largest of the Fancy Ribbon Threader dies out of Foundations Dot and Dash Paper and threaded some Blue White American Seam Binding through it.I cut Polka Dots out of white card and at the emboss stage added the Floral Vines Mask. I inked through the die with Dried Marigold. I cut a frame out using the Jewel Framed Sentiments Set and a 'Love' out of Brass Metal using the same die set. I added a bow tied from the Pastel Baker's Twine Set.
I tied a messy bow using 3 lengths of Blue White American Seam Binding. I stamped 2 flowers from the Button Florals stamp set on to Peach card and embossed them with Cosmic Shimmer True White Embossing Powder. I cut them out, layered them up and added an 8mm White Pearl.
I assembled the card as shown and added some dots of Cosmic Shimmer Pearlescent PVA in White.
Thanks for stopping by.
Julia.
Showing posts with label Metal. Show all posts
Wednesday, 26 September 2012
Sunday, 23 September 2012
Last Metal Card
Hi Bloggers.
This is the last metal card that I've made so far that I'm sharing with you today.
For this one I used some copper metal. I dropped some Butterscotch, Pesto, Sunshine Yelow and Terracotta Alcohol Ink directly onto the metal. They spread out into each other. I then added a few drops of Blending Solution which dispersed the ink. I then added some more drops of Alcohol Ink. When dry, I ran it through the Grand Calibur with the Spellbinders Brick and Bark M-Bossabilities Folder. I sanded it to reveal the copper core.
I cut a panel out of Brass Metal using the Fancy Weave Die Set. I stamped the sentiment from the Creative Expressions Heartfelt Sentiments Stamp Set using Coffee Archival and embossed with Cosmic Shimmer Clear Embossing Powder. I cut it out using Matting Basics B and inked through the die with Vintage Photo Distress Ink.
I added a key from the Assorted Key Charms Pack and finished off with some dots of Cosmic Shimmer Pearlescent PVA in Choco Brown around the edges.
Thanks for stopping by.
Julia.
This is the last metal card that I've made so far that I'm sharing with you today.
For this one I used some copper metal. I dropped some Butterscotch, Pesto, Sunshine Yelow and Terracotta Alcohol Ink directly onto the metal. They spread out into each other. I then added a few drops of Blending Solution which dispersed the ink. I then added some more drops of Alcohol Ink. When dry, I ran it through the Grand Calibur with the Spellbinders Brick and Bark M-Bossabilities Folder. I sanded it to reveal the copper core.
I cut a panel out of Brass Metal using the Fancy Weave Die Set. I stamped the sentiment from the Creative Expressions Heartfelt Sentiments Stamp Set using Coffee Archival and embossed with Cosmic Shimmer Clear Embossing Powder. I cut it out using Matting Basics B and inked through the die with Vintage Photo Distress Ink.
I added a key from the Assorted Key Charms Pack and finished off with some dots of Cosmic Shimmer Pearlescent PVA in Choco Brown around the edges.
Thanks for stopping by.
Julia.
Friday, 21 September 2012
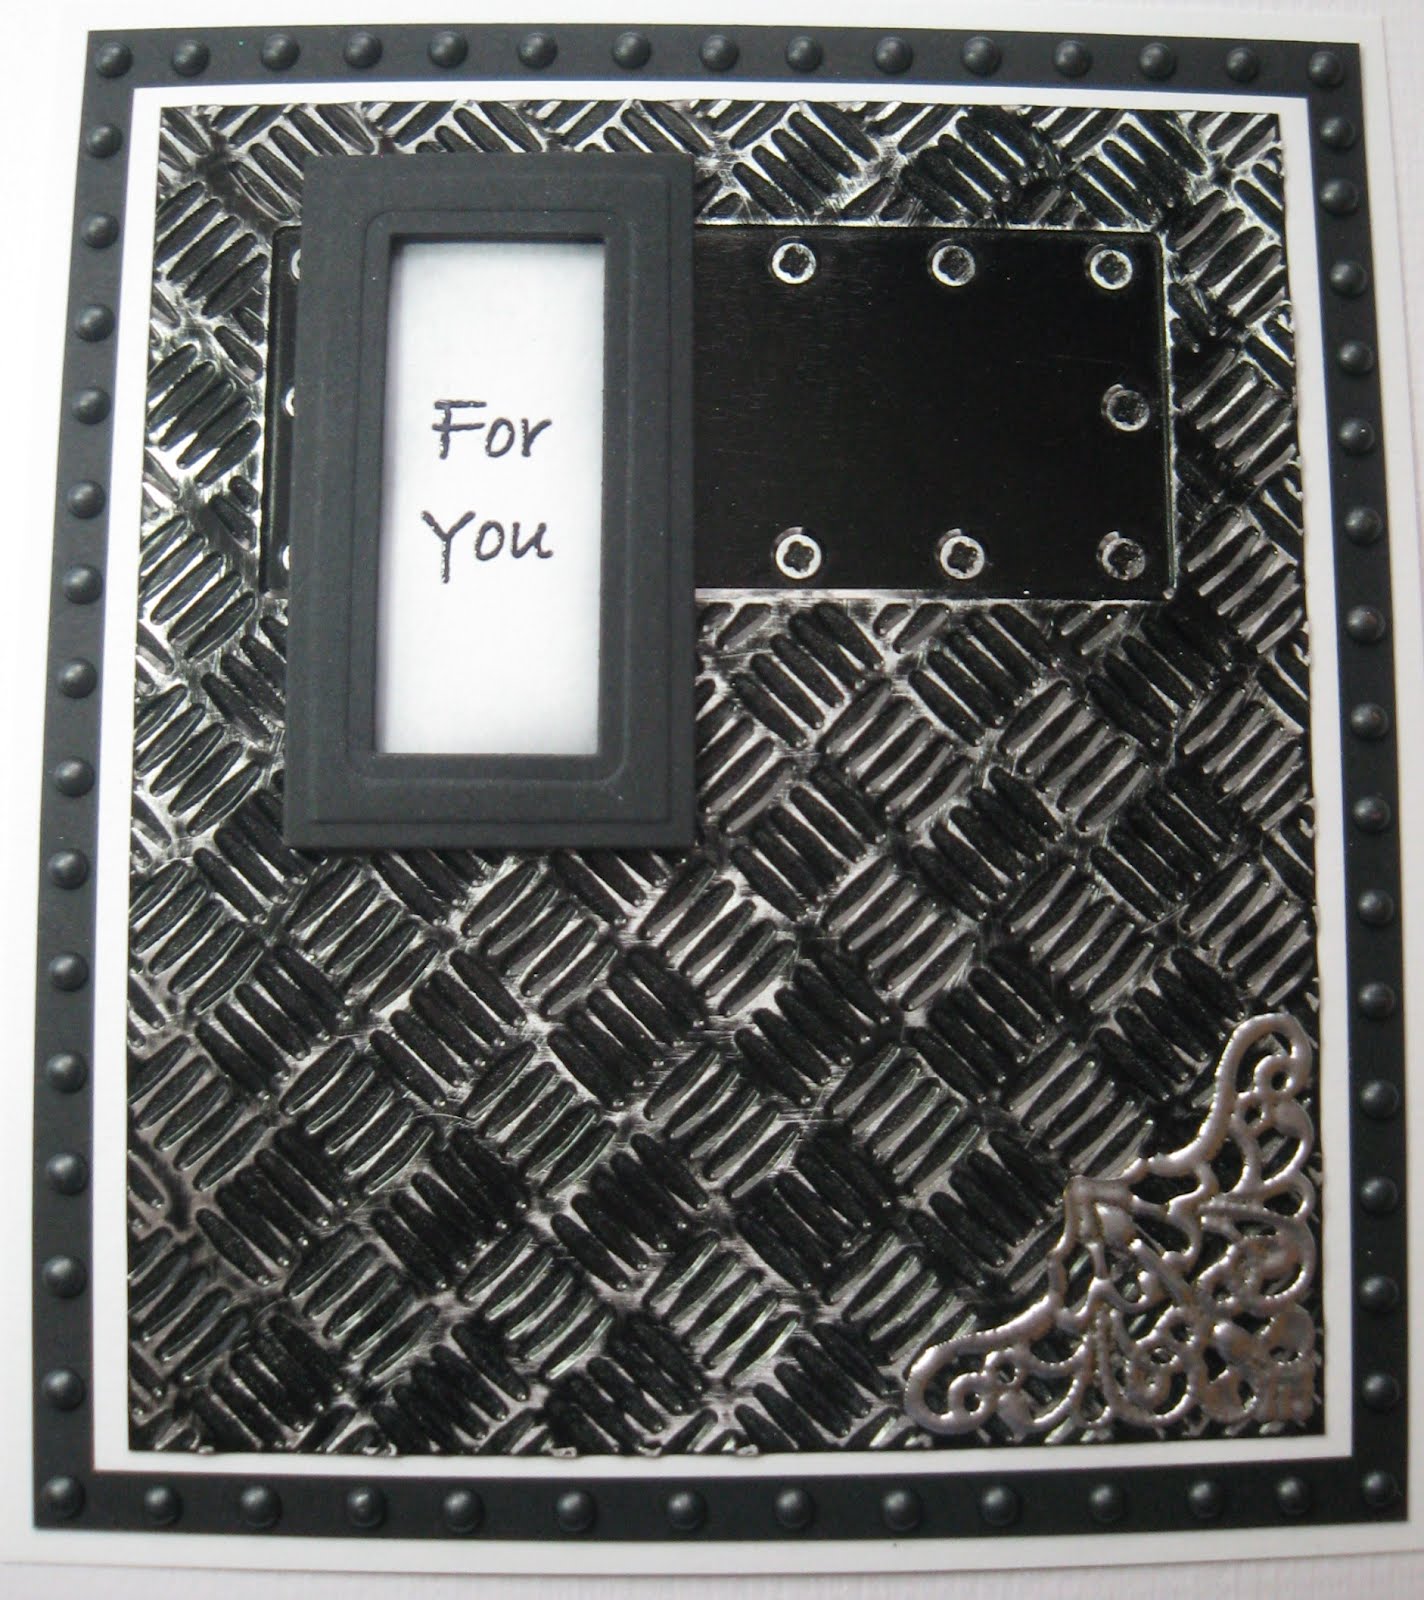
For You
Hi Bloggers.
Thanks to everyone who watched the shows yesterday and to those of you who emailed in. As usual, not enough time to read them all out. I really enjoyed all the shows but the ones with Loen were an absolute hoot - she's a nutter! I'm still giggling as I type this and I have Gonna Make You a Star and Sugar Baby Love going through my head! I am scheduled to do some more shows on Tuesday at 8am, 1pm and 6pm.
I'm off to Ally Pally today to set up for the weekend. I'll be demonstrating on the Creative Expressions Stand Saturday and Sunday along with Leonie, Sam, Hels (Saturday only) and Christine (Sunday only). I'm also set to do a demo in the demo room both days - yikes! Sue will be there on her own RubberNecker stand as usual.
Here's a very simple masculine card made with Black Metal. (Please note that I have 4 x 4 in my shop. This card was made with a 5 1/4 x 5 3/4 sheet.)
I ran the black metal sheet through the Grand Calibur with the Spellbinders Industrial M-Bossabilities Folder. I sanded it to reveal the Aluminium Core.
I stamped the sentiment from the Creative Expressions Kind Thoughts Stamp Set using Jet Black Archival and embossed with Cosmic Shimmer Clear Embossing Powder. I cut it out using Spellbinders Matting Basics B. I edged with a little Black Soot Distress Ink using Cut n Dry Foam. I used the 2 sizes either side of Matting Basics A to cut a frame out of black card.
I pressed a Creative Expressions Metal Decorative Corner into a Perfect Medium Ink Pad and sprinkled with Cosmic Shimmer Silver Shine Metallic Embossing Powder and heat set.
I assembled the card as shown adding some dots of Cosmic Shimmer Pearlescent PVA in Black Pearl around the edges.
Thanks for stopping by.
Julia.
Thanks to everyone who watched the shows yesterday and to those of you who emailed in. As usual, not enough time to read them all out. I really enjoyed all the shows but the ones with Loen were an absolute hoot - she's a nutter! I'm still giggling as I type this and I have Gonna Make You a Star and Sugar Baby Love going through my head! I am scheduled to do some more shows on Tuesday at 8am, 1pm and 6pm.
I'm off to Ally Pally today to set up for the weekend. I'll be demonstrating on the Creative Expressions Stand Saturday and Sunday along with Leonie, Sam, Hels (Saturday only) and Christine (Sunday only). I'm also set to do a demo in the demo room both days - yikes! Sue will be there on her own RubberNecker stand as usual.
Here's a very simple masculine card made with Black Metal. (Please note that I have 4 x 4 in my shop. This card was made with a 5 1/4 x 5 3/4 sheet.)
I ran the black metal sheet through the Grand Calibur with the Spellbinders Industrial M-Bossabilities Folder. I sanded it to reveal the Aluminium Core.
I stamped the sentiment from the Creative Expressions Kind Thoughts Stamp Set using Jet Black Archival and embossed with Cosmic Shimmer Clear Embossing Powder. I cut it out using Spellbinders Matting Basics B. I edged with a little Black Soot Distress Ink using Cut n Dry Foam. I used the 2 sizes either side of Matting Basics A to cut a frame out of black card.
I pressed a Creative Expressions Metal Decorative Corner into a Perfect Medium Ink Pad and sprinkled with Cosmic Shimmer Silver Shine Metallic Embossing Powder and heat set.
I assembled the card as shown adding some dots of Cosmic Shimmer Pearlescent PVA in Black Pearl around the edges.
Thanks for stopping by.
Julia.
Tuesday, 18 September 2012
Best Wishes
Hi Bloggers.
Congratulations if you managed to get the Tied Together Folder - the re-stock had sold out by yesterday morning. Don't despair if you missed it though as you'll still be able to buy it on Sue's shows on Wednesday (while stocks last!)
A little more metal today.
For the background, I ran some Coconut White Card through the Grand Calibur with the Spellbinders Industrial M-Bossabilities Folder. I ran it through a second time to extend the pattern. This ended up being a bit messy in the middle but I was able to hide it with my topper!
I inked up some Aluminium Foil with Terracotta, Butterscotch and Sunshine Yellow Alcohol Inks using my Alcohol Ink Applicator Tool. When dry I popped it through the Grand Calibur with the Paisley M-Bossabilities Folder. I sanded it to reveal the Aluminium core.
I cut a Fancy Weave Frame out of black card. I stamped the Best Wishes portion of the sentiment from the Creative Expressions Button Florals Stamp Set using Jet Black Archival and embossed with Cosmic Shimmer Clear Embossing Powder. I cut it out using one of the small dies in the Fancy Weave set.
I cut the middle size of the Floral Burst Cut, Fold and Tuck die set out of black card. I folded and tucked it and then added a 5mm White Pearl to the centre.
I assembled the card as shown adding some dots of Cosmic Shimmer Pearlescent PVA in Black Pearl around the edges.
Thanks for stopping by.
Julia.
Congratulations if you managed to get the Tied Together Folder - the re-stock had sold out by yesterday morning. Don't despair if you missed it though as you'll still be able to buy it on Sue's shows on Wednesday (while stocks last!)
A little more metal today.
For the background, I ran some Coconut White Card through the Grand Calibur with the Spellbinders Industrial M-Bossabilities Folder. I ran it through a second time to extend the pattern. This ended up being a bit messy in the middle but I was able to hide it with my topper!
I inked up some Aluminium Foil with Terracotta, Butterscotch and Sunshine Yellow Alcohol Inks using my Alcohol Ink Applicator Tool. When dry I popped it through the Grand Calibur with the Paisley M-Bossabilities Folder. I sanded it to reveal the Aluminium core.
I cut a Fancy Weave Frame out of black card. I stamped the Best Wishes portion of the sentiment from the Creative Expressions Button Florals Stamp Set using Jet Black Archival and embossed with Cosmic Shimmer Clear Embossing Powder. I cut it out using one of the small dies in the Fancy Weave set.
I cut the middle size of the Floral Burst Cut, Fold and Tuck die set out of black card. I folded and tucked it and then added a 5mm White Pearl to the centre.
I assembled the card as shown adding some dots of Cosmic Shimmer Pearlescent PVA in Black Pearl around the edges.
Thanks for stopping by.
Julia.
Sunday, 16 September 2012
Flowers are the Music of Life
Hi Bloggers.
Thanks for all your kind wishes re Kathryn over the last couple of days. We had a lovely but tiring day getting her moved in on Saturday. We left her unpacking loads of boxes on Saturday night. I can tell you, I hope she brings back less that we took there when she moves out next June!
I'm off to spend to some time with my dear friend Sue Wilson so that will keep me occupied for today. We're prepping for some Spellbinders Shows this week and packing for Ally Pally at the weekend.
Here's today's card with a bit of metal on it.
The background was made by running some Milk Card through the Grand Calibur with the Spellbinders Ornamental Iron Embossing Folder. I edged it with Vintage Photo Distress Ink using Cut n Dry Foam.
I cut a piece of Aluminium Foil in half. Using my Alcohol Ink Applicator Tool I added some Butterscotch, Terracotta and Sunshine Yellow Alcohol Ink. When dry I ran it through the Grand Calibur with the Floral Vines Mask. I sanded it a little to reveal the Aluminium core.
I cut a Spelbinders Fancy Postage Edge out of brown card. I stamped the sentiment from the Creative Expressions Button Florals Stamp Set using Coffee Archival and embossed with Cosmic Shimmer Clear Embossing Powder. I cut it our using the Spellbinders Fancy Ribbon Threader Die Set. I threaded some American Seam Binding in London Tan through the slots in the Ribbon Threader Die Cut. I attached the die cut to the Fancy Postage Edge die cut using 3d foam pads and wrapped the ribbon around the back.
I assembled the card as shown adding some dots of Cosmic Shimmer Pearlescent PVA in Choco Brown.
Just a heads up - I've listed loads of Wood Mounted Stamps on eBay starting at 99p each (click on the link in the right-hand sidebar to take you there).
Thanks for stopping by.
Julia.
Thanks for all your kind wishes re Kathryn over the last couple of days. We had a lovely but tiring day getting her moved in on Saturday. We left her unpacking loads of boxes on Saturday night. I can tell you, I hope she brings back less that we took there when she moves out next June!
I'm off to spend to some time with my dear friend Sue Wilson so that will keep me occupied for today. We're prepping for some Spellbinders Shows this week and packing for Ally Pally at the weekend.
Here's today's card with a bit of metal on it.
The background was made by running some Milk Card through the Grand Calibur with the Spellbinders Ornamental Iron Embossing Folder. I edged it with Vintage Photo Distress Ink using Cut n Dry Foam.
I cut a piece of Aluminium Foil in half. Using my Alcohol Ink Applicator Tool I added some Butterscotch, Terracotta and Sunshine Yellow Alcohol Ink. When dry I ran it through the Grand Calibur with the Floral Vines Mask. I sanded it a little to reveal the Aluminium core.
I cut a Spelbinders Fancy Postage Edge out of brown card. I stamped the sentiment from the Creative Expressions Button Florals Stamp Set using Coffee Archival and embossed with Cosmic Shimmer Clear Embossing Powder. I cut it our using the Spellbinders Fancy Ribbon Threader Die Set. I threaded some American Seam Binding in London Tan through the slots in the Ribbon Threader Die Cut. I attached the die cut to the Fancy Postage Edge die cut using 3d foam pads and wrapped the ribbon around the back.
I assembled the card as shown adding some dots of Cosmic Shimmer Pearlescent PVA in Choco Brown.
Just a heads up - I've listed loads of Wood Mounted Stamps on eBay starting at 99p each (click on the link in the right-hand sidebar to take you there).
Thanks for stopping by.
Julia.
Sunday, 9 September 2012
Some People
Hi Bloggers.
This is one of the cards I'm planning to demo on one of the shows today. It's bit different, definitely not girly and uses Aluminium Metal and Alcohol Inks which are on the shows.
So, for the background I used a piece of the Aluminium Metal. I applied a few drops of Butterscotch, Pesto and Terracotta Alcohol Inks to my Alcohol Ink Applicator Tool and dabbed it all over the metal. Once dry (it dries very quickly) I placed it face down onto my GC rubber mat which was already on my base plate. I popped the Leaves Mask on top and then my pink plate and then ran it through the Grand Calibur. I sanded it a little to reveal the Aluminium colour.
I stamped the sentiment from the Creative Expressions Kind Thoughts Stamp Set using Coffee Archival and embossed with Cosmic Shimmer Clear Embossing Powder. I cut it out using Spellbinders Matting Basics B. I did not bother to emboss it as it was going to go behind the frame. I cut the frame out using Matting Basics B again. I used the 2 dies either side of the one I used to cut the sentiment out. At the emboss stage I added the Floral Vines Mask.
I tied a bow using 3 lengths of American Seam Binding in London Tan. I threaded some Baker's Twine from the Earthtones Set through a brown button, tied a bow and added it to my ribbon bow. The Earthtones set is not on the show so I'll be using a Brown Zipper Rose instead of the button. I added a couple of Creative Expressions Small Metal Leaves just under the ribbon bow.
I assembled the card as shown adding some dots of Cosmic Shimmer Pearlescent PVA in Choco Brown.
Hope you can join me today at 12 noon for 2 hours in the Toolshed with Dean and then 1 hour with Lottie at 5pm.
On a final note, if Lesley is reading this post, please email me as I have the stamp sets you wanted.
Thanks for stopping by.
Julia.
This is one of the cards I'm planning to demo on one of the shows today. It's bit different, definitely not girly and uses Aluminium Metal and Alcohol Inks which are on the shows.
So, for the background I used a piece of the Aluminium Metal. I applied a few drops of Butterscotch, Pesto and Terracotta Alcohol Inks to my Alcohol Ink Applicator Tool and dabbed it all over the metal. Once dry (it dries very quickly) I placed it face down onto my GC rubber mat which was already on my base plate. I popped the Leaves Mask on top and then my pink plate and then ran it through the Grand Calibur. I sanded it a little to reveal the Aluminium colour.
I stamped the sentiment from the Creative Expressions Kind Thoughts Stamp Set using Coffee Archival and embossed with Cosmic Shimmer Clear Embossing Powder. I cut it out using Spellbinders Matting Basics B. I did not bother to emboss it as it was going to go behind the frame. I cut the frame out using Matting Basics B again. I used the 2 dies either side of the one I used to cut the sentiment out. At the emboss stage I added the Floral Vines Mask.
I tied a bow using 3 lengths of American Seam Binding in London Tan. I threaded some Baker's Twine from the Earthtones Set through a brown button, tied a bow and added it to my ribbon bow. The Earthtones set is not on the show so I'll be using a Brown Zipper Rose instead of the button. I added a couple of Creative Expressions Small Metal Leaves just under the ribbon bow.
I assembled the card as shown adding some dots of Cosmic Shimmer Pearlescent PVA in Choco Brown.
Hope you can join me today at 12 noon for 2 hours in the Toolshed with Dean and then 1 hour with Lottie at 5pm.
On a final note, if Lesley is reading this post, please email me as I have the stamp sets you wanted.
Thanks for stopping by.
Julia.
Subscribe to:
Posts (Atom)