Saturday, 12 August 2017

Sparkly Intense Pigment Stain Acetate

Hi Bloggers.

This card was the first one I demoed in the One Day Special this week. It's a very simple card but contains a cool technique.

For the background, I ran a piece of Milk Card through the Spellbinders Platinum Machine with the Creative Expressions Frosted Window Embossing Folder. I edged with Blue Lagoon Chalk Cloud using a Smoothie. I matted ontp a couple of pieces of Milk Card that I also edged with Blue Lagoon.

I popped some CS Clear Varnish Lacquer onto my Craft Sheet. I added some Bluebell CS Intense Pigment Stain and some Sparkle Star CS Diamond Frost and mixed well. I added this to a piece of Heat Emboss Acetate using a wide brush and put aside to dry (about an hour).

I cut dies #3 and #4 together from Sue Wilson's Art Deco Snowflake Die Set out of Milk Card. I cut die #4 out of my Acetate background and glued the 2 die cuts together.

I cut dies #1 and #2 together out of Milk Card. I cut die #2 out of my Acetate background and glued the 2 die cuts together.

I cut the snowflake from Sue's Looped Snowflake Frame out of Milk card and added a 5mm Cream Pearl.

I stamped the sentiment from the Creative Expressions Santa's Sentiments Stamp Set using Blue Lagoon Chalk Cloud. I cut it out using Sue's Pierced Flags and cut the next sized die out of my Acetate Background. I cut 3 more snowflakes out of Milk Card, adding Blue Lagoon Chalk Cloud to 2 of them.

 I completed my card by adding an 8mm Cream Pearl to each corner.

Phill Martin is launching a new One Day Special on Hochanda today at 6pm with his new Scribbled Dies Collection. I'm offering 10% discount on items from the shows. You can find them here. Offer applies till midnight tomorrow night or while stocks last. Discount will be applied automatically at checkout. Phill has another show today at 8pm and then more shows tomorrow at 9am, 1pm and 5pm.

Thanks for stopping by.

Julia.
www.juliawattscrafts.co.uk
Free card with all website orders over £10 (ask for one in the comments box at checkout).

Friday, 11 August 2017

Freebie Friday

Hi Bloggers.

Well, that was a busy One Day Special. I hope you enjoyed the shows. I'll be spending this morning sorting through my website orders and then it's on with the prep for my Woodware shows next Thursday.

It's that time of the week again. This card is looking for a new home -

This is a demo card from shows that I did in June. You can read how the original card was made here.

Leave a lovely comment below to go into the draw to win it. I will announce the winner on Monday. Be sure to pop back to see if you have won.

Please note : Only comments left below will go into the draw. Comments made on the original post will not count. Information given on the original post was correct at the time that post was published.

New to my website are some lovely new stamps and a paper pad from Wild Rose Studio's 2017 Christmas release. You can find them here. Here's a few of my favourites (just to tempt you!).


Thanks for stopping by.

Julia.
www.juliawattscrafts.co.uk
Free card with all website orders over £10 (ask for one in the comments box at checkout).

Thursday, 10 August 2017

One Day Special Shows on Hochanda today

Hi Bloggers.

One Day Special Shows continue on Hochanda today at 7am (Netherlands), 9am, 1pm and 5pm. I hope you can join me.

I have a different colourway for you today - obviously change the colours if you're not confortable with pink for Christmas. Personally, I find it quite a relaxing change 😊

For the background, I embossed a piece of Milk Card with the Creative Expressions Shimmering Stars Embossing Folder. I matted onto Baby Pink Card and another piece of Milk Card.

I stamped the motif from the Creative Expressions Christmas Motifs Stamp Set onto Milk Card using Clear Perfect Medium and embossed with CS Silver Shine Detail Embossing Powder. I cut it out using die #4 from Sue Wilson's Looped Snowflake Frame Die Set. I placed die #3 over the top of it and drew around the outside edge of the die using a Clear Perfect Medium Pen. I added CS Silver Light Brilliant Sparkle Embossing Powder and heat set.

I cut dies #5 and #6 together from Sue's Scalloped Snowflake Frame out of Milk Card. I cut die #6 out of Baby Pink Card and glued the 2 die cuts together.

I cut die #5 from Sue's Looped Snowflake Frame out of Milk Card. I added Clear Perfect Medium, then Silver Light Brilliant Sparkle Embossing Powder and heat set.

I cut Sue's Checkerboard Poinsettia Border out of Milk Card. I matted it onto a piece of Baby Pink Card. I added it to the bottom section of my card. I cut the snowflake from Sue's Looped Snowflake Frame out of Milk Card 5 times. I pressed 3 of them into Clear Perfect Medium, added Silverlight Brilliant Sparkle Embossing Powder and heat set. I added all 5 snowflakes to the Checkerboard Poinsettia Border covering the flowers in the border as shown. I added a 5mm Cream Pearl to the centre of each snowflake.

I added CS Glue around all the edged of my embossed background and then sprinkled CS Crystal Stars over. I completed my card by adding an 8mm Cream Pearl to the top corners.

I'm offering 10% discount on items from the shows on my website. You can find them here. Offer applies till midnight tonight or while stocks last. Discount will be applied automatically at checkout.

Thanks for stopping by.

Julia.
www.juliawattscrafts.co.uk
Free card with all website orders over £10 (ask for one in the comments box at checkout).

Wednesday, 9 August 2017

One Day Special on Hochanda today

Hi Bloggers.

Today's the day when I launch a new One Day Special on Hochanda with Festive Dies from Sue Wilson. I'm really looking forward to it. I hope you can join me.

Here's today's card -

I started by creating my caught in crystal style background. I used a piece of Heat Emboss Acetate. I added CS Glue, spritzed with water and spread the glue all over using my finger. I then added Cosmic Shimmer Pixie Powders in Peacock Green, Lava Red and Rich Gold so that all the glue was covered. I spritzed with a little more water and then added CS Aurora Sparkle Diamond Frost. I scrunched up a piece of White Tissue Paper, opened it out and added it to my background. I dabbed it down using a piece of Kitchen Roll and put aside to dry.

I cut die #1 from Sue Wilson's Poinsettia Star into a piece of Milk Card several times.

Once my Caught in Crystal background was dry, I glued my Poinsettia Star background to it. I made a frame out of Milk Card using Sue's Doubled Piercd Squares Set B. I added it to my backgrounds using 2mm Foam Tape and trimmed away the excess. I matted onto a couple of pieces of Milk Card.

I stamped the sentiment from Creative Expressions Santa's Sentiments Stamp Set using Onyx Black Versafine Ink. I cut it out using Sue's Pierced Flags.

I cut the outer die from Sue's Poinsettia Cluster out of Milk Card. I cut the inner flower die out of some more of my Caught in Crystal Background. I added a Cream 5mm Pearl to centre of each flower.

I completed my card by adding an 8mm Cream Pearl to each corner of my frame.

I have uploaded photos of the samples from the shows to the Gallery Section of this Blog and to my Julia Watts Crafts Facebook Page.

Shows are at 6pm and 8pm today (the 8pm show is not on Freeview but it's on Freesat and Sky and you can slo watch online at hochanda.com and they usually stream live on facebook). Shows continue tomorrow at 7am (Netherlands and hochanda.nl), 9am, 1pm and 5pm.

I'm offering 10% discount on items from the shows on my website. You can find them here. Offer applies till midnight tomorrow night or while stocks last. Discount will be applied automatically at checkout.

Thanks for stopping by.

Julia.
www.juliawattscrafts.co.uk
Free card with all website orders over £10 (ask for one in the comments box at checkout).

Tuesday, 8 August 2017

Art Deco Framed Candle Sneak Peek

Hi Bloggers.

Here's today's sneak peek from the One Day Special that I'm launching on Hochanda tomorrow at 6pm.

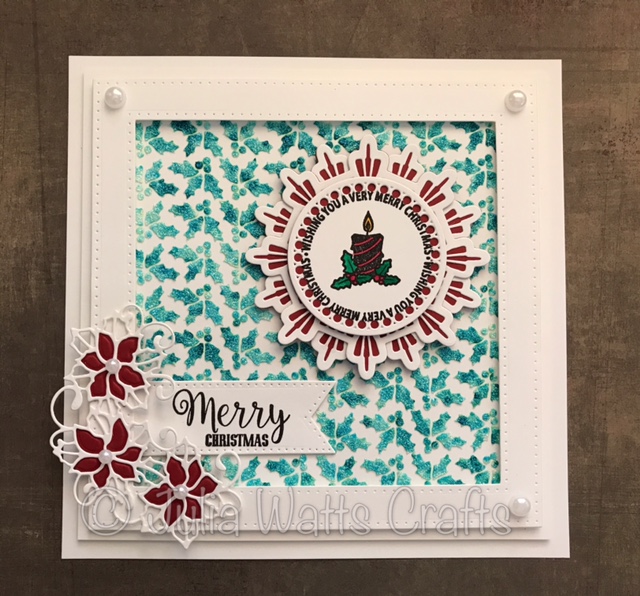
For my background, I spread Cosmic Shimmer Polar White Sparkle Texture Paste through the Holly Background Mask onto Coconut White Card. Leaving the mask in place, I sprinkled CS Peacock Green Pixie Powder over. I removed the mask and cleaned it under a tap and set my background aside to dty. The Pixie Powder does it's magic while drying and splits into different shades.

I made a frame out of Coconut White Card using Sue Wilson's Double Pierced Squares Set B. Once my background was dry, I added my frame using 2mm Foam Tape. I matted onto a couple of pieces of Coconut White Card.

I stamped the candle from the Creative Expressions Christmas Motifs Stamp Set using Onyx Black Versafine Ink. I coloured in using CS Intense Pigment Stains. I used Emerald, Rich Crimson and Sunflower Yellow. I popped a drop of each into separate wells in a Palette and used a Water Brush to pick up the ink. You only need a tiny bit so you could colour loads if images with just one drop! For the candle flame, I picked up some Red Crimson on my Water Brush and mixed that into the Sunflower Yellow in my Palette to make an orange. 

I cut the image out using dies #3 and #4 from Sue's Looped Snowflake Frame Die Set. I cut die #4 out of Rich Red Card and glued the 2 die cuts together.

I cut dies #3 and #4 together from Sue's Art Deco Snowflake out of Coconut White Card twice. I cut die #4 out of Rich Red Card twice. I glued the pairs of die cuts together and glue the pairs together, offsetting them as shown to form a really pretty circular frame for my candle.

I stamped the sentiment from the Creative Expressions Santa's Sentiments Stamp Set onto Coconut White Card using Versafine. I cut it out using Sue's Pierced Flags. I cut Sue's Poinsettia Cluster out of Coconut White and Rich Red Card and added a 5mm White Pearl to the centre of each flower.

I completed my card by adding an 8mm White Pearl to 3 of the corners of my square frame.

Thanks for stopping by.

Julia.
www.juliawattscrafts.co.uk
Free card with all website orders over £10 (ask for one in the comments box at checkout).

Monday, 7 August 2017

Star Shaker Card Sneak Peek

Hi Bloggers.

I have a shaker card for your sneak peek today -

I started by cutting the largest die from Sue Wilson's Radiating Star Die Set out of Acetate. I added some Cosmic Shimmer Crystal Stars to a Star Treat Cup and sealed them in with CS Glue and my Acetate star. I put aside to set/dry.

I misted a piece of Coconut White Card with water. I sprinkled over some CS Aqua Lagoon Pixie Powder and put aside to dry.

I cut an aperture out of Coconut White Card using the largest die in Sue's Poinsettia Star Die Set. I ran the background through the Spellbinders Platinum Machine with the Creative Expressions Candy Burst Embossing Folder.

I cut die #1 from Sue's Radiating Star out of Coconut White Card.

I cut die #4 from the set out of Coconut White Card and dies #3 and #4 out of Coconut White Card. I glued the 2 die cuts together. One the glue was dry, I slotted in die #2 and cut to create a frame.

I made a frame out of Coconut White Card using Sue's Double Pierced Squares Set B.

I then started to construct my card. I glued the inner Radiating Star die cut to a section of my Pixie Powder Background. I glued the Treat Cup to this and then slotted my embossed aperture piece over the top of the Treat Cup. I glued my star frame around this.

I added my square frame using 2mm Foam Tape. I matted onto Coconut White Card that I edged with Blue Lagoon Chalk Cloud. I matted onto another piece of Coconut White Card.

I stamped the sentiment from the Creative Expressions Santa's Sentiments using Blue Lagoon Chalk Cloud applying the ink with a Smoothie. I cut it out using Sue's Pierced Flags. I added a couple of snowflakes cut from my Pixie Powder Background using die #1 from Sue's Looped Snowflake Frame.

I completed my card by adding some White Pearls to the corners of my frame and the centre of the snowflake.

The winner of the card from Freebie Friday on 4th August is ................................

Ann Toppcards Leeds

Please email me at juliawattscrafts@gmail.com with your address and I'll pop your card in the post.

This was me yesterday morning - prepping the kits for the workshops with Lisa on 19th August. Now the kits are made the number of spaces is fixed in stone! If you would like to grab one of the last few places available, you can book here.

Thanks for stopping by.

Julia.
www.juliawattscrafts.co.uk
Free card with all website orders over £10 (ask for one in the comments box at checkout).

Sunday, 6 August 2017

Pine Wreath Sneak Peek

Hi Bloggers.

I have another sneak peek for you today from Wednesday's One Day Special -

For the background, I spread some Holly Green Sparkle Texture Paste through the Holly Background Mask onto Rich Red Card. Leaving the mask in place, I sprinkled over some Rich Gold Pixie Powder. I removed the mask and cleaned it under a tap and put my background aside to dry (a couple of hours).

I dusted a piece of Milk Card with an Anti-Static Pad. I stamped the CE Pine Wreath Stamp using Clear Perfect Medium and embossed with Forest CS Brilliant Sparkle Embossing Powder. I cut out using die #6 from Sue Wilson's Scalloped Snowflake Frame Die Set. I coloured in a little using Red Star Stardust Pen. I cut die #6 out of Brunswick Green Card and added my stamped die cut on top, offsetting it slightly.

I stamped the sentiment from the CE Santa's Sentiments Stamp Set using Olive Archival. I cut out using die #2 from Sue's Scalloped Snowlake Frame and added it to the centre of my wreath.

Once my background was dry, I matted onto Brunswick Green Card, then Antique Gold Pearl Card and Milk Card.

I cut a pair of pine cones out of Antique Gold Pearl Card and foliage out of Brunswick Green Card using Sue's Pine Cone & Greenery Die Set.

I completed my card by adding some pearls to the central die cut and to the corners of my background.

Thanks for stopping by.

Julia.
www.juliawattscrafts.co.uk
Free card with all website orders over £10 (ask for one in the comments box at checkout).

Saturday, 5 August 2017

Checkerboard Poinsettia Border Sneak Peek

Hi Bloggers.

As promised, I have a sneak peek for you today from the One Day Special that I'm launching on Hochanda on Wednesday at 6pm.

For the background, I cut Sue Wilson's Checkerboard Poinsettia Border out of Milk Card 5 times. I created my own background paper by spritzing a piece of Milk Card with water and adding Lava Red and Rich Gold Pixie Powders.

Once my Pixie Powder Background was dry, I added my die cut background securing with CS Glue in a Woodware Fine Tip Glue Applicator.

I made a frame out of Milk Card using Sue's Double Pierced Background Rectangles. I added it to my background using 2mm Foam Tape, trimming away the excess.

I dusted a piece of Milk Card with an Anti-Static Pad and stamped the sentiment from the Creative Expressions Santa's Sentiments Stamp Set using Clear Perfect Medium. I added CS Ruby Slippers Brilliant Sparkle Embossing Powder and heat set using a Low Speed Heat Tool. I cut it out using Sue's Pierced Flags and cut the next sized die out of Antique Gold Pearl Card.

I cut Sue's Poinsettia Cluster dies out of Rich Red Card and Antique Gold Pearl Card. I added a 5mm Cream Pearl to the centre of each flower.

I matted onto Antique Gold Pearl Card, Rich Red Card and Milk Card. I completed my card by adding an 8mm Cream Pearl to each corner of my frame.

Thanks for stopping by.

Julia.
www.juliawattscrafts.co.uk
Free card with all website orders over £10 (ask for one in the comments box at checkout).

Friday, 4 August 2017

Freebie Friday

Hi Bloggers.

Here's this week's card that needs a new home -

You can read how this card was made here.

Leave a lovely comment below to go into the draw to win it. I will announce the winner on Monday. Be sure to pop back to see if you have won.

Please note : Only comments left below will go into the draw. Comments made on the original post will not count. Information given on the original post was correct at the time that post was published.

The new Christmas range of Paper Cuts Dies from Creative Expressions has just been released. You can find them on my website here. I will be launching them on Hochanda in a One Day Special starting 25th August.

Here's sneaky peek from a couple of the cards I've made with them. They will have their day on the blog nearer the time.


I'll be back tomorrow with a sneak peek from the One Day Special that I'm launching on Hochanda on Wednesday.

Thanks for stopping by.

Julia.
www.juliawattscrafts.co.uk
Free card with all website orders over £10 (ask for one in the comments box at checkout).


Thursday, 3 August 2017

Chalk Clouds and the lovely Woodware Travel Background

Hi Bloggers.

I have a demo card from my last set of Hochanda shows for you today. I have already blogged this in a different colourway (here) but this is so pretty, I thought it derserved it's day on the blog -

I've used one of my mopped up waste ink backgrounds - Chalk Clouds in Enchanted Blossom, Sweet Violet, Gentle Lavender and Terracotta.

I stamped the Woodware Travel Background on top using Onyx Black Versafine Ink. I trimmed my piece and edged with Terracotta Chalk Cloud using a Smoothie.

I wrapped a piece of Sheer Iridescent Ribbon around the bottom section and them matted onto Black Card and popped onto a Coconut White Card blank.

I added CS White Gesso to an Arty Heart Pop-em. Once dry, I added Terracotta Chalk Cloud and then pounced through a section of the Celtic Vine Mask with Gentle Lavender Chalk Cloud. I edged the Pop-em with Enchanted Blossom Chalk Cloud.

I made a couple of flowers out of more of my mopped up waste ink background using Sue Wilson's Sweet Williams Die Set.

I completed my card by adding a 5mm Black Pearl to the centre of the flowers.

Francoise Read has shows on Hochanda today at 11am, 3pm and 7pm with the cute stamp sets from her Christmas release. I'm offering 10% discount on items from the shows that I have in stock on my website. You can find them here. Offer applies till midnight today only or while stocks last. Discount will be applied automatically at checkout.

Thanks for stopping by.

Julia.
www.juliawattscrafts.co.uk
Free card with all website orders over £10 (ask for one in the comments box at checkout).

Wednesday, 2 August 2017

Happy Birthday with Spellbinders Graceful Floral Lace

Hi Bloggers.

I have another card featuring Spellbinders Dies. Really simple, showing off the beautiful border die with the Creative Expressions Vanilla Pearl Card.

Products used -

Spellbinders - Graceful Floral Lace (one in the Pre-Loved Section of my website here), Pocket Elegante
Phill Martin Inkspirational Birthday Sentiments
Clear Perfect Medium
Cosmic Shimmer Gold Detail Embossing Powder
Creative Expressions Tulip Twist Embossing Folder
Card - Coconut White, Vanilla Pearl

I've been sharing a few pics on Facebook of prep for my next One Day Special on Hochanda starting 6pm next Wednesday (9th August). I thought you might like to see as I know some of you don't do Facebook -


Thanks for stopping by.

Julia.
www.juliawattscrafts.co.uk
Free card with all website orders over £10 (ask for one in the comments box at checkout).

Tuesday, 1 August 2017

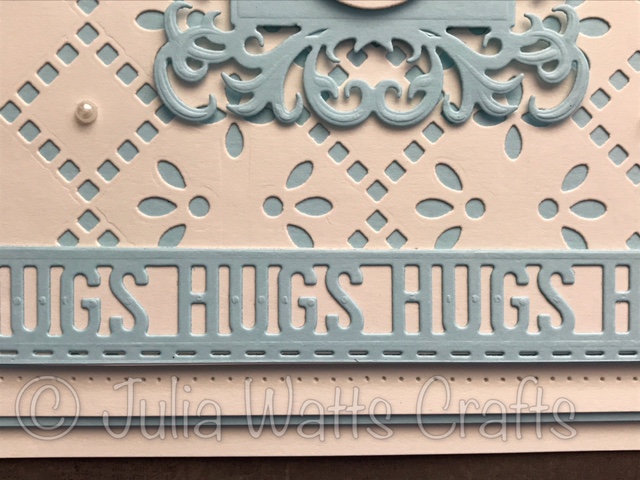
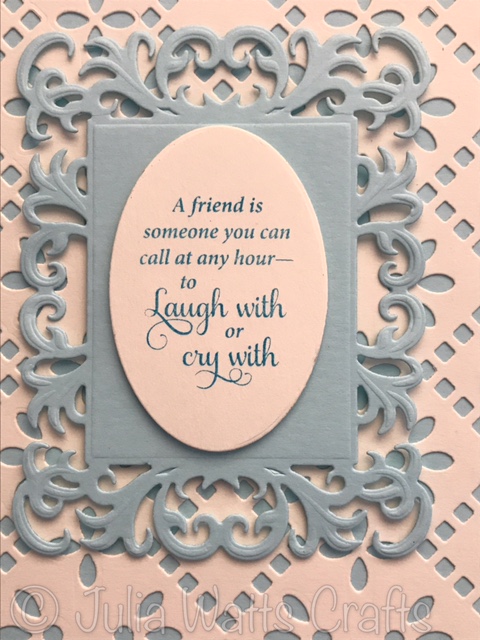
Spellbinders Graceful Eyelets Background

Hi Bloggers.

Here's today's card -

Products used -

Spellbinders - Graceful Eyelets (one available in my Pre-Loved Section here), Graceful Sweet Words, Iron Romance (one in my Pre-Loved Section here, Oval Ironwork (one in my Pre-Loved Section here)
Justrite - Special Gifts Vintage Labels 29 Stamp Set
Paradise Teal Archival
Craft Consortium Pearls
Card - Milk, Aqua

Tim Holtz Ruler
Pinflair Precision Probe
Self Healing Piercing Mat


Thanks for stopping by.

Julia.
www.juliawattscrafts.co.uk
Free card with all website orders over £10 (ask for one in the comments box at checkout).