Saturday, 23 July 2016

More Weekend Wow Shows today

Hi Bloggers.

I have another couple of shows on Hochanda today at 11am and 3pm. Hope you can join me.

Here's today's card which I demoed in the 10am show yesterday. You can still watch on it on catch up if you wish at www.hochanda.com.

For the background, I spread some CS Clear Texture Paste through the All Stirred Up Mask onto Coconut White Card. I removed the mask and added CS Luna Silver Mica Flakes and put aside to dry.

I made a frame using Sue Wilson's Double Pierced Squares and Double Pierced Squares Set B and added it to my background once it was dry using 3d Foam Tape.

I stamped the main image from the Justrite Multi-Step Don't Forget Stamp Set using Clear Perfect Medium and embossed using Phill Martin's CS Platinum Embossing Powder. I removed the excess mica using a dry wet wipe. I cut out using the largest die in the Justrite Vintage Labels Eleven Dies - the whole image doesn't fit but that's not a problem.

I stamped the sentiment from the same stamp set, again using Clear Perfect Medium and embossed with Phill's Platinum Powder. I cut it out using a die from the Justrite A2 Card Front Basics Dies.

I cut the largest die from the Justrite Hello Decorative Oval Frames Dies out of Coconut White Card twice. I pressed one of them into my Clear Perfect Medium Pad, added Phill's Platinum Powder and heat set.  I added more ink and more powder. Then, when I heat set this time, I also sprinkled on some CS Luna Silver Mica Flakes which became embedded into the embossing Powder.

With the other Hello die cut, I cut it in half, trimmed the split pointy bit off (see the demo) and glued to pieces to the back of the embossed die cut, off setting them slightly to form a shadow.

I embellished a pair of Sue Wilson's Laurel Leaves in the same way.

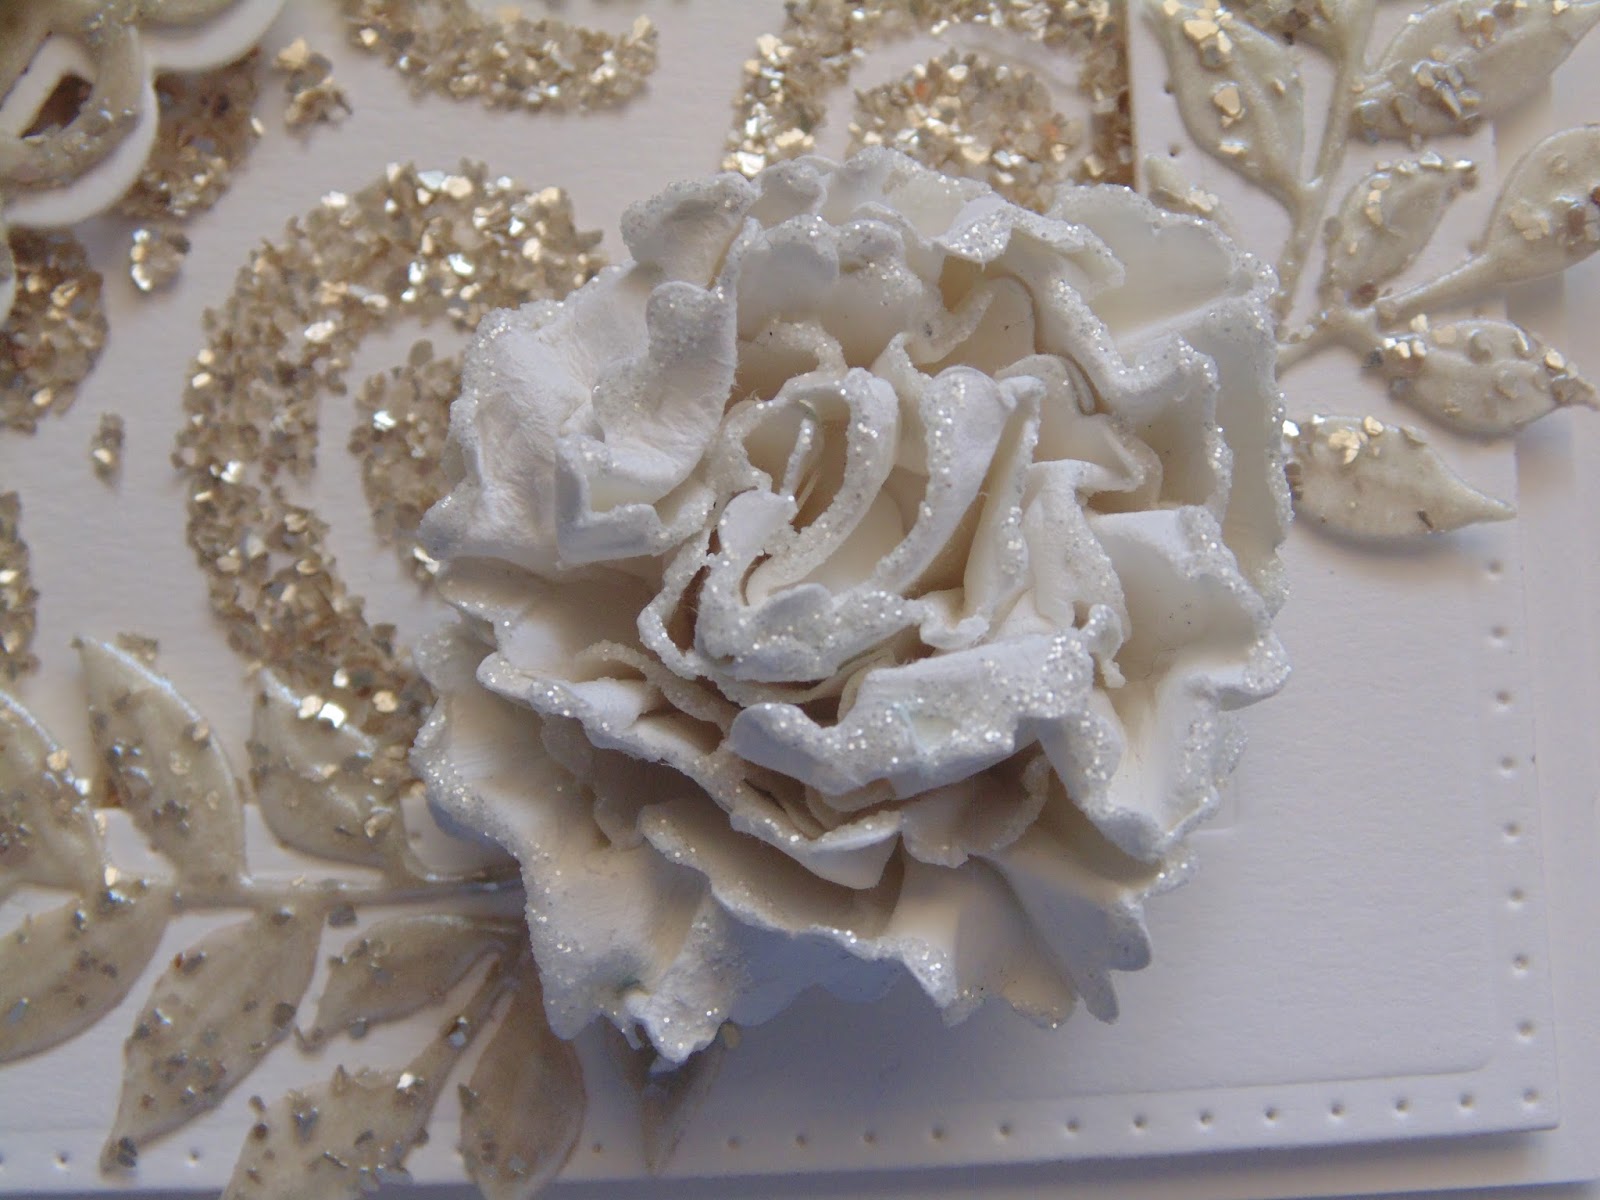
I made a scrunched up flower using 6 cuts of the smallest scalloped die in the Hello set ( I demoed this).

I assembled the card as shown adding some CS Polar White Twinkles around the edges of the image and the sentiment and adding some to the edges of the petals of the flower.

I ordered more stock yesterday including the new background stamps. You can find them and other products I have in stock from the shows on my website here. There's 10% discount on them till midnight tonight. I won't be able to do any post now till Monday. Orders placed from Thursday afternoon onwards will be posted Monday/Tuesday. Orders will be processed in the order received.

I've popped photos of the samples from the shows onto my Julia Watts Crafts Facebook Page and to the Gallery Page on this blog.

See you at 11am!

Thanks for stopping by.

Julia.
www.juliawattscrafts.co.uk
Free card with all website orders (ask for one in the comments box at checkout).
Deal of the Day today (23rd July) - John Lockwood Camellia Ring Elements Stamp Set only £7.99!


Friday, 22 July 2016

Justrite Shows on Hochanda today

Hi Bloggers.

I'm launching a Weekend Wow on Hochanda today with some gorgeous new Justrite stamps and dies. The shows are at 10am, 2pm and 5pm today and then tomorrow at 11am and 3pm. Hope you can join me.

There are some lovely beach themed stamps and matching dies on the show so I thought I'd share a card featuring those today -

The background on this was a bit of an experiment but I kind of like how it turned out- it was fun to do anyway! I started by placing the Wavy Mask onto a piece of Watercolour Card. I tapped some Purple Violet and some Candy Pink CS Pixie Powder all over and the spritzed with water. Leaving the mask in place, I popped another piece of Watercolour Card over the top and pressed down to get a negative print. I've actually used the negative for this project. I had already used the positive on another project.

I had watched Fran from Stampendous last week putting her texture paste on with a small spatula and kind of drawing with it so I tried it here. I popped some CS Clear Texture Paste onto a Small Spatula and added it to my dry background. Now, you have to remember that Pixie Powders are water re-active and adding the texture paste can move the colour a bit and you can get some into your texture paste so be careful when getting more out of the tub as you may contaminate your pot. Once I had enough paste on, I added some Midnight Blue and Luna Silver Mica Flakes. I also added some Phill Martin Chic Viola CS Embossing Powder and some Snowcap CS Brilliant Embossing Powder. I did forget to dust the area with my Anti Static Bag first but this time I did get away with it. I tapped off the excess - I now have a little pot of mixed mica flakes and embossing powder to use for another time. I heat set it - it takes a little while where the texture paste is thicker, you know it's done when it stops crackling.


I popped the largest die in the Justrite A2 Card Basics Dies set into the centre of a piece of Coconut White Card and embossed then cut. This created my frame. I used the corner stamp from the Justrite Congrats Card Basics Clear Stamp Set and stamped in all 4 corners of my frame using Jet Black Archival.

I stamped the sentiment, the shells, starfish and the seahorse from the Justrite At the Beach Stamp Set onto Coconut White Card using Clear Perfect Medium and embossed with CS Black Detail Embossing Powder. I cut the sentiment out using the Justrite A2 Card Front Basics Die Set and the shells, etc out using Justrite At The Beach Dies.

I popped a little Candy Pink and a little Purple Violet CS Pixie Powder into a Mixing Palette. I added a little water from my Water Brush and painted the seahorse pink and one of the shells purple. I added a little purple to the pink and painted the starfish. I added a little Silver Dream Pixie Powder to the purple and painted the remaining shell.

I cut a couple of corners out of Black Card and added them to the back of the opposite corners of my sentiment panel.


I assembled the card as shown adding a Black and a White Mat.

I managed to order the stamps that are on the shows last night - they should arrive Monday or Tuesday next week. You can find them and other products I have in stock from the shows on my website here. There's 10% discount on them till midnight tomorrow night. I won't be able to do any post now till Monday. Orders placed from yesterday afternoon onwards will be posted Monday/Tuesday.

My latest project on the Spellbinders Blog has gone live. You can see it here. It would be lovely if you have time to stop by and leave a comment.

See you at 10am!

Thanks for stopping by.

Julia.
www.juliawattscrafts.co.uk
Free card with all website orders (ask for one in the comments box at checkout).
Deal of the Day today (22nd July) - Spellbinders Savoy Decorative Elements only £13.99!


Thursday, 21 July 2016

Thursday Sneak Peek

Hi Bloggers.

Here's today's sneak peek from the Justrite Weekend Wow which starts on Hochanda tomorrow at 10am -

This is made with a cute little Justrite Stamp Set called Doodled Birds (I'm hoping  able to be to order this for my website very soon). I've used Coconut White Card (plus a little black for a mat). The little bit of grass has been stamped using Basil Leaf CS Colour Cloud using a Smoothie. The rest has been stamped using Jet Black Archival. I've coloured in using Distress Markers - Abandoned Coral, Fosilized Amber and Tumbled Glass, pulling the colour out a little using a Water Brush.

I've cut it out using Justrite A2 Card Front Basics and cut my mats and the card blank out using the same set.

Thanks for stopping by.

Julia.
www.juliawattscrafts.co.uk
Free card with all website orders (ask for one in the comments box at checkout).
Deal of the Day today (21st July) - Sue Wilson Thanks For Everything Die only £4.99!


Wednesday, 20 July 2016

Wednesday Sneak Peek

Hi Bloggers.

I thought I would share a sneak peek from the Justrite Weekend WOW that I'll be launching on Hochanda on Friday.

For the background, I dusted a piece of Coconut White Card with my Anti Static Bag and then spread some CS Clear Texture Paste through the Wavy Mask. I removed the mask and added CS White Gold Brilliant Sparkle Embossing Powder. I heat set it using a low speed Heat Tool (I find this best as the glitter in the powder seems to stay in place better). I will never tire of the way the texture paste crackles as you do this.

I do like to frame my mask backgrounds so I made a frame out of Coconut White Card using Sue Wilson's Double Pierced Squares and Double Pierced Squares Set B. I added it to my background using 3D Foam and trimmed away the excess.

For the focal point, I used Justrite Hello Decorative Oval Frame Dies and Justrite Vintage Labels Eleven Dies. I cut the largest die and the 'Hello' from the Hello Decorative Oval Frame Dies out of  Antique Gold Pearl Card. I cut a couple of the dies from the Vintage Labels Eleven Dies out out Coconut White Card. I also cut one of the scalloped edged dies from the Hello set out of Coconut White Card.

I pressed the largest Vintage Labels Eleven Die Cut into Clear Perfect Medium, added CS White Gold Brilliant Sparkle Embossing Powder and heat set. I repeated this process a second time. I then pressed the scalloped edged die cut into Clear Perfect Medium, added Phill Martin CS Old Gold Embossing Powder and heat set. I repeated this process a second time. I stacked all the layers on top of each other using Creative Expressions Mounting Cushion and added the 'Hello' using CS Glue in a Fine Tip Glue Applicator Bottle.

I made a scrunched up flower out of Coconut White Card by cutting the 2 smallest dies in the Vintage Labels Eleven Die Set (hopefully, I'll get chance to demo this). I added a couple of leaves cut from Sue's Laced Edged Leaves Die Set.

I assembled the card as shown adding some 8mm White Pearls and adding an Antique Gold Pearl and and a Coconut White Mat.

Thanks for stopping by.

Julia.
www.juliawattscrafts.co.uk
Free card with all website orders (ask for one in the comments box at checkout).
Deal of the Day today (20th July) - Spellbinders Houndstooth Card Creator Die Set only £11.99!


Tuesday, 19 July 2016

To Cheer You

Hi Bloggers.

I forgot to do the draw for Freebie Friday yesterday - sorry! That's what happens when pretty much every day is a working day - you loose track of what day it is! Anyhow, the winner of the card from Freebie Friday on July 15th is ...................................

Anne (Northampton)

Please email me at juliawattscrafts@gmail.com with your address and I'll pop your card in the post.

Here's today's card -

For the background, I ran a piece of Coconut White Card through the Spellbinders Platinum Machine with the Spellbinders VenetianM-Bossabilities Folder. I ran it through a second time to extend the design. I inked around the very edges with CS Plum Cobbler Colour Cloud using a Smoothie. I wrapped a piece of Craft Consortium Lily Lace Ribbon around the background.

I cut the largest die in the Spellbinders Jewelled Frame Die Set out of Coconut White Card and inked through the die with Plum Cobbler Colour Cloud. I snipped a section out from the long side. I glued the pieces to my background and wrapped a piece of Craft Consortium White Satin Ribbon around to hide the join.

I stamped the sentiment from the Creative Expressions Petite Lavish Sentiments Stamp Set using Plum Archival. I cut it out using a die from the Spellbinders Acanthus Leaf Tags Die Set.

I tied a bow using 2 lengths of the Satin Ribbon and added a Craft Consortium Heart Cluster Charm.

I assembled the card as shown adding some Craft Consortium Pearls and piercing around the edges using my Tim Holtz Ruler, Precision Probe and Piercing Mat.

Thanks for stopping by.

Julia.
www.juliawattscrafts.co.uk
Free card with all website orders (ask for one in the comments box at checkout).
Deal of the Day today (19th July) - Sue Wilson Scribble Flowers Die Set only £9.99!


Monday, 18 July 2016

I'd be so lost without you

Hi Bloggers.

Here's today's card -

The feature of this card is my Mica & Ice Technique which is a variation of Sue Wilson's Fire & Ice Technique.

I started by cutting the inner die only from the Spellbinders Acanthus Leaf Card Creator Die Set out of Coconut White Card. I placed a piece of Creative Expressions Double Sided Self Adhesive Sheet over the front. I turned it over to reveal the sticky areas and added some Phill Martin CS Mica Powders in Old Gold, Copper and Platinum. I removed as much of the excess mica powder as possible but it is a good idea to seal the powders in before adding the ice part of this technique. So, I glued a piece of white copy paper over the mica area, adding glue to the die cut areas.

I turned my piece over, remover the other backing sheet and rubbed CS Diamond Sprinkles over.

I then used the outer die from the set to cut the piece out. You need to run it through the machine a few times as you're cutting through card, adhesive sheet and copy paper.

I stamped the sentiment from the Justrite Chrysanthemum Stamp Set onto Coconut White Card using Clear Perfect Medium and embossed using CS Gold Detail Embossing Powder. I cut it out using a small die from the Spellbinders Acanthus Leaf Tags Die Set and cut the corresponding larger die from the set, again out of Coconut White Card.

I tied a bow using 2 lengths of Craft Consortium White Satin Ribbon and added a Circle Pearl Diamante Charm.

I've added some Craft Consortium Pearl Hearts and pierced around the edges using my Tim Holtz Ruler, Precision Probe and Piercing Mat.

Thanks for stopping by.

Julia.
www.juliawattscrafts.co.uk
Free card with all website orders (ask for one in the comments box at checkout).
Deal of the Day today (18th July) -
Phill Martin Sentimentally Yours Blossom Small Square 'Someone Special' Stamp Set only £2.99!

Sunday, 17 July 2016

ART

Hi Bloggers.

I have a tag for you today -

I covered a Scalloped MDF Tag with White Gesso. I popped a little CS Pearl Shimmer Paint onto my Craft Sheet. I spritzed a little CS Egyptian Blue Mister and mixed to create my own colour of Shimmer Paint. I used this to paint both sides and the edges of my tag.

I then popped the tag in a large box and placed the Distressed Dots Mask on top. I spritzed through it with Phill Martin's CS Titanium Mister.

Once dry, I stamped one of the designs from Lisa Horton's Tile Stamps - Set 2 using Jet Black Archival.

I cut the Spellbinders Cascading Circles Die out of Black Card and added it to my tag using CS Glue. It's bigger than the tag so I trimmed off the excess using scissors. I then covered my design with Clear Perfect Medium, added CS Clear Ultra Thick Embossing Powder and heat set using the Ranger Heat Tool. I repeated this twice more to give a lovely glossy finish. During the 3rd application, I also sprinkled some Sparkle Star CS Diamond Frost so thit became encased in the embossed finish.

I cut A R T out of Black Card using Spellbinders Donna's Alpha Grand Die Set. I added some Patina CS Gilding Wax.

I added a Vintage Metal Embellishment to a Dazzler Setting. Once the glue was set, I painted them with Black Gesso. Once that was dry, I rubbed some Patina Gilding Wax over.

I spritzed some Antique Green and Egyptian Blue Misters onto my Craft Sheet and ran some Blue White American Seam Binding through it. I dried it using my Heat Tool and added it to my tag.

Sue Wilson has shows on Hochanda today at 1pm and 2pm. John Lockwood is taking over tomorrow with shows at 5pm and 6pm. I'm offering 10% discount on products I have in stock on my website. You can find them here. Offer applies till midnight on tomorrow night (18th July). Discount will be applied at checkout.

Thanks for stopping by.
 
Julia.
www.juliawattscrafts.co.uk
Free card with all website orders (ask for one in the comments box at checkout).
Deal of the Day today (17th July) -
Spellbinders Labels Fifty Die Set only £13.99!

Saturday, 16 July 2016

Art Deco Tree

Hi Bloggers.

I have a Christmas Card for you today -

For the background, I used a paper from Phill Martin's Frosted Essentials Paper Pad. I spread some Phill Martin CS Frosty Sky Sparkle Texture Paste through the Snowflake Flurry Mask and put aside to dry.

I made a frame out of Coconut White Card using Sue Wilson's Double Pierced Squares. Once my background was dry, I added my frame using 3D Foam Tape.

I cut one of the tree dies from the Spellbinders Art Deco Trees Die Set out of Coconut White Card. I glued it to my background using CS Glue and added some 3mm Craft Consortium Pearls.

I cut the lovely corner swirl die from the Spellbinders Decorative 5 x 7 Holly Frame Die Set out of Coconut White Card and inked through the die with Phill Martin CS Frosty Sky Colour Cloud using a Smoothie. I made a flower using the Spellbinders Layered Poinsettis Die Set cut from a spotted paper from the same paper pad and inking through the dies with Frosty Sky Colour Cloud. I added a little Blue Dazzler to the centre of the flower.

I assembled the card as shown adding some 5mm Craft Consortium Pearl to the corners of the frame.

Sue Wilson has shows on Hochanda today at 2pm and 3pm and then tomorrow at 1pm and 2pm. John Lockwood is taking over on Monday with shows at 2pm and 6pm. I'm offering 10% discount on products I have in stock on my website. You can find them here. Offer applies till midnight on Monday night (18th July). Discount will be applied at checkout.

Thanks for stopping by.
 
Julia.
www.juliawattscrafts.co.uk
Free card with all website orders (ask for one in the comments box at checkout).
Deal of the Day today (16th July) -
Deal of the Day - Ranger Dye Ink Pad : Lily Pad only £2.99!