Friday, 6 December 2013

Sneak Peak

Hi Bloggers.

Today I thought I's share with you a sneak peak from Sunday's shows. There are a range of different stamp sets and dies from Justrite. I'm also launchng some new colours of PVA and some new Couture Creations Embossing Folders. There's a selection of sale items on the show too from Justrite, Spellbinders and That Special Touch. Agood  time to give the family a nudge if they haven't got your Christmas pressie yet!

I do have another guest with me on the shows - all will be revealed soon!

Here's today's sneaky peak -

I've used the Justrite Black-Eyed Susan Vintage Labels Five Clear Stamp Set on this. Quite a long name! As the title infers - there is a new Justrite die set - Vintage Labels Five and there are stamps on this set that directly co-ordinate with them. I love, love this stamp set and could have made dozens and dozens of cards with it but, as usual, I ran out of time.

So, for the background, I used a piece of Foundations Floral Dream paper as I did not want a white base. I randomly stamped a flower head stamp using Faded Jeans Distress Ink. Then, using a butterfly stamp from the set, I painted some Pastel Aqua Watercolour (from the Cosmic Shimmer Pastels Watercolour Set) on to it and stamped in the gaps (applying a little more paint each time). I made sure the ink and paint were dry and then ran it through the Grand Calibur with the Couture Creations Endless Embossing Folder (new design). I ran it through a second time to extend the design and inked around the edges with Faded Jeans.

I stamped the main image using Jet Black Archival and embossed with Cosmic Shimmer Clear Embossing Powder. I cut it out using Spellbinders Labels 13 and inked through the die with Faded Jeans. I coloured in using Tumbled Glass and Crushed Olive Distress Markers and CS Pale Aqua Watercolour.

I stamped the sentiment using Jet Black Archival and embossed with Cosmic Shimmer Clear Embossing Powder. I cut it out using Justrite Vintage Labels Three Dies and inked through the die with Faded Jeans.

I tied a bow using 2 lengths of White Satin Edged Organza Ribbon. I tied another bow using 2 lengths of blue twine from the Pastel Bakers Twine Set. I added a Frosted Blue Dazzler.

I assembled the card as shown adding some White Pearls in the corners and some dots of Pastel Blue Cosmic Shimmer Pastel PVA (new colour!) around the edges.

I'll be back tomorrow with anothe sneak peak.

Thanks for stopping by.

Julia.

Thursday, 5 December 2013

Postcard

Hi Bloggers.

Here's today's card -

For the background, I used a piece of paper from the Heartfelt Creations Antiquity 12 x 12 Paper Pad. I covered it with Double-Sided Adhesive and then added Glass Micro Beads. I added an Art Deco Metal Corner to 2 of the corners and wrapped some Cream Crochet Ribbon around the centre.

I stamped the Heartfelt Creations Postcard Stamp using Coffee Archival and embossed with Cosmic Shimmer Clear Embossing Powder. I inked around the edges with Victorian Velvet Distress Ink. I coloured in using Pink Mallow Mica Powder from the Cosmic Shimmer Summer Shades Mica Spray Set and Apple Green from the Cosmic Shimmer Luscious Greens Mica Spray Set.

I made a flower. I painted a piece of card with the Pink Mallow Mica Spray and cut the smallest flower die from the Heartfelt Creations Sweet Juliet Die Set 3 times. I cut the largest flower die out of felt from the Vintage Felt Pack. I used the felt die cut and one of the painted die cuts to mak ea flower in the usual way. I cut 2 flowers out of another paper from the Antiquity pad using the Heartfelt Creations Posy Patch Die Set. I stacked the layers of the flowers up as shown and added them to the postcard image.

I tied a bow out of Cream Crochet Ribbon and added a Crystal Sparkler.

I assembled the card as shown adding some dots of Cosmic Shimmer Pearlescent PVA in Golden Pearl around the edges.

Thanks for stopping by.

Julia

Wednesday, 4 December 2013

You are so beautiful to me

Hi Bloggers.

Here's today's card -

This card can be used either upright as I designed it on on it's side so that the sentiment can be read more easily.

I stamped the image from the Heartfelt Creations Beautiful Juliet Stamp Set using Perfect Medium and embossed with Cosmic Shimmer Silver Shine Detail Embossing Powder. I cut it out using Spellbinders Majestic Labels 25 and inked through the die with Dusty Concord Distress Ink. I used another couple of Majestic Labels 25 dies to cut a mat out of Heather Card. I used the largest of the Majestic Labels 25 dies and a Spellbinders 5 x 7 Matting Basics B die to cut the frame and I inked through the dies with Dusty Concord.

I made a flower out of felt from the Vintage Felt Pack using the Sweet Juliet die set. I cut some leaves from the same set.

I assembled the card as shown adding some 5mm White Pearls in the corners.

Thanks for stopping by.

Julia.

Tuesday, 3 December 2013

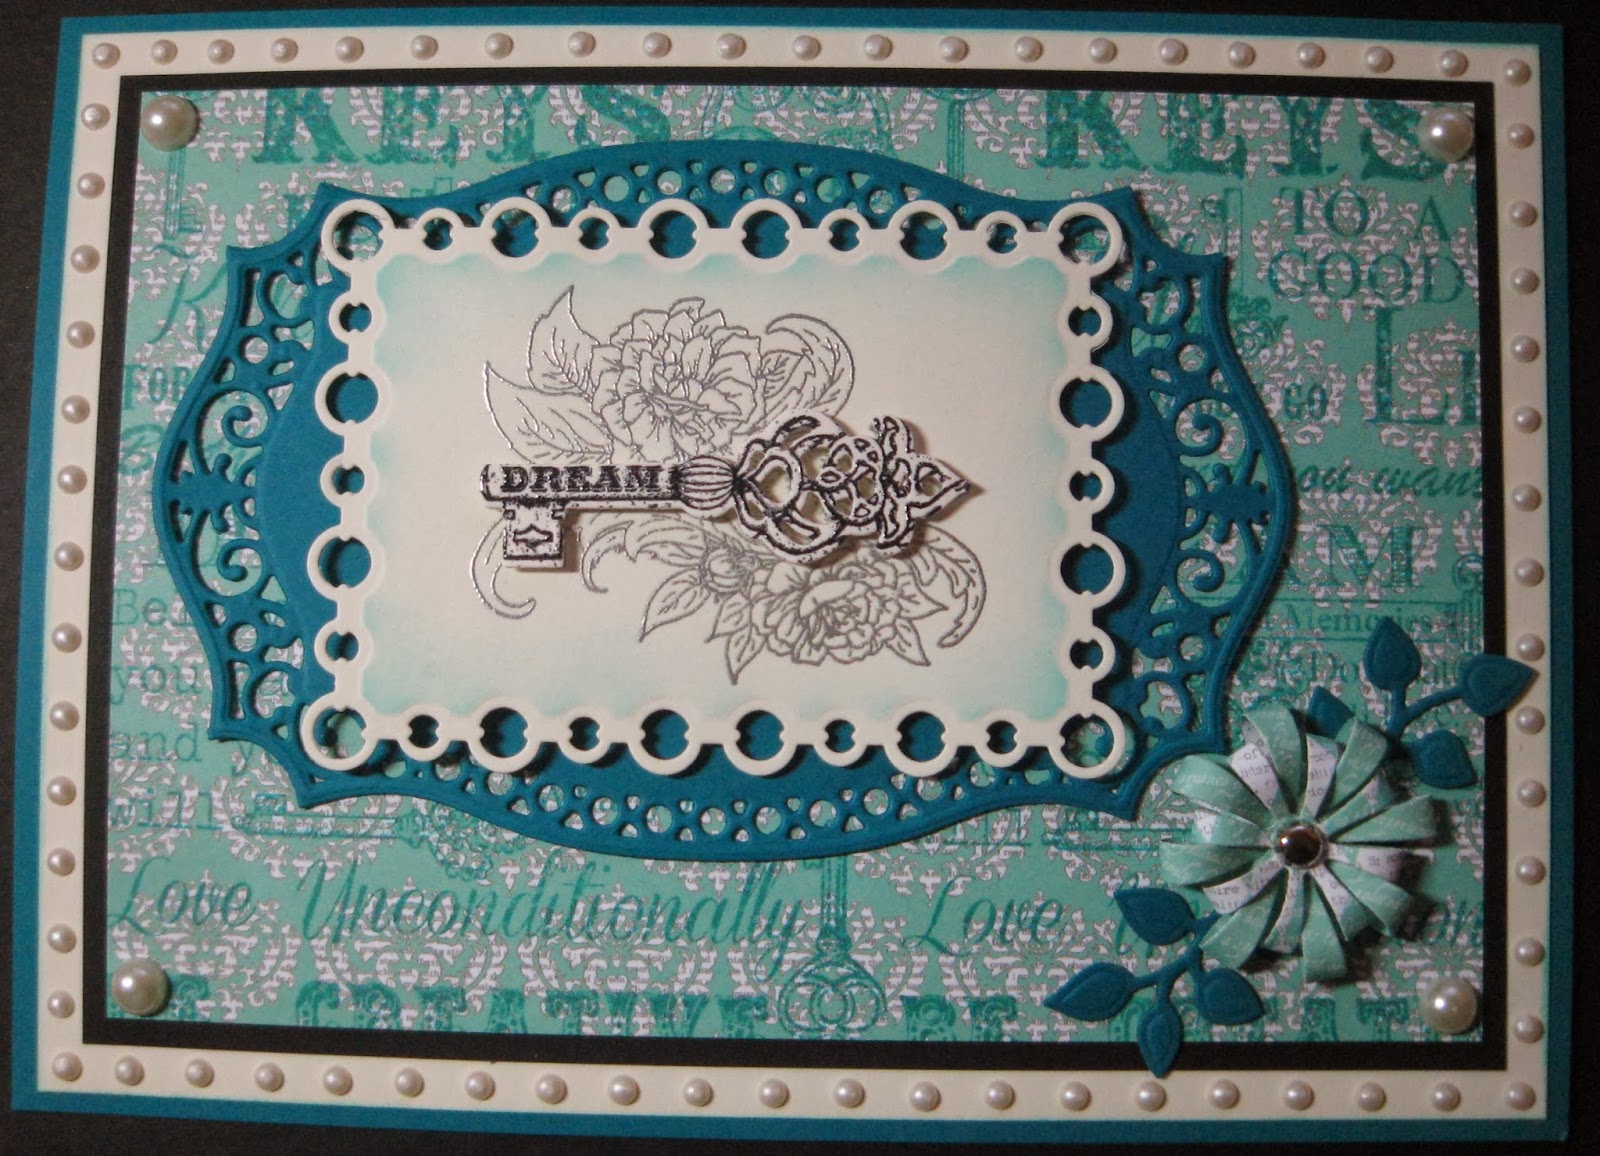
Dream

Hi Bloggers.

Another Floral Keys & Sweet Juliet card today. We are hoping to have some more Sweet Juliet dies available in the new year.

For the background, I used a piece of paper from the Teresa Collins 8 x 8 Paper Pad. I stamped the Heartfelt Creations Script Key Background a couple of times using Peacock Feathers Distress Ink.

I stamped the image from the Heartfelt Creations Keys and Roses Stamp Set using Perfect Medium and embossed with Cosmic Shimmer Silver Shine Detail Embossing Powder. I descided not to colour the image in this time. As a contrast, I used a key I had already stamped using the Heartfelt Creations Burnished Key Background and Jet Black Archival, embossed with Cosmic Shimmer Clear Embossing Powder and cut out using the Heartfelt Creation Burnished Key Die. I cut the image out using Spellbinders Pearl Effects and inked through the die with Peacock Feathers. I cut a Spellbinders Majestic Labels 25 out of Teal Card.

I made a flower from some more papers from the Teresa Collins Pad using the Heartfelt Creations Sweet Juliet Die Set. I cut some leaves out of Teal Card using the same die set.

I assembled the card as shown adding an 8mm White Pearl to each corner and some dots of Cosmic Shimmer Pearlescent PVA in White around the edges.

Thanks for stopping by.

Julia.

Monday, 2 December 2013

Just Want you to Know

Hi Bloggers.

Here's today's card -

For the background, I dusted a piece of Milk Card with my anti static bag and then stamped the flower spray from the Heartfelt Creations Recovery Wishes Stamp Set randomly using Perfect Medium. I added Cosmic Shimmer Gold Detail Embossing Powder and heat set. I then ran the piece through the Grand Calibur with the Couture Creations Cheerful Embossing Folder.

I stamped the sentiment image from the Heartfelt Creations Beautiful Juliet Stamp Set using Perfect Medium and embosssed with Gold Detail Powder. I cut it out using Spellbinders Labels 25. I cut a Spellbinders Majestic Labels 25 out of Soft Gold Card and glued it to a Spellbinders Labels 25 of the same size cut from Milk Card.

I made some flowers using the Heartfelt Creations Sweet Juliet Die - just one die cut per flower this time. I cut some leaves out of Soft Gold Card using the same die set.

I pressed a couple of Creative Expressions Art Deco Corners into a Perfect Medium Ink Pad, added Gold Detail Powder and heat set.

I assembled the card as shown adding some dots of Cosmic Shimmer Pearlescent PVA in Olympic Gold around the edges.

Thanks for stopping by.

Julia.

Sunday, 1 December 2013

Thinking of You

Hi Bloggers.

Marilyn still hasn't claimed her prize. I'll give her till Tuesday and then I'll try something else!

I suppose the countdown to Christmas is on now, being December 1st. Can't say I'm really into it this year yet. Too much else going on at the moment.

Anyhow, here's today's card -

The background on this one is easy peasy - it's one of the card panels from the Heartfelt Creations Antiquity Paper Pad. It really gives the impression of lots of layers but it's completely flat. I added the Thinking of You border to the top (from the same pad).

I stamped the image from the Heartfelt Creations Floral Keys & Locket Stamp Set using Jet Black Archival and embossed with Cosmic Shimmer Clear Embossing Powder. I coloured in using Aged Mahogany and Bundled Sage Distress Inks. I dabbed a little Flake & Glitter Glue onto the spray in the image and then added some Cosmic Shimmer Aurora Crystal Sparkle Glitter. I cut the image out using Spellbinders Labels 18 and inked through the die with Vintage Photo and Aged Mahogany Distress Inks. I added a couple of keys that I had previously stamped and cut using the Heartfelt Creations Burnished Key Stamp and Burnished Key Die Set. I also added a key from the Creative Expressions Assorted Key Charms Pack.

I made some flowers from some other papers in the Antiquity Pad using Heartfelt Creations Posy Patch Die Set, adding some Black Pearls to the centre. I also added some Faux Suede Leaves.


I assembled the card as shown adding some more pearls in the corners and some dots of Cosmic Shimmer Pearlescent PVA in Black Pearl around the edges.

Thanks for stopping by.

Julia.
Saturday, 30 November 2013

A Recovery Wish For You and Amazon Store Stock Updates

Hi Bloggers.

Here's today's card -

For the background, I used Milk Card. I randomly stamped the flower spray from the Heartfelt Creations Recovery Wishes Stamp Set using Faded Jeans Distress Ink. I made sure the ink was dry and then ran it through the Grand Calibur with the Spellbinders Twisted Hearts M-Bossabilities Folder. I ran it through a second time to extend the design (repeating pattern so easy to line up) and then inked around the edges with Faded Jeans using Cut n Dry Foam. I wrapped a piece of Cream Crochet Ribbon around just below the centre.

I stamped the sentiment from the same stamp set using Jet Black Archival and embossed with Cosmic Shimmer Clear Embossing Powder. I cut it out using Spellbinders Labels 18 and inked through the die with Faded Jeans. I dotted a little CS Flake & Glitter Glue on the sprays on the image and added Cosmic Shimmer Crystal Aurora Sparkle Glitter. I cut the largest of the Spellbinders Pearl Effects Dies out of Periwinkle Card and inked through the die with Faded Jeans.

 I cut a couple of Heartfelt Creations Posy Patch flowers out of Milk Card and spritzed them with Marine Ultra Mica Powder from the Cosmic Shimmer Shimmering Luxury Mica Spray Set. I made a flower and cut some leaves using the Heartfelt Creations Sweet Juliet Die Set.

I assembled the card as shown adding an 8mm Cream Pearl to 3 of the corners and some dots of Cosmic Shimmer Pearlescent PVA in White around the edges.

I have some new embellishments in my Amazon Store -

Crystal Sparklers
Vintage Metal Buttons
Crystal Sparklers are now back in stock
Also back in stock is the CS Flake & Glitter Glue. Ribbon has been selling well lately so I've re-stocked that too.

Don't forget - you can clink on the links (products in blue in the text) to go straight to the products in my store. Alternatively, click on Amazon in the top bar of this blog to take you to my storefront.

All for now.

Thanks for stopping by.

Julia.

Friday, 29 November 2013

Purple Tones

Hi Bloggers.

Joan has not come forward to claim the Blog Candy prize so I have made the draw again. The new winner is -

Marilyn Mcnama!!

Please email me at juliawattscrafts@gmail.com with your addy and I'll pop your prize in the post.

Here's today's card -

For the background, I used Coconut White Card. I randomly inked through the Squared Mask with Dusty Concord Distress Ink using Cut n Dry Foam. I then repeated the process with the Filigree Mask and Seedless Preserves Distress Ink. With the stamp in my hand I randomly stamped the Heartfelt Creations Burnished Keys Stamp using Dusty Concord. I made sure that the ink was dry and then ran it through the Grand Calibur with the Couture Creations Cheerful Embossing Folder. I ran it through a second time to extend the design. I then rubbed Pearl Moon Gilding Wax all over. Once dry I buffed it up with a dry wetwipe and inked around the edges with Dusty Concord.

I stamped the image from the Heartfelt Creations Keys and Roses Stamp Set using Jet Black Archival and embossed with Cosmic Shimmer Clear Embossing Powder. I coloured it in using Lapis Lavender Mica Powder from the Cosmic Shimmer Summer Shades Mica Spray Set and Apple Green Mica Powder from the Cosmic Shimmer Luscious Greens Mica Spray Set. I cut it our using Spellbinders Classic Squares Large and inked through the die with Dusty Concord. I stamped the main image again and embossed using Clear Powder. Using the template I had made for the Heartfelt Creations Burnished Key die, I lined the relevant key shape up over the key in the image. I slotted the Burnished Key die in place and secured with removable tape. I then ran it through the Grand Calibur to cut and emboss. Use this technique if you don't want to cut out the full set of keys. I cut a mat out of Heather Card using Spellbinders Grand Squares and Spellbinders Gold Squares One.

I made some flowers out of Heather Card and felt from the Vintage Felt Pack using the Heartfelt Creations Sweet Juliet Die Set. I cut some leaves using the same die set.

I assembled the card as shown adding an 8mm White Pearl in each corner and some dots of Cosmic Shimmer Pearlescent PVA in White around the edges.

Thanks for stopping by.

Julia.

Thursday, 28 November 2013

Sweet Memories with You

Hi Bloggers.

I'm adding new items onto ebay daily so click on the bar above is you'd care to have a look. I've also added some items for sale in the Beadwork section.

Here's today's card -

For the background, I used Milk Card. I stamped the Heartfelt Creations Script Keys Background twice using Dried Marigold Distress Ink. I made sure the ink was dry ran it through the Grand Calibur with the Couture Creations Large Hepburn Embossing Folder. I ran it through a second time to extend the design and then rubbed Enchanted Gold Gilding Wax all over the surface. Once dry, I buffed it up using a dry wetwipe and inked around the edges with Dried Marigold.

I stamped the image from the Heartfelt Creations Floral Keys & Locket Stamp Set using Jet Black Archival and embossed with Cosmic Shimmer Clear Embossing Powder. I cut it out using Spellbinders Labels 18 and inked through the die with Dried Marigold. I coloured in using Jade Teal Mica Powder from the Cosmic Shimmer Luscious Greens Mica Spray Set and Warm Peach Mica Powder from the Cosmic Shimmer Morning Sunlight Mica Spray Set. I already had a corresponding key cut out (I'd stamped the Burnished keys stamp and cut out with the Burnished Keys die). I coloured in parts of the key using a little Olympic Gold Mica Powder (from the Morning Sunlight Set) mixed with a little Vintage Photo Distress Ink. I layered this key on top of the image using 3d Foam. I cut 2 Spellbinders Majestic Labels 25 dies out of Soft Gold Card.


I made a flower out of a couple of papers from the Teresa Collins 8 x 8 Paper Pad using the Heartfelt Creations Sweet Juliet Die. I used another paper to cut out a couple of Heartfelt Creations Posy Patch flowers. I cut some leaves out of Soft Gold Card using the Sweet Juliet Die Set.

I assembled the card as shown adding some Cream Pearls in the corners and some dots of Cosmic Shimmer Pearlescent PVA in Golden Pearl around the edges.

Thanks for stopping by.

Julia.

Wednesday, 27 November 2013

You are Such a Blessing to Me

Hi Bloggers.

Before I share today's card, I'd just like to let you know that I'm having a bit of a clear out and have started putting some stuff on ebay. If you'd like to have a look, click on the eBay link in the bar above.

Here's today's card - a bit of a vintage feel to this one -

For the background on this one, I used one of the 6 x 6 designs in the Heartfelt Creations Antiquity 12 x 12 Paper Pad. I ran it through the Grand Calibur with the Couture Creations Cheerful Embossing Folder. I ran it through a second time to extend the design. I then rubbed Cast Bronze Gilding Wax all over. Once dry, I buffed it up using a dry wetwipe to make it shine a little more and inked around the edges with Vintage Photo and Aged Mahogany Distress Inks using Cut n Dry Foam.

I stamped the main image from the Heartfelt Creations Blessing to Me Stamp Set twice using Jet Black Archival and embossed with Cosmic Shimmer Clear Embossing Powder. On one of them I placed a Spellbinders Standard Circles Large Die over the top of the circular part of the design (I actually used a template for accuracy) and ran it through the Grand Calibur. I inked through the die with Vintage Photo and Aged Mahogany. I cut the other image out using Spellbinders Pearl Effects and inked through the die with Vintage Photo and Aged Mahogany. On both images, I coloured the leaves using Jade Teal Mica Powder from the Cosmic Shimmer Luscious Greens Mica Spray Set. I mounted the cicular piece on top of the complete image using 3d Foam Pads.

I cut the largest of the Spellbinders Pearl Effects Dies out of Chestnut Card. At the emboss stage, I added the Ivy Mask.

I cut a Spellbinders Lace Hearts out of another background paper from the Antiquity Pad and inked through the die with Vintage Photo and Aged Mahogany.

I made a flower out of another paper using the Heartfelt Creations Sweet Juliet Die Set and cut some leaves out of Chestnut Card using the same set.

I assembled the card as shown adding a couple of Victorian Corners and some dots of Cosmic Shimmer Pearlescent PVA in Black Pearl around the edges.

Thanks for stopping by.

Julia.