Sunday, 13 October 2013

Friends Forever

Hi Bloggers.

Here's today's card. It features the primrose image from the Spring Flowers Stamp Set but I have coloured it in as an auricula which is in the same family and comes in some great colours - go google them!

For the background, I randomly inked through sections of the Eyelet Lace Mask with Bundled Sage Distress Ink using Cut n Dry Foam. I then ran it through the Grand Calibur with the Couture Creations Extra Loren Embossing Folder. I ran it through a second time to extend the design and inked around the edges with Bundled Sage.

I stamped the image from the Spring Flowers Stamp Set using Jet Black Archival and embossed with Cosmic Shimmer Clear Embossing Powder. I coloured in using Golden Pear and Violet Frost Mica Powder from the Cosmic Shimmer Garden Flora Mica Spray Set and Apple Green Mica Powder from the Cosmic Shimmer Luscious Greens Mica Spray Set. I cut it out using Spellbinders Decorative Labels 28 and inked through the die with Bundled Sage I cut the largest of the dies from the Spellbinders Diamond Effects out of Mauve Card.

I stamped the sentiment from the same stamp set, again using Jet Black Archival and embossed with Clear Powder. I cut it out using Spellbinders Scalloped Labels One and inked through the die with Bundled Sage. I cut a Spellbinders Captivating Square out of Mauve Card.

I tied a bow using Cream Satin Edged Organza and added a Frosted Violet Dazzler.

I assembled the card as shown adding some Cream Pearls in the corners and some dots of Cosmic Shimmer Pearlescent PVA in Golden Pearl around the edges.

I am having trouble linking items in my Amazon Store to my posts at the moment which is a bit annoying! Hopefully normal serveice will be resumed soon. I do have a few Joyous Santa and Herald Angel back in stock. Goodness knows if those links will work!

Don't forget that Sue has shows today at 12noon (2 hours) and 7pm. Lots of new Justrite stamps!

Thanks for stopping by.

Julia.

Saturday, 12 October 2013

Amethyst Get Well Soon

Hi Bloggers.

Here's today's card -

This is quite a quick and easy card to make.

For the background, I dusted a piece of Coconut White Card with my anti static bag. I inked up the Fence Border Mask with Clear Perfect Medium, popped it onto the dusted card which was sitting on my tan mat on my base plate. I popped the pink embossing plate on top and ran it through the Grand Calibur. The ink transferred to the debossed pattern. I embossed with Cosmic Shimmer Amethyst Mist Lustre Embossing Powder. I popped the remaining card inside the Couture Creations Celebrate Embossing Folder and ran it through the Grand Calibur with the embossed fence design hanging over the edge of the plates. I inked around the edges with Milled Lavender Distress Ink using Cut n Dry Foam.

I stamped the image from the Summer Flowers Stamp Set using Perfect Medium and embossed with Amythyst Mist Lustre. I cut it out using Spellbinders Labels 28 and inked through the die with Milled Lavender.

I stamped the sentiment from the same stamp set, again using Perfect Medium and embossed with Amethyst Mist Lustre. I cut it out using Justrite Vintage Labels Four and inked through the die with Milled Lavender.

I assembled the card as shown adding some White Pearls in the corners and some dots of Cosmic Shimmer Pearlescent PVA in White around the edges.

Thanks for stopping by.

Julia.

Friday, 11 October 2013

Lots of Love

Hi Bloggers.

Thanks for all your comments and emails yesterday. I really enjoyed the shows with Leonie - love her to bits!

Here's a demo card from the 2nd show -

For the background, I dusted a pice of Milk Card with my anti-static bag. With the stamp in my hand, I randomly stamped the Justrite Floral Flourishes Background with Dried Marigold Distress Ink. I then dusted Orange Mica Powder from the Cosmic Shimmer Autumn Sunset Mica Spray Set all over the stamped areas. I lightly wiped away the excess with a dry wetwipe, misted with a little water and  heat set. Then, again with the stamp in my hand, I randomly stamped the Justrite Autumn Damask Background. I made sure the ink was dry and inked around the edges with Dried Marigold using Cut n Dry Foam.

I stamped the Begonia and the 'BEGONIA' stamp from the Summer Flowers Stamp Set using Jet Black and embossed with Cosmic Shimmer Clear Embossing Powder. I coloured in using Yellow Ultra and Orange Mica Powders from the Cosmic Shimmer Autumn Sunset Mica Spray Set and Lime Twist Mica Powder from the Cosmic Shimmer Luscious Greens Mica Spray Set. I cut it out using Spellbinders Scalloped Labels One and inked through the die with Dried Marigold. I cut the largest 2 dies from the Spellbinders Adorning Squares Die Set out of Apricot Card.

I stamped the sentiment from the same stamp set using Jet Black Archival and embossed with clear powder. I cut it out using Justrite Vintage Labels Four and inked through the die with Dried Marigold. I cut a Spellbinders Diamond Effects out of Apricot Card.

I assembled the card as shown adding some Cream Pearls in the corners and some dots of Cosmic Shimmer Pearlescent PVA in Golden Pearl around the edges.

Thanks for stopping by.

Julia.

Thursday, 10 October 2013

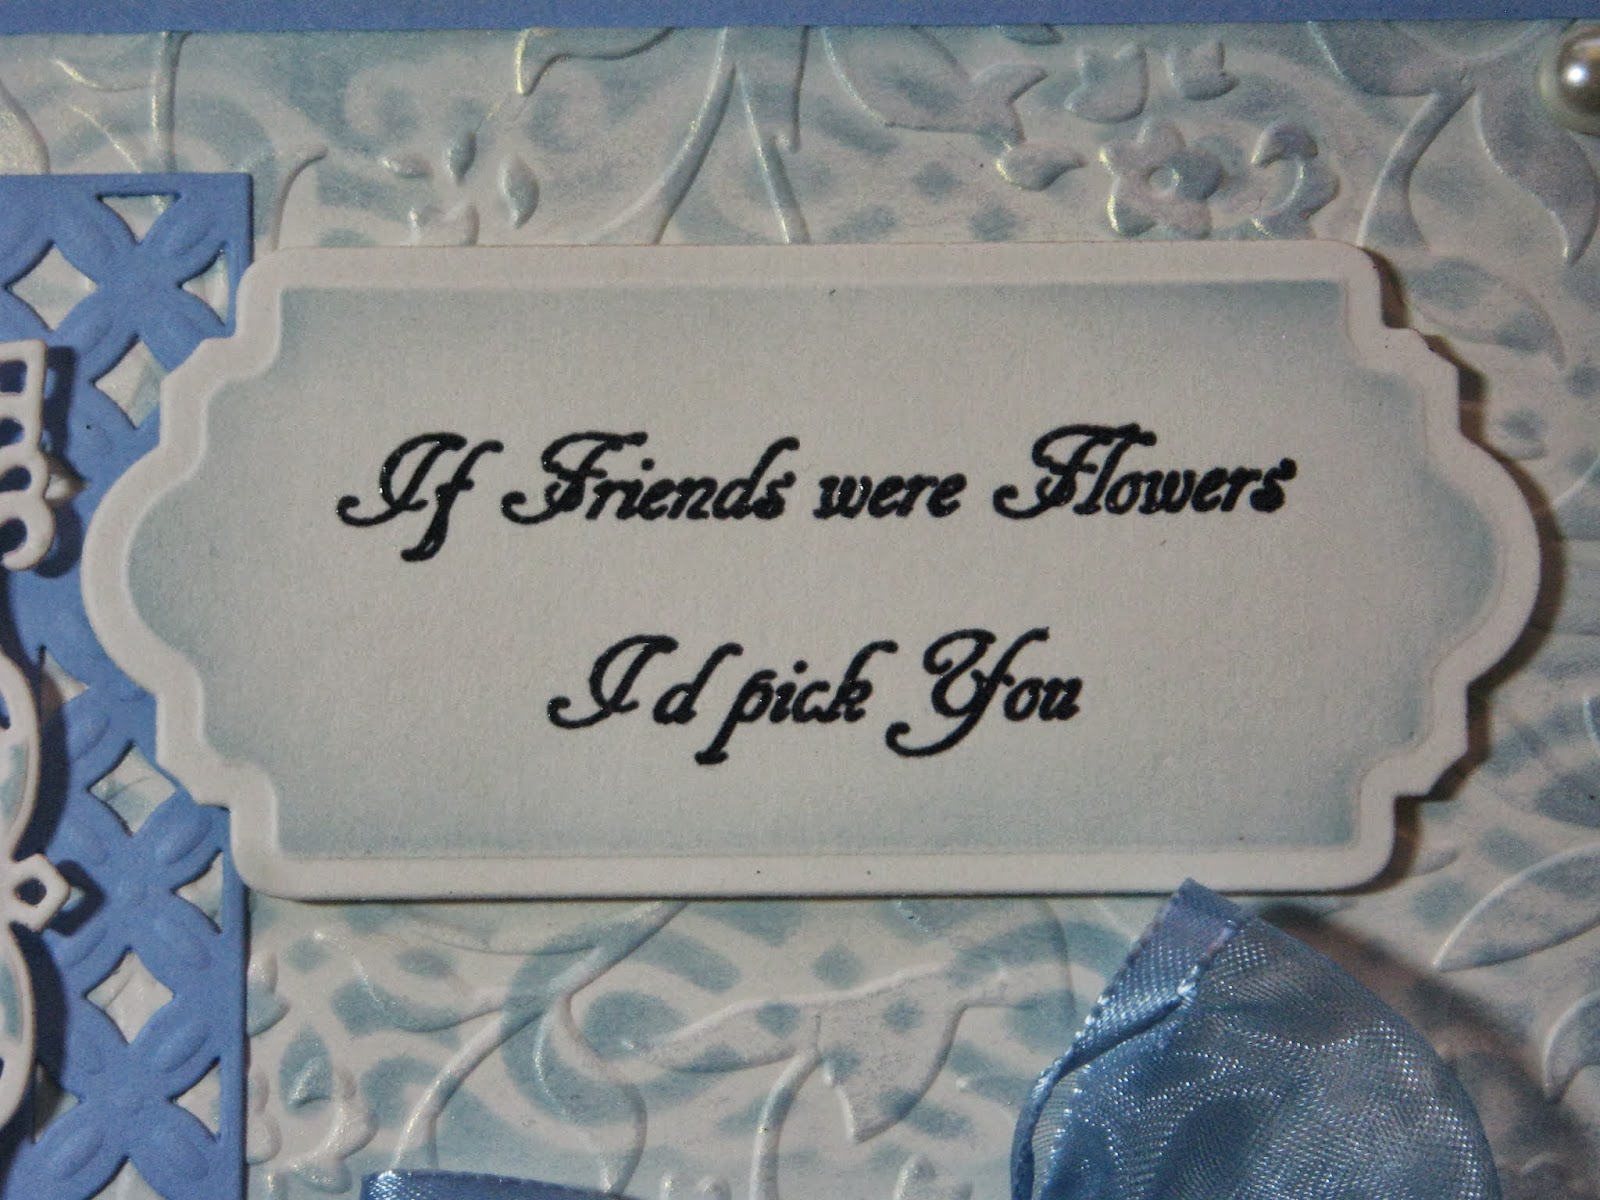
If friends were flowers ....

Hi Bloggers.

I have shows today on Create & Craft at 8am and 2pm - hope you can join me. I will have been up since 4.30am so if I'm not quite with it, please forgive me!

Here's today's card -

For the background, I inked through the Elegance Border Mask with Faded Jeans Distress Ink using Cut n Dry Foam. I did this 3 times across the card. I then ran it through the Grand Calibur with the Couture Creations Extra Loren Embossing Folder. I ran it through again to extend the design. I rubbed Enchanted Gold Gilding Wax all over. Once dry, I inked around the edges with Faded Jeans.

I stamped the Bluebells from the Spring Flowers Stamp Set using Jet Black Archival and embossed with Cosmic Shimmer Clear Embossing Powder. I coloured in using Golden Pear and Tropic Blue Mica Powders from the Cosmic Shimmer Garden Flora Mica Spray Set. I cut it out using Spellbinders Decorative Labels 8 and inked through the die with Faded Jeans. I cut the largest die from the Spellbinders Diamond Effects out of Periwinkle Card.

I stamped the sentiment from the same stamp set, again using Jet Black Archival and embossed with Cosmic Shimmer Clear Embossing Powder. I cut it out using Justrite Vintage Labels Four (on Sue's show on Sunday) and inked through the die with Faded Jeans.

I tied a bow using Blue Satin Edged Organza and added a Small Fancy Pearl Embellishment.

I assembled the card as shown adding some 8mm Cream Pearls in the corners and some dots of Cosmic Shimmer Pearlescent PVA in Golden Pearl around the edges.

Thanks for stopping by. See you later.

Julia.

Wednesday, 9 October 2013

Get Well Soon - Sneak Peak

Hi Bloggers.

As promised here's a card from tomorrow's shows. The time of the first show is now 8am, the other is still at 2pm. Looks like I have a double dose of Leonie - yay!

I've left this un-embellished at the moment. It may have some pearls in the corners by the time it arrives at the studios.

For the background, I placed the Patchwork Quilt Mask in the centre of a piece of Coconut White Card and inked through it with Victorian Velvet Distress Ink using Cut n Dry Foam. I also inked around the outide of the mask with the Distress Ink. With the stamp in my hand, I randomly stamped the Justrite Floral Flourishes Background using Victorian Velvet. I repeated the process with the Justrite Autumn Damask Background and Milled Lavender Distress Ink. Finally I stamped the 'GERANIUM' stamp from the Summer Flowers Stamp Set a few times using Victorian Velvet.

I stamped the Geranium image from the Summer Flowers Stamp Set using Jet Black Archival and embossed with Cosmic Shimmer Clear Embossing Powder. I coloured it in using Pear Green, Pink Ultra and Enchanted Gold Mica Powders from the Cosmic Shimmer Garden Flora Mica Spray Set. I cut it out using Spellbinders Captivating Squares (on Sue's shows on Sunday) and inked through the die with Victorian Velvet.

I stamped the sentiment from the same stamp set, again using Jet Black Archival and embossed with Clear Powder. I cut it out using Spellbinders Diamond Effects and inked through the die with Victorian Velvet.

I assembled the card as shown adding some dots of Cosmic Shimmer Pearlescent PVA in Vintage Pink around the edges.

Thanks for stopping by.

Julia.

Tuesday, 8 October 2013

To the Best Daughter

Hi Bloggers.

For those of you who have asked about the Christmas Cards that Sue had on her shows last weekend - I have already shared some of them as they were from a Pick of the Day that I did in July. You can view them by selecting July in the right hand side bar of this blog. The titles should give you a clue as to which ones are from the Christmas Shows.

Here's today's card -

For the background, I used a piece of Periwinkle Card and stamped the flourish from the Floral Footsteps Stamp Set around the edges using Faded Jeans Distress Ink. I made sure the ink was dry and then ran it through the Grand Calibur with the Couture Creations Cheerful Embossing Folder. I ran it through a second time to extend the design. I rubbed some Spring Green Gilding Wax all over. Once dry I inked around the edges with Faded Jeans using Cut n Dry Foam.

I stamped the image from the same stamp set using Jet Black Archival and embossed with Cosmic Shimmer Clear Embossing Powder. I coloured it in with Jade Green and Marine Sea from the Cosmic Shimmer Luscious Greens Watercolour Paint Set. I cut it out using Spellbinders Fleur de Lys Squares and inked through the die with Faded Jeans.

I stamped the sentiment with Jet Black Archival and embossed with Clear Powder. I cut it out using Spellbinders Pearl Effects and inked through the die with Faded Jeans.

I cut a leafy flourish out of Black Card using Heartfelt Creations Ornamental Add On die set. I shaped 3 little flowers that I cut from the Pearl Effects Die Set. I inked around the edges of each one with Faded Jeans and added a 5mm White Pearl to the centres.

I assembled the card as shown adding some dots of Cosmic Shimmer Pearlescent PVA in Cobalt around the edges.

I'll be back tomorrow with a sneaky peak from Thursday's shows.

Thanks for stopping by.

Julia.

Monday, 7 October 2013

Birthday Wishes

Hi Bloggers.

Back from a weekend of demoing. Met some lovely crafters.

A card from the Spellbinders Shows I did at the end of August today -

For the background, I popped a piece of Coconut White Card through the Grand Calibur with the Spellbinders Twisted Hearts M-Bossabilities Folder. I ran it through a second time to extend the design - this is a repeating pattern so really easy to line up. I inked around the edges with Faded Jeans Distress Ink using Cut n Dry Foam.

I stamped the sentiment that comes with the Beaded Flourish Single Stamp using Jet Black Archival and embossed with Cosmic Shimmer Clear Embossing Powder. I cut it out using a Spellbinders Gold Rectangles One Die within a Spellbinders Classic Rectangles Die. After cutting and embossing, I removed the Gold Die and inked through the Classic Die with Faded Jeans.

I placed a larger Gold Rectangles One Die within another Classic Rectangles Die and cut and embossed that. Again I removed the Gold Die and inked through the Classic Die with Faded Jeans.

I cut the largest 2 Spellbinders Nobel Rectangles Dies out of Foundations Paper and inked through the die and around the edges with Faded Jeans.

I tied a bow out of 3 lengths of Chalk White American Seam Binding and added a Frosted Blue Dazzler.

I assembled the card as shown adding some White 5mm Pearls and some dots of Cosmic Shimmer Pearlescent PVA in White around the edges.

Thanks for stopping by.

Julia.

Sunday, 6 October 2013

Bags of Fun part 2

Hi Bloggers.

Another card with the same sentiment as yesterday. Not sure how well this will show up for some people so apologies in advance. I did demo this one on tv so that's why I thought I'd share it.

Ok, a messy background. I used Coconut White Card. First I spritzed all over with Cosmic Shimmer Antique Green Vintage Mister. I dried it with my heat tool and then randomly inked through small areas of the Knitted Mask with Old Paper Distress Ink. Then, with the stamp in my hand I randomly stamped the Rose Background and the Plaid Stamp both with Old Paper. I made sure the ink was dry and then ran it through the Grand Calibur with the Couture Creations Poetry Embossing Folder. I ran it through a second time to extend the design and then rubbed Enchanted Gold Gilding Wax all over. Once dry, I inked around the edges with Old Paper. (sorry the pic below is blurry)

I stamped the handbag from the Bags Of Style Stamp Set using Perfect Medium and embossed with Cosmic Shimmer Golden Mint Lustre Embossing Powder. I cut it out using Spellbinders Fleur De Lys Rectangles and inked through the die with Old Paper. I added a 5mm White Pearl to the handbag.

I stamped the sentiment from the same stamp set using Perfect Medium and embossed with Golden Mint Lustre. I cut it out using Justrite Vintage Labels Four Die and inked through the die with Old Paper.

I made a flower out of White Crochet Ribbon and cut a couple of leaves out using Heartfelt Creations Classic Leaf Die Set.

I assembled the card as shown adding some more White Pearls in the corners and some dots of Cosmic Shimmer Cosmic Pearl Pearlescent PVA around the edges.

I'll be at Percy Throwers Garden Centre today demoing - from about 11am till 4pm. Pop by if you're in the area. Don't forget to tune into Sue's shows today - if there's anything left!

Thanks for stopping by.

Julia.

Saturday, 5 October 2013

Hope You Have Bags of Fun

Hi Bloggers.

I'm demonstrating at Melbicks Garden Centre, Coleshill today at their Craft Event. If you live locally, please pop by. I'll be doing the same thing at Percy Throwers Garden Centre, Shrewsbury tomorrow.

Here's today's card -

For the background I just inked through the Ivy Mask with Dried Marigold Distress Ink using Cut n Dry Foam. Job done!

I stamped the bag from the Bags of Style Stamp Set using Jet Black Archival and embossed with Cosmic Shimmer Clear Embossing Powder. I coloured in the top section with Cosmic Shimmer Umber Matt Drawing Ink from the Autumn Shades Set and Cosmic Shimmer Copper Mica Powder from the Metallics Set. I stamped the bag again onto some paper from the Teresa Collins 8 x 8 Paper Pad. I cut the bottom section out and glued it to the original image using Cosmic Shimmer Dries Clear Glue. I cut the image out using Spellbinders Pearl Effects and inked through the die with Dried Marigold.

I stamped the sentiment, again using Jet Black Archival and embossed with Clear Powder. I cut it out using Justrite Vintage Labels Four Dies (using that set a lot!) and inked through the die with Dried Marigold.

I made a flower using the Teresa Collins Paper. I stamped a couple of leaves from the Heartfelt Creations Open Leaf Stamp Set using Perfect Medium. I brushed some Copper Mica Powder over and used a dry wetwipe to remove the excess. I spritzed with water and dried with my heat tool to set. I cut the leaves out using the Heartfelt Creations Classic Leaf Die Set.

I assembled the card as shown adding a few White Pearls in a couple of the corners and some dots of Cosmic Shimmer Cosmic Pearl Pearlescent PVA around the edges.

Don't forget to catch Sue's Pick of the Weekend Shows again today.

Thanks for stopping by.

Julia.

Friday, 4 October 2013

Happy Birthday

Hi Bloggers.

Here's today's card -

For the background, I stamped the smaller corner which comes on the Belle of the Ball Stamp Set in each corner of a piece of Milk Card using Jet Black Archival and embossed with Cosmic Shimmer Clear Embossing Powder. I then ran it through the Grand Calibur with the Couture Creations Poetry Embossing Folder. I ran it through a second time to extend the design. I rubbed some Enchanted Gold Gilding Wax all over. I love the way the wax clings to the embossed Archival Ink. Once dry, I inked around the edges with Peacock Feathers Distress Ink using Cut n Dry Foam.

I wrapped some Black Crochet Ribbon around the background and glued a strip from the Teresa Collins 8 x 8 Paper Pad on top. I added 3 x 8mm Cream Pearls as shown.

I stamped the image using Jet Black Archival and embossed with Cosmic Shimmer Clear Embossing Powder. I cut it out using scissors and went around the edges with a black pen to hide any white bits. I coloured in the torso using Cosmic Tone Cosmic Shimmer Matt Drawing Ink and the patterned part of the dress with Blue Lace from the Soft Velvet Set. I stamped the image again onto some Teresa Collins Paper and cut out the 2 side sections of the dress and the waistband. I glued these in place on the original image using Cosmic Shimmer Dries Clear Glue.

I cut a Spellbinders Resplendent Rectangle and inked through the die and around the edges with Peacock Feathers Distress Ink.

I stamped the sentiment, again using Jet Black Archival and embossed with Clear Powder. I cut it out using Justrite Vintage Labels Four and inked through the die with Peacock Feathers.

I assembled the card as shown adding some dots of Cosmic Shimmer Cosmic Pearl Pearlescent PVA around the edges.

Sue lauches the first ever Pick of the Weekend today at 8am on Create & Craft. Lots of Christmas Goodies to be had. You can see the full list of show times on the right-hand side of her blog. Talking of her blog, another blog has knocked her off the No. 1 spot on Crafty Blogs - be sure to visit her blog regularly so that she can perhaps move back to the No.1 spot.


Thanks for stopping by.

Julia.

Thursday, 3 October 2013

Treat Yourself!

Hi Bloggers.

A quick & easy card today -

The background paper is from the Teresa Collins 8 x 8 Paper Pad from Creative Expressions. I used the Spellbinders Classic Petal Edgeabilities to cut the fancy edge at the bottom. I mounted it onto Milk Card and added some larger than usual dots of Cosmic Shimmer Cosmic Pearl Pearlescent PVA - hard to get them in a straight line!

I stamped the image from the Belle of the Ball Stamp Set (now back in stock) using Jet Black Archival and embossed with Cosmic Shimmer Clear Embossing Powder. I cut it out using Spellbinders Fleur de Lys Squares and inked through the die with Dried Marigold. I stamped the image again onto some dotty paper from the Teresa Collins Pack. I cut out the dress and glued on top of the original image using CS Dries Clear Glue.

I stamped the sentiment from the same stamp set, again using Jet Black Archival and embossed with Clear Powder. I cut it out using Justrite Vintage Labels Four and inked through the die with Dried Marigold.

I assembled the card as shown adding an 8mm Pearl to the top corners.

Like I said - quick & easy!

Dee Paramour is on Create & Craft today at 9am & 4pm. She has 2 new stamp sets on the shows - Autumn Flowers and Winter Flowers. I worked with Sue and her artist on these - I do hope you lke them. I tried to pick some flowers that aren't normally found on stamps. I have the Spring Flowers and Summer Flowers stamp sets on my shows next Thursday. Be sure to tune in to Dee's shows - she usually has some stunning samples and great demos.

Just to let you know - as well as the Bell of the Ball Stamp Set being back in stock in my Amazon Store, I've also re-stocked the Bags of Style Stamp Set, Floral Footsteps Stamp Set, Christmas Scene Bauble. The Teresa Collins Paper Pad is in stock as I write this, I also have a couple of pots of the Large Cosmic Shimmer Dries Clear Glue left. I have stocked a range of Cosmic Shimmer Mica Spray Sets ahead of next weeks shows and also large single pots of the so very useful Pearlescent Mica Powder.

All for now. Thanks for stopping by.

Julia.

Wednesday, 2 October 2013

Birthday Wishes

Hi Bloggers.

Here's today's card -

The background is from the Teresa Collins 8 x 8 Paper Pack. As I had cut down the paper, I lost a little of the shading around the edges so I went around the edges with Black Soot Distress Ink using Cut n Dry Foam.

I stamped the image from the Bags of Style Stamp Set using Perfect Medium and brushed some Dark Bronze Mica Powder from the Metallics Set over the top. I carefully removed the excess using a dry wetwipe, misted it with water and heat set. I cut it out using Spellbinders Distressed Edges and inked through the die with Brushed Corduroy Distress Ink using Cut n Dry Foam. I cut the largest of the Spellbinders Pearl Effects out of another of the papers and inked through the die with Brushed Corduroy.

I stamped the sentiment from the same stamp set in the same way as the handbag. I cut it out using Spellbinders Resplendent Rectangles. I inked through the die with Brushed Corduroy.

I made a flower from another of the papers following this tutorial. I stamped a couple of leaves from the Heartfelt Creations Open Leaf Stamp Set using Perfect Medium. I brushed Dark Bronze Mica Powder over and set with water as before. I cut the leaves out using Heartfelt Creations Classic Leaf Die Set.

I assembled the card as shown adding an 8mm Cream Pearl in each corner and some dots of Cosmic Shimmer Pearlescent PVA in Black around the edges.

Thanks for stopping by.

Julia.

Tuesday, 1 October 2013

I'm so Sorry

Hi Bloggers.

A bit of a Burst of Splendour today -

Milk andCustard Card on this one. For the background, I randomly stamped the one of the stamps from the Heartfelt Creations Dahlia Bouquet Stamp Set using Scattered Straw Distress Ink. I made sure the ink was dry and then ran it through the Grand Calibur with the Couture Creations Hyper Magical Embossing Folder. I ran it through a second time and then inked around the edges with Scattered Straw using Cut n Dry Foam.

I stamped the image from the Heartfelt Creations Dahlia Cluster Stamp Set using Coffee Archival and embossed with Cosmic Shimmer Clear Embossing Powder. I coloured the image in using Distress Markers - Mustard Seed and Crushed Olive. I cut it out using Spellbinders Radiant Rectangles and inked through the die with Scattered Straw. I cut the 2 largest dies in the same set out of Custard Card and again inked through the die with Scattered Straw.

I stamped the sentiment from the Heartfelt Creations Classic Message Stamp Set using Coffee Archival and embossed with Clear Powder. I cut it out using Spellbinders Stately Circles and inked through the die with Scattered Straw. (the next photo looks an entirely different colour - goodness knows why!)

I ran the Scattered Straw Ink Pad over a length of Cream Crochet Ribbon and tied a bow. I added a Fancy Pearl Embellishment to the centre.


I assembled the card as shown adding some Cream Pearls and some dots of Cosmic Shimmer Pearlescent PVA in Golden Pearl around the edges.

Thanks for stopping by.

Julia.