Saturday, 29 October 2016

Joy

Hi Bloggers.

Off to our Christmas Playdate today. Should be fun.

Here's today's card -

For the background, I popped the Christmas Quilt Mask onto a piece of Watercolour Card. I sprinkled Plum Twist, Silver Dream and Aqua Lagoon Pixie Powders over - I was a bit specific where I sprinkled the powders trying have the Plum Twist where the reindeers are, Silver Dream on the Snowflakes and Aqua Lagoon on the little squares. I spritzed with water and then removed the mask.

I made a frame out of Cobalt Card using Sue Wilson's Double Pierced Squares and Double Pierced Squares Set B. I added it to my background using 3D Foam, trimming away the excess using scissors.

I spread some CS Clear Varnish Lacquer over a piece of Acetate. I sprinkled Silver Dream Pixie Powder over and mixed it with the Varnish Lacquer using my fingers. I then sprinkled Aqua Lagoon Pixie Powder over. I scrunched up a piece of White Tissue Paper, opened it out and popped it on top pressing it into the lacquer using a piece of Kitchen Roll. I put it aside to dry (approx 1 hour).

I cut the largest die only from the Justrite Snowflake and Tag Dies out of Cobalt Card. I cut the large snowflake die in the set out of Coconut White Card. I cut the same die out of my acetate background. I glued the die cuts together and added a Craft Consortium Heart Cluster Charm and some White 5mm Pearls.


I cut 'joy' out of my acetate background using Joy Oval Frame Dies. I cut the smallest oval die from the same die set out of Coconut White Card and edged with CS Decadent Denim Colour Cloud using a Smoothie. I cut the next sized die out of Cobalt Card.

I assembled the card as shown adding some 8mm White Pearls to the frame and a couple of mats.

Lisa Horton is continuing with his One Day Special on Hochanda today with shows at 9am, 12noon, 4pm and 7pm. I'm offering 10% discount on items I have on my website from the shows. You can find them here. Discount valid till midnight tonight or while stocks last and will be applied at checkout.

Thanks for stopping by.

 Julia.
www.juliawattscrafts.co.uk
Free card with all website orders (ask for one in the comments box at checkout).
Deal of the Day today (29th October) - Sue Wilson Frames & Tags - Lauren only £9.99!


Friday, 28 October 2016

Freebie Friday

Hi Bloggers.

It's Friday again! That means I have another card that needs a new home -

You can read how this card was made in this post.

To go into the draw to win it, leave a lovely comment below and I will announce the winner on Monday.

Lisa Horton is launching a One Day Special on Hochanda this evening at 8pm. I'm offering 10% discount on items I have on my website from the shows. You can find them here. Discount valid till midnight tomorrow night or while stocks last and will be applied at checkout.

Thanks for stopping by.

 Julia.
www.juliawattscrafts.co.uk
Free card with all website orders (ask for one in the comments box at checkout).
Deal of the Day today (28th October) - D
esigns by John Lockwood - Daisy Heart Stamp only £2.99!

Thursday, 27 October 2016

Thinking of you

Hi Bloggers.

Had a great day at CE HQ yesterday. My next workshop up there is on Wednesday 16th November. For more details and to book click here. This Saturday we have our Christmas Playdate at Yardley Gobion Village Hall (just outside Milton Keynes) - for more info, click here.

Here's today's card -

For the background, I used a paper from Phill Martin's Blossom 8 x 8 Paper Pad, I trimmed it down a little and matted it onto Bright White Card.

I cut the border from the Spellbinders Venetian Accents Die Set out of the plain side of the same paper twice and glued it to the back of the white mat on my background. I added Mounting Cushion to the back of my background piece and matted onto another piece of Bright White Card. I used another piece of paper (plain side) as a mat and then added another larger mat of Bright White Card.

I cut the largest die in the Spellbinders In Spades Pendants Die Set out of Bright White Card and inked through the die with Phill Martin CS Chic Magenta Colour Cloud using a Smoothie. I cut the inner die out of patterned paper and inked through the die with Chic Magenta.

I added a Craft Consortium Vintage Pearl Charm to the centre.

I stamped the sentiment from the Justrite Meadow Circles Stamp Set onto Bright White Card using Watering Can Archival. I cut it out using a die from the Spellbinders Venetian Accents Die Set and inked through the die with Chic Magenta.

I finished my card with some 5mm White Pearls.

Thanks for stopping by.

 Julia.
www.juliawattscrafts.co.uk
Free card with all website orders (ask for one in the comments box at checkout).
Deal of the Day today (27th October) - C
reative Expressions New Home Clear Stamp Set only £7.99!

Wednesday, 26 October 2016

Simple Twofer

Hi Bloggers.

Heating fixed - yay! I'm up at CE HQ today running a couple of Christmas workshops. It's going to be a good day!

As the title suggests I have a twofer for you today. A couple of simple cards, great for batch making.

Here's the first -

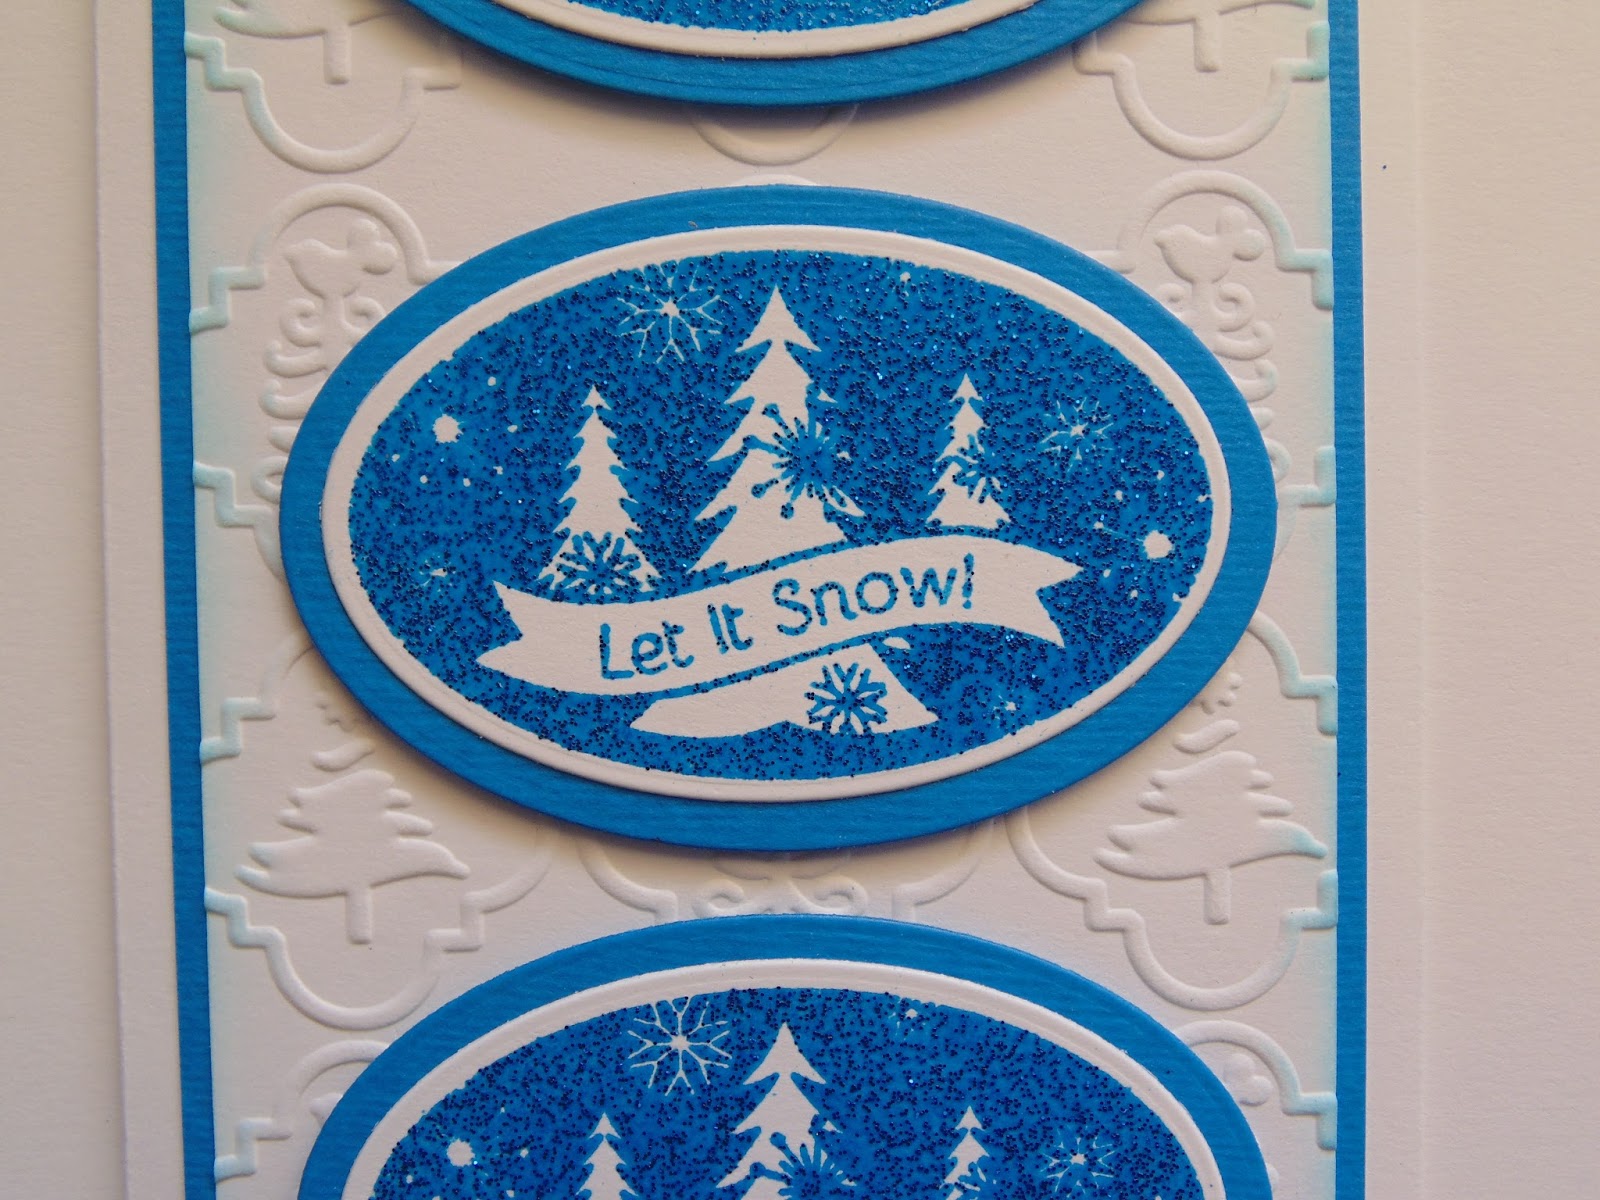
Coconut White Card Blank. I've stamped the image from the Justrite Large Oval Christmas Wishes Stamp Set onto Coconut White Card 3 times using Clear Perfect Medium and embossed with CS Blue Zircon Brilliant Sparkle Embossing Powder. I cut them all out using Justrite Joy Oval Frame Dies and cut a mats out of blue card from my stash using Justrite Hope Oval Frame Dies.

I embossed a piece of Coconut White Card with the Couture Creations Merry Little Christmas Embossing Folder, added it to a piece of blue card and popped it onto my card blank. Easy!

Here's your second card -

Not a big fan of this one but it does include a cool technique which is why I'm including it. It would probably look better with a bow rather than a buckle.

Anyway, for the background, I added a little CS Aqua Lagoon Pixie Powder to a Mister Bottle and then added water. I gave it a good mix and spritzed some onto a piece of Cut n Dry Foam. I used this as my ink pad. I inked up the Justrite Ribbons of Holly Background and stamped into Watercolour Card. I trimmed it down and edged it using my ink pad. I added it to a piece of Teal Card.

I threaded a piece of Tornado Blue Satin Ribbon through a Craft Consortium Rectangle Buckle Charm and secured the ribbon at the back of the Teal Card. I added to a Coconut White Card Blank.

I used my ink pad to stamp the sentiment from the Justrite Large Oval Christmas Wishes Stamp Set onto Coconut White Card. I cut it out using Justrite Joy Oval Frame Dies. I stamped the light bulb frame from the same stamp set onto Teal Card using Clear Perfect Medium and embossed using CS True White Detail Embossing Powder. I cut it out using Justrite Hope Oval Frame Dies.

I completed the card with a couple of White 5mm Pearls in the top corners.

Thanks for stopping by.

 Julia.
www.juliawattscrafts.co.uk
Free card with all website orders (ask for one in the comments box at checkout).
Deal of the Day today (26th October) - P
hill Martin Sentimentally Yours - Timeless Birthday Verses only £8.99!

Tuesday, 25 October 2016

Merry Christmas

Hi Bloggers.

An engineer is due today to have a look at my heating. Hopefully, it will be fixed. Desperate for a hot shower!

Here's today's card -

For the background, I embossed a piece of Coconut White Card with the Couture Creations Merry Little Christmas Embossing Folder. I ran it through a second time to extend the design. I matted it onto Rich Red Card andthen onto Antique Gold Pearl Card.

I stamped the Justrite Holly Stitched Background Stamp onto Coconut White Card using Clear Perfect Medium and embossed using CS Ruby Slippers Brilliant Sparkle Embossing Powder. I trimmed it and cut it in half lengthways (keeping the 2nd half for another project). I matted onto Rich Red Card and then onto Antique Gold Pearl Card.


I stamped the sentiment image from the Justrite Large Oval Christmas Wishes Stamp Set onto Coconut White Card using Slipper BS EP. I cut it out using Justrite Hope Oval Frame Dies. I cut the largest die in the Justrite Joy Oval Frame Dies out of Rich Red Card and cut the outer frame out of Anique Gold Pearl Card using Justrite Hope Oval Frame Dies.

I stamped the Justrite Holly Stitched Background onto Rich Red Card using Clear Perfect Medium and embossed with Ruby Slippers BS EP. I made a flower using the Justrite Multi-Step Poinsettia Dies. I tied a bow using 2 lengths of Red Two Tone Ribbon, added my flower and a Gold Dazzler.

I assembled the card as shown adding some 8mm White Pearls to the corners of the background and piercing around the edges using my Tim Holtz Ruler, Precision Probe and Piercing Mat.  

Phill Martin is continuing with his One Day Special on Hochanda today with shows at 9am, 12noon, 4pm and 7pm. I'm offering 10% discount on items I have in stock from the shows. You can find them here. Offer applies till midnight tonight or while stocks last. Discount will be applied at checkout.

Thanks for stopping by.

 Julia.
www.juliawattscrafts.co.uk
Free card with all website orders (ask for one in the comments box at checkout).
Deal of the Day today (25th October) - L
eonie Pujol - Masks & Stencils - Adore only £2.99!
 

Monday, 24 October 2016

Sending Hugs

Hi Bloggers.

Cold start to the day for me today - the heating stopped working last night and there's no hot water this morning. Not a happy bunny!

I had a fab day beading yesterday. I've a pic of the little I've got done over the past 2 weekend workshops at the end of this post - it's quite a time consuming hobby.

Back to today's card which was a magazine submission that was not used -

  1. Spritz a piece of Watercolour Card with water. Add Plum Twist and Rich Gold Pixie Powders by tapping very gently on the base of the pot. The powder will explode as it hits the water. The Plum Twist separates into many colours. It’s best to leave to dry but can be heat set. Once dry you will see the shimmer from the mica.
    2.       Dust with an Anti-Static Bag. Ink up the image from the Justrite Doodled Roses Stamp Set using Clear Perfect Medium and stamp leaving enough space around the image to die cut. Add Black Detail EmbossingPowder and heat set.
    3.       Tap a little Plum Twist and Peacock Green into a Paint Palette. Use a Water Brush to make the powders into paint and then colour the image. The paint won’t stick to the embossed lines making it easier to achieve a good result.
    4.       Make sure the paint is dry and then cut out using #2 die from Spellbinders Astoria Decorative Accents. Cut #5 die from Spellbinders Astoria Labels and glue the die cuts together.
    5.       Stamp the sentiment from the Doodled Roses Stamp Set onto another section of the Pixie Powder Background using Clear Perfect Medium and emboss with Black Detail Embossing Powder. Cut out using #2 die from Spellbinders Labels 50 Decorative Elements. Cut #3 die from Spellbinders LabelsFifty out of Black Card and glue the die cuts together.
    6.       Cut a piece of Coconut White Card to 5” x 5 ½”. Run it through the Spellbinders Platinum Machine with the Spellbinders Flowersand Leaves Embossing Folder. The card is bigger than the folder so leave the excess card outside the folder and have the cutting plate a little away from the edge where the excess card is so that you don’t get a line down your card. The pattern on the folder isn’t a repeating one but you can position the folder on the extra bit of card so that the pattern almost lines up. Run through the machine again, once more leaving the excess card outside the folder and the cutting plate a little away from the edge where the excess card is. Mat onto Black Card measuring 5 1/8” x 5 5/8”.
    7.       Cut a piece of Coconut White Card measuring 5 7/8” x 6 3/8” and pierce around the edges. Add a Black mat measuring 6” x 6 ½”. Add this to a Coconut White mat measuring 6 ½” x 7” using Mounting Cushion. Add the embossed card and mat to these 3 pieces, again using Mounting Cushion.
    8.       Add the 2 die cuts to the embossed background as shown using 3d Foam. Tie a bow using 2 lengths of Black Satin Ribbon. Add to your card as shown using a Glue Spot. Cut the smallest of the flower dies in the Spellbinders Lacework Button Flowers Die Set out of the Pixie Powder Background. Cut the smallest button die from the same die set out of Black Card. 
    9.   Insert the button die cut into the flower die cut as shown adding a SmallBlack Circle Dazzler with glue and add to the bow using a Glue Spot. Add a little glue to where you have used a Glue Dot to ensure that your bow and embellishment stays put. 
    10. Complete your card by adding a Small Black Circle Dazzler to each corner securing with glue.
Phill Martin is launching a One Day Special on Hochanda this evening at 8pm with his new Dainty Daisies Collection. I'm offering 10% discount on items I have in stock from the shows. You can find them here. Offer applies till midnight tomorrow night and discount will be applied at checkout.

As promised here's a photo of the elements I've beaded so far for my 'Is It' project designed by my good friend Sue Stallard -

The winner of the card from Freebie Friday on 21st October is ............................

BridgetCG

Please email me at juliawattscrafts@gmail.com with your address and I'll pop it in the post.

Thanks for stopping by.

 Julia.
www.juliawattscrafts.co.uk
Free card with all website orders (ask for one in the comments box at checkout).
Deal of the Day today (24th October) -  Sue Wilson M
ini Gemini Dies - Indus only £5.99!

Sunday, 23 October 2016

ART

Hi Bloggers.

I have a canvas for you today -

I've actually used a Dina Wakley Media Board. These are pre-treated so no need to apply a layer of Gesso.

I made this a while ago so I'll try and describe how I made it as best as I can remember.

I started my mixing some CS Multi-Tex Powder with water on my Craft Sheet. I added a little CS Glue to the mix and then spread it through the Basketweave Mask all along the right-hand side of the board. I had to move it to extend the design, drying the Multi-Tex mixture in between using a Heat Tool. I then used the Knitted Mask and applied Multi-Tex through it down the left-hand side of the board. I dried it and then extended the design down the side.

I added some Cream Crochet Ribbon and some Cream Guipure Lace securing with Matte Distress Collage Medium.

I cut the Spellbinders Cascading Butterflies Die out of Coconut White Card (can be any colour!). I also cut both the dies in the Spellbinders Medallion Three Die Set. I added them to my design plus a bunch of embellishments - Dazzlers, Dazzler Settings, Satin Roses, Watch Face Charms, Metal Corners, Vintage Buttons, Mini Pearl Swirls and a Zipper Rose.

I ran some of the butterflies from the inside of my Cascading Butterflies die cut through the Spellbinders Platinum Machine with the Creative Expressions Butterfly Dreams Embossing Folder. I shaped them and added them to the die cut on my board. I cut a couple of leaves using the Spellbinders Romantic Vines Die Set and slotted them in around the ribbon roses.

I painted the MDF 'ART' word with White Gesso and added it to the bottom right-hand corner.

I put my piece aside to dry for a few hours - it's easier to let it dry before the next bit.

Once dry, I painted the whole thing with CS White Gesso. Some areas needed a couple of coats.

I then sprayed with CS Misters - I used Phill Martin's Platinum and Decadent Teal. Once dry, I rubbed Phill's New Gold Gilding Wax over the embellishments to make them pop.

I finished by painting some CS Glue in various places and adding some Snow White Micro Beads.

Here's a few close ups -

I'm off the the second part of the beading workshop I went to last week. This doesn't mean that I will finish my piece - I expect it'll take me about 12 months to finish it! The accounts will just have to wait until this evening.

Thanks for stopping by.

 Julia.
www.juliawattscrafts.co.uk
Free card with all website orders (ask for one in the comments box at checkout).
Deal of the Day today (23rd October) -  Sue Wilson F
estive Collection - Wise Men Mini Striplet only £5.99!