Sunday, 13 July 2014

You Are Loved

Hi Bloggers.

Day 2 in Aberdeen. If my memory serves me right, Kim Robertson has shows on Create & Craft today. I'm not sure of the times so please check the schedule.

Here's today's card -

This card was inspired by a sample on the Justrite Stampers Blog.

I started by stamping 3 of the borders from the Justrite Ribbons, Lace & Tape Clear Stamp Set using Jet Black Archival. I made sure the ink was dry and then ran it through the Grand Calibur with the Couture Creations Small Dots Embossing Folder. I ran it through a second time to extend the design and inked around the edges with Antique Linen Distress Ink.

I stamped the sentiment from the Justrite Magnolia Vintage Labels 7 Clear Stamp Set using Jet Black Archival. I cut it out using Justrite Vintage Tag Dies and inked through the die with Antique Linen. I stamped the frame from the Magnolia Stamp Set, again using Jet Black Archival. I cut it out using Justrite Vintage Labels 7 and inked through the die with Antique Linen.

I tied a bow using 2 lengths of Black Silky Crush Ribbon and added a Vintage Metal Embellishment.

I assembled the card as shown adding some Black Pearls in the top left hand corner and some dots of Cosmic Shimmer Pearlescent PVA in Black Pearl around the edges.

I finally remembered to take some photos yesterday of Sue's first workshop. So, here's one of them -

You can see more photos on The Papeterie blog here.

Thanks for stopping by.

Julia.

Saturday, 12 July 2014

It's been too Long

Hi Bloggers.

Sue & I are at the Papeterie in Aberdeen today and tomorrow. I'm demoing today while Sue does her workshops and then we swop over tomorrow.

Here's today's card -
For the background, I stamped the Justrite Sweet Lace Background using Perfect Medium and embossed with Cosmic Shimmer Gold Detail Embossing Powder. I stamped it a second time to extend the design.

I stamped the image from the Taylored Expressions Mixed Blooms Set, using Perfect Medium and embossed with Gold Detail Powder. I cut it out using Spellbinders Classic Squares Large. I cut a Spellbinders Marvelous Squares out of Black Card.

I stamped the sentiment from the same stamp set, again using Perfect Medium and embossed with Gold Detail Powder. I cut it out using Spellbinders Decorative Labels 8 and cut a Spellbinders Labels 29 out of Black Card.

I tied a bow using 2 lengths of Black Silky Crush Ribbon and added a Bronze Vintage Button.

I assembled the card as shown adding some dots of Cosmic Shimmer Pearlescent PVA in Olympic Gold around the edges.

Thanks for stopping by.

Julia.

Friday, 11 July 2014

Love in a Ribbon

Hi Bloggers.

We had a great day at Strikes in Northallerton yesterday. Meant to take photos but were so busy that we clean forgot until the end of the day.

We're travelling to Aberdeen today.

So, the big surprise is the launch of the second release of Sue's dies - a little later than planned but they're available now. Sue is doing a special launch of them over on her blog with regular posts on her blog today through to Monday with giveaways on every post. So, please be sure to check her blog over the next few days here. Unfortunately, they are not available in my Amazon Store as I have closed it while I am away.

Here's today's card -

For the background, I stamped the Wrought Iron Corner in each corner using Aged Mahogany Distress Ink. It's very subtle as I rubbed the ink pad over the surface of the stamp rather than tapping it on. I ran it through the Grand Calibur with the Couture Creations Irish Clubs Embossing Folder. I ran it through a second time to extend the design and inked around the edges with Aged Mahogany Distress Ink.

I stamped the sentiment from the Celebration Stamp Set using Jet Black Archival and embossed with Cosmic Shimmer Clear Embossing Powder. I cut it out using Couture Creations Ornamental Rectangle Die. I cut a Spellbinders Fleur de Lys Rectangle out of Black Card.

I cut 2 more Couture Creations Ornamental Rectangles out of Milk Card  and 2 Spellbinders Wonky Rectangles out of Black Card. I cut 2 Couture Creations Ivy out of Black card and some of Sue's Faux Quilled Blooms out of Rich Red Card.

 
I tied a bow using Black/Ivory Striped Grosgrain and added a Black Vintage Button.

I assembled the card as shown adding a Cream 8mm Pearl to each corner and some dots of Cosmic Shimmer Ivory PVA around the edges.

Thanks for stopping by.

Julia.

Thursday, 10 July 2014

Keep in Touch

Hi Bloggers.

We've arrived safely in Northallerton. We're demoing at Strikes Garden Centre today. If you're coming to the demos - get there as early as possible. Big Surprise!! That's all I'm saying! Hope to see some of you there.

Here's today's card -

For the background, I inked through the Openwork Mask with Stonewashed Adirondack Dye Ink using Cut n Dry Foam. I moved the mask alongto extend the design which is easy as it's a repeating pattern. I then went around the edges with Sky Blush Cosmic Shimmer Twinkles and put aside to dry.

I stamped the sentiment from the Justrite Pansies in Spring Stamp Set using Cobalt Archival and embossed with Cosmic Shimmer Clear Embossing Powder. I cut it out using Justrite Vintage Labels 7 Dies and inked through the die with Stonewashed Ink. I cut a larger Labels 7 and again inked through the die.

I cut Sue's Cordoba Die from the Spanish Collection out of Cobalt Card.

I stamped 3 pansies from the same stamp set, using Cobalt Archival and embossed with Clear Powder. I cut them out using scissors. I think I may have stuck them on the card upside down but I don't think it matters. They look like trumpets to me!

I tied a bow using Blue/Ivory Striped Grosgrain and added a Silver Vintage Button.

I assembled the card as shown adding some Cream Pearls to the corners and some dots of Cosmic Shimmer Pearlescent PVA in Cobalt around the edges.

Thanks for stopping by.

Julia.

Wednesday, 9 July 2014

Turn Your Face to the Sun

Hi Bloggers.

First day of our Road Trip today. Heading up to Northallerton ready for our demo day tomorrow.

Here's today's card -

This is one of those cards that's an exercise in patience as you have to wait for each corner to dry before going on to the next one. You can use your heat gun to dry the paste but the finish is not as good as when you leave it to dry naturally. The corners are using the Rose Copper Cosmic Shimmer Sparkle Texture Paste with the Art Deco Elements Mask.

I wrapped some White Crochet Ribbon around the centre, added a bow and a Clear Sparkler.

I stamped the sentiment from the Justrite Sunflowers Vintage Labels Five using Jet Black Archival and embossed with Cosmic Shimmer Clear Embossing Powder. I cut it out using Justrite Vintage Labels Five and inked through the die with Tattered Rose Distress Ink. I cut the largest die in the set out of Blush Card and again inked through the die with Tattered Rose.

I assembled the card as shown adding a White 8mm Pearl in each corner and some dots of Cosmic Shimmer Pearlescent PVA in Cosmic Pearl  around the edges.

Thanks for stopping by.

Julia.

Tuesday, 8 July 2014

Happy Wedding Day

Hi Bloggers.

Here's today's card -

Another wonky photo! Must have been having that kind of day!

Anyway, for the background, I ran a piece of Coconut White Card through the Grand Calibur with the Couture Creations Feather Frenzy Embossing Folder. I ran it through a second time to extend the design. I rubbed Pearl Moon Gilding Wax over the surface.

I cut 4 borders using one of the dies in the Couture Creations Chandeliers Die Set.

I stamped the sentiment from the All Occasions Stamp Set using Perfect Medium and embossed with Cosmic Shimmer Silver Shine Metallic Embossing powder. I cut it out using Couture Creations Cameo Die. I also cut one of Sue's Decorative Frames Set B (from the Californian Collection) and a Spellbinders Devine Eleoquence Die.

I tied a bow using White Satin Edged Organza and added a Silver Satin Ribbon Rose.

I assembled the card as shown adding some White Pearls to the top corners and some dots of Cosmic Shimmer Pearlescent PVA in Cosmic Pearl around the edges.

I will be closing my Amazon Store this afternoon for about a week while Sue and I are away on our Road Trip. I have still added links to products in my Store on the posts while we're away so as soon as my Store is open again you'll be able to go stright to the products from the links.

Thanks for stopping by.

Julia.

Monday, 7 July 2014

Your Kindness

Hi Bloggers.

A Sue Wilson style card today -

For the background, I ran a piece of Milk Card through the Grand Calibur with the Couture Creations Irish Clubs Embossing Folder. I ran it through a second time to extend the design.

I cut 4 of one of the border dies from the Couture Creations Chandeliers Set and glued them across the background as shown.

I stamped the sentiment from the Celebration Stamp Set using Perfect Medium and embossed with Cosmic Shimmer Bright Gold Metallic Embossing Powder. I cut it out using Couture Creations Ornamental Rectangle Die. I cut Sue's Murcia Die from the Spanish Collection.

I cut some leaves using the Couture Creations Ivy and Panama Branch Dies and added a couple of Gold Satin Ribbon Roses.

I assembled the card as shown adding some Cream 5mm Pearls and some dots of Cosmic Shimmer Ivory PVA around the edges.

Thanks for stopping by.

Julia.

Sunday, 6 July 2014

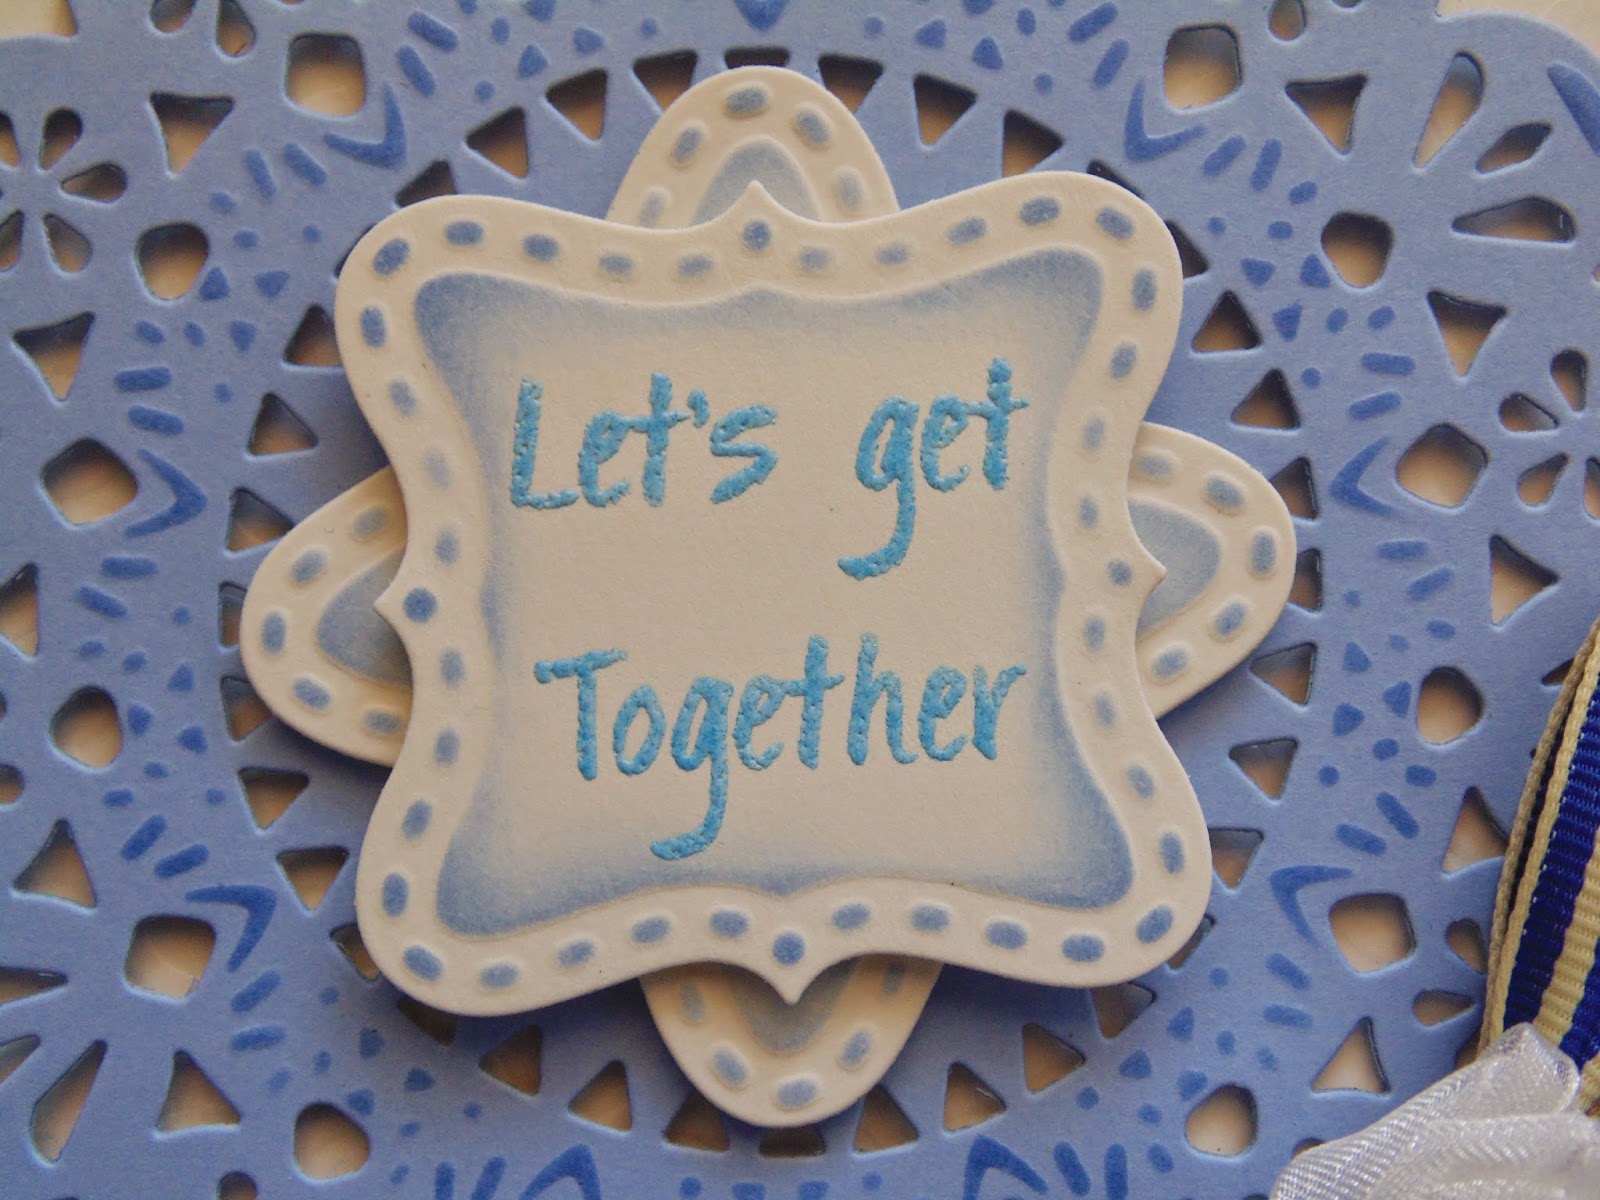
Let's get Together

Hi Bloggers.

I must admit I was totally confused with some of the comments yesterday. My trip with Sue doesn't start till Wednesday. I wasn't with her in Wales yesterday. The stops on our trip are detailed in the left hand side bar of this blog.

Here's today's card -

For the background, I stamped the Wrought Iron Corner into each corner using Perfect Medium and embossed with Cosmic Shimmer Pastel Blue Embossing Powder. I then ran it through the Grand Calibur with the Couture Creations Irish Clubs Embossing Folder. I ran it through a second time to extend the design and inked around the edges with Stonewashed Adirondack Dye Ink using Cut n Dry Foam.

I stamped the sentiment from the All Occasions Sentiments Stamp Set using Perfect Medium and embossed with Pastel Blue Powder. I cut it out using Couture Creations Square Plaque and inked through the die with Stonewashed Ink. I cut another Square Plaque and again inked through the die with Stonewashed Ink.

I cut a Couture Creations Cappuccino Die out of Periwinkle Card and inked through the die with Stonewashed Ink.

I tied a bow using Blue/Ivory Striped Grosgrain and added an Ivory Organza Ribbon Rose.

I assembled the card as shown adding a Cream 8mm Pearl to each corner and some dots of Cosmic Shimmer Pastel Blue PVA around the edges.

Thanks for stopping by.

Julia.
www.juliawattscrafts.co.uk

Saturday, 5 July 2014

A Day to Celebrate

Hi Bloggers.

Here's today's card -

For the background, I ran a piece of Milk Card through the Grand Calibur with the Couture Creations Irish Clubs Embossing Folder. I ran it through a second time to extend the design. I rubbed some Golden Lilac Gilding Wax all over.

I cut a Couture Creations French Frame out of Mauve Card. I cut a second French Frame and snipped away just the ornate corner. I glued this in the opposite corner to the corner in the complete frame.

I stamped the sentiment from the Celebration Stamp Set using Perfect Medium and embossed with Cosmic Shimmer Pastel Lilac Embossing Powder. I cut it out using Couture Creations Cameo Die and inked through the die with Dusty Concord Distress Ink.

I tied a bow using Purple/Ivory Striped Grosgrain and added a Black Organza Ribbon Rose.

I assembled the card as shown adding some Cream Mini Pearl Swirls, a 5mm Black Pearl in each corner and some dots of Cosmic Shimmer Pastel Lilac PVA around the edges.

With the first batch of 19 sets of sample cards all sold on ebay and posted, £96.65 has been raised for Teenage Cancer Trust. Many thanks to those of you who have taken part.

Thanks for stopping by.

Julia.