Hi Bloggers.
Here's today's card -
For the background, I ran a piece of Coconut White Card through the Grand Calibur with the Spellbinders Holiday Magic M-Bossabilities Folder. I ran it through a second time to extend the design and inked around the edges with Fired Brick Distress Ink. I pressed some Victorian Metal Corners into a Perfect Medium Ink Pad, added Cosmic Shimmer Christmas Red Sparkle Embossing Powder and heat set. I attached them to the corners of the background using Cosmic Shimmer Dries Clear Glue.
I stamped the Santa image from the Justrite Christmas Labels 22 Stamp Set using Vermillion Archival. I cut it out using Justrite Vintage Labels Three Dies and inked through the die with Fired Brick. I cut a Spellbinders Heitloom Ornament 2011 out of Burgundy Card and embossed through the die with the Spellbinders Holiday Magic M-Boss. I tied a knot in a piece of Burgundy/Ivory Striped Grosgrain.
I stamped the sentiment from the Justrite Holiday Magic Stamp Set using Vermillion Archival. I cut it out using Justrite Vintage Labels Two Dies and inked through the die with Fired Brick. I cut the pointy end off a wooden cocktail stick and glued it to the back of the sentiment panel.
I assembled the card as shown adding some dots of Cosmic Shimmer Pearlescent PVA in Berry Red around the edges.
Thanks for stopping by.
Julia.
Monday, 11 November 2013
Sunday, 10 November 2013
Santa Claus is Coming to Town
Hi Bloggers.
You may have noticed the appearance of a new bar at the top of this blog. I wanted to make it easier for you to find my Amazon and eBay links. I've also got some pieces of beadwork that I'm offering up for sale if anyone is interested - I'll pop those on there as soon as I can get some photos loaded and take some measurements. You can get back to this section of the blog by clicking on the Home section.
To answer a few questions about the beading I shared yesterday. The pattern for the Garden Necklace can be found for free at www.aroundthebeadingtable.com. Stephanie Burnham has a shop called The Bead Scene just outside Milton Keynes and my friend Sue Stallard runs classes in Milton Keynes usually 1st Friday every month. She also teaches in Leighton Buzzard and other places around England.
Here's today's card -
For the background. I covered a piece of card with Double Sided Adhesive Sheet and removed the backing. I dusted the Snowflake Frame Mask with my anti-static bag (you could ink it with Perfect Medium instead). I popped it, dusted side down, onto the adhesive and rubbed Cosmic Shimmer Brilliant Blue Polished Silk Glitter into the exposed adhesive. I made sure I rubbed all the excess glitter off the mask and then removed it. I added Cosmic Shimmer Silver Chrome Polished Silk Glitter, rubbing it into the surface.
I popped some more Double Sided Adhesive onto some card and die cut some snowflakes using the Spellbinders Snowflake Pendant 2012 die set. I trimmed some of the end bits of a couple of the snowflakes and covered all of them with Silver Chrome Polished Silk Glitter. I added a 5mm White Pearl to the centre of each.
I stamped the image from the Justrite Holiday Magic Stamp Set using Cobalt Archival and embossed with Cosmic Shimmer Clear Embossing Powder. I cut it out using Justrite Vintage Labels Three and inked through the die with Faded Jeans Distress Ink.
I assembled the card as shown adding some dots of Cosmic Shimmer Pearlescent PVA in Silver Lustre around the edges.
Thanks for stopping by.
Julia.
You may have noticed the appearance of a new bar at the top of this blog. I wanted to make it easier for you to find my Amazon and eBay links. I've also got some pieces of beadwork that I'm offering up for sale if anyone is interested - I'll pop those on there as soon as I can get some photos loaded and take some measurements. You can get back to this section of the blog by clicking on the Home section.
To answer a few questions about the beading I shared yesterday. The pattern for the Garden Necklace can be found for free at www.aroundthebeadingtable.com. Stephanie Burnham has a shop called The Bead Scene just outside Milton Keynes and my friend Sue Stallard runs classes in Milton Keynes usually 1st Friday every month. She also teaches in Leighton Buzzard and other places around England.
Here's today's card -
For the background. I covered a piece of card with Double Sided Adhesive Sheet and removed the backing. I dusted the Snowflake Frame Mask with my anti-static bag (you could ink it with Perfect Medium instead). I popped it, dusted side down, onto the adhesive and rubbed Cosmic Shimmer Brilliant Blue Polished Silk Glitter into the exposed adhesive. I made sure I rubbed all the excess glitter off the mask and then removed it. I added Cosmic Shimmer Silver Chrome Polished Silk Glitter, rubbing it into the surface.
I popped some more Double Sided Adhesive onto some card and die cut some snowflakes using the Spellbinders Snowflake Pendant 2012 die set. I trimmed some of the end bits of a couple of the snowflakes and covered all of them with Silver Chrome Polished Silk Glitter. I added a 5mm White Pearl to the centre of each.
I stamped the image from the Justrite Holiday Magic Stamp Set using Cobalt Archival and embossed with Cosmic Shimmer Clear Embossing Powder. I cut it out using Justrite Vintage Labels Three and inked through the die with Faded Jeans Distress Ink.
I assembled the card as shown adding some dots of Cosmic Shimmer Pearlescent PVA in Silver Lustre around the edges.
Thanks for stopping by.
Julia.
Saturday, 9 November 2013
Beadwork
Hi Bloggers.
Today I thought I'd share some photos of the pieces I completed on my little holiday this week.
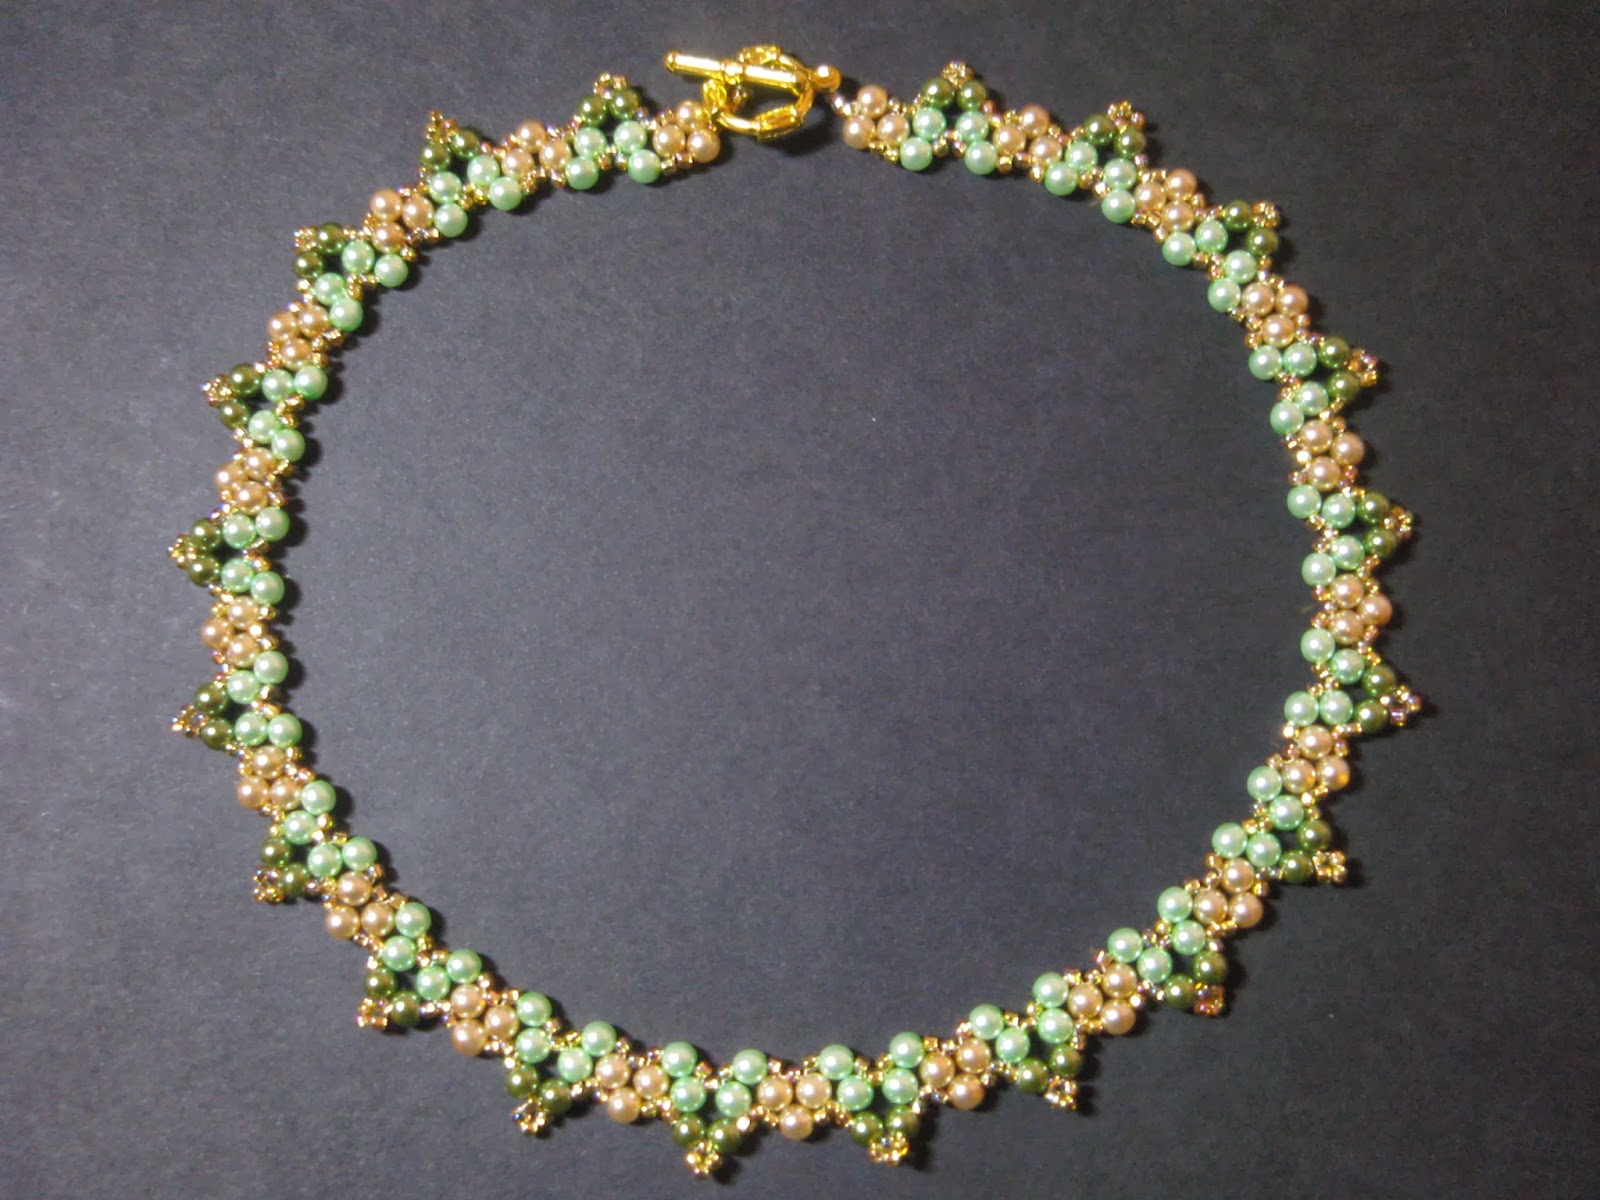
Garden Necklace (Around the Beading Table) -
Embelished Peyote Bracelet (Sue Stallard) -
Bad Hair Day (Sue Stallard) -
I had a fab few days - now back making samples for my next shows. My Amazon Store is open again for those of you who are interested.
I'll be back tomorrow with a card.
Thanks for stopping by.
Julia.
Today I thought I'd share some photos of the pieces I completed on my little holiday this week.
Garden Necklace (Around the Beading Table) -
Embelished Peyote Bracelet (Sue Stallard) -
Twist & Shout (Stephanie Burnham) -
I had a fab few days - now back making samples for my next shows. My Amazon Store is open again for those of you who are interested.
I'll be back tomorrow with a card.
Thanks for stopping by.
Julia.
Friday, 8 November 2013
Just Thinking of You
Hi Bloggers.
A guys card today -
For the background, I stamped one of the leaves from the Creative Expressions Autumn Leaves Stamp Set using Perfect Medium and embossed with Cosmic Shimmer Clear Embossing Powder. I rubbed Vintage Golden Green Gilding Wax over the leaves to make them 'pop'.
I stamped the sentiment from the same stamp set using Jet Black Archival and embossed with Cosmic Shimmer Clear Embossing Powder. I cut it out using Spellbinders Captivating Squares and inked through the die with Oregano Adirondack Dye Ink using Cut n Dry Foam. I cut a larger Captivating Squares Die out of Brunswick Green Card.
I assembled the card as shown adding some dots of Cosmic Shimmer Pearlescent PVA in Vintage Golden Green around the edges.
Thanks for stopping by.
Julia.
A guys card today -
For the background, I stamped one of the leaves from the Creative Expressions Autumn Leaves Stamp Set using Perfect Medium and embossed with Cosmic Shimmer Clear Embossing Powder. I rubbed Vintage Golden Green Gilding Wax over the leaves to make them 'pop'.
I stamped the sentiment from the same stamp set using Jet Black Archival and embossed with Cosmic Shimmer Clear Embossing Powder. I cut it out using Spellbinders Captivating Squares and inked through the die with Oregano Adirondack Dye Ink using Cut n Dry Foam. I cut a larger Captivating Squares Die out of Brunswick Green Card.
I assembled the card as shown adding some dots of Cosmic Shimmer Pearlescent PVA in Vintage Golden Green around the edges.
Thanks for stopping by.
Julia.
Thursday, 7 November 2013
Give Thanks
Hi Bloggers.
Here's today's card -
For the background, I ran a piece of Coconut White through the Grand Calibur with the Couture Creations Super Powder Puff Embossing Folder. I ran it through a second time to extend the design and inked around the edges with Oregano Adirondack Dye Ink.
I stamped the sentiment from the Creative Expressions Autumn Leaves Stamp Set using Perfect Medium and embossed with Cosmic Shimmer Gold Detail Embossing Powder. I cut it out using Spellbinders Pearl Effects and inked through the die with Oregano Adirondack. I cut a larger Pearl Effects out of Black Card.
For the kind of stripey background behind the black mat, I had a bit of fun with ink and a plastic bag! I used a clean plastic food bag and popped my hand in it. I scrunched it up a bit and then picked up some ink from the Butterscotch Adirondack Dye Ink Pad. I used this to stamp onto a piece of Coconut White Card. I repeated this a few times and then did the same with Terra Cotta, Oregano and Meadow Adirondack Dye Ink Pads (I cleaned the bag each time I changed ink pad). I made sure the ink was dry and then ran it through the Grand Calibur with the Creative Expressions Bark Embossing Folder. I dusted it with my anti static bag and then rubbed Perfect Medium carefully over the surface just picking up the peaks in the design. I added Cosmic Shimmer Gold Detail Embossing Powder and heat set. I cut out one of the Spellbinders Distressed Edges dies and inked through the die with Oregano Adirondack.
I stamped a couple of leaves from the same stamp set using Perfect Medium and embossed with Cosmic Shimmer Gold Detail Embossing Powder. I cut them out using scissors and then coloured the veins with Oregano Adirondack. I made a ribbon flower out of Black Crochet Ribbon.
I assembled the card as shown adding a 5mm Black Pearl in the top corners and some dots of Cosmic Shimmer Pearlescent PVA in Olympic Gold around the edges.
Thanks for stopping by.
Julia.
Here's today's card -
For the background, I ran a piece of Coconut White through the Grand Calibur with the Couture Creations Super Powder Puff Embossing Folder. I ran it through a second time to extend the design and inked around the edges with Oregano Adirondack Dye Ink.
I stamped the sentiment from the Creative Expressions Autumn Leaves Stamp Set using Perfect Medium and embossed with Cosmic Shimmer Gold Detail Embossing Powder. I cut it out using Spellbinders Pearl Effects and inked through the die with Oregano Adirondack. I cut a larger Pearl Effects out of Black Card.
For the kind of stripey background behind the black mat, I had a bit of fun with ink and a plastic bag! I used a clean plastic food bag and popped my hand in it. I scrunched it up a bit and then picked up some ink from the Butterscotch Adirondack Dye Ink Pad. I used this to stamp onto a piece of Coconut White Card. I repeated this a few times and then did the same with Terra Cotta, Oregano and Meadow Adirondack Dye Ink Pads (I cleaned the bag each time I changed ink pad). I made sure the ink was dry and then ran it through the Grand Calibur with the Creative Expressions Bark Embossing Folder. I dusted it with my anti static bag and then rubbed Perfect Medium carefully over the surface just picking up the peaks in the design. I added Cosmic Shimmer Gold Detail Embossing Powder and heat set. I cut out one of the Spellbinders Distressed Edges dies and inked through the die with Oregano Adirondack.
I stamped a couple of leaves from the same stamp set using Perfect Medium and embossed with Cosmic Shimmer Gold Detail Embossing Powder. I cut them out using scissors and then coloured the veins with Oregano Adirondack. I made a ribbon flower out of Black Crochet Ribbon.
I assembled the card as shown adding a 5mm Black Pearl in the top corners and some dots of Cosmic Shimmer Pearlescent PVA in Olympic Gold around the edges.
Thanks for stopping by.
Julia.
Wednesday, 6 November 2013
Thank You For All You Do
Hi Bloggers.
Here's today's card -
For the background, I stamped the border from the Creative Expressions Autumn Leaves Stamp Set using Perfect Medium and embossed with Cosmic Shimmer True White Detail Embossing Powder. I then ran it through the Grand Calibur with the Couture Creations Hyper Magical Embossing Folder. I ran it through a second time to extend the design.
Unfortunately, the doily die is not available at the moment.
I stamped the sentiment from the same stamp set, again using Perfect Medium and embossed with True White Detail Powder. I cut it out using Spellbinders Scalloped Labels One. Leaving the die cut in the die, I stamped through the die with one of the leaves from the set with Perfect Medium. I removed it from the die and added the powder and heat set.
I assembled the card as shown adding some dots of Cosmic Shimmer Pearlescent PVA in Black Pearl around the edges.
Thanks for stopping by.
Julia.
Here's today's card -
For the background, I stamped the border from the Creative Expressions Autumn Leaves Stamp Set using Perfect Medium and embossed with Cosmic Shimmer True White Detail Embossing Powder. I then ran it through the Grand Calibur with the Couture Creations Hyper Magical Embossing Folder. I ran it through a second time to extend the design.
Unfortunately, the doily die is not available at the moment.
I stamped the sentiment from the same stamp set, again using Perfect Medium and embossed with True White Detail Powder. I cut it out using Spellbinders Scalloped Labels One. Leaving the die cut in the die, I stamped through the die with one of the leaves from the set with Perfect Medium. I removed it from the die and added the powder and heat set.
I assembled the card as shown adding some dots of Cosmic Shimmer Pearlescent PVA in Black Pearl around the edges.
Thanks for stopping by.
Julia.
Tuesday, 5 November 2013
Joy
Hi Bloggers.
Here's today's card -
The background is the Caught in Crystal technique as per Sue's tutorial here. On my sample I used Cosmic Shimmer Clear Crystal Lacquer, Cool Peri, Aqua and Denim Alcohol Inks and I sprinkled a little Silver Chrome and Ice Blue Cosmic Shimmer Polished Silk Glitter instead of Mica Powder.
I stamped the Beaded Lattice Bauble using Jet Black Archival and embossed with Cosmic Shimmer Clear Embossing Powder. I coloured in with a slection of Cosmic Shimmer Matt Drawing Inks, Mica Powders and Watercolours (sorry I can't remember the exact colours as I coloured this at Ally Pally). I cut it out using Spellbinders Heirloom Ornament 2012. I added a few 5mm White Pearls and a bow tied from 3 lengths of American Seam Binding in Blue White.
I stamped the sentiment from the Love & Joy at Christmas Stamp Set using Jet Black Archival and embossed with Clear Powder. I cut it out using a Justrite Vintage Labels Four Die and inked through the die with Faded Jeans Distress Ink.
I cut some snowflakes out using the Snowflake Pendant 2011 and 2012 die sets. I added some pearls to the centres.
I assembled the card as shown adding some more white pearls in the corners and some dots of Cosmic Shimmer Pearlescent PVA in Silver Lustre around the edges.
Thanks for stopping by.
Julia.
Here's today's card -
The background is the Caught in Crystal technique as per Sue's tutorial here. On my sample I used Cosmic Shimmer Clear Crystal Lacquer, Cool Peri, Aqua and Denim Alcohol Inks and I sprinkled a little Silver Chrome and Ice Blue Cosmic Shimmer Polished Silk Glitter instead of Mica Powder.
I stamped the Beaded Lattice Bauble using Jet Black Archival and embossed with Cosmic Shimmer Clear Embossing Powder. I coloured in with a slection of Cosmic Shimmer Matt Drawing Inks, Mica Powders and Watercolours (sorry I can't remember the exact colours as I coloured this at Ally Pally). I cut it out using Spellbinders Heirloom Ornament 2012. I added a few 5mm White Pearls and a bow tied from 3 lengths of American Seam Binding in Blue White.
I stamped the sentiment from the Love & Joy at Christmas Stamp Set using Jet Black Archival and embossed with Clear Powder. I cut it out using a Justrite Vintage Labels Four Die and inked through the die with Faded Jeans Distress Ink.
I cut some snowflakes out using the Snowflake Pendant 2011 and 2012 die sets. I added some pearls to the centres.
I assembled the card as shown adding some more white pearls in the corners and some dots of Cosmic Shimmer Pearlescent PVA in Silver Lustre around the edges.
Thanks for stopping by.
Julia.
Monday, 4 November 2013
Just Thinking of You
Hi Bloggers.
I'm off for a little holiday today. Hopefully Blogger will be kind and correctly schedule my posts for me. I have a bunch of easy cards to post while I'm away - I'm sure you can appreciate that I have loads to do before I go. My Amazon Store will be closed for a few days. I'll re-open it on Friday.
Here's today's card -
Easy peasy quick card.
I stamped the sentiment from the Creative Expressions Autumn Leaves Stamp Set using Jet Black Archival and embossed with Cosmic Shimmer Clear Embossing Powder. I cut it out using Spellbinders Labels 32. I cut a Spellbinders Captivating Squares Die out of Black Card.
The fancy square doily has been cut using the Couture Creations Tatted Lace Die - such a pretty die.
I cut some mats out using Spellbinders Grand Squares.
Job done!
Thanks for stopping by.
Julia.
I'm off for a little holiday today. Hopefully Blogger will be kind and correctly schedule my posts for me. I have a bunch of easy cards to post while I'm away - I'm sure you can appreciate that I have loads to do before I go. My Amazon Store will be closed for a few days. I'll re-open it on Friday.
Here's today's card -
Easy peasy quick card.
I stamped the sentiment from the Creative Expressions Autumn Leaves Stamp Set using Jet Black Archival and embossed with Cosmic Shimmer Clear Embossing Powder. I cut it out using Spellbinders Labels 32. I cut a Spellbinders Captivating Squares Die out of Black Card.
The fancy square doily has been cut using the Couture Creations Tatted Lace Die - such a pretty die.
I cut some mats out using Spellbinders Grand Squares.
Job done!
Thanks for stopping by.
Julia.
Sunday, 3 November 2013
Every Day is a Gift
Hi Bloggers.
Here's today's card -
For the background, I ran a piece of Coconut White Card through the Grand Calibur with the Couture Creations Super Powder Puff Embossing Folder. I ran it through a second time to extend the design.
I popped some Cosmic Shimmer Flake & Glitter Glue onto my Craft Sheet. Using a piece of Cut n Dry Foam I picked up some of the glue and dabbed it all over the large stamp in the Creative Expressions Autumn Blessings Stamp Set. I stamped the image onto some card and then cleaned my stamp with a sheet of Grime Boss. The glue remains tacky until you put something on it. I added some Red Speckle Gilding Flakes and removed the excess with a piece of Rubbit Scrubbit.
I stamped the sentiment from the same stamp set using Perfect Medium and embossed with Cosmic Shimmer Silver Shine Detail Embossing Powder. I cut it out using Justrite Vintage Labels Four and cut a larger diefrom the same set out of Rich Red Card .
I tied a bow using White Crochet Ribbon and added a Fancy Pearl Embellishment.
I assembled the card as shown adding some dots of Cosmic Shimmer Pearlescent PVA in White around the edges.
Thanks for stopping by.
Julia.
Here's today's card -
For the background, I ran a piece of Coconut White Card through the Grand Calibur with the Couture Creations Super Powder Puff Embossing Folder. I ran it through a second time to extend the design.
I popped some Cosmic Shimmer Flake & Glitter Glue onto my Craft Sheet. Using a piece of Cut n Dry Foam I picked up some of the glue and dabbed it all over the large stamp in the Creative Expressions Autumn Blessings Stamp Set. I stamped the image onto some card and then cleaned my stamp with a sheet of Grime Boss. The glue remains tacky until you put something on it. I added some Red Speckle Gilding Flakes and removed the excess with a piece of Rubbit Scrubbit.
I stamped the sentiment from the same stamp set using Perfect Medium and embossed with Cosmic Shimmer Silver Shine Detail Embossing Powder. I cut it out using Justrite Vintage Labels Four and cut a larger diefrom the same set out of Rich Red Card .
I tied a bow using White Crochet Ribbon and added a Fancy Pearl Embellishment.
I assembled the card as shown adding some dots of Cosmic Shimmer Pearlescent PVA in White around the edges.
Thanks for stopping by.
Julia.
Saturday, 2 November 2013
Treat Yourself!
Hi Bloggers.
Here's today's card -
For the main background, I ran a piece of Black Card through the Grand Calibur with the Creative Expressions Fauna Embossing Folder. I ran it through a second time to extend the design and then rubbed Cast Bronze Gilding Wax over the surface.
For the panel on the side, I dusted a piece of Coconut White Card with my anti static bag and then stamped one of the leaves from the Creative Expressions Autumn Leaves Stamp Set using Perfect Medium and embossed with Cosmic Shimmer True White Detail Embossing Powder. I inked with Butterscotch and Terra Cotta Adirondack Dye Ink using Cut n Dry Foam. I used a piece of Kitchen Roll to remove the ink from the leaves.
Unfortunately, the doily die I used on this card was not available when I did the shows so when I demoed this card I used the Coutured Creations Dazzling Die. I inked it with Butterscotch and Terra Cotta Adirondack.
I stamped the dress from the Creative Expressions Belle of the Ball Stamp Set using Jet Black Archival and embossed with Cosmic Shimmer Clear Embossing Powder. I coloured in using Cosmic Tone from the Cosmic Shimmer Skin Tones Matt Drawing Ink Set, Yellow Ultra and Orange Mica Powders from the Cosmic Shimmer Autumn Sunset Mica Spray Set. I cut it out using Spellbinders Labels 28 and inked through the die with Butterscotch Aditondack.
I stamped the sentiment from the Belle of the Ball Stamp Set using Jet Black Archival and embossed with Cosmic Shimmer Clear Embossing Powder. I cut it out using Spellbinders Distressed Edges and inked through the die with Butterscotch Adirondack.
I assembled the card as shown adding some dots of Cosmic Shimmer Pearlescent PVA in Olympic Gold around the edges.
Thanks for stopping by.
Julia.
Here's today's card -
For the main background, I ran a piece of Black Card through the Grand Calibur with the Creative Expressions Fauna Embossing Folder. I ran it through a second time to extend the design and then rubbed Cast Bronze Gilding Wax over the surface.
For the panel on the side, I dusted a piece of Coconut White Card with my anti static bag and then stamped one of the leaves from the Creative Expressions Autumn Leaves Stamp Set using Perfect Medium and embossed with Cosmic Shimmer True White Detail Embossing Powder. I inked with Butterscotch and Terra Cotta Adirondack Dye Ink using Cut n Dry Foam. I used a piece of Kitchen Roll to remove the ink from the leaves.
Unfortunately, the doily die I used on this card was not available when I did the shows so when I demoed this card I used the Coutured Creations Dazzling Die. I inked it with Butterscotch and Terra Cotta Adirondack.
I stamped the dress from the Creative Expressions Belle of the Ball Stamp Set using Jet Black Archival and embossed with Cosmic Shimmer Clear Embossing Powder. I coloured in using Cosmic Tone from the Cosmic Shimmer Skin Tones Matt Drawing Ink Set, Yellow Ultra and Orange Mica Powders from the Cosmic Shimmer Autumn Sunset Mica Spray Set. I cut it out using Spellbinders Labels 28 and inked through the die with Butterscotch Aditondack.
I stamped the sentiment from the Belle of the Ball Stamp Set using Jet Black Archival and embossed with Cosmic Shimmer Clear Embossing Powder. I cut it out using Spellbinders Distressed Edges and inked through the die with Butterscotch Adirondack.
I assembled the card as shown adding some dots of Cosmic Shimmer Pearlescent PVA in Olympic Gold around the edges.
Thanks for stopping by.
Julia.
Friday, 1 November 2013
To Someone with a Fabulous Purse-onality
Hi Bloggers.
I made this card at Ally Pally in September. It's not brilliant but I thought I'd share it as I have the Precious Purse Singles Stamp Set in my Amazon Store at the moment.
The background is on Khaki Card. With the stamp in my hand, I randomly stamped the Vintage Filigree Stamp using Victorian Velvet Distress Ink, the Newsprint Stamp using Tattered Rose Distress Ink and the Bubbles Stamp using Dried Marigold Distress Ink. I made sure the ink was dry and then ran it through the Grand Calibur with the Couture Creations Taylor Embossing Folder. I ran it through a second time to extend the design and then rubbed Enchanted Gold Gilding Wax all over the surface. Once dry I buffed it up a bit with a dry wetwipe and inked around the edges with Dried Marigold.
I stampled the Precious Purse using Jet Black Archival and embossed with Cosmic Shimmer Clear Embossing Powder. I coloured in using Copper and Pale Gold Mica Powders from the Cosmic Shimmer Metallics Mica Spray Set and Orange Mica Powder from the Cosmic Shimmer Autumn Sunset Mica Spray Set. I cut out using Spellbinders Decorative Labels 8 and inked through the die with Dried Marigold.
I stamped the sentiment that comes with the purse, again using Jet Black Archival and embossed with Cosmic Shimmer Clear Embossing Powder. I cut it out using Spellbinders Distressed Edges and inked through the die with Dried Marigold.
I stamped a couple of leaves from the Heartfelt Creations Open Leaf Stamp Set using Jet Black Archival and embossed with Cosmic Shimmer Clear Embossing Powder. I cut them out using the Heartfelt Creations Classic Leaf Die Set. I made a scrunched flower out of Black Card using Spellbinders Blossom 5.
I assembled the card as shown adding some dots of Cosmic Shimmer Pearlescent PVA in Black Pearl around the edges.
Thanks for stopping by.
Julia.
I made this card at Ally Pally in September. It's not brilliant but I thought I'd share it as I have the Precious Purse Singles Stamp Set in my Amazon Store at the moment.
The background is on Khaki Card. With the stamp in my hand, I randomly stamped the Vintage Filigree Stamp using Victorian Velvet Distress Ink, the Newsprint Stamp using Tattered Rose Distress Ink and the Bubbles Stamp using Dried Marigold Distress Ink. I made sure the ink was dry and then ran it through the Grand Calibur with the Couture Creations Taylor Embossing Folder. I ran it through a second time to extend the design and then rubbed Enchanted Gold Gilding Wax all over the surface. Once dry I buffed it up a bit with a dry wetwipe and inked around the edges with Dried Marigold.
I stampled the Precious Purse using Jet Black Archival and embossed with Cosmic Shimmer Clear Embossing Powder. I coloured in using Copper and Pale Gold Mica Powders from the Cosmic Shimmer Metallics Mica Spray Set and Orange Mica Powder from the Cosmic Shimmer Autumn Sunset Mica Spray Set. I cut out using Spellbinders Decorative Labels 8 and inked through the die with Dried Marigold.
I stamped the sentiment that comes with the purse, again using Jet Black Archival and embossed with Cosmic Shimmer Clear Embossing Powder. I cut it out using Spellbinders Distressed Edges and inked through the die with Dried Marigold.
I stamped a couple of leaves from the Heartfelt Creations Open Leaf Stamp Set using Jet Black Archival and embossed with Cosmic Shimmer Clear Embossing Powder. I cut them out using the Heartfelt Creations Classic Leaf Die Set. I made a scrunched flower out of Black Card using Spellbinders Blossom 5.
I assembled the card as shown adding some dots of Cosmic Shimmer Pearlescent PVA in Black Pearl around the edges.
Thanks for stopping by.
Julia.
Thursday, 31 October 2013
So Very Stylish
Hi Bloggers.
Another White on White card today - apologies once again if you can't see it very well.
The background on this one is a piece of Coconut White Card run through the Grand Calibur with the Couture Creations Large Hepburn Embossing Folder. I ran it through a second time to extend the design and then rubbed Pearl Moon Gilding Wax all over.
I stamped the image from the Creative Expressions Belle of the Ball Stamp Set using Perfect Medium and embossed with Cosmic Shimmer Arctic Pearl Lustre Embossing Powder. I cut it out using Spellbinders Fleur de Lys Squares.
I stamped the sentiment from the same stamp set, again using Perfect Medium and embossed with Arctic Pearl Lustre. I cut it out using Spellbinders Floral Ovals.
I made a flower using White Crochet Ribbon. I stamped a couple of the leaf sprays from the Heartfelt Creations Open Leaf Stamp Set using Perfect Medium and embossed with Arctic Pearl Lustre. I cut them out using Heartfelt Creations Classic Leaf Die Set.
I assembled the card as shown adding an 8mm White Pearl in each corner and some dots of Cosmic Shimmer Pearlescent PVA in White around the edges.
Please scroll down to the previous post to see news from my Amazon Store.
Thanks for stopping by.
Julia.
Another White on White card today - apologies once again if you can't see it very well.
The background on this one is a piece of Coconut White Card run through the Grand Calibur with the Couture Creations Large Hepburn Embossing Folder. I ran it through a second time to extend the design and then rubbed Pearl Moon Gilding Wax all over.
I stamped the image from the Creative Expressions Belle of the Ball Stamp Set using Perfect Medium and embossed with Cosmic Shimmer Arctic Pearl Lustre Embossing Powder. I cut it out using Spellbinders Fleur de Lys Squares.
I stamped the sentiment from the same stamp set, again using Perfect Medium and embossed with Arctic Pearl Lustre. I cut it out using Spellbinders Floral Ovals.
I made a flower using White Crochet Ribbon. I stamped a couple of the leaf sprays from the Heartfelt Creations Open Leaf Stamp Set using Perfect Medium and embossed with Arctic Pearl Lustre. I cut them out using Heartfelt Creations Classic Leaf Die Set.
I assembled the card as shown adding an 8mm White Pearl in each corner and some dots of Cosmic Shimmer Pearlescent PVA in White around the edges.
Please scroll down to the previous post to see news from my Amazon Store.
Thanks for stopping by.
Julia.
Wednesday, 30 October 2013
Amazon Store Update
Hi Bloggers.
I've been told that products aren't showing up on my Amazon Store. I did contact Amazon a couple of weeks ago and they insisted that the search engines were working properly but it appears that they aren't always.
There are currently 564 products available in my Amazon Store. If you want to search for a specific product then it's best to preceed the search with julia watts crafts for example julia watts crafts pva to see all the CS PVA glues I have.
I am going on holiday next week so won't be doing any re-stocking before then but there are currently mica powder sets, embossing powders, embossing folders, single stamps and to die for stamps, glitter, gilding wax, drawing inks, gilding flakes, pva, large dries clear glue and lots more goodies still in stock.
I recently added a new single stamp set - Precious Purse
and the Vintage Felt Pack
All for now.
Julia
I've been told that products aren't showing up on my Amazon Store. I did contact Amazon a couple of weeks ago and they insisted that the search engines were working properly but it appears that they aren't always.
There are currently 564 products available in my Amazon Store. If you want to search for a specific product then it's best to preceed the search with julia watts crafts for example julia watts crafts pva to see all the CS PVA glues I have.
I am going on holiday next week so won't be doing any re-stocking before then but there are currently mica powder sets, embossing powders, embossing folders, single stamps and to die for stamps, glitter, gilding wax, drawing inks, gilding flakes, pva, large dries clear glue and lots more goodies still in stock.
I recently added a new single stamp set - Precious Purse
and the Vintage Felt Pack
All for now.
Julia
If Friends Were Flowers
Hi Bloggers.
Here's today's card -
Coconut White and Custard Card on this one. The back background has been run through the Grand Calibur with the Couture Creations Extra Loren Embossing Folder. I ran it through a second time and then inked around the edges with Scattered Straw Distress Ink using Cut n Dry Foam.
For the 3 panels, I stamped the Justrite Autumn Damask Background using Scattered Straw. I did this twice and then cut down to size.
I stamped the image from the Creative Expressions Spring Flowers Stamp Set using Perfect Medium and embossed with Cosmic Shimmer Tropic Yellow Lustre Embossing Powder. I cut it out using Spellbinders Labels 28 and inked through the die with Scattered Straw.
I stamped the sentiment from the same stamp set, again using Perfect Medium and embossed with Tropic Yellow Lustre. I cut it out using Spellbinders Distressed Edges and inked through the die with Scattered Straw.
I assembled the card as shown adding some 5mm White Pearls and some dots of Cosmic Shimmer Pearlescent PVA in White around the edges.
Don't forget to tune into Hels' Pick of the Day shows today on Ideal World and Create & Craft. Lots of Melt Pot goodies!
Thanks for stopping by.
Julia
Here's today's card -
Coconut White and Custard Card on this one. The back background has been run through the Grand Calibur with the Couture Creations Extra Loren Embossing Folder. I ran it through a second time and then inked around the edges with Scattered Straw Distress Ink using Cut n Dry Foam.
For the 3 panels, I stamped the Justrite Autumn Damask Background using Scattered Straw. I did this twice and then cut down to size.
I stamped the image from the Creative Expressions Spring Flowers Stamp Set using Perfect Medium and embossed with Cosmic Shimmer Tropic Yellow Lustre Embossing Powder. I cut it out using Spellbinders Labels 28 and inked through the die with Scattered Straw.
I stamped the sentiment from the same stamp set, again using Perfect Medium and embossed with Tropic Yellow Lustre. I cut it out using Spellbinders Distressed Edges and inked through the die with Scattered Straw.
I assembled the card as shown adding some 5mm White Pearls and some dots of Cosmic Shimmer Pearlescent PVA in White around the edges.
Don't forget to tune into Hels' Pick of the Day shows today on Ideal World and Create & Craft. Lots of Melt Pot goodies!
Thanks for stopping by.
Julia
Tuesday, 29 October 2013
Give Thanks
Hi Bloggers.
Quick post today as I'm scheduling this having got back late from Portsmouth. No problems on the roads. Weather pretty good, windy but mostly dry. We had a lovely day and it was nice for my parents and Nathan to see where Kathryn is living.
Here's today's card -
Background is a piece of self adhesive sheet on a piece of card with new Verdigris Gilding Flakes rubbed into it. Then run through the Grand Calibur with the Creative Expressions Bark Embossing Folder. Lightly run the Adirondack Oregano Dye Ink Pad over design then add Cosmic Shimmer Clear Embossing Powder and heat set. Any shrinkage around the edges hidden by Oregano Ink.
Cream Crochet Ribbon around the centre. Cream Crochet Ribbon flower. Leaves from Creative Expressions Autumn Leaves Stamp Set stamped with Perfect Medium and embossed with Gold Detail Embossing Powder. Cut out with scissors and veins coloured with Oregano using Cut n Dry Foam.
Sentiment is from same stamp set, stamped with Perfect Medium and embossed with Gold Detail Embossing Powder. Cut out using Justrite Vintage Labels Four and inked through the die with Butterscotch Adirondack. I used some more Justrite Vintage Labels Four dies for the mats.
Cosmic Shimmer Black Pearl Pearlescent PVA around the edges.
Thanks for stopping by.
Julia.
Quick post today as I'm scheduling this having got back late from Portsmouth. No problems on the roads. Weather pretty good, windy but mostly dry. We had a lovely day and it was nice for my parents and Nathan to see where Kathryn is living.
Here's today's card -
Background is a piece of self adhesive sheet on a piece of card with new Verdigris Gilding Flakes rubbed into it. Then run through the Grand Calibur with the Creative Expressions Bark Embossing Folder. Lightly run the Adirondack Oregano Dye Ink Pad over design then add Cosmic Shimmer Clear Embossing Powder and heat set. Any shrinkage around the edges hidden by Oregano Ink.
Cream Crochet Ribbon around the centre. Cream Crochet Ribbon flower. Leaves from Creative Expressions Autumn Leaves Stamp Set stamped with Perfect Medium and embossed with Gold Detail Embossing Powder. Cut out with scissors and veins coloured with Oregano using Cut n Dry Foam.
Sentiment is from same stamp set, stamped with Perfect Medium and embossed with Gold Detail Embossing Powder. Cut out using Justrite Vintage Labels Four and inked through the die with Butterscotch Adirondack. I used some more Justrite Vintage Labels Four dies for the mats.
Cosmic Shimmer Black Pearl Pearlescent PVA around the edges.
Thanks for stopping by.
Julia.
Monday, 28 October 2013
Get Well Soon
Hi Bloggers.
I'm taking my Mom & Dad and Nathan to see Kathryn in Portsmouth today - wish I could've picked a better day to travel. Hey ho!
Here's today's card -
For the background, I randomly inked through the Patchwork Quilt Mask with Victorian Velvet Distress Ink. Next, I stamped one of the fuchsia stamps from the Creative Expressions Summer Flowers Stamp Set a few times using Victorain Velvet. I made sure the ink was dry and then ran it through the Grand Calibur with the Couture Creations Celebrate Embossing Folder. I ran it through a second time to extend the design and then inked around the edges with Victorian Velvet.
I stamped the Fuchsia again using Jet Black Archival and embossed with Cosmic Shimmer Clear Embossing Powder. I coloured in using Red Blaze and Lava Red Mica Powders from the Cosmic Shimmer Autumn Sunset Mica Spray Set and Apple Green Mica Powder from the Cosmic Shimmer Luscious Greens Mica Spray Set. I cut it out using Justrite Vintage Labels Four and inked through the die with Victorian Velvet. I cut the largest of the Spellbinders Diamond Effects dies out of Rich Red Card.
I stamped the sentiment from the same stamp set using Jet Black Archival and embossed with clear powder. I cut it out using another Justrite Vintage Labels Four die and inked through the die with Victorian Velvet.
I assembled the card as shown adding some White Pearls in the corners and some dots of Cosmic Shimmer Pearlescent PVA in White around the edges.
Thanks for stopping by.
Julia
I'm taking my Mom & Dad and Nathan to see Kathryn in Portsmouth today - wish I could've picked a better day to travel. Hey ho!
Here's today's card -
For the background, I randomly inked through the Patchwork Quilt Mask with Victorian Velvet Distress Ink. Next, I stamped one of the fuchsia stamps from the Creative Expressions Summer Flowers Stamp Set a few times using Victorain Velvet. I made sure the ink was dry and then ran it through the Grand Calibur with the Couture Creations Celebrate Embossing Folder. I ran it through a second time to extend the design and then inked around the edges with Victorian Velvet.
I stamped the Fuchsia again using Jet Black Archival and embossed with Cosmic Shimmer Clear Embossing Powder. I coloured in using Red Blaze and Lava Red Mica Powders from the Cosmic Shimmer Autumn Sunset Mica Spray Set and Apple Green Mica Powder from the Cosmic Shimmer Luscious Greens Mica Spray Set. I cut it out using Justrite Vintage Labels Four and inked through the die with Victorian Velvet. I cut the largest of the Spellbinders Diamond Effects dies out of Rich Red Card.
I stamped the sentiment from the same stamp set using Jet Black Archival and embossed with clear powder. I cut it out using another Justrite Vintage Labels Four die and inked through the die with Victorian Velvet.
I assembled the card as shown adding some White Pearls in the corners and some dots of Cosmic Shimmer Pearlescent PVA in White around the edges.
Thanks for stopping by.
Julia
Sunday, 27 October 2013
Birthday Wishes
Hi Bloggers.
Had a lovely day at Domino Crafts in Wolverhampton yesterday - met some lovely crafters.
Here's today's card -
For the background, I first spritzed some Milk Card with Lava Red Mica Powder from the Cosmic Shimmer Autumn Sunset Mica Spray Set. Once dry, I inked through the Swirl Border Mask using Aged Mahogany Distress Ink. I ran the background through the Grand Calibur with the Couture Creations Celebrate Embossing Folder. I ran it though a second time to extend the design and then rubbed Enchanted Gold Gilding Wax all over. Once dry, I buffed it up with a DRY wetwipe to make it shinier. I inked around the edges with Aged Mahogany.
I stamped the Geranium from the Creative Expressions Summer Flowers Stamp Set using Jet Black Archival and embossed with Cosmic Shimmer Clear Embossing Powder. I coloured in with Lava Red Mica Powder from the Cosmic Shimmer Autumn Sunset Mica Spray Set and Jade Teal Mica Powder from the Luscious Greens Mica Spray Set. I cut it out using Spellbinders Labels 28 and inked through the die with Aged Mahogany.
I stamped the sentiment from the same stamp set using Jet Black Archival and embossed with Clear Powder. I cut it out using Spellbinders Scalloped Labels One and inked through the die with Aged Mahogany.
I tied a bow using Cream Satin Edged Organza and added a Red Dazzler.
I assembled the card as shown addinsome Cream Pearls in the corners and some dots of Cosmic Shimmer Pearlescent PVA in Golden Pearl around the edges.
Thanks for stopping by.
Julia.
Had a lovely day at Domino Crafts in Wolverhampton yesterday - met some lovely crafters.
Here's today's card -
For the background, I first spritzed some Milk Card with Lava Red Mica Powder from the Cosmic Shimmer Autumn Sunset Mica Spray Set. Once dry, I inked through the Swirl Border Mask using Aged Mahogany Distress Ink. I ran the background through the Grand Calibur with the Couture Creations Celebrate Embossing Folder. I ran it though a second time to extend the design and then rubbed Enchanted Gold Gilding Wax all over. Once dry, I buffed it up with a DRY wetwipe to make it shinier. I inked around the edges with Aged Mahogany.
I stamped the Geranium from the Creative Expressions Summer Flowers Stamp Set using Jet Black Archival and embossed with Cosmic Shimmer Clear Embossing Powder. I coloured in with Lava Red Mica Powder from the Cosmic Shimmer Autumn Sunset Mica Spray Set and Jade Teal Mica Powder from the Luscious Greens Mica Spray Set. I cut it out using Spellbinders Labels 28 and inked through the die with Aged Mahogany.
I stamped the sentiment from the same stamp set using Jet Black Archival and embossed with Clear Powder. I cut it out using Spellbinders Scalloped Labels One and inked through the die with Aged Mahogany.
I tied a bow using Cream Satin Edged Organza and added a Red Dazzler.
I assembled the card as shown addinsome Cream Pearls in the corners and some dots of Cosmic Shimmer Pearlescent PVA in Golden Pearl around the edges.
Thanks for stopping by.
Julia.
Subscribe to:
Posts (Atom)
