Hi Bloggers,
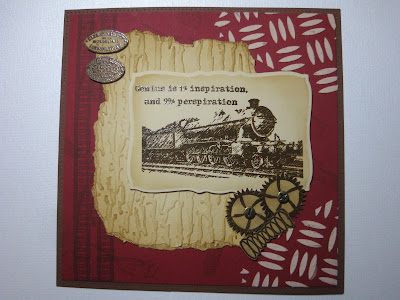
Today I'm sharing this card which I demonstrated on the 6pm show last Saturday. This one was sent out to the lucky winner who was drawn from the Cup of Chance after the show.
For the background on the burgundy card I stamped the rail track from the Vintage Inventor Stamp Set with Coffee Archival Ink all down the left-hand side of the card. Being an unmounted stamp makes it quite easy to line the stamp up with the previously stamped image.
Next I added some small images from the stamp sets using Frayed Burlap and Vintage Photo Distress Ink.
I popped a good amount of Vintage Photo Distress Stain onto a spare piece of craft sheet and then added a dollop of Artist Spackle to the ink and mixed it in well using a bone folder. Once I was happy with the colour and that it was mixed sufficiently, I placed my That Special Touch Mask - Metal Effect over a corner of my background and then added my dyed spackle on top scraping away any excess with my bone folder. I repeated the process in a second corner. I then put the background aside to dry and washed my craft sheet, bone folder and mask in warm soapy water. Artist Spackle comes off easily when wet but once dry it's permanent.
I put a piece of beige card into the Creative Expressions Bark Embossing Folder and ran it through my Grand Calibur. I tore around the embossed pattern and then inked the area with Vintage Photo Distress Ink using Cut & Dry Foam.
I stamped the steam train from the Vintage Illusion stamp set using Coffee Archival Ink and embossed using Cosmic Shimmer Clear Embossing Powder. I stamped the sentiment from the Vintage Treasures set just next to the train - again using the Coffee Archival and clear embossing powder. I cut the image out using the Spellbinders Curved Rectangles die and inked with Vintage Photo while still in the die.
I stamped and embossed and coloured some embellishment images from the sheets and added a couple of Creative Expressions Faux Screw Brads in Antique Gold.
I assembled the card as shown, making sure that the Artist Spackle was dry before doing so. I finished the card with some paper piercing all around the outside edge using my Tim Holtz Ruler.
Hope you enjoyed the demo if you watched on Saturday and have enjoyed this post.
Thanks for stopping by.
Julia.

Super card and what a great demonstrator you are love your shows xx
ReplyDelete