Monday, 19 January 2015

Thanks so Much

Hi Bloggers.

I'm on the Create & Craft Craft Clinic today at 11am for 2 hours. Hope you can join me.

Here's today's card -

For the background, I popped a little Azure Cosmic Shimmer Shimmer Paint onto my Craft Sheet, picked some up onto a piece of Cut n Dry Foam and inked through the Floral Frame Mask onto a piece of Coconut White Card. I also inked around the very edges of the card with the paint.

I cut 4 of the largest dies from the Couture Creations Cameo Die Set out of Sky Blue Card, inking through the die with Faded Jeans Distress Ink. I scored each of them several times across the centre, made a cut down one side to the centre and mountain and valley folded them. I then glued them together using Cosmic Shimmer Dries Clear Glue to make a rosette.

I cut 2 of the smallest dies from the Couture Creations Cameo Die Set out of Coconut White Card, inking through the die with Faded Jeans Distress Ink. I made another rosette as before.

I cut the largest die from the Spellbinders Marvelous Squares Die Set out of Sky Blue Card and inked through the die with Faded Jeans. I cut the next size down from the same die set out out Coconut White Card and again inked through the die with Faded Jeans.

I stamped the sentiment from the Creative Expressions Delightful Sentiments Clear Stamp Set using Cobolt Archival. I cut it out using the smallest die in Sue's Dainty Rectangular Frame Die Set and inked through the die with Faded Jeans.

I assembled the card as shown adding some White Pearls to the corners, a White Crystal Sparkler to the centre of the rosettes and some dots of Cosmic Shimmer Cosmic Pearl PVA around the edges.

Thanks for stopping by.

Julia.

Sunday, 18 January 2015

Sneak Peek

Hi Bloggers.

Tomorrow I will be on the Craft Clinic on Create & Craft from 11am till 1pm. I hope you can join me. It's a show full of tips and techniques.

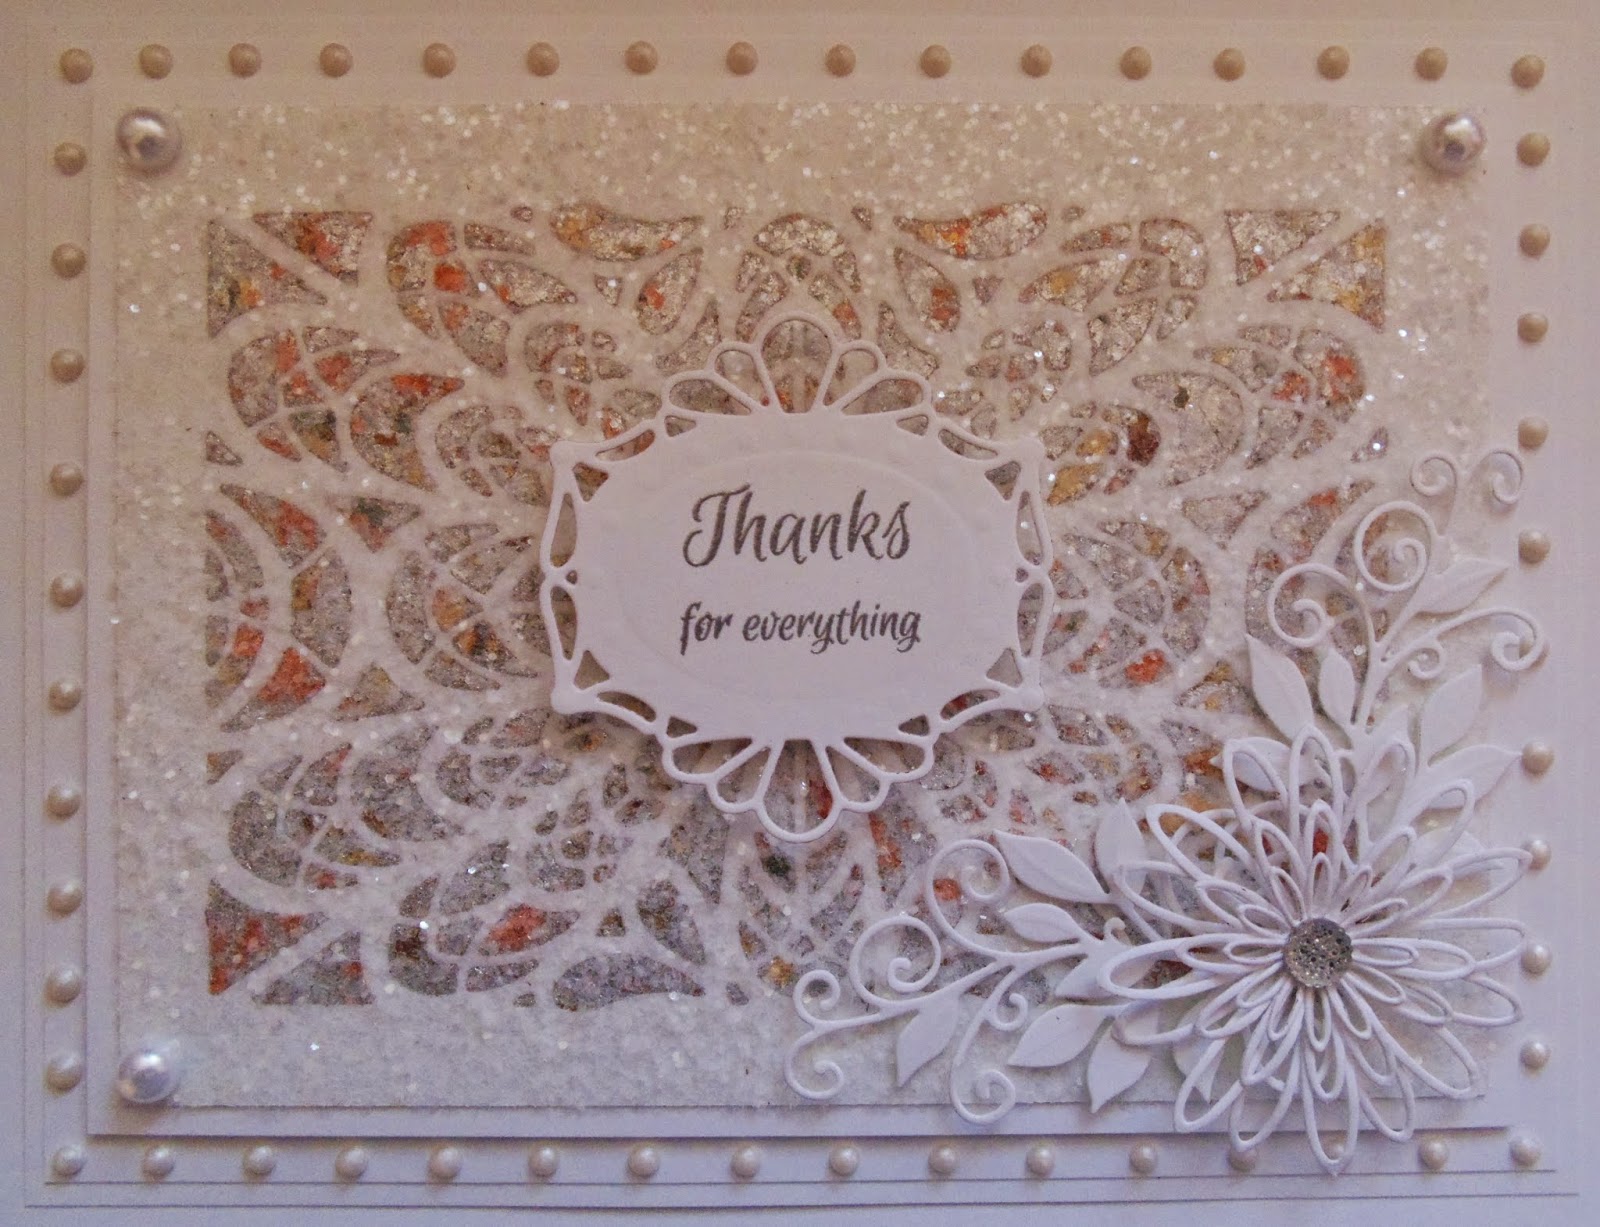
Here's today's card featuring Sue's Fire & Ice Technique -

I started by cutting Sue's French Background out of Coconut White Card. I added a piece of Creative Expressions Double Sided Self Adhesive Sheet to the front of the card. On the back, where the adhesive was exposed through the die cut, I added Cosmic Shimmer Aurora Lights Gilding Flakes and rubbed away the excess with a piece of Rubbit Scrubbit.

I peeled away the backing sheet from the other side of the adhesive (on the front of the card) and added Cosmic Shimmer Iced Snow Glitter Jewels.

I stamped the sentiment from the Creative Expressions Amazing Sentiments Clear Stamp Set using Perfect Medium and embossed with Cosmic Shimmer Silver Shine Detail Embossing Powder. I cut it out using the Tag Die from Sue's French Border, Corner and Tag Die Set.

I cut some leaves out using Sue's Petite Vinery Die Set. I made a flower using Sue's Delicate Daisies - Open Petals Die Set and added a Small Circle Dazzler.

I assembled the card as shown adding some 8mm White Pearls to the corners and some dots of Cosmic Shimmer Cosmic Pearl PVA around the edges.

Thanks for stopping by.

Julia.

Saturday, 17 January 2015

Scrapbook Saturday

Hi Bloggers.

Here's this week's Scrapbook Page -

This is my cat, Smokey. She has to be one of the prettiest cats I've ever had - well I think so anyway. She's a very independent little cat, hates to be picked up and will only be stroked when she wants to be stroked. She's also very hard to photograph! Kathryn took these pics- some of the best of Smokey that I have.

I used some Brown 12 x 12 Card, some Teal 12 x 12 from Arctic Frog (mat on middle photo). The papers are from the Couture Creations 12 x 12 Paper Pad (I'm on a mission to use every sheet in the pad!).

The border is cut using Couture Creations Simplicity Borders Die Set. The title is cut using Spellbinders Font One Upper and Lowercare Alphabet Die Sets.

The fancy frame is cut using Sue's Dainty Rectangular Frame Die Set and the journalling is written on a die cut from Sue's Dainty Oval Frame Die Set.

Thanks for stopping by.

Julia.

Friday, 16 January 2015

Doggone good day!

Hi Bloggers.

Had a cracking day of workshops yesterday at Creative Expressions HQ. More workshops on Tuesday!

Here's today's card -

For the background, I ran a piece of Milk Card through the Grand Calibur with the Tiles Mask. I rubbed Cast Bronze Gilding Wax over the surface. Once dry, I buffed it up using a dry wet wipe.

I stamped Alfie using Perfect Medium and embossed with Cosmic Shimmer Ancient Copper Metallic Embossing Powder. I coloured his neckerchief using a Spun Sugar Distress Marker. I cut the image using Spellbinders Classic Squares Large and inked through the die with Vintage Photo Distress Ink. I cut the largest die in the Spellbinders Marvelous Squares Die Set out of Chestnut Card.

I stamped the sentiment from the Paws-itively Great Stamp Set using Perfect Medium and embossed with Ancient Copper Detail Powder. I cut it out using the smallest die in Sue's Scandinavian Die Set and inked through the die with Vintage Photo.

I tied a bow using Pink/Brown Solid Satin Centre Band Ribbon and added and Vintage Metal Button.

I assembled the card as shown wrapping a piece of ribbon around the centre of the background, a Cream Pearl to each corner and some dots of Cosmic Shimmer Choco Brown PVA around the edges.

Thanks for stopping by.

Julia.

Thursday, 15 January 2015

Love

Hi Bloggers.

I'm up at Creative Expressions HQ today running my first workshops of the year. It's going to be a fun day.

Here's today's card -

For the background, I started by popping some Phill Martin Graceful Pink Mister onto a piece of Cut n Dry Foam. I used this as my ink pad and with the stamp in my hand randomly stamped the Justrite Quilted Circles Background over a piece of Coconut White Card. I misted a little more Graceful Pink Mister onto my Craft Sheet and mixed in a little Graceful Pink Mica Powder. I added this to my ink pad and with the stamp in my hand, I randomly stamped the Justrite Sweet Lace Background. I ran it through the Grand Calibur with the Checkerboard PinPoint Embossing Folder and then edged it with Graceful Pink Twinkles.

I stamped the sentiment and the frame from the Justrite Ornate Happiness Squares Stamp Set onto Coconut White Card using Perfect Medium and embossed with Graceful Pink Embossing Powder. I cut it out using Spellbinders Ornate Squares and edged with Graceful Pink Twinkles.

I cut 2 of the largest die from the same die set out of Coconut White Card and rubbed Graceful Pink Gilding Wax over them.

Iassembled the card as shown adding a Black Pearl to each corner and some dots of Graceful Pink PVA around the edges.

Thanks for stopping by.

Julia.

Wednesday, 14 January 2015

Hope all your Birthday Wishes come true

Hi Bloggers.

Here's today's card -

For the background, I stamped one of the little designs from the Justrite Vintage Fan and Sentiments Clear Stamp Set along the top and the bottom edges of a piece of Milk Card using Perfect Medium and embossed with Cosmic Shimmer Gold Detail Embossing Powder. I then ran it through the Grand Calibur with the Couture Creations Velvet Tea Lights Embossing Folder. I ran it through a second time to extend the design.

I stamped the fan design from the same stamp set onto Milk Card using Perfect Medium and embossed with Gold Detail Powder. I covered each of them with a piece of Creative Expressions Double Sided Adhesive and cut them out using Justrite Vintage Fan Dies. I peeled the backing sheet away and covered them all with Glass Micro Beads. I cut the largest die in Sue's Granada Die Set out of Milk Card. I cut the largest 2 dies from the same die set out of Vintage Gold Card.

I stamped the sentiment and the frame from the Justrite Birthday Floral Vintage Labels Eight & Nine Clear Stamp Set, using Perfect Mediuma and embossed with Gold Detail Powder. I cut it out using Justrite Vintage Labels Nine Dies and cut a larger die from the same set out of Vintage Gold Card.

I tied a bow using Cream Crochet Ribbon and added a Vintage Metal Button.

I assembled the card as shown adding some dots of Cosmic Shimmer Ivory PVA around the edges.

Thanks for stopping by.

Julia.

Tuesday, 13 January 2015

Paw Prints

Hi Bloggers.

Here's today's card -

For the background, I started by randomly inking through the Stripy Spots Mask using Pumice Stone Distress Ink. Then, with the stamp in my hand, I randomly stamped the Kitten Treats Background, again using Pumice Stone. I made sure the ink was dry and ran it through the Grand Calibur with the Creative Expressions Eternity Embossing Folder and inked around the edges with Pumice Stone. I rubbed Pearl Moon Gilding Wax over the surface. Once dry, I buffed it up using a dry wet wipe.

I stamped Willow onto a piece of Slate Grey Card using Perfect Medium and embossed with Cosmic Shimmer True White Detail Embossing Powder. I cut it out using Sue's Innsbruck Die Set.

I stamped the sentiment from the Pawprints on Your Heart Clear Stamp Set, again using Perfect Medium and embossed with True White Detail Powder. I cut it out using Spellbinders Resplendent Rectangles.

I tied a bow using Pewter Solid Satin Centre Band Ribbon and added a Heart Sparkler.

I assembled the card as shown adding a Small Circle Dazzler to each corner and some dots of Cosmic Shimmer Cosmic Pearl PVA around the edges.

Just to let you know that today is your last chance to book onto Thursday's worskhops in Kettering. So far the afternoon workshop seems to be most popular with just a couple of spaces available. The morning worskhop actually has more techniques than the afternoon one, really not to be missed. Here's a photo of a different colour scheme for the morning workshop -

Full details of all the workshops can be found on the workshop page of this blog (in the top menu).

Also, a polite reminder that I have a bunch of stuff up for grabs on ebay here.

Thanks for stopping by.

Julia.

Monday, 12 January 2015

Thank You

Hi Bloggers.

Here's today's card -

For the background, I sprayed some Phill Martin Graceful Peach Mister onto a piece of Cut n Dry Foam. I used this as my ink pad and stamped the Justrite Doily One Stamp several times onto a piece of Coconut White Card. I ran it through the Grand Calibur with the Creative Expressions Quilted Flower Embossing Folder and inked around the edges with Dried Marigold Distress Ink. I edged with Graceful Peach Twinkles and put aside to dry.

I stamped the sentiment from the Justrite Anchors Away Stamp Set and the frame from the Justrite Ornate Happiness Squares Stamp Set using Perfect Medium and embossed with Graceful Peach Embossing Powder. I cut it out using Spellbinders Ornate Squares and edged with Graceful Peach Twinkles.

 I cut a Spellbinders Asian Motifs Die out of Peach Card and inked through the die with Dried Marigold. I cut the largest die in the set out of Coconut White Card and rubbed Graceful Peach Gilding Wax over. I left it to dry for a few minutes and then buffed it up using a dry wet wipe.

I cut a couple of leaves out of Coconut White Card using Sue's Curled Vines Die Set. I rubbed Graceful Peach Gilding Wax over. I popped some Graceful Peach Twinkles onto my Craft Sheet, picked some up onto a piece of Cut n Dry Foam and dabbed it over the leaves.

I popped some Warm White Cosmic Shimmer Matt Chalk Paint onto my Craft Sheet and mixed in a little Graceful Peach Mica Powder. I used this to colour a piece of White Crochet Ribbon using a piece of Cut n Dry Foam. Once dry, I made a flower with half of it cut lengthways.

I assembled the card as shown adding a White Pearl to the corners and some dots of Graceful Peach PVA around the edges.

Thanks for stopping by.

Julia.

Sunday, 11 January 2015

Happy Birthday to You

Hi Bloggers.

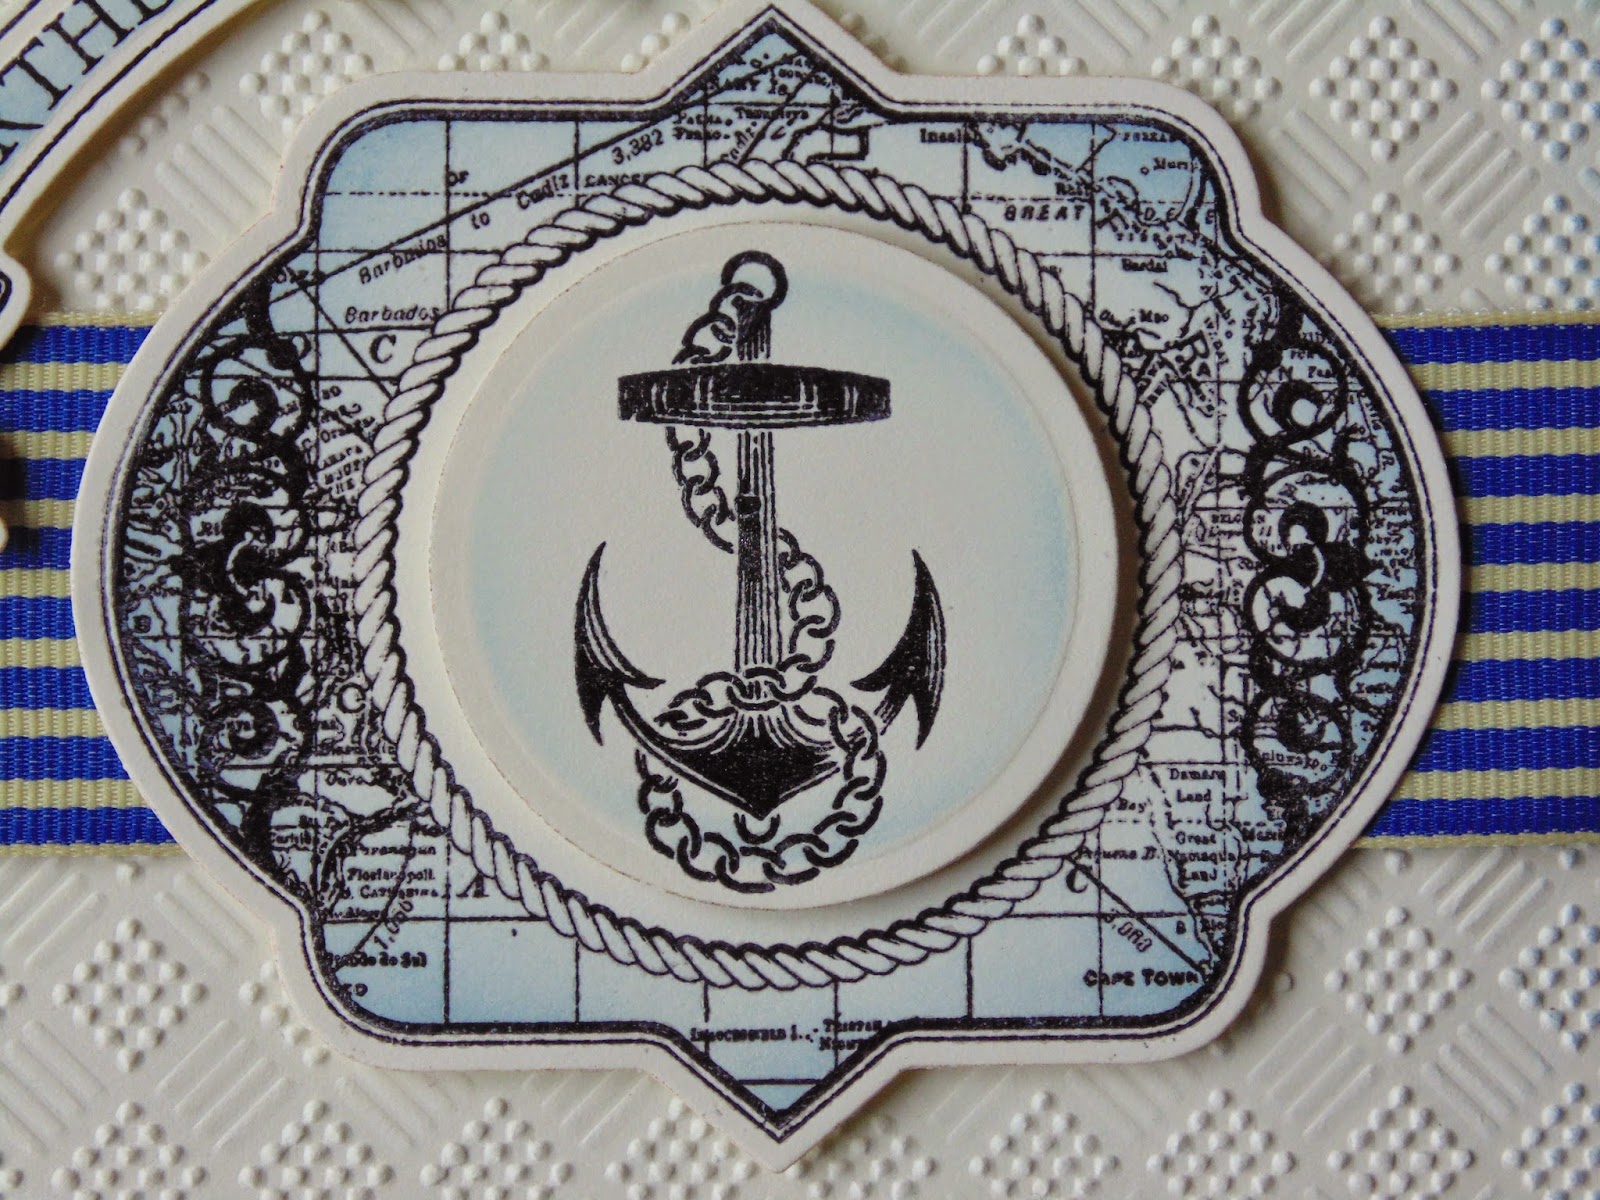
Here's today's card -

For the background, I stamped the anchor design from the Justrite Anchors Away Clear Stamp Set along the bottom of a piece of Milk Card using Jet Black Archival. I made sure the ink was dry and then ran it through the Grand Calbur with the Checkerboard Embossing Folder. I inked around the edges with Faded Jeans Distress Ink. and wrapped a piece of Royal Blue/Ivory Striped Grosgrain around the centre.

I stamped the map frame from the same stamp set using Jet Black Archival and embossed with Cosmic Shimmer Clear Embossing Powder. I cut it out using Justrite Nested Oval Medallion Lables Die Set and inked through the die with Faded Jeans. I stamped the anchor from the same stamp set, again using Jet Black Archival and embossed with Clear Powder. I cut it out using a Spellbinders Circle Die and inked through the die with Faded Jeans.

I stamped the banner sentiment from the same stamp set using Jet Black Archival and embossed with Clear Powder. I cut it out using Justrite Antique Labels One Die Set and inked through the die with Faded Jeans.

I assembled the card as shown adding a couple of Black Pearls and some dots of Phill Martin Graceful Blue PVA around the edges.

Thanks for stopping by.

Julia.

Saturday, 10 January 2015

Scrapbook Saturday

Hi Bloggers.

I'm so glad that you enjoyed the first Scrapbook Saturday last week. This week I have an 8 x 8 page is with a photo that Magic Hands took before one of the shows I did with Nigel last year.

I used some Black Cardstock. The patterned paper is from the Couture Creations Sew Jo 12 x 12 Paper Pad. I trimmed it down to size and used the Spellbinders Classic Triple Scallop Edgeabilities die set to cut a fancy edge and insert. I used Black Soot Distress Ink to stamp one of the Newsprint Flourishes over the paper and then with the stamp in my hand I also randomly stamped Phill Martin's Leafy Background. I edged the whole piece with Black Soot using Cust n Dry Foam.

I cut Sue's Scandinavian Border from the Border, Corner and Tag Die Set out of Black Card. I cut the Tag from the same die set out of Green Bazzill Card. I cut one of Sue's Stockholm Dies out of Milk Card and inked through the die with Black Soot. I used a fineliner pen for my bit of journalling.

I used Spellbinders Font One Upper and Lower Case to cut out Nigel's name.

I added a few 5mm Black Pearls to the cut insert.

I have blogged a few scrapbook pages over the last few years. You can see them here.

Thanks for stopping by.

Julia.