Tuesday, 11 October 2016

Have a Bright Bright Sunshiny Day and Beading Projects

Hi Bloggers.

Here's today's card -

For the background, I used a paper from Phill Martin's Blossom 8 x 8 Paper Pad. I added an extra bit of interest by stamping the flower border from the Wendy Vecchi Studio 490 It's More Flower Art Stamp Set using Phill's Cosmic Shimmer Chic Aubergine Colour Cloud applied using a Smoothie. With the stamp in my hand I also stamped a section of the background from the same stamp set. I matted my background onto another of Phill's papers, using the plain side this time.

I cut the flowers from the Spellbinders Romantic Blooms One out of Coconut White Card twice and inked through the die with Chic Aubergine Colour Cloud. I cut the flower stem from the same set. I cut the outer die only from the Spellbinders Medallion Three Die Set twice and added my flowers to them.


I stamped the sentiment from the Wendy Vecchi Studio 490 Wildflower Art Stamp Set onto Coconut White Card using Plum Archival. I cut it down into sections using scissors and edged each piece with Chic Aubergine Colour Cloud.

I assembled the card as shown adding some 5mm White Pearls and piercing around the edges using my Tim Holtz Ruler, Precision Probe and Piercing Mat. 

I've been reminded to share photos of my beading from last week I have been a bit busy since I've been back! Anyway, yesterday afternoon I had a few minutes and took a few snaps.

This necklace has been on the go for about 6 months as I don't get much time to bead nowadays - just 1 day a month and sometimes I don't even get that! It's reversible - matt dark blue on one side and purple on the other so it's a two-fer! Designed by my good friend, Sue Stallard.


Next I wanted to make this kit by Melanie Potter - not finished yet as the rope needs to be 34" long made in size 15 beads - very small beads so it takes a long time to grow and it's a tad boring so I'll be chipping away at that every now and again.


oT relieve the boredom of the rope, I started to encase a bead in an hexagonal frame. This will eventually be a necklace like my grey rectangular one. Designed by Sue Stallard.

Lisa Horton is continuing with her One Day Special on Hochanda today with shows at 9am, 12noon, 4pm and 7pm.  You can see the products I have for sale on my website from the shows here. Offer is valid till midnight tonight or while stocks last. Discount will be applied at checkout.
 

The new colours of Pixie Powders and Gilding Polishes are due in this morning so I'll try and get the pre-orders out today. You can find the new Pixies here and the new Polishes here.

Thanks for stopping by.

Julia.
www.juliawattscrafts.co.uk
Free card with all website orders (ask for one in the comments box at checkout).
Deal of the Day today (11th October) -
Leonie Pujol Masks & Stencils : Sing only £2.99!

Monday, 10 October 2016

Pop-Out Card

Hi Bloggers.

Had a great day yesterday at Phill's Martin's Sheffield Store - it was lovely to see so many of Phill's customers. Hands are now clean by the way!

I have a pop-out card to share with you today -

I started with 2 pieces of A4 Coconut White Card. I scored both of them on a scoreboard to Half Fold A4. One of them I scored along the A4 Gatefold lines on both sides. I trimmed both pieces to 6 1/2" tall.

When making a pop-out card, it's easiest to decorate the outside and the inside pieces separately before assembly. I've used Phill Martin's Snowflake 8 x 8 Paper Pad throughout.

So, let's look at the inside first -

I used the largest die from the Justrite Snowflake and Tags Dies from the centre along the middle fold. I positioned the die slightly closer to the top edge of the card.

I stamped a little motif from the Justrite Large Oval Christmas Wishes Stamp Set in the 4 corners of the inner section using Phill Martin CS Chic Aubergine Colour Cloud applied with a Smoothie.

For the panels, I used one of Phill's papers and matted it onto another paper, but used the plain side for the mat. I stamped the Let it Snow image from the same stamp set, onto Coconut White Card using Chic Aubergine Colour Cloud. I cut it out using a die from the Justrite Hope Oval Frame Dies.

I cut the inner snowflake die from the Justrite Snowflake and Mini Tags Die Set out of Coconut White Card twice. I glued them back to back securing a piece of Beading Thread in between them. I hung this from the aperture, securing with tape and added a Purple Dazzler. This completed decoration of the inner piece.

I then decorated the outiside card. I needed to put a piece of patterned paper inside it first - this is seen through the aperture in the inside piece. I cut a patterned paper slightly shorter than the card - so 6 1/4" is fine, by 7" wide. I folded it in half. I ran some CS Glue along the 2 long edges only - the paper has to be free to move. I left it folded and added it to the fold of the Coconut White Card and then closed the card over it. When you open it up, you will see a gap at the fold between the paper and the card. This is correct - it needs to be there so that the paper folds correctly when the card is closed and doesn't bunch up (hope that makes sense).

Now to the front of the card. I dusted a piece of patterned paper from Phill's Paper Pad with an Anti-Static Pad and stamped the sentiment from the Justrite Inside and Outside Christmas Sentiments Stamp Set using Clear Perfect Medium and embossed with CS True White Detail Embossing Powder. I matted the paper onto another paper, using the plain side.

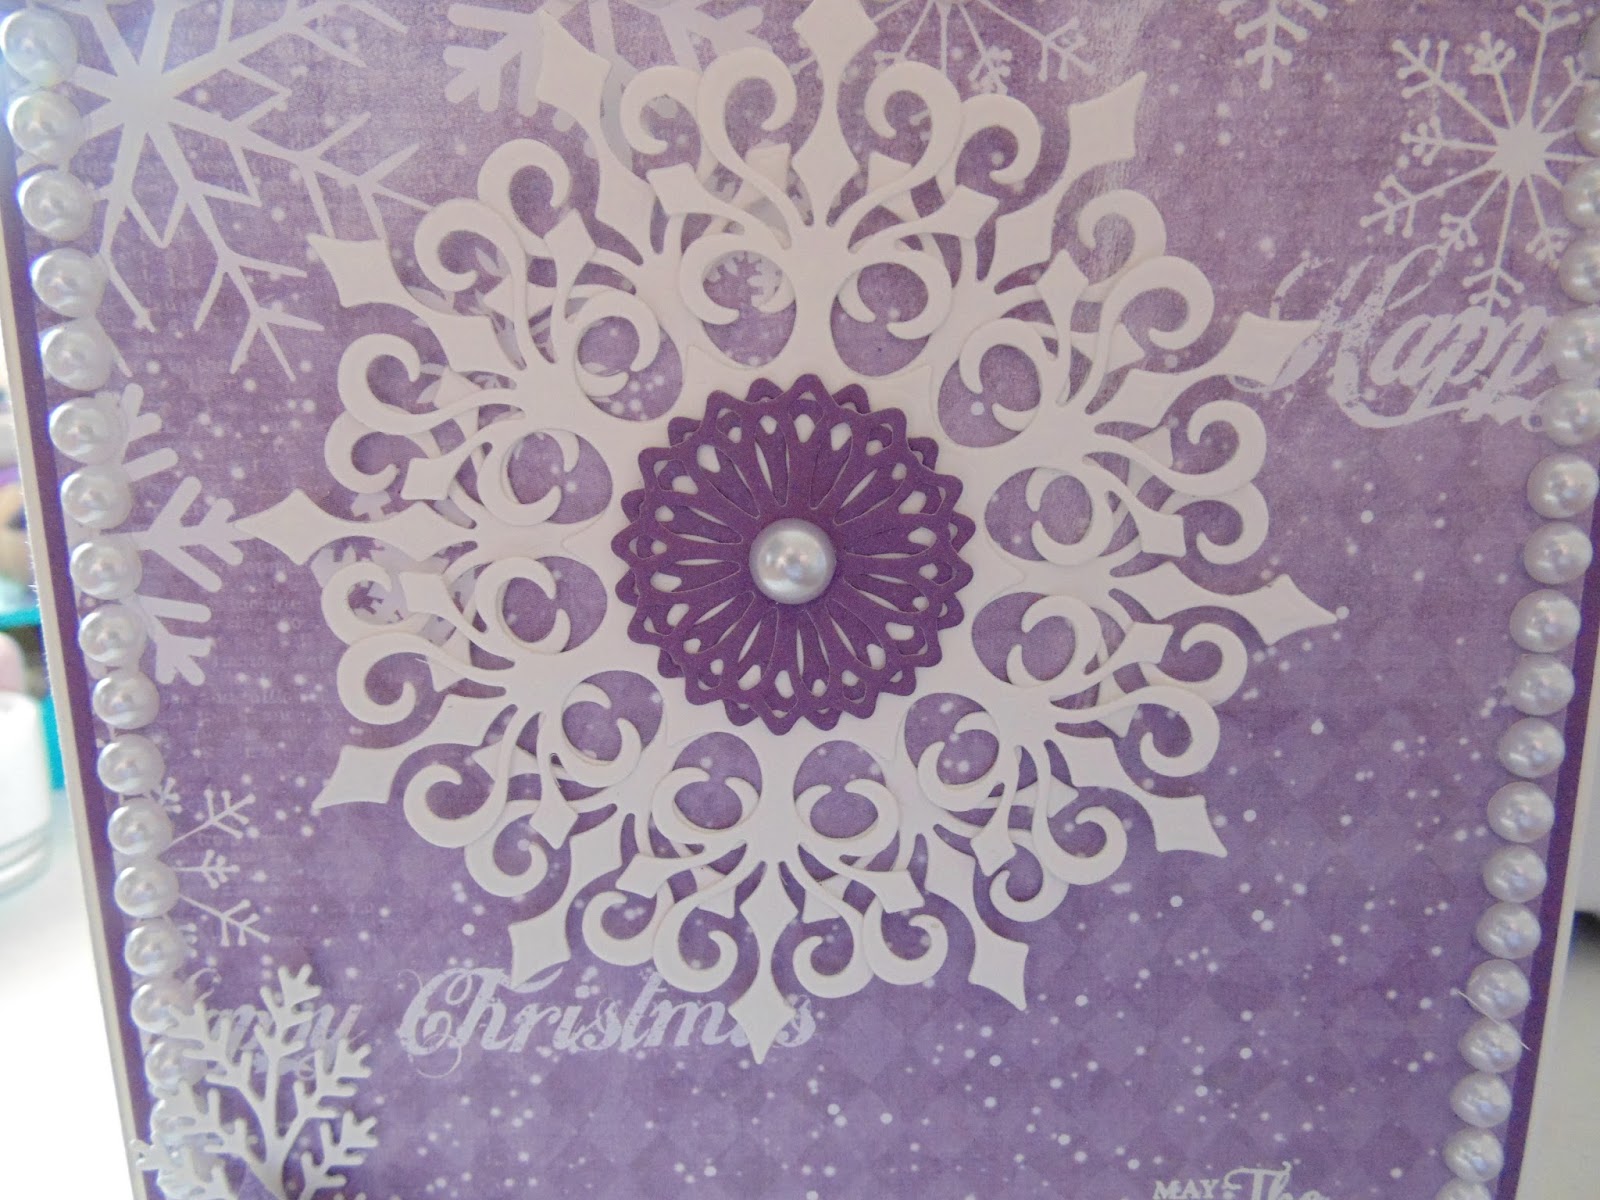
I cut the large snowflake die from the Justrite Snowflake and Tags Die Set out of Coconut White Card twice. I cut the inner die from the same set out of the plain side of one of the papers twice and added an 8mm White Pearl to the centre.


I added some Single White Pearl Strips around the edges of my front panel.

I stamped the smaller of the poinsettias from the Justrite Multi-Step Poinsettia Stamp Set onto Coconut White Card using Phill Martin CS Chic Aubergine Colour Cloud applied using a Smoothie. I stamped the veins and the centres using Watering Can Archival. I used the Justrite Multi-Step Poinsettia Dies to cut the flower and centre out. I cut a pair of leaves out of Coconut White Card using Sue Wilson's Pine Twig Dies.

To assemble the card, I added CS Glue to the back of one of the inside panels and lined it up with the edge of the inside of the font of the card. I repeated the process with the other inside panel and the back of the card.


You can see another pop-out card I've made here.

Lisa Horton is launching a One Day Special on Hochanda at 8pm this evening.  You can see the products I have for sale on my website from the shows here. Offer is valid till midnight tomorrow night or while stocks last. Discount will be applied at checkout.

The winner of the card from Freebie Friday on October 7th is ........................

June Fletcher

Please email me at juliawattscrafts@gmail.com with your address and I'll pop your card in the post.

Thanks for stopping by.

Julia.
www.juliawattscrafts.co.uk
Free card with all website orders (ask for one in the comments box at checkout).
Deal of the Day today (10th October) -
Sue Wilson Rose Garden Mini Striplet only £6.99!

Sunday, 9 October 2016

Merry Christmas

Hi Bloggers.

I'm in Sheffield today demoing in Phill Martin's Honeypot Crafts Shop 10am till 4pm. Pop along and join us if you're in the area. It's going to be fun!

One of the products I'm going to be demoing will be Pixie Powders (of course!) and I'm so excited as there are 6 new autumn colours in the range and I'll have them with me. I have already ordered some for my website and they're available to pre-order here. I'm expecting delivery on Tuesday hopefully, otherwise, I will pick them up when I'm at CE HQ for my Stamping Masterclass on Wednesday. There are also 5 new autumn colours of Gilding Polishes and I have ordered those too - you can find them on my website here, again for pre-order. Orders will be sent out Tuesday or Thursday depending on when I get my delivery.

I'd better get on with today's card -

For the background, I popped some CS Flake & Glitter Glue onto a piece of Wax Paper. I picked it up onto a piece of Cut n Dry Foam and used it to ink up the Justrite Ribbons of Holly Background. I stamped it onto Coconut White Card leaving the stamp on the card no more than 3 seconds so as not to tear the card. I cleaned my stamp under a cold tap and then went back to my stamped image. I added CS Inca Gold Gilding Flakes. I removed the excess using a piece of Rubit Scrubit. I trimmed it down a little and wrapped a piece of Off White Satin Ribbon around it. I matted it onto Antique Gold Pearl Card and added it to a Coconut White Card blank.

I 'inked' up and stamped the image from the Justrite Large Oval Christmas Wishes Stamp Set in the same way as I stamped the background. I cut it out using a die from the Justrite Hope Oval Frames Die Set. I then cut the largest die from the Justrite Joy Oval Frames Dies Set out of Antique Gold Pearl Card.

I tied a bow using 2 lengths of White Satin Ribbon and added a Dazzler Setting and a Vintage Button.

On the inside of my card, I stamped a sentiment and a frame from the Justrite Large Oval Wishes Stamp Set using Clear Perfect Medium and embossed with CS Gold Detail Embossing Powder.

I stamped a little stamp from the same set in the bottom left hand corner.

Thanks for stopping by.

Julia.
www.juliawattscrafts.co.uk
Free card with all website orders (ask for one in the comments box at checkout).
Deal of the Day today (9th October) -
Designs by John Lockwood - Daisy Everyday Sentiments Stamp Set only £7.99!

Saturday, 8 October 2016

Naughty or Nice?

Hi Bloggers.

I'm back off my little holiday. I had a lovely break. I will share what I made some time next week when I get chance to take some photos.

I managed to get all the website orders out yesterday afternoon. This afternoon I'm heading up to Sheffield ready for my demo day tomorrow at Phill Martin's shop. It's going to be fun!

Here's today's card -

For the background, I popped the Holly Mask onto a piece of Watercolour Card. I sprinkled aome Plum Twist CS Pixie Powder over and then spritzed with water. I removed the mask and put the background aside to dry. I cleaned the mask under a running tap.

I popped the Christmas Quilt Mask onto a piece of Coconut White Card. I spread CS Vivid Violet Sparkle Texture Paste through it, removed the mask and put aside to dry. Again, the texture paste cleans off the mask easily with water.

Once my backgrounds were dry, I trimmed the Holly Mask down a little and edged with Phill Martin CS Chic Aubergine Colour Cloud using a Smoothie. I cut the Sparkle Texture Paste background into strips, edged it with Chic Aubergine Colour Cloud and added a reindeer strip to my background. I matted onto Amethyst Card and added to a Coconut White Card Blank.

I stamped the sentiment from the Justrite Mini Tags Stamp Set onto Coconut White Card using Watering Can Archival. I ticked 'Naughty' using a Pigma Micron Pen and cut the sentiment out using Justrite Joy Oval Frame Dies. I edged with Chic Aubergine Colour Cloud. I cut the next sized die in the set out of Amethyst Card. I cut the largest die in the set out of Coconut White Card. I double embossed it using Clear Perfect Medium and CS Vivid Violet Brilliant Sparkle Embossing Powder.

I coloured a couple of Creative Expressions Star Swirl Embellishments with No.73 Blue Violet Graphmaster Pen.

 Sue Wilson is continuing with her One Day Special on Hochanda today with shows at 9am, 12noon, 4pm and 7pm. I'm offering 10% discount on products I have on my website from the shows. You can find them here. Offer applies till midnight tonight or while stocks last. Discount will be applied at checkout.

Thanks for stopping by.

Julia.
www.juliawattscrafts.co.uk
Free card with all website orders (ask for one in the comments box at checkout).
Deal of the Day today (8th October) - 
Sue Wilson Striplets Collection - Rococo only £8.99!

Friday, 7 October 2016

Freebie Friday

Hi Bloggers.

It's that time of the week again. Here's this week's card that is looking for a new home -

I am quite fond of this card so it does need a really good home. If you think you can offer this card what it needs, please leave a lovely comment below to go into the draw. I will announce the winner on Monday.

You can read how this card was made here.

Sue Wilson is launching a new One Day Special on Hochanda this evening with part 3 of her festive dies. I'll do my best to populate a category on my website here with the lovely goodies I have for sale on my website from her shows. There'll be the usual 10% discount off them, valid till midnight tomorrow night or while stocks last. Offer valid till midnight tomorrow night.

Thanks for stopping by.

Julia.
www.juliawattscrafts.co.uk
Free card with all website orders (ask for one in the comments box at checkout).
Deal of the Day today (7th October) -
Spellbinders Nestabilities - Circle Contempo Decorative Accents only £12.99! (RRP £24.50)

Thursday, 6 October 2016

Warm Wishes


Hi Bloggers.

I thought I’d share this card with you today as a contrast to yesterday’s card using the Justrite Snowflake Die in a different way –

For the background, I popped the Nordic Christmas Mask onto a piece of Watercolour Card. I sprinkled some Aqua Lagoon and Silver Dream CS Pixie Powders over then spritzed with water. I removed the mask and put the background aside to dry (doesn't take long) and washed the mask under a running tap.

I made a frame out of Coconut White Card using Sue Wilson's Double Pierced Squares and Double Pierced Squares Set B. I added 3D Foam to my frame and then added it to my background (once dry).

 I cut the largest 2 dies in the Justrite Snowflake and Tag Dies together out of Coconut White Card. I put the inner snowlake to one side for another project and used the 'waste' instead. I double embossed using Clear Perfect Medium and CS Blue Zircon Brilliant Sparkle Embossing Powder. 

I cut the largest die in the set on its own out of Coconut White Card and glued my doubled embossed snowlake to it. 

I cut the smallest snowflake in the set out of Coconut White Card. I double embossed it using Clear Perfect Medium and CS Frosty Dawn Brilliant Sparkle Embossing Powder. I added a Craft Consortium Adhesive Pearl and Rhinestone to the centre.

I cut a couple of poinsettias out of Coconut White Card using Justrite Multi-Step Poinsettias Dies. I double embossed them using Clear Perfect Medium and CS Blue Zircon BS Embossing Powder. I glued them together offsetting them and added some 3mm White Pearls to the centre.

I stamped the sentiment from the Justrite Christmas Mini Tags Stamp Set using Cobalt Archival. I cut it out using a tag die from the Justrite Snowflakes and Tag Dies.

I assembled the card as shown adding some more Coconut White mats and an 8mm White Pearl to each corner of my frame.

Just a reminder that the 10% off everything on my website ends at midnight tonight. I'll start sending orders out tomorrow afternoon in the order they were received.

Thanks for stopping by.

Julia.
www.juliawattscrafts.co.uk
Free card with all website orders (ask for one in the comments box at checkout).