Tuesday, 4 October 2016

Mica and Ice


Hi Bloggers.

Here’s today’s card –

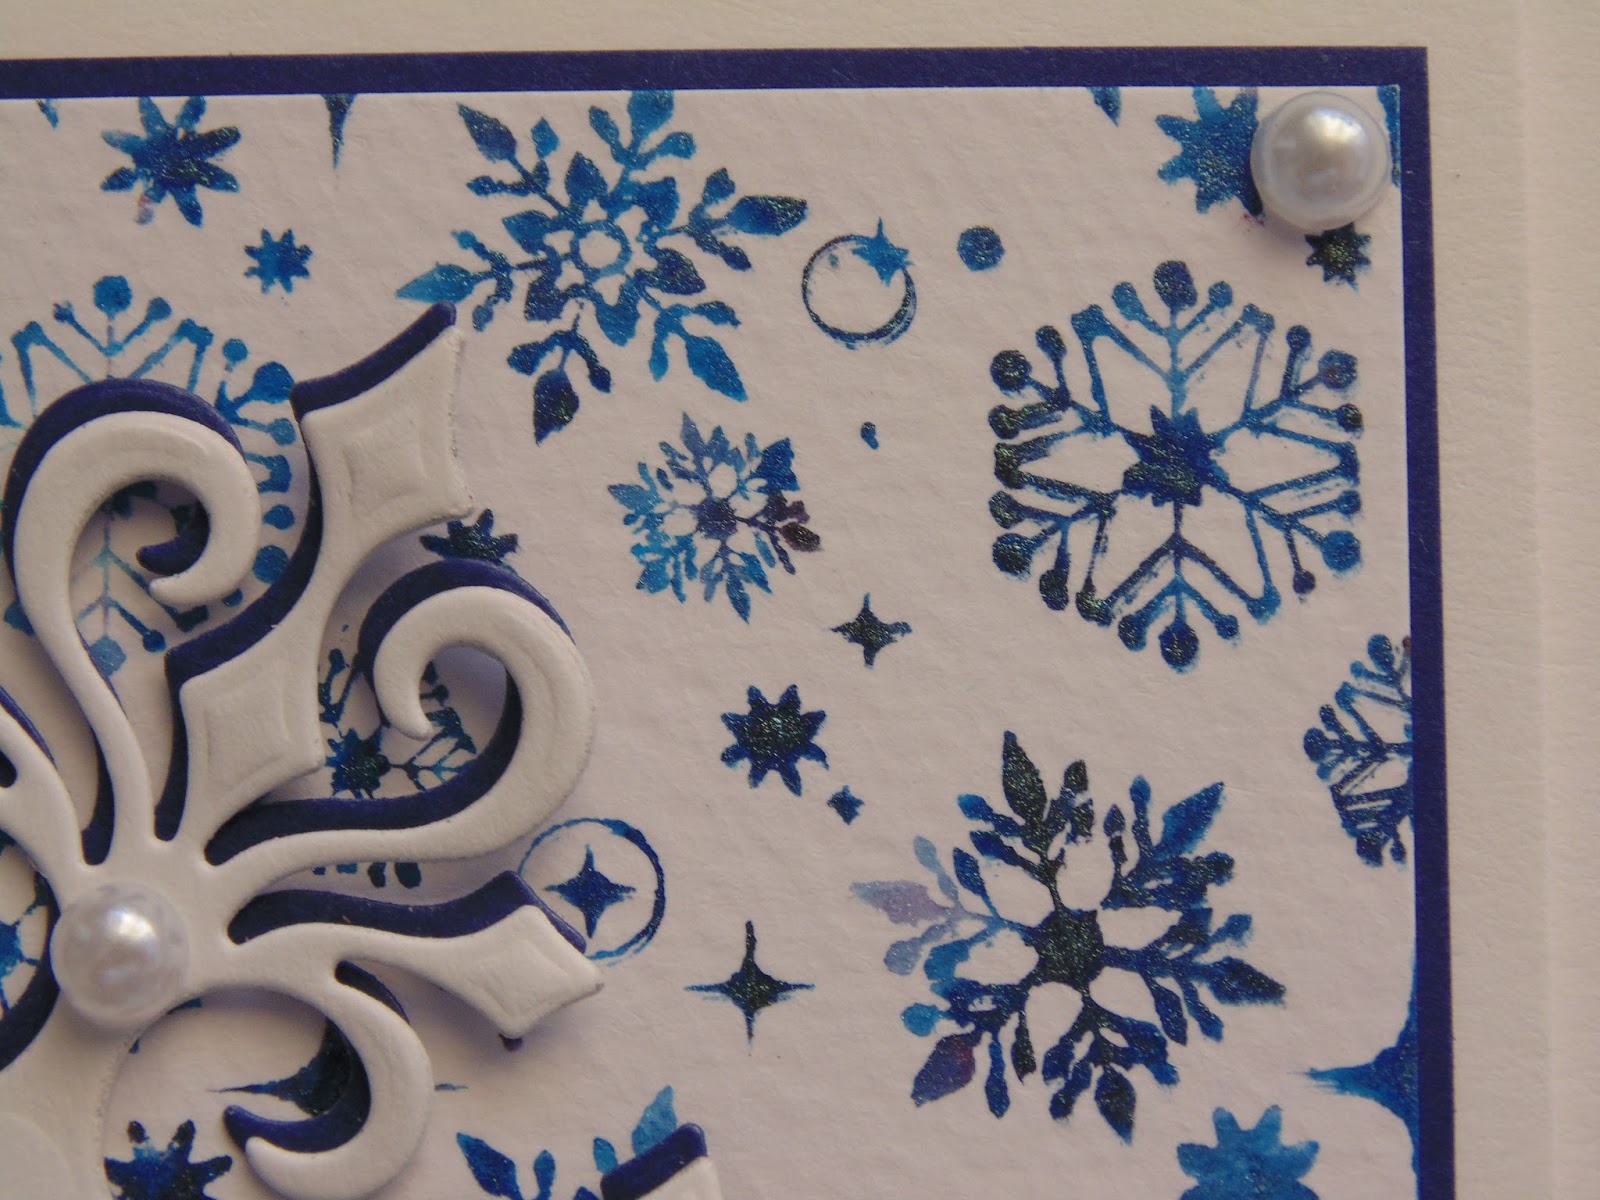
For the background, I cut the large decorative die from the Justrite A2 Butterfly Garden Frame Dies out of Coconut White Card. I added a piece of Creative Expressions Double Sided Self Adhesive Sheet to the front. I turned it over and added Phill Martin CS Chic Aubergine and Chic Moss Mica Powders. I removed as much of the excess Mica Powder as possible and then glued a piece of copy paper over it to make doubly sure that no mica powder would contaminate my glitter jewels.
I turned my background over, removed the other backing sheet and then added CS Iced Snow Glitter Jewels. I cut my background out using the largest die in the same set.

I stamped the image from the Justrite Meadow Circles StampSet onto Coconut White Card using CS Lilac Whisper Colour Cloud using a Smoothie. I cut it out using a die from the Justrite Stitched A2 Banners andRectangles Die Set. I cut a mat out of Black Card using the circle die from the Justrite A2 Butterfly Garden Frame Dies. 

I assembled the card as shown adding some 5mm White Pearls and piercing around the edges using my Tim Holtz Ruler, Precision Probe and Piercing Mat. 

John Lockwood continues with his DCWV One Day Special on Hochanda today with shows at 9am, 12noon, 4pm and 7pm.

Don't forget that there's 10% off everything on my website till midnight on Thursday.

Thanks for stopping by.

Julia.
www.juliawattscrafts.co.uk
Free card with all website orders (ask for one in the comments box at checkout).

Monday, 3 October 2016

Merry Christmas


Hi Bloggers.

Here’s today’s card – 
 I just love Sue Wilson’s Weaving Dies but it’s been a while since I’ve used them. Whilst I was waiting for my Justrite Dies to arrive when prepping for my last One Day Special I did a bit of batch background making and I immediately thought about using them again. 


So, to begin with, I popped a little CS Flake & GlitterGlue onto a piece of Wax Paper. I picked some up onto a piece of Cut n Dry Foam and used it to ‘ink up’ the Justrite Ribbons of Holly Background. Using the 3 second rule, I added a piece of Coconut White Card to transfer the image. I ‘inked’ up the stamp again and this time added it to a piece of Rich Green Card. I put the pieces of Card to one side while I cleaned my stamp under the tap. I repeated the process with the Justrite Holly Stitched Background and Coconut White Card. Once again, I put the image aside while I cleaned my stamp.
Next, I added CS Inca Gold Gilding Flakes to the Coconut White Ribbons of Holly Background. I removed the excess using a piece of RubitScrubit. I added CS Mulled Wine Gilding Flakes to the Rich Green Ribbons of Holly Background and the Coconut White Holly Stitched Background, removing the excess with Rubit Scrubit.

I used Sue’s Classic Weaving Die to cut both of the Ribbons of Holly Backgrounds and wove them as shown.
I made a frame out of Antique Gold Pearl Card using Sue’sDouble Pierced Rectangles and Double Pierced Rectangles Set B. I added it to my background using 3D Foam and trimmed away the excess using scissors. 

I stamped the image from the Justrite Large Oval ChristmasWishes Stamp Set onto Coconut White Card using Clear Perfect Medium and embossed with CS Gold Detail Embossing Powder. I cut it out using Justrite JoyOval Frames. I cut a Justrite Hope Oval Frame Die out of Rich Green Card. I cut the largest Joy Oval Frame Die out of Antique Gold Card.
 I stamped the sentiment from the same stamp set onto Coconut White Card, again using Clear Perfect Medium and embossed with Gold Detail Powder. I cut it out using Sue’s Pierced Flags and used the other two dies in the set to cut out mats in Rich Green and Antique Gold Card. 

Going back to my gilded Holly Stitched Background, I made a flower using the Justrite Multi-Step Poinsettia Dies. I added an 8mm White Pearl to the centre and cut some leaves out of Rich Green Card using Sue’s PineTwig Dies.
 I assembled the card as shown adding some mats of Coconut White, Rich Green and Antique Gold Card and some White 5mm Pearls to the frame. 

You can see other cards I've made using these fabulous dies here.

I’m heading off on a little Beading Holiday today. I’ll be back on Friday afternoon. To compensate for the delay in sending out website orders, there’s 10% off everything on my website till midnight on Thursday 6th October. Discount will be applied at checkout. Orders will be dispatched from Friday 7th October onwards. There’ll be no new Deal of the Day till Friday.

John Lockwood is launching a One Day Special on Hochanda this evening at 8pm with new DCWV Light Ups. 

The winner of the card from Freebie Friday is ……………………………..

 granny sue

Please email me at juliawattscrafts@gmail.com with your address and I’ll pop your card in the post when I get back from my holiday.

 Thanks for stopping by.

Julia.
www.juliawattscrafts.co.uk
Free card with all website orders (ask for one in the comments box at checkout).

Sunday, 2 October 2016

Happy Retirement

Hi Bloggers.

Here’s today’s card –

 For the background, I used a piece of Watercolour Card. I popped the Wavy Mask on top and then sprinkled CS Pixie Powders in Candy Pink and Purple Violet over. Leaving the mask in place, I then spritzed with water. I removed the mask and put aside to dry. If you wish, before removing the mask, you can pop another piece of card on top to get a negative print. 


I made a frame out of Coconut White Card using Sue Wilson’sDouble Pierced Squares and Double Pierced Squares Set B. I added this to my background using 3D Foam and trimmed away the excess using scissors.

I stamped the sentiment and the frame from the JustriteCongrats Card Basics Stamp Set onto Coconut White Card using Jet BlackArchival. I cut it out using a die from the Justrite A2 Card Front Basics DieSet. I cut the next sized die out of Black Card.

I spritzed a piece of Watercolour Card with water and then sprinkled some Candy Pink and some Purple Violet over and put aside to dry. Once dry, I cut some flowers using Sue’s Exquisite Poppy Die Set. Whilst the card was still in the die, I coloured the veins using a Pigma Micron Pen. I cut some stamens out of Black Card and some centres out of Coconut White Card using the same die set. I cut some leaves out of Coconut White Card using Sue’s Olive Branch Die Set.

 I cut some corners out of Black Card using Justrite A2 Card Front Basics. 

I assembled the card as shown adding a Black Card mat, a Coconut White Card and an 8mm White Pearl to each corner of the frame.

Thanks for stopping by.

Julia.
www.juliawattscrafts.co.uk
Free card with all website orders (ask for one in the comments box at checkout).
Deal of the Day today (2nd October) - 
Spellbinders Nestabilities - Savoy Decorative Elements only £11.99! (RRP £19.60) 


Saturday, 1 October 2016

Believe in the Magic

Hi Bloggers.

My Dad's tests went well yesterday and he needs to have another check up in 6 months time. Good news.

Here's today's card -

I started by spreading some Phill Martin CS Decadent Denim Sparkle Texture Paste through the Christmas Quilt Mask onto a piece of Acetate. I put it aside to dry (a couple of hours).

I made a frame out of Coconut White Card using Sue Wilson's Double Pierced Squares and Double Pierced Squares Set B. I added 3D Foam to my frame and then added it to my background (once dry). I trimmed away the excess acetate then added more 3D Foam to the back around the frame (making sure there were no gaps in the foam).

I popped some Snow White Micro Beads into the centre of a mat of Coconut White Card and then added my frame.

I stamped the 2 sizes of veins from the Justrite Multi-Step Poinsettia Stamp Set onto Coconut White Card several times using Clear Perfect Medium and embossed with CS Denim Brilliant Sparkle Embossing Powder. I cut them out using Justrite Multi-Step Poinsettia Dies and added some Snow White Micro Beads to the centres using CS Glue.

I stamped the sentiment from the Justrite Mini Tags Clear Stamp Set onto Coconut White Card using Cobalt Archival. I cut it out using a die from the Justrite Snowflake Mini Tags Die Set. I tucked the tag behind a poinsettia securing with CS Glue.

I assembled the card as shown adding another mat of Coconut White Card, some Blue Dazzlers to the corners of my frame and some 5mm White Pearls onto the centres of the Texture Paste Snowflakes.

Sue Wilson is continuing with her One Day Special on Hochanda today with shows at 9am, 12noon, 4pm and 7pm. I'm offering 10% discount on products I have on my website from the shows. You can find them here. Offer applies till midnight tonight or while stocks last. Discount will be applied at checkout.

Thanks for stopping by.

Julia.
www.juliawattscrafts.co.uk
Free card with all website orders (ask for one in the comments box at checkout).
Deal of the Day today (1st October) -
Sue Wilson Perspectives Collection - Thank You Circle only £6.99!

Friday, 30 September 2016

Freebie Friday

Hi Bloggers.

Here we go again - another Freebie Friday Card. We're going back a couple of years with this one -

You can read how this card was made here.

Leave a lovely comment below to go into the draw to win. I'll announce the winner on Monday.

Sue Wilson is lauching a One Day Special on Hochanda this evening at 8pm. I'm offering 10% discount on products I have on my website from the shows. You can find them here. Offer applies till midnight tomorrow night or while stocks last. Discount will be applied at checkout. 

Thanks for stopping by.

Julia.
www.juliawattscrafts.co.uk
Free card with all website orders (ask for one in the comments box at checkout).
Deal of the Day today (30th September) -
Creative Expressions Vintage Bronze Buttons only 99p per pack!

Thursday, 29 September 2016

The Magic of Christmas

Hi Bloggers.

I'm heading up to my parents this afternoon to take my Dad back to the hospital for some more tests. I have scheduled blog posts for the next couple of days but please be patient with website order as although Nathan is a very competent house sitter he really isn't clued up enough to get orders sent out yet.

Here's today's card which features a Pixie Powder technique that I demoed a few times on Hochanda on Sunday/Monday.

This is a very simple little 'proper' card, brilliant for batch makes.

So, for my latest favourite Pixie Powder Technique - I made a palette by sprinkling some Aqua Lagoon and Plum Twist CS Pixie Powder onto a piece of Coconut White Card. I spread it around using a Dusting Brush.

I then pressed the Justrite Snow Days Background Stamp into the powder palette - there is no need to ink the stamp with Perfect Medium unless you want a two-fer (see Hochanda Catchup Sunday 25th Sept 8pm). You will see that the background stamp now has Pixie Powder on it.

I put my palette to one side to use again and then spritzed the background stamp with water. I added a piece of Watercolour Card (it can be Coconut White) to the stamp and rubbed all over to transfer the image. And voila! Stamping with Pixie Powders!

It dries in just a couple of minutes.

I stamped the sentiment from the Justrite Inside and Outside Christmas Sentiments Stamp Set onto Coconut White Card using Cobalt Archival and cut it out using the Justrite Snowflake and Tags Dies. I cut the snowflake die out again out of Deep Blue Card. I glued them together, offsetting them slightly to give a shadow and added some 5mm White Pearls.

I added a mat of Deep Blue Card to my background and some more 5mm White Pearls and added to my card blank.

I stamped a sentiment on the inside, again from the Inside and Outside Christmas Sentiments Stamp Set using Cobalt Archival and job done!

If you'd like to have a go at this an many more backgrounds, my next Milton Keynes workshop is on Saturday 15th October. You can book via my website here.

My next workshop at Creative Expressions HQ in Kettering is a Stamping Masterclass on Wednesday 12th October. Here we will be doing lots of practice with a wide range of stamps and stamping mediums. You can book for this one via my website here.

Thanks for stopping by.

Julia.
www.juliawattscrafts.co.uk
Free card with all website orders (ask for one in the comments box at checkout).
Deal of the Day today (29th September) -
Spellbinders 6 x 6 Card Creator - Deco Lux only £13.99! (RRP £24.50)

Wednesday, 28 September 2016

Rows of Bells

Hi Bloggers.

Here's today's card -

I started by cutting both the dies together the from the Spellbinders Holiday Botanical Strip out of Milk Card. I cut them again, positioning the die below the first cut. I mounted the waste piece onto Antique Gold Pearl Card using a double layer of Creative Expressions Mounting Cushion. I glued the die cuts back in place in the aperture.

I cut the 2 dies again out of another piece of Milk Card and then the outer die only out of Antique Gols Pearl Card. I glued the die cuts together and added them to the centre of the card as shown using another double layer of Mounting Cushion. I added some 3mm Cream Pearls to the poinsettias at the top of each bell.

I assembled the card as shown adding some 8mm Cream Pearls and piercing around the edges using my Tim Holtz Ruler, Precision Probe and Piercing Mat. 

Thanks for stopping by.

Julia.
www.juliawattscrafts.co.uk
Free card with all website orders (ask for one in the comments box at checkout).
Deal of the Day today (28th September) -
Phill Martin Sentimentally Yours - Dragonfly Days Background only £4.99!