Hi Bloggers.
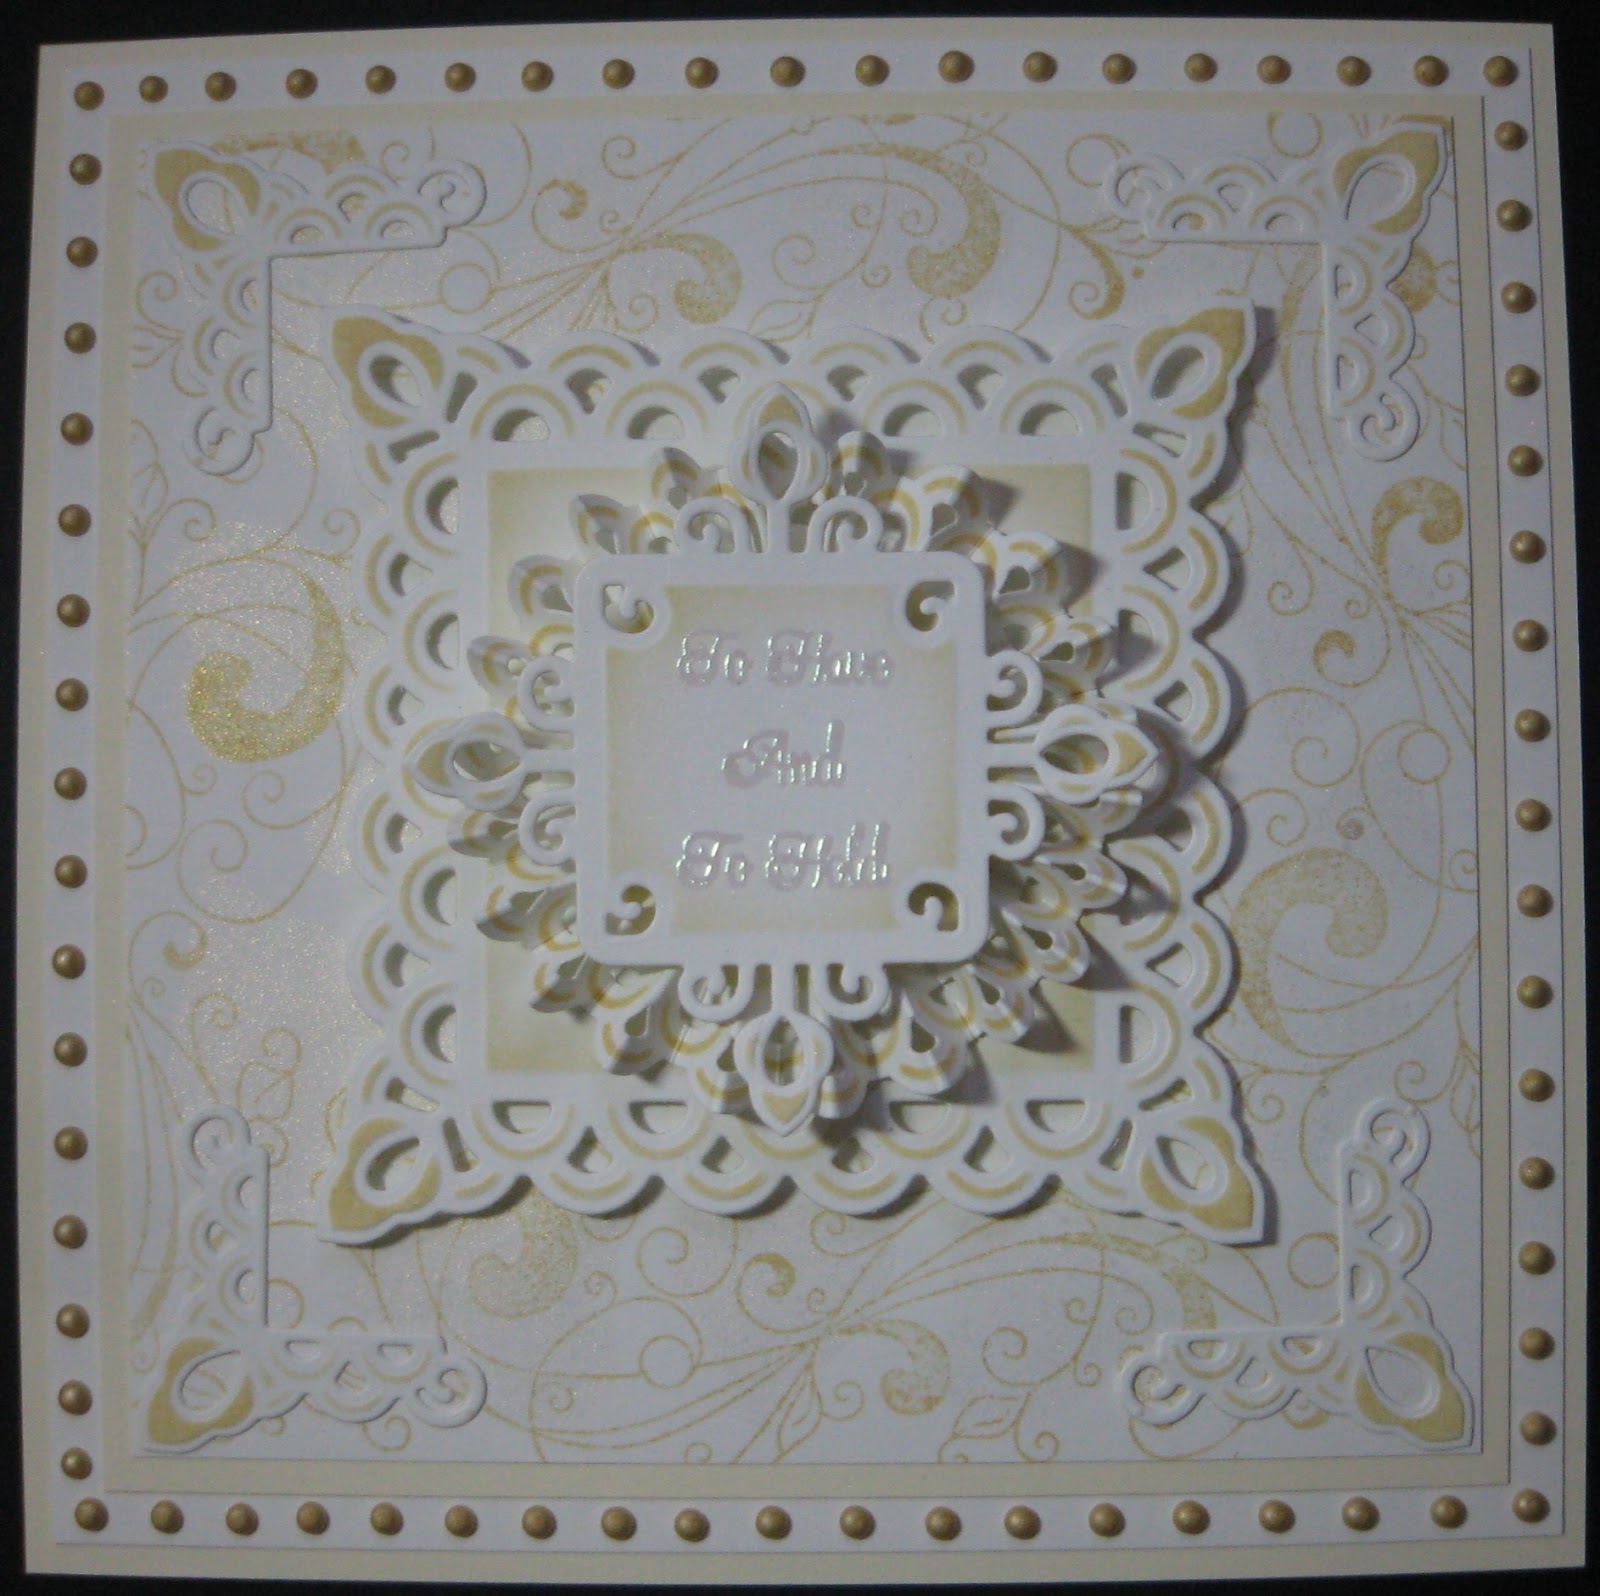
Here's today's card -
For the background, I started by cutting Sue Wilson's Classic Weaving Die out of Coconut White Card twice and Sue's Striped Weaving Die out of Milk Card twice. I
embossed the Classic die cuts with the Couture Creations Velvet Tea
Lights Embossing Folder. I glued the Striped die cuts on top of the
Classic ones. I cut one set into strips and wove it through the other.
I made a frame out of Coconut White and Milk Card using Sue's Ornate Pierced Squares Die Set. I added it to my background using 3D Foam Tape, trimming away the excess using scissors.
I added some mats of Coconut White and Milk Card and added an 8mm Cream Pearl to each corner.
I cut die #4 from Sue's Ornate Framed Happily Ever After Die Set out of Coconut White Card. I cut dies #3 and #4 from the same set out of Milk Card and glued the 2 die cuts together. I cut die #2 from Sue's Double Pierced Circles Set B out of Coconut White Card and die #2 from Sue's Double Pierced Circles out of Milk Card and stacked them onto the Ornate Frame. I cut the sentiment from the Ornate Framed Happily Ever After Die Set out of Milk Card.
I cut Sue's The Happy Couple Die out of Coconut White Card.
Thanks for stopping by.
Julia.
www.juliawattscrafts.co.uk
Free card with all website orders over £10 (ask for one in the comments box at checkout).
Deal of the Day today (1st February) - Sue Wilson New Zealand Collection : Hamilton only £9.99!
Showing posts with label Wedding Card. Show all posts
Wednesday, 1 February 2017
Tuesday, 26 April 2016
Sneak Peek
Hi Bloggers.
It's that time again - time for a sneak peek from the Spellbinders One Day Special on Hochanda which starts at 8pm tomorrow evening. It's the 2nd Part of the Wedding Collection designed by Becca Feeken.
It's always a hard decision - which sample to share first, but I made this one yesterday and I really like it so this is the one I'm sharing -
I started by creating a card blank (yes, this is an actual card!) by folding a piece of Custard Card in half, hanging part of the cutting edge of the largest die in the Spellbinders Swirling Grace Die Set on the outside of the fold. I ran it through the Spellbinders Platinum Machine.
I then ran the same die through the machine again with another piece of Custard Card. I used the 3 largest dies together and cut from Dark Grey Card. I glued this die cut to my single-sided Custard die cut and then popped them onto my card blank (I actually glued it to the back of my card blank to hide the marks from my cutting plate).
I stamped the sentiment from the Creative Expressions Wedding Cake Singles Set onto Custard Card using Watering Can Archival, quickly added CS Silver Lustre Embossing Powder and heat set. I cut it out using Spellbinders Ornamental Crest Die Set. I cut the little motif die from the Ornamental Crest Die Set out of Dark Grey Card twice. I covered them using Flake & Glitter Glue Highlighter and then added CS Sparkle Star Diamond Frost.
I tied abow using 2 lengths of Craft Consortium Silver Satin Ribbon and added Craft Consortium Vintage Rhinestone Charm (love these!).
I added a Craft Consortium Metal Silver Heart Charm : Amore. I didn't realise till I opened the packet that these have little flowers engraved on the reverse side so you can use then either way. I have actually glued this one down using CS Glue but you could add using twine. Oooh - you could make earrings out of them! I'll have to see if I have some findings!
I hope you agree that this is a lovely 'proper' card!
Julia.
www.juliawattscrafts.co.uk
Free card with all website orders (ask for one in the comments box at checkout).
Deal of the Day today (26th April) - Sue Wilson Classic Vase Die Set only £2.99!
It's that time again - time for a sneak peek from the Spellbinders One Day Special on Hochanda which starts at 8pm tomorrow evening. It's the 2nd Part of the Wedding Collection designed by Becca Feeken.
It's always a hard decision - which sample to share first, but I made this one yesterday and I really like it so this is the one I'm sharing -
I started by creating a card blank (yes, this is an actual card!) by folding a piece of Custard Card in half, hanging part of the cutting edge of the largest die in the Spellbinders Swirling Grace Die Set on the outside of the fold. I ran it through the Spellbinders Platinum Machine.
I then ran the same die through the machine again with another piece of Custard Card. I used the 3 largest dies together and cut from Dark Grey Card. I glued this die cut to my single-sided Custard die cut and then popped them onto my card blank (I actually glued it to the back of my card blank to hide the marks from my cutting plate).
I stamped the sentiment from the Creative Expressions Wedding Cake Singles Set onto Custard Card using Watering Can Archival, quickly added CS Silver Lustre Embossing Powder and heat set. I cut it out using Spellbinders Ornamental Crest Die Set. I cut the little motif die from the Ornamental Crest Die Set out of Dark Grey Card twice. I covered them using Flake & Glitter Glue Highlighter and then added CS Sparkle Star Diamond Frost.
I tied abow using 2 lengths of Craft Consortium Silver Satin Ribbon and added Craft Consortium Vintage Rhinestone Charm (love these!).
I added a Craft Consortium Metal Silver Heart Charm : Amore. I didn't realise till I opened the packet that these have little flowers engraved on the reverse side so you can use then either way. I have actually glued this one down using CS Glue but you could add using twine. Oooh - you could make earrings out of them! I'll have to see if I have some findings!
I hope you agree that this is a lovely 'proper' card!
Thanks for stopping by.
Julia.
www.juliawattscrafts.co.uk
Free card with all website orders (ask for one in the comments box at checkout).
Deal of the Day today (26th April) - Sue Wilson Classic Vase Die Set only £2.99!
Monday, 25 April 2016
ThankYou
Hi Bloggers.
Here's today's card -
I started by cutting the largest die in the Spellbinders Intertwined Spirals Die Set out of Coconut White Card. I then cut the same die plus the large fancy die together out of Milk Card and glued the 2 die cuts together.
I cut the small insert die from the same set out of Milk Card. I cut the 2 accents dies from the set out of Milk Card 3 times, making a total of 6 little die cuts. I used these to 'hold hands' with the insert die cut as shown adding a little CS Glue to keep secure. I cut the 'Thank You' from the Spellbinders Inviting Words Die Set and added it to the centre.
I assembled the card as shown piercing around the edges using my Tim Holtz Ruler, Precision Probe and Piercing Mat.
Easy peasy! The dies do all the work.
Julia.
www.juliawattscrafts.co.uk
Free card with all website orders (ask for one in the comments box at checkout).
Deal of the Day today (25th April) - Spellbinders Majesty Die Set only £9.99!
Here's today's card -
I started by cutting the largest die in the Spellbinders Intertwined Spirals Die Set out of Coconut White Card. I then cut the same die plus the large fancy die together out of Milk Card and glued the 2 die cuts together.
I cut the small insert die from the same set out of Milk Card. I cut the 2 accents dies from the set out of Milk Card 3 times, making a total of 6 little die cuts. I used these to 'hold hands' with the insert die cut as shown adding a little CS Glue to keep secure. I cut the 'Thank You' from the Spellbinders Inviting Words Die Set and added it to the centre.
I assembled the card as shown piercing around the edges using my Tim Holtz Ruler, Precision Probe and Piercing Mat.
Easy peasy! The dies do all the work.
The winner of the card from Freebie Friday on April 22nd is ....................
karenlotty
Please email me at juliawattscrafts@gmail.com with your address and I'll pop it in the post.
Thanks for stopping by.
Julia.
www.juliawattscrafts.co.uk
Free card with all website orders (ask for one in the comments box at checkout).
Deal of the Day today (25th April) - Spellbinders Majesty Die Set only £9.99!
Thursday, 14 April 2016
Spellbinders One Day Special continues today
Hi Bloggers.
The Spellbinders Wedding Collection One Day Special Shows continue today at 9am, 12noon, 4pm and 7pm. I hope you can join me.
My son, Nathan, is 20 today. I won't see him till much later this evening. I don't think he's all that bothered about that - lol!
Here's today's card -
I made a card blank out of Coconut White Card by using the largest die in the Spellbinders Intertwined Spirals Die Set - I folded an A4 sheet in half and placed the die with some of the outside edge outside the fold and ran it through the Spellbinders Platinum Machine. You may get a few marks on the back of the card from your plates but that's not a problem as you can cover that up.
I cut the outside die again out of Coconut White Card. I cut it again with the next sized die out of Black Gloss Card.
I cut the round die from the set out of Coconut White Card.
I made a couple of shoes out of Black Gloss Card - they look like patent shoes, don't they? I used the Spellbinders Ladies Shoe and added a Craft Consortium White Resin Rose.
I also used the Spellbinders Gents Shoe - you need to lace it up BEFORE you glue the pieces together. I used some Off White Satin Ribbon for the lace.
I stamped the sentiment from the Creative Expressions Bold Flourish Wedding Stationery Set onto Coconut White Card using Clear Perfect Medium and embossed with CS Black Detail Embossing Powder. I cut it out using Spellbinders Decorative Swallowtail Tags. I gave it a little shape and added it to my card as shown securing the tips with CS Glue and with a little 3D Foam under the centre.
I glued my card front to the back of my card blank so that any marks from my plates were hidden and the real back of my card looked nice and clean.
10% discount on products I have in stock from today's ODS continues on my website here. Offer is valid till midnight tonight. A couple of the dies have sold out and I can't get anymore at the moment, sorry. I've ordered the Arched Pennants and they're due in any day now.
Thanks for stopping by.
Julia.
www.juliawattscrafts.co.uk
Free card with all website orders (ask for one in the comments box at checkout).
Deal of the Day today (14th April) - Sue Wilson Best of Luck Die only £5.99!
The Spellbinders Wedding Collection One Day Special Shows continue today at 9am, 12noon, 4pm and 7pm. I hope you can join me.
My son, Nathan, is 20 today. I won't see him till much later this evening. I don't think he's all that bothered about that - lol!
Here's today's card -
I made a card blank out of Coconut White Card by using the largest die in the Spellbinders Intertwined Spirals Die Set - I folded an A4 sheet in half and placed the die with some of the outside edge outside the fold and ran it through the Spellbinders Platinum Machine. You may get a few marks on the back of the card from your plates but that's not a problem as you can cover that up.
I cut the outside die again out of Coconut White Card. I cut it again with the next sized die out of Black Gloss Card.
I cut the round die from the set out of Coconut White Card.
I made a couple of shoes out of Black Gloss Card - they look like patent shoes, don't they? I used the Spellbinders Ladies Shoe and added a Craft Consortium White Resin Rose.
I also used the Spellbinders Gents Shoe - you need to lace it up BEFORE you glue the pieces together. I used some Off White Satin Ribbon for the lace.
I stamped the sentiment from the Creative Expressions Bold Flourish Wedding Stationery Set onto Coconut White Card using Clear Perfect Medium and embossed with CS Black Detail Embossing Powder. I cut it out using Spellbinders Decorative Swallowtail Tags. I gave it a little shape and added it to my card as shown securing the tips with CS Glue and with a little 3D Foam under the centre.
I glued my card front to the back of my card blank so that any marks from my plates were hidden and the real back of my card looked nice and clean.
10% discount on products I have in stock from today's ODS continues on my website here. Offer is valid till midnight tonight. A couple of the dies have sold out and I can't get anymore at the moment, sorry. I've ordered the Arched Pennants and they're due in any day now.
Thanks for stopping by.
Julia.
www.juliawattscrafts.co.uk
Free card with all website orders (ask for one in the comments box at checkout).
Deal of the Day today (14th April) - Sue Wilson Best of Luck Die only £5.99!
Thursday, 12 March 2015
Thursday Two-Fer
Hi Bloggers.
Another two-fer starting with a sneak peek from tomorrow's show -
I've kept this very simple and very flat with the thought that when making wedding invites there's probably 50 or more to make and most will be sent in the post.
So, the background is a piece of Coconut White Card run through the Grand Calibur with the Creative Expressions Heart Lattice Embossing Folder.
I cut a panel from the Couture Creations Vintage Rose 6 x 6 Paper Pad (you can get 3 panels from each sheet). I ran a Perfect Medium Ink Pad along the edges of the panel, dipped it into Cosmic Shimmer Gold Detail Embossing Powder and heat set.
I cut a Couture Creations Touch of Love Die out of Coconut White Card. I added Perfect Medium all over and then dusted with Cosmic Shimmer Enchanted Gold Mica Powder.
I stamped the sentiment from the Creative Expressions Vintage Typewriter Wedding Stationery Stamp Set using Perfect Medium and embossed with Cosmic Shimmer Gold Detail Embossing Powder. I cut it out using Spellinders A2 Matting Basics A and inked through the die with Tattered Rose Distress Ink.
I assembled the card as shown adding a few 3mm Cream Pearls.
Here's today's second card -
For the background, I ran a piece of Coconut White Card through the Grand Calibur with the Creative Expressions Cross Stitch PinPoint Embossing Folder.
The borders are cut from Black Card using Spellbinders Draping Vines Elements. The little flowers are cut from Rich Red Card using Spellbinders Draping Vines Frame Die Set. I added some 3mm White Pearls to the centre of the flowers.
I stamped the sentiment from Phill Martin's Baroque Sentiments using Jet Black Archival. I popped a piece of Creative Expressions Double Sided Self Adhesive Sheet over the top of it and added Cosmic Shimmer Diamond Snow Glitter Jewels. I cut it out using a Spellbinders Circle Delight die and inked through the die with Black Soot Distress Ink.
I cut 2 frames out of Black Card using 2 of the dies in the Spellbinders Triple Floral Die Set.
I tied a bow using Black Crochet Ribbon and added a Crystal Sparkler.
I assembled the card as shown piercing around the edges.
Hope you've enjoyed today's two-fer.
Thanks for stopping by.
Julia.
Another two-fer starting with a sneak peek from tomorrow's show -
I've kept this very simple and very flat with the thought that when making wedding invites there's probably 50 or more to make and most will be sent in the post.
So, the background is a piece of Coconut White Card run through the Grand Calibur with the Creative Expressions Heart Lattice Embossing Folder.
I cut a panel from the Couture Creations Vintage Rose 6 x 6 Paper Pad (you can get 3 panels from each sheet). I ran a Perfect Medium Ink Pad along the edges of the panel, dipped it into Cosmic Shimmer Gold Detail Embossing Powder and heat set.
I cut a Couture Creations Touch of Love Die out of Coconut White Card. I added Perfect Medium all over and then dusted with Cosmic Shimmer Enchanted Gold Mica Powder.
I stamped the sentiment from the Creative Expressions Vintage Typewriter Wedding Stationery Stamp Set using Perfect Medium and embossed with Cosmic Shimmer Gold Detail Embossing Powder. I cut it out using Spellinders A2 Matting Basics A and inked through the die with Tattered Rose Distress Ink.
I assembled the card as shown adding a few 3mm Cream Pearls.
Here's today's second card -
For the background, I ran a piece of Coconut White Card through the Grand Calibur with the Creative Expressions Cross Stitch PinPoint Embossing Folder.
The borders are cut from Black Card using Spellbinders Draping Vines Elements. The little flowers are cut from Rich Red Card using Spellbinders Draping Vines Frame Die Set. I added some 3mm White Pearls to the centre of the flowers.
I stamped the sentiment from Phill Martin's Baroque Sentiments using Jet Black Archival. I popped a piece of Creative Expressions Double Sided Self Adhesive Sheet over the top of it and added Cosmic Shimmer Diamond Snow Glitter Jewels. I cut it out using a Spellbinders Circle Delight die and inked through the die with Black Soot Distress Ink.
I cut 2 frames out of Black Card using 2 of the dies in the Spellbinders Triple Floral Die Set.
I tied a bow using Black Crochet Ribbon and added a Crystal Sparkler.
I assembled the card as shown piercing around the edges.
Hope you've enjoyed today's two-fer.
Thanks for stopping by.
Julia.
Monday, 24 June 2013
For a Special Couple
Hi Bloggers.
A Wedding Card today -
I used Milk Card on this one. For the background, I inked through the Elegance Mask with Antique Linen Distress Ink using Cut n Dry Foam. I did this 3 times across the card.
I stamped the Wedding Belle using Perfect Medium and embossed with Cosmic Shimmer Olympic Gold Lustre Embossing Powder. I cut it out using Spellbinders Labels 29, with the image towards the right, and inked through the die with Antique Linen.
I stamped the sentiment that comes with the image, again using Perfect Medium and embossed with Olympic Gold Lustre. I cut it out using Spellbinders Fancy Postage Edge and inked through the die with Antique Linen.
I tied a bow using Cream Satin Edged Organza. I pressed a Fancy Pearl Embellishment into a Perfect Medium Pad, sprinkled with Olympic Gold Lustre, tapped off the excess and heat set.
I assembled the card as shown adding some Cream Pearls in the corners and some dots of Cosmic Shimmer Pearlescent PVA in Golden Pearl around the edges.
Thanks for stopping by.
Julia.
A Wedding Card today -
I used Milk Card on this one. For the background, I inked through the Elegance Mask with Antique Linen Distress Ink using Cut n Dry Foam. I did this 3 times across the card.
I stamped the Wedding Belle using Perfect Medium and embossed with Cosmic Shimmer Olympic Gold Lustre Embossing Powder. I cut it out using Spellbinders Labels 29, with the image towards the right, and inked through the die with Antique Linen.
I stamped the sentiment that comes with the image, again using Perfect Medium and embossed with Olympic Gold Lustre. I cut it out using Spellbinders Fancy Postage Edge and inked through the die with Antique Linen.
I tied a bow using Cream Satin Edged Organza. I pressed a Fancy Pearl Embellishment into a Perfect Medium Pad, sprinkled with Olympic Gold Lustre, tapped off the excess and heat set.
I assembled the card as shown adding some Cream Pearls in the corners and some dots of Cosmic Shimmer Pearlescent PVA in Golden Pearl around the edges.
Thanks for stopping by.
Julia.
Thursday, 20 June 2013
For a Special Couple
Hi Bloggers.
A Wedding Card today -
Easy peasy this one - can be done in any colour.
For the background, I popped my tan mat onto my base plate. I dusted a piece of Coconut White Card with my anti static bag and placed it dusted side up on my tan mat. I inked up the Heart Confetti Mask with Perfect Medium and placed it inked side down on top of the dusted card. I added the pink embossing plate and ran it through the Grand Calibur. The ink transferred to the debossed pattern. I added Cosmic Shimmer Silver Lustre Embossing Powder, tapped off the excess and heat set.
I stamped the Vintage Car using Perfect Medium and embossed with Silver Lustre. I cut it out using Spellbinders Labels 29.
I stamped the sentiment that comes with the Wedding Belle Stamp using Perfect Medium and embossed with Silver Lustre. I cut it out using Spellbinders Fancy Postage Edge.
I tied a bow using 2 lengths of White Sheer Wrinkled Edge Ribbon and added a Fancy Pearl Embellishment.
I assembled the card as shown adding some dots of Cosmic Shimmer Pearlescent PVA in Silver Lustre around the edges.
I'll be back tomorrow with a card from the Christmas Shows on Ideal World and Create & Craft.
Thanks for stopping by.
Julia
A Wedding Card today -
Easy peasy this one - can be done in any colour.
For the background, I popped my tan mat onto my base plate. I dusted a piece of Coconut White Card with my anti static bag and placed it dusted side up on my tan mat. I inked up the Heart Confetti Mask with Perfect Medium and placed it inked side down on top of the dusted card. I added the pink embossing plate and ran it through the Grand Calibur. The ink transferred to the debossed pattern. I added Cosmic Shimmer Silver Lustre Embossing Powder, tapped off the excess and heat set.
I stamped the Vintage Car using Perfect Medium and embossed with Silver Lustre. I cut it out using Spellbinders Labels 29.
I stamped the sentiment that comes with the Wedding Belle Stamp using Perfect Medium and embossed with Silver Lustre. I cut it out using Spellbinders Fancy Postage Edge.
I tied a bow using 2 lengths of White Sheer Wrinkled Edge Ribbon and added a Fancy Pearl Embellishment.
I assembled the card as shown adding some dots of Cosmic Shimmer Pearlescent PVA in Silver Lustre around the edges.
I'll be back tomorrow with a card from the Christmas Shows on Ideal World and Create & Craft.
Thanks for stopping by.
Julia
Tuesday, 18 June 2013
Love
Hi Bloggers.
I had a request to share this demo card from Sunday -
For the background, I spritzed some Coconut White Card with Cosmic Shimmer Pearl Mist. Once dry, I popped it through the Grand Calibur with the Couture Creations Extra Flint Embossing Folder. I ran it through a second time to extend the design.
I stamped the Wedding Belle Stamp using Perfect Medium and embossed with Cosmic Shimmer Marine Sea Lustre Embossing Powder (in the show I used Lapis Sapphire Lustre). I cut the image out using scissors. I cut 2 Spellbinders Asian Motifs. I trimmed 1 sided off each of them and glued them together to make a large frame. I cut a Spellbinders Labels 29 and at the emboss stage added the Moroccan Mask. I inked through the die with Cloudy Blue Adirondack Dye Ink.
I stamped the sentiment that comes with the Damask Heart using Perfect Medium and embossed with Marine Sea Lustre (I used Lapis Sapphire Lustre in the show). I cut it out using Spellbinders Labels 25 (I used Labels 29 in the show) and inked through the die with Cloudy Blue.
I tied a bow using White Satin Edged Organza and added a Fancy Pearl Embellishment.
I assembled the card as shown adding some White Pearls in the corners and some dots of Cosmic Shimmer Pearlescent PVA in White around the edges.
Thanks for stopping by.
Julia.
I had a request to share this demo card from Sunday -
For the background, I spritzed some Coconut White Card with Cosmic Shimmer Pearl Mist. Once dry, I popped it through the Grand Calibur with the Couture Creations Extra Flint Embossing Folder. I ran it through a second time to extend the design.
I stamped the Wedding Belle Stamp using Perfect Medium and embossed with Cosmic Shimmer Marine Sea Lustre Embossing Powder (in the show I used Lapis Sapphire Lustre). I cut the image out using scissors. I cut 2 Spellbinders Asian Motifs. I trimmed 1 sided off each of them and glued them together to make a large frame. I cut a Spellbinders Labels 29 and at the emboss stage added the Moroccan Mask. I inked through the die with Cloudy Blue Adirondack Dye Ink.
I stamped the sentiment that comes with the Damask Heart using Perfect Medium and embossed with Marine Sea Lustre (I used Lapis Sapphire Lustre in the show). I cut it out using Spellbinders Labels 25 (I used Labels 29 in the show) and inked through the die with Cloudy Blue.
I tied a bow using White Satin Edged Organza and added a Fancy Pearl Embellishment.
I assembled the card as shown adding some White Pearls in the corners and some dots of Cosmic Shimmer Pearlescent PVA in White around the edges.
Thanks for stopping by.
Julia.
Sunday, 10 March 2013
To Have and to Hold
Hi Bloggers.
Happy Mother's Day. Kathryn came home on Friday (last minute decision) and is staying till Wednesday which is lovely. Unfortunately, I have to spend most to spend most of the time prepping for the Pick of the Week so won't get to spend much time with her. Sometimes this job isn't quite so much fun!
Here's today's card -
For the background, I used Coconut White card and spritzed through the Heart Confetti Mask with the Cosmic Shimmer Sunlight Mist Mister. I then stamped one of the flourishes from the Eco Green Embellishing Flourishes Stamp Set using Antique Linen Distress Ink. I cut 4 corners using the Spellbinders Asian Accents die set and inked through the die with Antique Linen.
I cut a large square motif using the Spellbinders Asian Motifs die set and inked through the die with Antique Linen. I cut 2 of the circle motifs from the Asian Accents die set and inked though the die with Antique Linen. I scored then right across the centre on every peak of the design and then turned then over and scored across the centre on every lower part of the design (hope that makes sense - if you have the die set it probably makes more sense!). I cut to the centre on each one and then concertina folded. I glued the 2 pieces together using Cosmic Shimmer Glue.
I stamped the sentiment from the Creative Expressions From the Heart Stamp Set using Perfect Medium and embossed with Cosmic Shimmer Lapis Pearl Lustre Embossing Powder. I cut it out using a smaller motif from the Asian Motifs die set and inked through the die with Antique Linen.
I assembled the card as shown adding some dots of Cosmic Shimmer Pearlescent PVA in Golden Pearl around the edges.
Thanks for stopping by.
Julia.
Happy Mother's Day. Kathryn came home on Friday (last minute decision) and is staying till Wednesday which is lovely. Unfortunately, I have to spend most to spend most of the time prepping for the Pick of the Week so won't get to spend much time with her. Sometimes this job isn't quite so much fun!
Here's today's card -
For the background, I used Coconut White card and spritzed through the Heart Confetti Mask with the Cosmic Shimmer Sunlight Mist Mister. I then stamped one of the flourishes from the Eco Green Embellishing Flourishes Stamp Set using Antique Linen Distress Ink. I cut 4 corners using the Spellbinders Asian Accents die set and inked through the die with Antique Linen.
I cut a large square motif using the Spellbinders Asian Motifs die set and inked through the die with Antique Linen. I cut 2 of the circle motifs from the Asian Accents die set and inked though the die with Antique Linen. I scored then right across the centre on every peak of the design and then turned then over and scored across the centre on every lower part of the design (hope that makes sense - if you have the die set it probably makes more sense!). I cut to the centre on each one and then concertina folded. I glued the 2 pieces together using Cosmic Shimmer Glue.
I stamped the sentiment from the Creative Expressions From the Heart Stamp Set using Perfect Medium and embossed with Cosmic Shimmer Lapis Pearl Lustre Embossing Powder. I cut it out using a smaller motif from the Asian Motifs die set and inked through the die with Antique Linen.
I assembled the card as shown adding some dots of Cosmic Shimmer Pearlescent PVA in Golden Pearl around the edges.
Thanks for stopping by.
Julia.
Tuesday, 12 June 2012
Labels Thirteen
Hi Bloggers.
A mixed bag of comments from the post yesterday which is what I expected. It is good to know that even if you didn't like the image or the colour of the background, there was still something there that you could perhaps get a little inspiration from. The Radiant Embossing Folder used in yesterday's post is one from last month's release from Couture Creations. I'm hoping that it will be on the show on 25th June.
Today's card should appeal to more of you. It features the frame that I cut from Spellbinders Labels Thirteen towards the end of the 7pm show on Saturday. Usually, die cuts from the shows end up in a big bag of bits and pieces that I may use sometime but never do - I think we've all got one of those. But, this frame was so lovely and I knew what I could do with it so I made this card. It was so quick to make but I think it's quite elegant.

Just to re-cap, the frame was cut from the largest of the Labels Thirteen dies, I missed the next 2 sizes and used the one after that to cut the inside edge of the frame. I used pearlescent ivory card. At the emboss stage I added the Small Polka Dots Mask making sure that the cutting edge of the die was going into my tan mat and the mask was placed on top.

I stamped the sentiment from the Creative Expressions Bride & Groom Stamp Set using Coffee Archival and embossed with Cosmic Shimmer Clear Embossing Powder. I cut it out using the next size up of Labels Thirteen to the one I used for the centre of my frame. I didn't bother to emboss it as the edge was going to be hidden.
For the background I popped the Couture Creations Cultivated Embossing Folder through the Grand Calibur with some white card. I put it though a second time to extend the pattern. I then inked all over with Eco Green Yellow Damasque Dye Ink using Cut & Dry Foam.

I added some of the new Guipure Duchess Lace in Cream, which is available via Creative Expressions Stockist, along the side of the background. This is such a pretty lace - just a little really adds a special touch to your project. I then added some 6mm super sticky tape along the inside edge of it and ruffled some cream Vintage Ribbon along it. I tied a bow using 2 lengths of the cream ribbon and added it to the ruffled border. I made a flower out of the ivory pearlescent card using 2 of the smaller dies from the Spellbinders Rose Creations die set. I popped a pearl in the centre and added it to my bow.

I finished the card off with a couple of Decorative Stick Pins in Cream Pearl and some dots of Cosmic Shimmer Pearlescent PVA in Golden Pearl.
Hope you like the card.
Thanks for stopping by.
Julia.
A mixed bag of comments from the post yesterday which is what I expected. It is good to know that even if you didn't like the image or the colour of the background, there was still something there that you could perhaps get a little inspiration from. The Radiant Embossing Folder used in yesterday's post is one from last month's release from Couture Creations. I'm hoping that it will be on the show on 25th June.
Today's card should appeal to more of you. It features the frame that I cut from Spellbinders Labels Thirteen towards the end of the 7pm show on Saturday. Usually, die cuts from the shows end up in a big bag of bits and pieces that I may use sometime but never do - I think we've all got one of those. But, this frame was so lovely and I knew what I could do with it so I made this card. It was so quick to make but I think it's quite elegant.
Just to re-cap, the frame was cut from the largest of the Labels Thirteen dies, I missed the next 2 sizes and used the one after that to cut the inside edge of the frame. I used pearlescent ivory card. At the emboss stage I added the Small Polka Dots Mask making sure that the cutting edge of the die was going into my tan mat and the mask was placed on top.
I stamped the sentiment from the Creative Expressions Bride & Groom Stamp Set using Coffee Archival and embossed with Cosmic Shimmer Clear Embossing Powder. I cut it out using the next size up of Labels Thirteen to the one I used for the centre of my frame. I didn't bother to emboss it as the edge was going to be hidden.
For the background I popped the Couture Creations Cultivated Embossing Folder through the Grand Calibur with some white card. I put it though a second time to extend the pattern. I then inked all over with Eco Green Yellow Damasque Dye Ink using Cut & Dry Foam.
I added some of the new Guipure Duchess Lace in Cream, which is available via Creative Expressions Stockist, along the side of the background. This is such a pretty lace - just a little really adds a special touch to your project. I then added some 6mm super sticky tape along the inside edge of it and ruffled some cream Vintage Ribbon along it. I tied a bow using 2 lengths of the cream ribbon and added it to the ruffled border. I made a flower out of the ivory pearlescent card using 2 of the smaller dies from the Spellbinders Rose Creations die set. I popped a pearl in the centre and added it to my bow.
I finished the card off with a couple of Decorative Stick Pins in Cream Pearl and some dots of Cosmic Shimmer Pearlescent PVA in Golden Pearl.
Hope you like the card.
Thanks for stopping by.
Julia.
Subscribe to:
Posts (Atom)