Hi Bloggers,
Today I'm sharing this card which again features Artist Spackle in the background -
The background for this card was made by popping some Artist Spackle onto a spare piece of Craft Sheet. I then added a few drops of Vintage Photo Distress Re-Inker. You could use Vintage Photo Distress Stain instead though the result may be a little lighter or you could compensate by adding quite a lot of the stain to the spackle.
Once happy with my spackle colour, I placed the That Special Touch Metal Effect Mask onto some white card and I spread my spackle over the whole area. I scraped off any excess with a squeege tool. I removed the mask and set aside to dry. I cleaned my tools and my mask with some warm soapy water. It's easy to clean the spackle off when it's wet but it's permanent when dry.
I stamped the Steam Engine Sketch from the Vintage Treasures stamp set onto some white card with Perfect Medium and embossed with Cosmic Shimmer Clear Embossing Powder. I then went over the image with Vintage Photo Distress Ink Pad and Cut & Dry Foam. I distressed the edges of the card with my scissors and then re-applied the Vintage Photo Distress Ink. I repeated this process for the sentiment which is on the same stamp set.
Once the Artist Spackle background was dry I inked around the edges with Vintage Photo Distress Ink and Cut & Dry Foam.
I made a mat for the background by inking up the edges of a piece of white card with Vintage Photo, distressing it with my scissors and going back over it again with the ink.
I assembled the card as shown adding some Creative Expressions Faux Screw Brads in Antique Gold in each corner.
Hope you like the card.
I'm entering this card into the following challenges -
Polka Doodles - Vintage/Retro
Make It Monday #71
Thanks for stopping by.
Julia.
Showing posts with label Artist Spackle. Show all posts
Saturday, 14 January 2012
Thursday, 12 January 2012
Following on from Yesterday
Hi Bloggers,
As promised, today's card has been made with the die cut taken from the background on yesterday's card -
The background for this card was made by popping some Artist Spackle onto a spare piece of Craft Sheet. I then added a few drops of Vintage Photo Distress Re-Inker. You could use Vintage Photo Distress Stain instead though the result may be a little lighter or you could compensate by adding quite a lot of the stain to the spackle.
Once happy with my spackle colour, I placed the That Special Touch Metal Effect Mask onto some ivory card and I spread my spackle over the whole area. I scraped off any excess with a squeege tool. I removed the mask and set aside to dry.
I cleaned my tools and my mask with some warm soapy water. It's easy to clean the spackle off when it's wet but it's permanent when dry.
I cut a faux nestie out of rust card and popped my saved die cut on to it. I stamped Mr. Inventor and the large engine plate from the Vintage Inventor stamp set using Jet Black Archival Ink onto some marine blue card and cut them out.
Once the Artist Spackle background was dry I inked around the edges with Vintage Photo Distress Ink and Cut & Dry Foam.
I assembled the card as shown adding some Creative Expressions Faux Screw Brads in Antique Gold.
Simple but effective.
Thanks for stopping by.
Julia.
As promised, today's card has been made with the die cut taken from the background on yesterday's card -
The background for this card was made by popping some Artist Spackle onto a spare piece of Craft Sheet. I then added a few drops of Vintage Photo Distress Re-Inker. You could use Vintage Photo Distress Stain instead though the result may be a little lighter or you could compensate by adding quite a lot of the stain to the spackle.
Once happy with my spackle colour, I placed the That Special Touch Metal Effect Mask onto some ivory card and I spread my spackle over the whole area. I scraped off any excess with a squeege tool. I removed the mask and set aside to dry.
I cleaned my tools and my mask with some warm soapy water. It's easy to clean the spackle off when it's wet but it's permanent when dry.
I cut a faux nestie out of rust card and popped my saved die cut on to it. I stamped Mr. Inventor and the large engine plate from the Vintage Inventor stamp set using Jet Black Archival Ink onto some marine blue card and cut them out.
Once the Artist Spackle background was dry I inked around the edges with Vintage Photo Distress Ink and Cut & Dry Foam.
I assembled the card as shown adding some Creative Expressions Faux Screw Brads in Antique Gold.
Simple but effective.
Thanks for stopping by.
Julia.
Tuesday, 10 January 2012
Another demo card from Saturday's Show
Hi Bloggers,
Today I'm sharing this card which I demonstrated on the 6pm show last Saturday. This one was sent out to the lucky winner who was drawn from the Cup of Chance after the show.
For the background on the burgundy card I stamped the rail track from the Vintage Inventor Stamp Set with Coffee Archival Ink all down the left-hand side of the card. Being an unmounted stamp makes it quite easy to line the stamp up with the previously stamped image.
Next I added some small images from the stamp sets using Frayed Burlap and Vintage Photo Distress Ink.
I popped a good amount of Vintage Photo Distress Stain onto a spare piece of craft sheet and then added a dollop of Artist Spackle to the ink and mixed it in well using a bone folder. Once I was happy with the colour and that it was mixed sufficiently, I placed my That Special Touch Mask - Metal Effect over a corner of my background and then added my dyed spackle on top scraping away any excess with my bone folder. I repeated the process in a second corner. I then put the background aside to dry and washed my craft sheet, bone folder and mask in warm soapy water. Artist Spackle comes off easily when wet but once dry it's permanent.
I put a piece of beige card into the Creative Expressions Bark Embossing Folder and ran it through my Grand Calibur. I tore around the embossed pattern and then inked the area with Vintage Photo Distress Ink using Cut & Dry Foam.
I stamped the steam train from the Vintage Illusion stamp set using Coffee Archival Ink and embossed using Cosmic Shimmer Clear Embossing Powder. I stamped the sentiment from the Vintage Treasures set just next to the train - again using the Coffee Archival and clear embossing powder. I cut the image out using the Spellbinders Curved Rectangles die and inked with Vintage Photo while still in the die.
I stamped and embossed and coloured some embellishment images from the sheets and added a couple of Creative Expressions Faux Screw Brads in Antique Gold.
I assembled the card as shown, making sure that the Artist Spackle was dry before doing so. I finished the card with some paper piercing all around the outside edge using my Tim Holtz Ruler.
Hope you enjoyed the demo if you watched on Saturday and have enjoyed this post.
Thanks for stopping by.
Julia.
Today I'm sharing this card which I demonstrated on the 6pm show last Saturday. This one was sent out to the lucky winner who was drawn from the Cup of Chance after the show.
For the background on the burgundy card I stamped the rail track from the Vintage Inventor Stamp Set with Coffee Archival Ink all down the left-hand side of the card. Being an unmounted stamp makes it quite easy to line the stamp up with the previously stamped image.
Next I added some small images from the stamp sets using Frayed Burlap and Vintage Photo Distress Ink.
I popped a good amount of Vintage Photo Distress Stain onto a spare piece of craft sheet and then added a dollop of Artist Spackle to the ink and mixed it in well using a bone folder. Once I was happy with the colour and that it was mixed sufficiently, I placed my That Special Touch Mask - Metal Effect over a corner of my background and then added my dyed spackle on top scraping away any excess with my bone folder. I repeated the process in a second corner. I then put the background aside to dry and washed my craft sheet, bone folder and mask in warm soapy water. Artist Spackle comes off easily when wet but once dry it's permanent.
I put a piece of beige card into the Creative Expressions Bark Embossing Folder and ran it through my Grand Calibur. I tore around the embossed pattern and then inked the area with Vintage Photo Distress Ink using Cut & Dry Foam.
I stamped the steam train from the Vintage Illusion stamp set using Coffee Archival Ink and embossed using Cosmic Shimmer Clear Embossing Powder. I stamped the sentiment from the Vintage Treasures set just next to the train - again using the Coffee Archival and clear embossing powder. I cut the image out using the Spellbinders Curved Rectangles die and inked with Vintage Photo while still in the die.
I stamped and embossed and coloured some embellishment images from the sheets and added a couple of Creative Expressions Faux Screw Brads in Antique Gold.
I assembled the card as shown, making sure that the Artist Spackle was dry before doing so. I finished the card with some paper piercing all around the outside edge using my Tim Holtz Ruler.
Hope you enjoyed the demo if you watched on Saturday and have enjoyed this post.
Thanks for stopping by.
Julia.
Tuesday, 3 January 2012
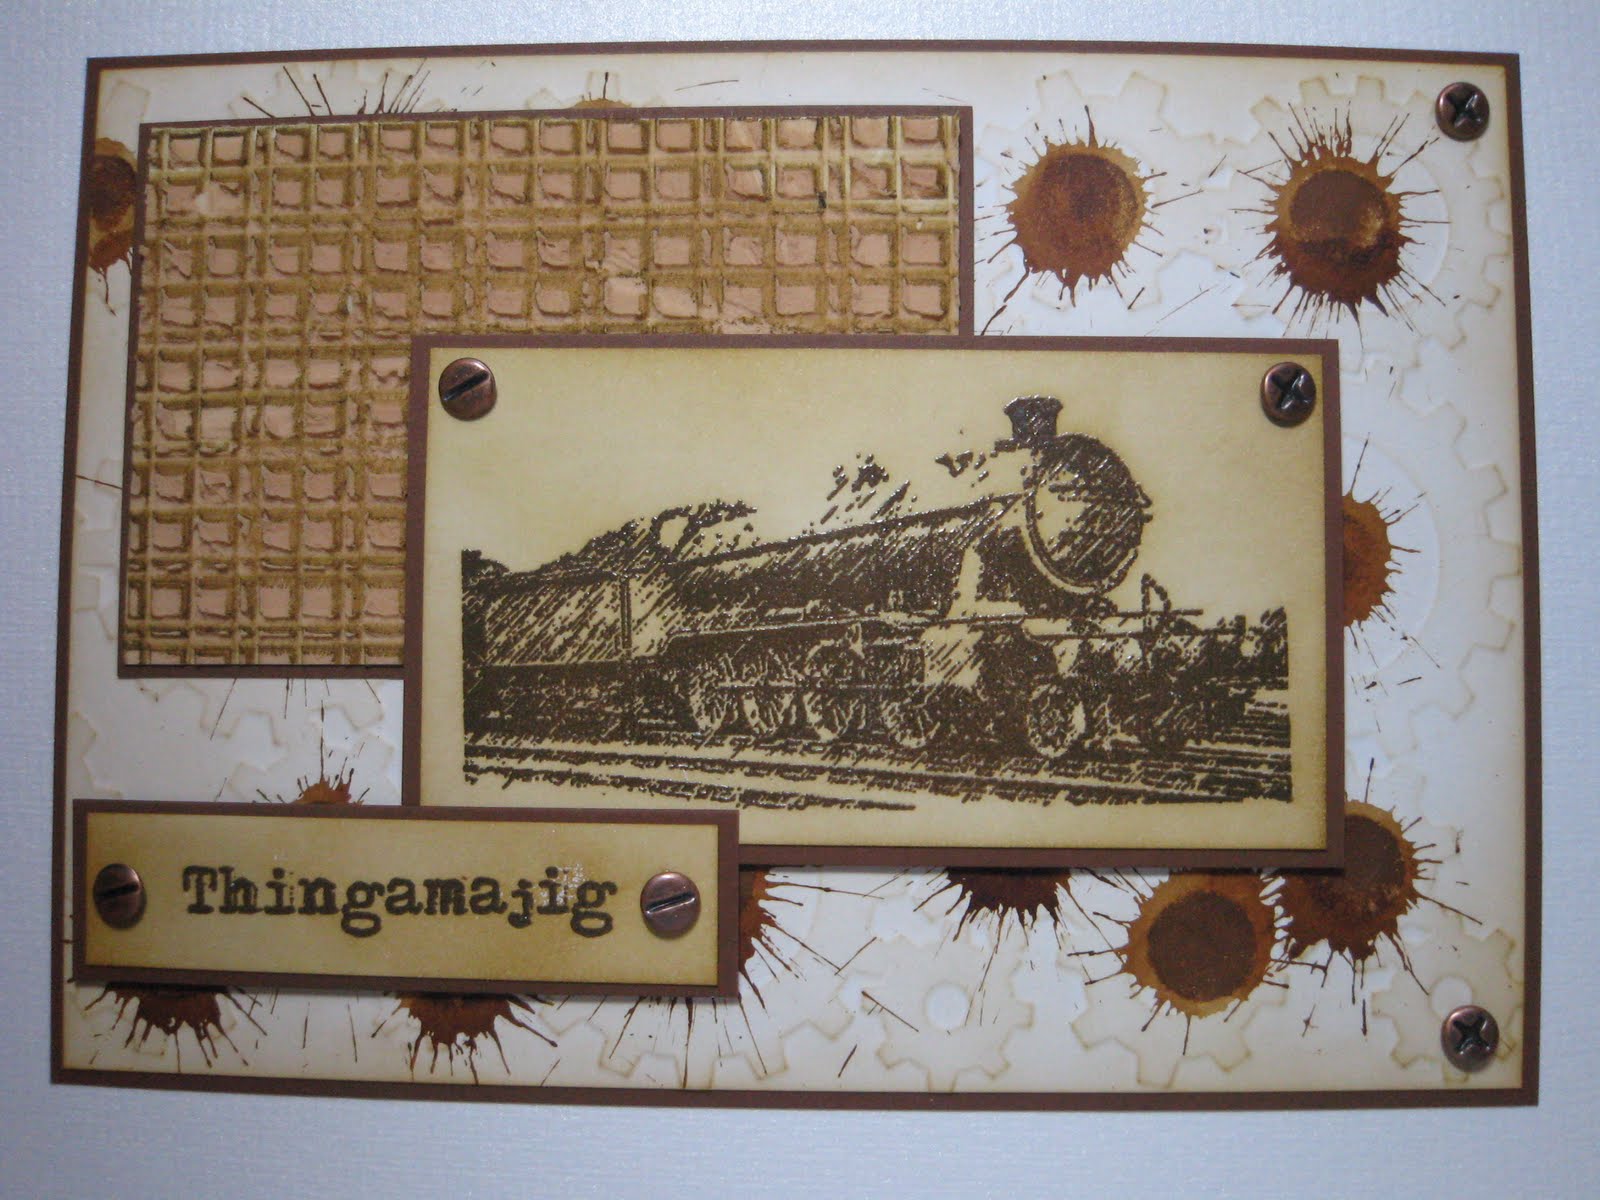
Thingamajig
Hi Bloggers,
I just love that Sam Poole put a 'Thingamajig' text stamp on her Vintage Inventor stamp set. What a fantastic word that is - can be used in so many situations!
Anyway, this is the card I'm sharing today which I've made for the show I'm doing on Create & Craft on Saturday.
First I put some Vintage Photo Distress Stain onto a spare piece of Craft Sheet and I added some Artist Spackle and mixed until the colour was blended evenly. Then I spread the dyed spackle onto a piece of card. I used a squeege tool to make it fairly even. Next I inked up the Creative Expressions Plaid stamp with Coffee Archival Ink and stamped into the Artist Spackle. I carefully removed the stamp and cleaned it thoroughly in warm soapy water and set the stamped spackle aside to dry. Cool, eh?
For my main background I ran some white card through the Grand Calibur with the That Special Touch Cogs Mask. I increased the size of the background by running though a second time making sure that the area that was already embossed remained outside of the plates. I then added some Vintage Photo Distress Ink with some Cut & Dry Foam. Using the Vintage Photo Distress Stain I splatted in the centre of each cog.
I stamped the Steam Train from the Vintage Illusion stamp set with Coffee Archival Ink and embossed using Cosmic Shimmer Clear Embossing Powder. I coloured the background with Vintage Photo Distress Ink. I stamped the coloured the sentiment in the same way.
I assembled the card as shown and added some Creative Expressions Faux Screw Brads in Antique Copper.
I'm entering this card into the following challenges -
Make It Monday #70
Simon Says Stamp - Anything Goes
Thanks for stopping by. Hope you can join me on Saturday (details on the left-hand side bar).
Julia.
I just love that Sam Poole put a 'Thingamajig' text stamp on her Vintage Inventor stamp set. What a fantastic word that is - can be used in so many situations!
Anyway, this is the card I'm sharing today which I've made for the show I'm doing on Create & Craft on Saturday.
First I put some Vintage Photo Distress Stain onto a spare piece of Craft Sheet and I added some Artist Spackle and mixed until the colour was blended evenly. Then I spread the dyed spackle onto a piece of card. I used a squeege tool to make it fairly even. Next I inked up the Creative Expressions Plaid stamp with Coffee Archival Ink and stamped into the Artist Spackle. I carefully removed the stamp and cleaned it thoroughly in warm soapy water and set the stamped spackle aside to dry. Cool, eh?
For my main background I ran some white card through the Grand Calibur with the That Special Touch Cogs Mask. I increased the size of the background by running though a second time making sure that the area that was already embossed remained outside of the plates. I then added some Vintage Photo Distress Ink with some Cut & Dry Foam. Using the Vintage Photo Distress Stain I splatted in the centre of each cog.
I stamped the Steam Train from the Vintage Illusion stamp set with Coffee Archival Ink and embossed using Cosmic Shimmer Clear Embossing Powder. I coloured the background with Vintage Photo Distress Ink. I stamped the coloured the sentiment in the same way.
I assembled the card as shown and added some Creative Expressions Faux Screw Brads in Antique Copper.
I'm entering this card into the following challenges -
Make It Monday #70
Simon Says Stamp - Anything Goes
Thanks for stopping by. Hope you can join me on Saturday (details on the left-hand side bar).
Julia.
Thursday, 29 December 2011
Blue & White Vintage Inventor
Hi Bloggers,
Today I'm sharing this card with you -
For the background on this one I've mixed some Faded Jeans Distress Ink Re-Inker (you can also use Distress Stain - the pads won't give you such an intense colour but if you only want a hint of colour you can use them) with some Eco Green Crafts Artist Spackle. I cut a square piece of white card and popped the That Special Touch Metal Effect Maskover it and dragged the Spackle mixture over the top using a tool which I think is called a squeegee.
Once I had scraped away the excess from the mask, I removed the mask from my card and popped it together with my craft sheet and tool into some warm soapy water. This is important as the spackle is permanent when dry. It washes off easily using warm soapy water.
I put my background aside to dry.
I stamped the blank ledger image from the Creative Expressions Vintage Treasures stamp set using Chipped Sapphire Distress Ink and embossed it using Cosmic Shimmer Clear Embossing Powder.
I inked up some white card with Faded Jeans Distress Ink and stamped Mr. Inventor (Vintage Inventor) and the square image (Vintage Treasures) using Jet Black Archival Ink.
I stamped the 'Inventor' text (Vintage Inventor) using Chipped Sapphire Distress Ink and embossed with clear powder. I dabbed some Faded Jeans Distress Ink over the top.
I assembled the card as shown, securing the Inventor text with staples and adding a Creative Expressions Faux Screw Brad in Antique Silver in each corner. I also did some faux stitching using a Sakura Fine Liner Blue Pen.
I'm entering this card into the following challenges -
Simon Says Stamp - Anything Goes
Make It Monday #69
I hope you like the card.
Thanks for stopping by.
Julia.
Today I'm sharing this card with you -
For the background on this one I've mixed some Faded Jeans Distress Ink Re-Inker (you can also use Distress Stain - the pads won't give you such an intense colour but if you only want a hint of colour you can use them) with some Eco Green Crafts Artist Spackle. I cut a square piece of white card and popped the That Special Touch Metal Effect Maskover it and dragged the Spackle mixture over the top using a tool which I think is called a squeegee.
Once I had scraped away the excess from the mask, I removed the mask from my card and popped it together with my craft sheet and tool into some warm soapy water. This is important as the spackle is permanent when dry. It washes off easily using warm soapy water.
I put my background aside to dry.
I stamped the blank ledger image from the Creative Expressions Vintage Treasures stamp set using Chipped Sapphire Distress Ink and embossed it using Cosmic Shimmer Clear Embossing Powder.
I inked up some white card with Faded Jeans Distress Ink and stamped Mr. Inventor (Vintage Inventor) and the square image (Vintage Treasures) using Jet Black Archival Ink.
I stamped the 'Inventor' text (Vintage Inventor) using Chipped Sapphire Distress Ink and embossed with clear powder. I dabbed some Faded Jeans Distress Ink over the top.
I assembled the card as shown, securing the Inventor text with staples and adding a Creative Expressions Faux Screw Brad in Antique Silver in each corner. I also did some faux stitching using a Sakura Fine Liner Blue Pen.
I'm entering this card into the following challenges -
Simon Says Stamp - Anything Goes
Make It Monday #69
I hope you like the card.
Thanks for stopping by.
Julia.
Subscribe to:
Posts (Atom)