Hi Bloggers.
Debby is hosting My 5 Favourite Cards from 2011. Here's my 5 (really difficult choice) -
The first is using the Road Trip stamp set from Tim Holtz -
The next uses the 'All That' stamp from the Kenny K Collection at Whimsy Stamps -
This one uses Mr. Inventor in Black & White -
This is one of my favourite stamps from Sugar Nellie. She's called Tiffany and she's absolutely gorgeous -
Finally, I've chosen this Mother's Day card. I was really pleased with how this one turned out -
Hope you've enjoyed your visit.
Thanks for dropping by.
Hope you have a wonderful New Year.
Julia.
Showing posts with label Polka Doodles. Show all posts
Saturday, 31 December 2011
Monday, 19 December 2011
Happy Anniversary
Hi Bloggers.
Today I'm sharing a card that I've made for my Mom & Dad for their Anniversary which is later this week.
It's only a small card - just 12cm square but it seemed appropriate as I wanted the sentiment to be the focal point.
The sentiment is from Lili of the Valley which I stamped in Jet Black Archival and embossed with Cosmic Shimmer Clear Embossing Powder. I added a bit of colour with Summer Haze Cosmic Shimmer Drawing Ink. I cut it out using a circle nestie and inked around the edges with Dusty Concord Distress Ink. I cut a Spellbinders Picot Edged Circle from purple card and mounted the sentiment on to it.
I cut some leaves out of the Spellbinders Foliage Die Set. I inked through the die on the lighter card with Dusty Concord.
I made a flower using the Spellbinders Spiral Blossom and some felt that I bought from Sam Poole Creative Studios.
I tied a tatty bow using two lengths of Violet Vintage Ribbon.
I assembled the card as shown. The paper is from Polka Doodles Sundae of Seasons. I finished the card off with a couple of Creative Expressions Decorative Stick Pins in White Pearl and added a purple gem in each corner.
I'm entering this card into the following challenges -
Sparkles Challenge - Anything But Christmas
Make It Monday #68
Hope you like the card.
Thanks for stopping by.
Julia.
Today I'm sharing a card that I've made for my Mom & Dad for their Anniversary which is later this week.
It's only a small card - just 12cm square but it seemed appropriate as I wanted the sentiment to be the focal point.
The sentiment is from Lili of the Valley which I stamped in Jet Black Archival and embossed with Cosmic Shimmer Clear Embossing Powder. I added a bit of colour with Summer Haze Cosmic Shimmer Drawing Ink. I cut it out using a circle nestie and inked around the edges with Dusty Concord Distress Ink. I cut a Spellbinders Picot Edged Circle from purple card and mounted the sentiment on to it.
I cut some leaves out of the Spellbinders Foliage Die Set. I inked through the die on the lighter card with Dusty Concord.
I made a flower using the Spellbinders Spiral Blossom and some felt that I bought from Sam Poole Creative Studios.
I tied a tatty bow using two lengths of Violet Vintage Ribbon.
I assembled the card as shown. The paper is from Polka Doodles Sundae of Seasons. I finished the card off with a couple of Creative Expressions Decorative Stick Pins in White Pearl and added a purple gem in each corner.
I'm entering this card into the following challenges -
Sparkles Challenge - Anything But Christmas
Make It Monday #68
Hope you like the card.
Thanks for stopping by.
Julia.
Thursday, 15 December 2011
Christmas Milton
Hi Bloggers,
Today I'm sharing this card -
The stamp is Milton in Hat from Wild Rose Studio. I stamped him in Memento Tuxedo Black and coloured with Promarkers. I used a Quickie Glue Pen on the furry parts of the hat and added some Cosmic Shimmer Aurora Crystal Glitter. You can see it really catches the light.
I inked up a Craftwork Cards frame with Chipped Sapphire Distress Ink. I printed the sentiment using my labelling machine and matted it onto cobalt blue card.
I cut the poinsettia from the Spellbinders Layered Poinsettias die set and inked with Chipped Sapphire while still in the die. I put the poinsettia together using Cosmic Shimmer Dries Clear Glue and added an Eco Green Glass Glintz in blue to the centre.
I assembled the card as shown. The backing paper is from the Polka Doodles CD Jingle Jangle (I think!).
I'm entering this card into the following challenges -
Oldie But A Goodie - Christmas Animals
Make It Monday #67
Hope you like the card.
Thanks for stopping by.
Julia
Today I'm sharing this card -
The stamp is Milton in Hat from Wild Rose Studio. I stamped him in Memento Tuxedo Black and coloured with Promarkers. I used a Quickie Glue Pen on the furry parts of the hat and added some Cosmic Shimmer Aurora Crystal Glitter. You can see it really catches the light.
I inked up a Craftwork Cards frame with Chipped Sapphire Distress Ink. I printed the sentiment using my labelling machine and matted it onto cobalt blue card.
I cut the poinsettia from the Spellbinders Layered Poinsettias die set and inked with Chipped Sapphire while still in the die. I put the poinsettia together using Cosmic Shimmer Dries Clear Glue and added an Eco Green Glass Glintz in blue to the centre.
I assembled the card as shown. The backing paper is from the Polka Doodles CD Jingle Jangle (I think!).
I'm entering this card into the following challenges -
Oldie But A Goodie - Christmas Animals
Make It Monday #67
Hope you like the card.
Thanks for stopping by.
Julia
Monday, 12 December 2011
Just Chillin'
Hi Bloggers,
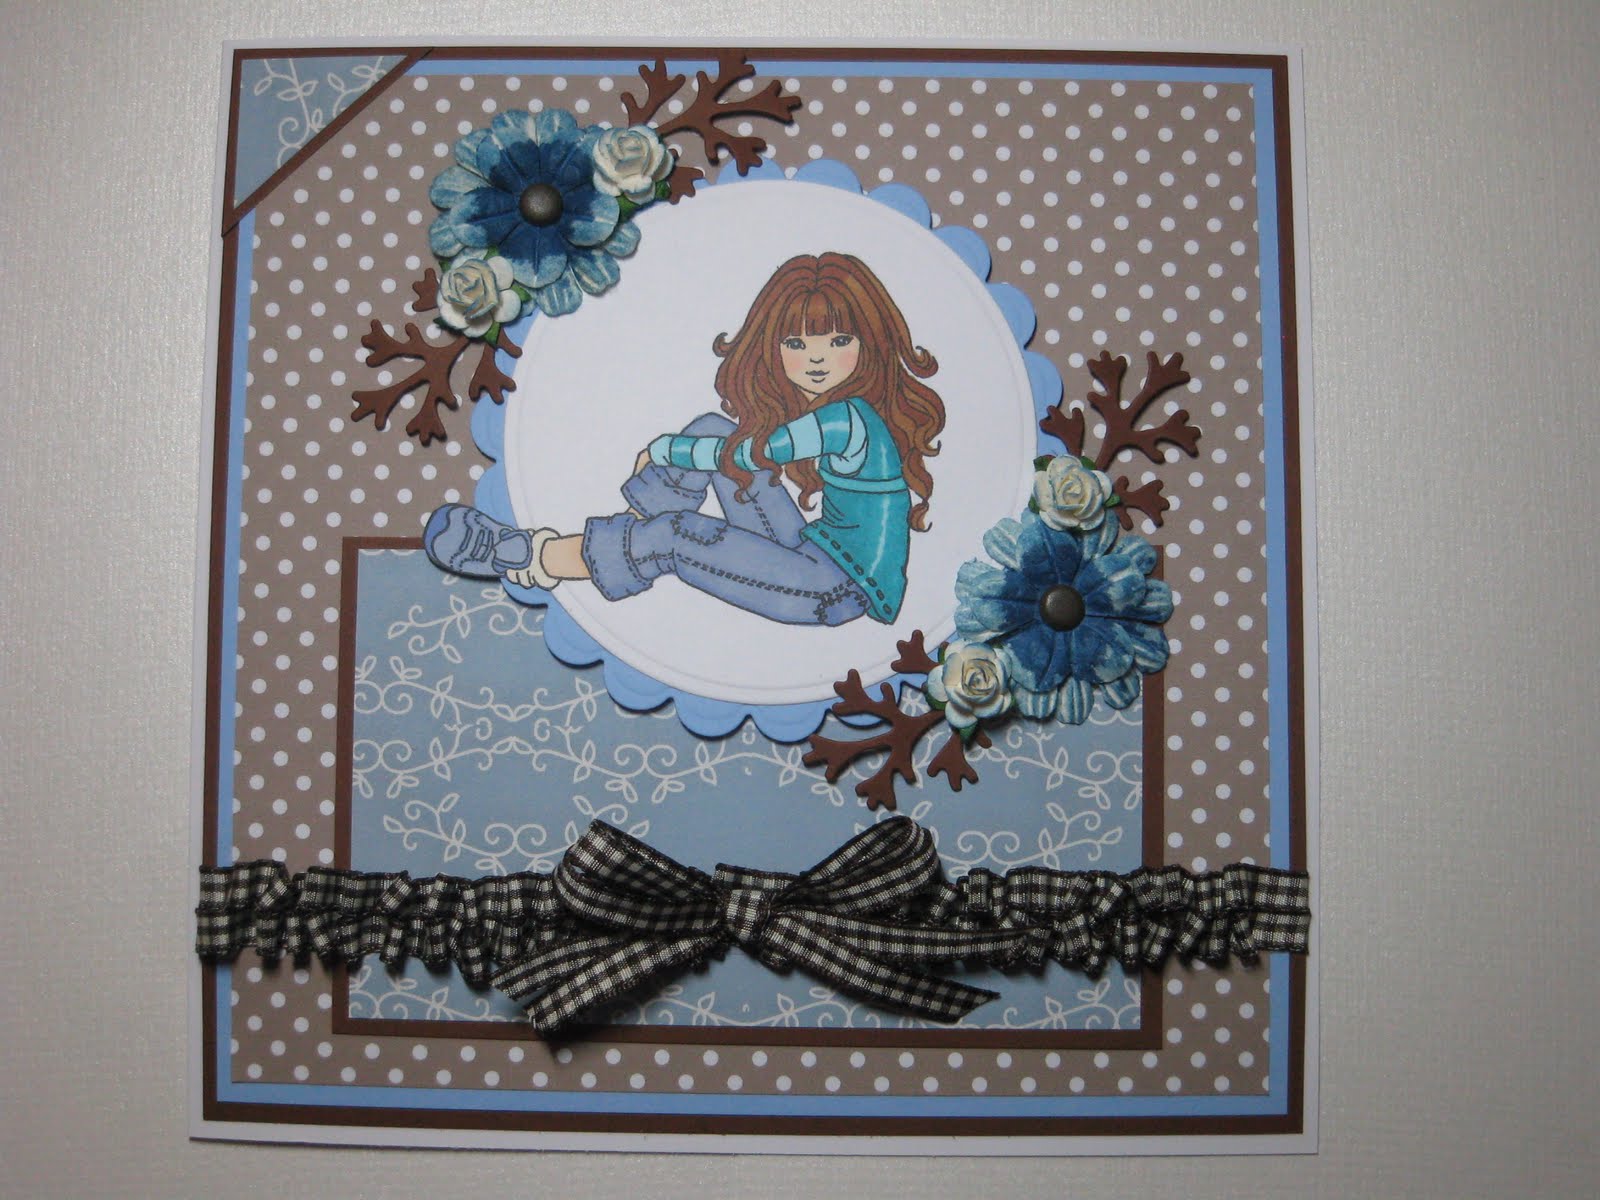
Today I have a card to share using the gorgeous Sugar Nellie stamp Chillax.
I stamped the image using Memento Tuxedo Black and coloured using promarkers. I cut the image out using the 'out of the box' technique and a circle nestability die. You can see that her foot is outside of the circle. I cut a mat out of marine blue card using a scallop nestie.
I coloured some Woodware Paper Flowers by splatting Faded Jeans Distress Stain in the centre and added some Faded Jeans Distress Ink around the edges. I added a brown American Crafts brad in the centre. I inked some white roses from my stash with the Faded Jeans Distress Ink. The leaves were cut using one of the Spellbinders Foliage dies.
I assembled the front of the card as shown using papers from Polka Doodles Sundae of Seasons CD. Before mounting it on my 8" x 8" Craftwork Cards blank, I ran some Woodware Hi-Tack Tape along the width of the design and ruffled some brown gingham ribbon along it. I did two lines of it. I added some Cosmic Shimmer Dries Clear Glue along the edges of the ruffles to secure them. I tied a messy bow two lengths of the ribbon and added it to the centre of the ruffled ribbon securing it with Cosmic Shimmer Dries Clear Glue.
I'm entering this card into the following challenges -
Allsorts Challenge - It Takes Two
The Sugar Bowl Challenge - 73 Cathy's Sketch
Make It Monday #67
I hope you like the card.
Thanks for stopping by.
Julia.
Today I have a card to share using the gorgeous Sugar Nellie stamp Chillax.
I stamped the image using Memento Tuxedo Black and coloured using promarkers. I cut the image out using the 'out of the box' technique and a circle nestability die. You can see that her foot is outside of the circle. I cut a mat out of marine blue card using a scallop nestie.
I coloured some Woodware Paper Flowers by splatting Faded Jeans Distress Stain in the centre and added some Faded Jeans Distress Ink around the edges. I added a brown American Crafts brad in the centre. I inked some white roses from my stash with the Faded Jeans Distress Ink. The leaves were cut using one of the Spellbinders Foliage dies.
I assembled the front of the card as shown using papers from Polka Doodles Sundae of Seasons CD. Before mounting it on my 8" x 8" Craftwork Cards blank, I ran some Woodware Hi-Tack Tape along the width of the design and ruffled some brown gingham ribbon along it. I did two lines of it. I added some Cosmic Shimmer Dries Clear Glue along the edges of the ruffles to secure them. I tied a messy bow two lengths of the ribbon and added it to the centre of the ruffled ribbon securing it with Cosmic Shimmer Dries Clear Glue.
I'm entering this card into the following challenges -
Allsorts Challenge - It Takes Two
The Sugar Bowl Challenge - 73 Cathy's Sketch
Make It Monday #67
I hope you like the card.
Thanks for stopping by.
Julia.
Sunday, 11 December 2011
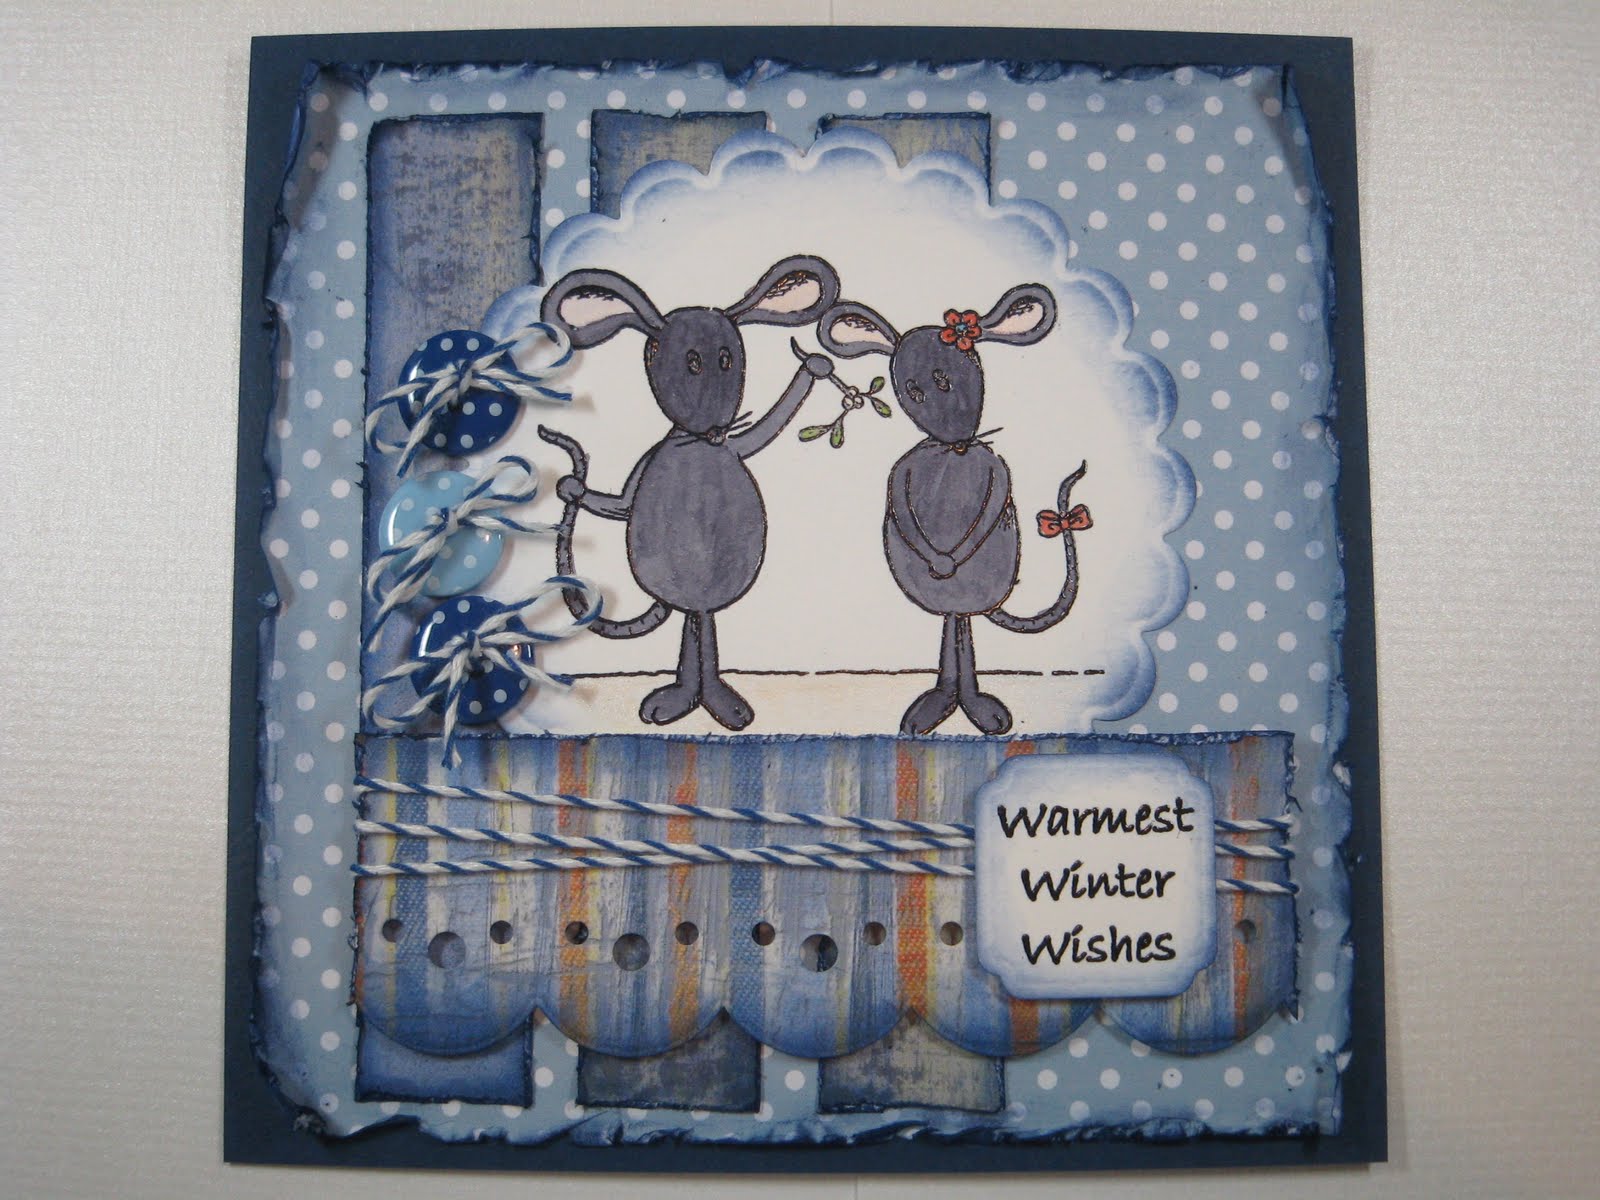
Mousey Winter Wishes
Hi Bloggers,
Continuing on from yesterday I have another Mousey card. This time the stars are the Tatty Button Mistletoe and Pipsqueak.
I stamped the image using Jet black Archival and embossed with Cosmic Shimmer Clear Embossing Powder. I coloured in using Cosmic Shimmer Drawing Inks. I cut the image out using a Scalloped Circle neastie and inked around the edges with Chipped Sapphire Distress Ink.
The polka dot paper is from the Polka Doodles Sundae Of Seasons CD. The other papers are Junkitz.
I cut the scalloped border using the Spellbinders Edgeabilities Classic Scallops dies. I distressed all the papers with my scissors and inked around the edges with Chipped Sapphire. I wrapped some blue Baker's Twine around the striped paper.
I stamped the sentiment from the Tatty Button Text 2 set in Jet Black Archival and embossed with Clear Powder. I cut it out using a Spellbinders Labels Twelve die.
I assembled the card as shown and added some Polka Dot buttons with Some Baker's Twine tied in a bow.
Hope you like the card.
Thanks for stopping by.
Julia
Continuing on from yesterday I have another Mousey card. This time the stars are the Tatty Button Mistletoe and Pipsqueak.
I stamped the image using Jet black Archival and embossed with Cosmic Shimmer Clear Embossing Powder. I coloured in using Cosmic Shimmer Drawing Inks. I cut the image out using a Scalloped Circle neastie and inked around the edges with Chipped Sapphire Distress Ink.
The polka dot paper is from the Polka Doodles Sundae Of Seasons CD. The other papers are Junkitz.
I cut the scalloped border using the Spellbinders Edgeabilities Classic Scallops dies. I distressed all the papers with my scissors and inked around the edges with Chipped Sapphire. I wrapped some blue Baker's Twine around the striped paper.
I stamped the sentiment from the Tatty Button Text 2 set in Jet Black Archival and embossed with Clear Powder. I cut it out using a Spellbinders Labels Twelve die.
I assembled the card as shown and added some Polka Dot buttons with Some Baker's Twine tied in a bow.
Hope you like the card.
Thanks for stopping by.
Julia
Wednesday, 7 December 2011
Let It Snow Tatty
Hi Bloggers,
First I'd like to say thank everyone so much for your support on my first TV show yesterday. It was such fun.
So, today I'm sharing another of the samples from the show while I try and get my head around making something else.
I stamped the Tatty Button Let It Snow stamp in Jet Black Archival and embossed with Cosmic Shimmer Clear Embossing Powder. I coloured the image with Cosmic Shimmer Drawing Inks. I inked around the edges of the image with Black Soot Distress Ink.
The sentiment is from the Tatty Button Text 2 set. It's actually only 1 line of it as the saying appears 3 times on the stamp. I stamped it in Jet Black Archival and embossed in clear.
I embossed a piece of Dusky Pink Colorcore card with the Couture Creations Drink Me Embossing Folder and sanded it to highlight the pattern. I inked around the edges of some Polka Dot backing paper printed from the Polka Doodles Sundae of Seasons CD with Black Soot Distress Ink.
I cut a border using the Spellbinders Classic Scallops Edgeabilities die set.
The snowflakes are from the Spellbinders Create-A-Flake die set and have been inked with Black Soot while still in the die.
I assembled the card as shown and added Cosmic Shimmer White Pearlescent PVA all around the edge of my card, on the snowflakes and on the snow on the image.
I'm entering this card into the following challenges -
Charisma Cardz - Challenge 47 Seeing Spots
Make It Monday #66
Thanks for stopping by.
Julia
First I'd like to say thank everyone so much for your support on my first TV show yesterday. It was such fun.
So, today I'm sharing another of the samples from the show while I try and get my head around making something else.
I stamped the Tatty Button Let It Snow stamp in Jet Black Archival and embossed with Cosmic Shimmer Clear Embossing Powder. I coloured the image with Cosmic Shimmer Drawing Inks. I inked around the edges of the image with Black Soot Distress Ink.
The sentiment is from the Tatty Button Text 2 set. It's actually only 1 line of it as the saying appears 3 times on the stamp. I stamped it in Jet Black Archival and embossed in clear.
I embossed a piece of Dusky Pink Colorcore card with the Couture Creations Drink Me Embossing Folder and sanded it to highlight the pattern. I inked around the edges of some Polka Dot backing paper printed from the Polka Doodles Sundae of Seasons CD with Black Soot Distress Ink.
I cut a border using the Spellbinders Classic Scallops Edgeabilities die set.
The snowflakes are from the Spellbinders Create-A-Flake die set and have been inked with Black Soot while still in the die.
I assembled the card as shown and added Cosmic Shimmer White Pearlescent PVA all around the edge of my card, on the snowflakes and on the snow on the image.
I'm entering this card into the following challenges -
Charisma Cardz - Challenge 47 Seeing Spots
Make It Monday #66
Thanks for stopping by.
Julia
Sunday, 4 December 2011
Get Well Wishes
Hi Bloggers,
Here I am again with a second post for today. I'm going for blue and brown with this card. Haven't used this colour combination before. I really like how it turned out.
The image is Lili of the Valley Little Nurse. I stamped with Memento Tuxedo Black and coloured with Promarkers. I cut the image out with a circle nestie and cut a mat out of brown card with a scalloped circle nestie.
The papers are from the Polka Doodles CD Sundae of Seasons. The gingham ribbon is Woodware. For some reason I ordered 6 rolls of that so I will be using it on quite a few of my cards!
I stamped the sentiment which is also Lili of the Valley and cut it out with a rectangle nestie and cut a mat out of brown card with rectangle scalloped nestie.
The card was assembled as shown.
I'm entering this card into the following challenges -
CES Challenge - Bear Necessities
Allsorts Challenge - Going Round in Circles
Lili of the Valley - Anything but a Christmas Card
Willow Sketchie Challenge - Anything Goes
Oldie But a Goodie - No Red or Green
Simon Says Stamp - Anything Goes
Hope you like the card.
Thanks for stopping by.
Julia
Here I am again with a second post for today. I'm going for blue and brown with this card. Haven't used this colour combination before. I really like how it turned out.
The image is Lili of the Valley Little Nurse. I stamped with Memento Tuxedo Black and coloured with Promarkers. I cut the image out with a circle nestie and cut a mat out of brown card with a scalloped circle nestie.
The papers are from the Polka Doodles CD Sundae of Seasons. The gingham ribbon is Woodware. For some reason I ordered 6 rolls of that so I will be using it on quite a few of my cards!
I stamped the sentiment which is also Lili of the Valley and cut it out with a rectangle nestie and cut a mat out of brown card with rectangle scalloped nestie.
The card was assembled as shown.
I'm entering this card into the following challenges -
CES Challenge - Bear Necessities
Allsorts Challenge - Going Round in Circles
Lili of the Valley - Anything but a Christmas Card
Willow Sketchie Challenge - Anything Goes
Oldie But a Goodie - No Red or Green
Simon Says Stamp - Anything Goes
Hope you like the card.
Thanks for stopping by.
Julia
Grey and Lemon Christmas Card
Morning Bloggers,
When making Christmas cards I'm generally quite traditional and lean towards using red, green or blue. However, I really like yellow and grey together so I decided to use it on a Christmas card to see if it would work. I quite like how it turned out.
The stamp is Tatty's Christmas Tree from the Creative Expressions Tatty Button range. I stamped it in Memento London Fog. I just coloured in the stars on the tree with the Sunflower Cosmic Shimmer Matt Drawing Ink. I cut the image out using the largest of the Spellbinders Lattice Rectangles dies. I cut a faux nestie out using pale lemon card.
I stamped the sentiment from the Tatty Button Text 2 set in Memento London Fog and cut it out using a Spellbinders Labels Twenty-Three die and again made a faux nestie out of pale lemon card.
I cut a panel of grey card and embossed it using the Couture Creations Drink Me embossing folder. The backing paper is from Polka Doodles Sundae of Seasons CD.
I joined the embossed grey card and the yellow polka dot paper together with a piece of Nickle Mist Vintage Ribbon. I tied a messy bow using 2 lengths of the ribbon and added a Creative Expressions wooden button with some yellow Baker's Twine tied through it.
I cut 2 flourishes from the Tim Holtz Alterations Die Elegant Flourishes - one in pale lemon and one in grey and glued them in place with Cosmic Shimmer Dries Clear Glue as shown.
I'm entering this card in to the following challenges -
Make It Monday #65
Simon Says Stamp - Anything Goes
Charisma Cardz - Challenge 47 Seeing Spots
I hope you like the card.
Thanks for stopping by.
Julia
When making Christmas cards I'm generally quite traditional and lean towards using red, green or blue. However, I really like yellow and grey together so I decided to use it on a Christmas card to see if it would work. I quite like how it turned out.
The stamp is Tatty's Christmas Tree from the Creative Expressions Tatty Button range. I stamped it in Memento London Fog. I just coloured in the stars on the tree with the Sunflower Cosmic Shimmer Matt Drawing Ink. I cut the image out using the largest of the Spellbinders Lattice Rectangles dies. I cut a faux nestie out using pale lemon card.
I stamped the sentiment from the Tatty Button Text 2 set in Memento London Fog and cut it out using a Spellbinders Labels Twenty-Three die and again made a faux nestie out of pale lemon card.
I cut a panel of grey card and embossed it using the Couture Creations Drink Me embossing folder. The backing paper is from Polka Doodles Sundae of Seasons CD.
I joined the embossed grey card and the yellow polka dot paper together with a piece of Nickle Mist Vintage Ribbon. I tied a messy bow using 2 lengths of the ribbon and added a Creative Expressions wooden button with some yellow Baker's Twine tied through it.
I cut 2 flourishes from the Tim Holtz Alterations Die Elegant Flourishes - one in pale lemon and one in grey and glued them in place with Cosmic Shimmer Dries Clear Glue as shown.
I'm entering this card in to the following challenges -
Make It Monday #65
Simon Says Stamp - Anything Goes
Charisma Cardz - Challenge 47 Seeing Spots
I hope you like the card.
Thanks for stopping by.
Julia
Saturday, 3 December 2011
Snow Lady
Hi Bloggers,
Today I thought I'd share another sample for the Tatty Button Show on Tuesday. I've used the Creative Expressions Tatty Button Snowman stamp but he's become a 'her'.
I stamped the image in Jet Black Archival ink and embossed with Cosmic Shimmer Clear Embossing Powder. I coloured the image using Cosmic Shimmer Matt Drawing Inks. I punched a few mini flowers out of pink card and added a tiny spot of Cosmic Shimmer White Pearlescent PVA in the centre of each one. The handbag was made from a Woodware punch - really handy as it punches as 2 pieces so fits over my lady's arm nicely.
I cut the image out using a Spellbinders Labels Eight die and carefully inked around the edges with Spun Sugar Distress Ink and Cut & Dry Foam while the image was still in the die. I cut a mat out of pink card with the largest of the Spellbinders Lattice Rectangles dies. I really love that set.
All the backing papers are from the Polka Doodles Sundae of Seasons CD except for the long panel to the right of the image. This I made by randomly stamping the bow from the Tatty Button Accessories 2 set all over a piece of white card with Perfect Medium. I embossed the images with clear powder and then covered the card with Spun Sugar Distress Stain. The embossed images resisted the stain.
I stamped the sentiment from the Tatty Button Text 2 set in Jet Black Archival and embossed with clear powder. I cut it out using a circle nestie and cut a mat out of pink card using a scalloped circle nestie.
I stained a piece of cream lace with the Spun Sugar Distress Stain and added it to the back of my sentiment.
I added a couple of Creative Expressions White Pearl Stick Pins and some square gems to complete my card.
I'm entering this card into the following challenges -
Charisma Cardz - Challenge 47 Seeing Spots
Make It Monday #65
Simon Says Stamp - Anything Goes
Hope you like the card.
Thanks for stopping by.
Julia
Today I thought I'd share another sample for the Tatty Button Show on Tuesday. I've used the Creative Expressions Tatty Button Snowman stamp but he's become a 'her'.
I stamped the image in Jet Black Archival ink and embossed with Cosmic Shimmer Clear Embossing Powder. I coloured the image using Cosmic Shimmer Matt Drawing Inks. I punched a few mini flowers out of pink card and added a tiny spot of Cosmic Shimmer White Pearlescent PVA in the centre of each one. The handbag was made from a Woodware punch - really handy as it punches as 2 pieces so fits over my lady's arm nicely.
I cut the image out using a Spellbinders Labels Eight die and carefully inked around the edges with Spun Sugar Distress Ink and Cut & Dry Foam while the image was still in the die. I cut a mat out of pink card with the largest of the Spellbinders Lattice Rectangles dies. I really love that set.
All the backing papers are from the Polka Doodles Sundae of Seasons CD except for the long panel to the right of the image. This I made by randomly stamping the bow from the Tatty Button Accessories 2 set all over a piece of white card with Perfect Medium. I embossed the images with clear powder and then covered the card with Spun Sugar Distress Stain. The embossed images resisted the stain.
I stamped the sentiment from the Tatty Button Text 2 set in Jet Black Archival and embossed with clear powder. I cut it out using a circle nestie and cut a mat out of pink card using a scalloped circle nestie.
I stained a piece of cream lace with the Spun Sugar Distress Stain and added it to the back of my sentiment.
I added a couple of Creative Expressions White Pearl Stick Pins and some square gems to complete my card.
I'm entering this card into the following challenges -
Charisma Cardz - Challenge 47 Seeing Spots
Make It Monday #65
Simon Says Stamp - Anything Goes
Hope you like the card.
Thanks for stopping by.
Julia
Thursday, 1 December 2011
Blue and White Christmas Stepper Card
Hi Bloggers,
Today I have a Stepper Card to share -
I purchased a Hougie Board last weekend. The booklet that I got with it boasts that you can make the easiest stepper card with it. True! Making the blank for this card was easy peasy.
I stamped the Creative Expressions Tatty's Christmas Tree in Chipped Sapphire Distress Ink. I used a paint brush to draw some of the ink out around the edges of the layers of the tree, the pot and on some of the baubles. I used some Pearl Shine Cosmic Shimmer Drawing Ink on the garlands and the fairy.
I cut the image out using the largest of the Spellbinders Lattice Rectangles dies.
I cut some polka dot paper (from Polka Doodles Sundae of Seasons) to fit the large side panel and added my image with foam pads.
I cut a border using the Spellbinders Scalloped Edgeabilities dies and inked whilst still in the die with Chipped Sapphire Distress Ink. I added this to my front panel on the right.
I cut a panel to fit the middle section on the right of my card and popped it through my Cuttlebug with the Couture Creations Drink Me Embossing Folder. I inked the raised areas with Chipped Sapphire and added the panel to my card.
I added another piece of polka dot paper to my back panel. I stamped the sentiment from the Tatty Button Text 2 set using Chipped Sapphire Distress Ink and cut it out using a Spellbinders Labels Two die. I inked around the edges with Chipped Sapphire and added it to my card as shown.
Hope you like the card.
I'm entering this card into the following challenges -
Make It Monday #65
Simon Says Stamp - Anything Goes
Thanks for stopping by.
Julia.
Today I have a Stepper Card to share -
I purchased a Hougie Board last weekend. The booklet that I got with it boasts that you can make the easiest stepper card with it. True! Making the blank for this card was easy peasy.
I stamped the Creative Expressions Tatty's Christmas Tree in Chipped Sapphire Distress Ink. I used a paint brush to draw some of the ink out around the edges of the layers of the tree, the pot and on some of the baubles. I used some Pearl Shine Cosmic Shimmer Drawing Ink on the garlands and the fairy.
I cut the image out using the largest of the Spellbinders Lattice Rectangles dies.
I cut some polka dot paper (from Polka Doodles Sundae of Seasons) to fit the large side panel and added my image with foam pads.
I cut a border using the Spellbinders Scalloped Edgeabilities dies and inked whilst still in the die with Chipped Sapphire Distress Ink. I added this to my front panel on the right.
I cut a panel to fit the middle section on the right of my card and popped it through my Cuttlebug with the Couture Creations Drink Me Embossing Folder. I inked the raised areas with Chipped Sapphire and added the panel to my card.
I added another piece of polka dot paper to my back panel. I stamped the sentiment from the Tatty Button Text 2 set using Chipped Sapphire Distress Ink and cut it out using a Spellbinders Labels Two die. I inked around the edges with Chipped Sapphire and added it to my card as shown.
Hope you like the card.
I'm entering this card into the following challenges -
Make It Monday #65
Simon Says Stamp - Anything Goes
Thanks for stopping by.
Julia.
Wednesday, 30 November 2011
Tiffany in Blue
Hi Bloggers,
This is my second post today. Hope you've had a good day so far.
I wanted to share this card with you -
The image is called Tiffany and she's from Sugar Nellie. I've had her a while and have been putting off stamping her as there have been so many fab cards using her on The Sugar Bowl that I felt I may not be able to do her justice. Anyway, today I've taken the plunge and I'm pretty happy with the result.
I stamped Tiffany in Memento Tuxedo Black and coloured her with promarkers. She's in blue to follow the Ice and Snow theme on the Sugar Bowl Challenge this week.
I cut Tiffany out using the largest of the Spellbinders Lattice Rectangles dies. I cut some poinsettias out using the smallest 3 dies from the Spellbinders Layered Poinsettias die set and inked through the dies with Stormy Sky Distress Ink. I cut 2 of each size. I assembled the poinsettia and added a blue gem in the middle.
The sentiment is from Lili of the Valley. I didn't have quite the right size nestie for a mat for it so I used a Spellbinders Layered Poinsettias die to create the mat. Although I've made this card as a Birthday card, it could just as easily be a Christmas card instead if a different sentiment is used.
The backing papers are all from Polka Doodles Sundae of Seasons CD.
The card was assembled onto a Craftwork Cards 8" x 8" card blank as per Gayle's Sketch at The Sugar Bowl
I'm also entering this card into the following challenges -
Simon Says Stamp - Anything Goes
Make It Monday #65
Hope you like Tiffany as much as I do.
Thanks for stopping by.
Julia
This is my second post today. Hope you've had a good day so far.
I wanted to share this card with you -
The image is called Tiffany and she's from Sugar Nellie. I've had her a while and have been putting off stamping her as there have been so many fab cards using her on The Sugar Bowl that I felt I may not be able to do her justice. Anyway, today I've taken the plunge and I'm pretty happy with the result.
I stamped Tiffany in Memento Tuxedo Black and coloured her with promarkers. She's in blue to follow the Ice and Snow theme on the Sugar Bowl Challenge this week.
I cut Tiffany out using the largest of the Spellbinders Lattice Rectangles dies. I cut some poinsettias out using the smallest 3 dies from the Spellbinders Layered Poinsettias die set and inked through the dies with Stormy Sky Distress Ink. I cut 2 of each size. I assembled the poinsettia and added a blue gem in the middle.
The sentiment is from Lili of the Valley. I didn't have quite the right size nestie for a mat for it so I used a Spellbinders Layered Poinsettias die to create the mat. Although I've made this card as a Birthday card, it could just as easily be a Christmas card instead if a different sentiment is used.
The backing papers are all from Polka Doodles Sundae of Seasons CD.
The card was assembled onto a Craftwork Cards 8" x 8" card blank as per Gayle's Sketch at The Sugar Bowl
I'm also entering this card into the following challenges -
Simon Says Stamp - Anything Goes
Make It Monday #65
Hope you like Tiffany as much as I do.
Thanks for stopping by.
Julia
Saturday, 5 November 2011
Snowman Book Card
Hi Bloggers,
Today I'm sharing a very simple book shaped card made with the WS Designs Book Template.
I cut the base card out of a piece of purple A5 card stock using the WS Designs Book Template. I drew pencil lines to represent the pages in the book.
I stamped the Woodware Startstruck Snowman stamp with Memento ink and coloured with Promarkers. I cut the image out with the Spellbinders Lattice Rectangles die and inked around the edges with the new Seasonal Distress Ink Seedless Preserves.
I stamped the greeting (Creative Expressions) with Black Archival ink and cut it out using the Spellbinders Double-ended Tag die. Again I inked around the edges with the Seedless Preserves Distress Ink. I added some black Baker's Twine to the holes in the tag.
The backing paper is from the Polka Doodles Sundae of Seasons CD. I inked around the edges with the Seedless Preserves Distress Ink and added some faux stitching with a black fineliner pen.
I added some black Baker's Twine to some Polka Dot Buttons and tied it in a knot. The buttons are from Sam Poole Creative Studios. Aren't they lovely?
I'm entering this card into the following challenges -
Simon Says Stamp Challenge - Buttons
Polka Doodles Week 44 - Shaped Cards
Allsorts Challenge Week 128 - Anything But Square
Papertake Weekly Challenge - Anything Goes
Make it Monday #61
I do hope you like this simple, fun card.
Thanks for stopping by.
Julia.
Today I'm sharing a very simple book shaped card made with the WS Designs Book Template.
I cut the base card out of a piece of purple A5 card stock using the WS Designs Book Template. I drew pencil lines to represent the pages in the book.
I stamped the Woodware Startstruck Snowman stamp with Memento ink and coloured with Promarkers. I cut the image out with the Spellbinders Lattice Rectangles die and inked around the edges with the new Seasonal Distress Ink Seedless Preserves.
I stamped the greeting (Creative Expressions) with Black Archival ink and cut it out using the Spellbinders Double-ended Tag die. Again I inked around the edges with the Seedless Preserves Distress Ink. I added some black Baker's Twine to the holes in the tag.
The backing paper is from the Polka Doodles Sundae of Seasons CD. I inked around the edges with the Seedless Preserves Distress Ink and added some faux stitching with a black fineliner pen.
I added some black Baker's Twine to some Polka Dot Buttons and tied it in a knot. The buttons are from Sam Poole Creative Studios. Aren't they lovely?
I'm entering this card into the following challenges -
Simon Says Stamp Challenge - Buttons
Polka Doodles Week 44 - Shaped Cards
Allsorts Challenge Week 128 - Anything But Square
Papertake Weekly Challenge - Anything Goes
Make it Monday #61
I do hope you like this simple, fun card.
Thanks for stopping by.
Julia.
Wednesday, 2 November 2011
Tatty Button Snowman and Seasonal Distress Inks
Hi Bloggers!
Well, guess what the postie delivered to me this morning? The title of this post should be a big hint - yep, the seasonal distress ink sets as featured on Tim Holtz's blog.
It was really hard for me to finish my chores (there weren't many of them) before I could have a play.
For this card I've used Iced Spruce and Evergreen Bough from the Winter set.
I stamped the Creative Expressions Tatty Button Snowman with the Iced Spruce Distress Ink. I coloured him in with Grey Green and Tea Green promarkers. I really like the way they toned in with the distress ink. I cut the image out with an Oval nestie and inked around the edges with the Iced Spruce.
The back mat is an 8" x 8" piece of Colorcore Whitewash which is stuck onto a Craftwork Cards card blank. The scalloped oval mat has also been cut from the whitewash and so has the Doily Lace border using a Martha Stewart punch.
The Polka Dot backing paper is from Polka Doodles Sundae of Seasons CD. It's been distressed with scissors and inked with the Iced Spruce.
The long backing panel on the left has been made by stamping the snowflake from the Creative Expressions Christmas Swirl set with Perfect Medium and then embossing it with Clear embossing powder. I then inked the area with the Iced Spruce and Evergreen Bough distress inks using Cut & Dry foam. I wrapped some fluffy white yarn around it.
I made some background paper by inking with the Iced Spruce and the Evergreen Bough and then spritzed lightly with water. I then blotted with some kitchen roll. This gave a nice mottled effect. I cut some snowflakes out using the Spellbinders Create a Flake die set from the inked backing paper I had created and from the whitewash. I layered them up and added Woodware Snowflake brads to two of them and Craftime buttons to the other two. The pearly stringy embellishment is meant to be used for a wedding piece of some sort (I've had it years!).
The lettering that I used for the sentiment is chipboard - I think it's Maya Road. I inked up the letters with the Evergreen Bough Distress Ink and once dry I painted them with Cosmic Shimmer Glitter Paint Aurora Sparkle.
The card was assembled as per the Sunday Sketch and Stamp Challenge this week.
I'm also entering this card into the following challenges -
Bunny Zoe's Crafts Challeng 17 - Lace it up
I love Promarkers Challenge 90 - Glitter & Glitz
Crafters Companion Challenge 18 - Let it Snow
Hope you like the card.
Thanks for stopping by.
Julia.
Well, guess what the postie delivered to me this morning? The title of this post should be a big hint - yep, the seasonal distress ink sets as featured on Tim Holtz's blog.
It was really hard for me to finish my chores (there weren't many of them) before I could have a play.
For this card I've used Iced Spruce and Evergreen Bough from the Winter set.
I stamped the Creative Expressions Tatty Button Snowman with the Iced Spruce Distress Ink. I coloured him in with Grey Green and Tea Green promarkers. I really like the way they toned in with the distress ink. I cut the image out with an Oval nestie and inked around the edges with the Iced Spruce.
The back mat is an 8" x 8" piece of Colorcore Whitewash which is stuck onto a Craftwork Cards card blank. The scalloped oval mat has also been cut from the whitewash and so has the Doily Lace border using a Martha Stewart punch.
The Polka Dot backing paper is from Polka Doodles Sundae of Seasons CD. It's been distressed with scissors and inked with the Iced Spruce.
The long backing panel on the left has been made by stamping the snowflake from the Creative Expressions Christmas Swirl set with Perfect Medium and then embossing it with Clear embossing powder. I then inked the area with the Iced Spruce and Evergreen Bough distress inks using Cut & Dry foam. I wrapped some fluffy white yarn around it.
I made some background paper by inking with the Iced Spruce and the Evergreen Bough and then spritzed lightly with water. I then blotted with some kitchen roll. This gave a nice mottled effect. I cut some snowflakes out using the Spellbinders Create a Flake die set from the inked backing paper I had created and from the whitewash. I layered them up and added Woodware Snowflake brads to two of them and Craftime buttons to the other two. The pearly stringy embellishment is meant to be used for a wedding piece of some sort (I've had it years!).
The lettering that I used for the sentiment is chipboard - I think it's Maya Road. I inked up the letters with the Evergreen Bough Distress Ink and once dry I painted them with Cosmic Shimmer Glitter Paint Aurora Sparkle.
The card was assembled as per the Sunday Sketch and Stamp Challenge this week.
I'm also entering this card into the following challenges -
Bunny Zoe's Crafts Challeng 17 - Lace it up
I love Promarkers Challenge 90 - Glitter & Glitz
Crafters Companion Challenge 18 - Let it Snow
Hope you like the card.
Thanks for stopping by.
Julia.
Baby Blanket
Morning Bloggers.
Today I'm sharing a card with you made with the Lili of the Valley Stamp Baby Blanket.
The image was stamped with Memento ink and coloured with Promarkers. I used a circle nestie to cut it out and inked around the edges with Stormy Sky Distress Ink while still in the die.
The polka dot paper is from Polka Doodles Sundae of Seasons CD. It was distressed with scissors and inked around the edges with Stormy Sky.
The other papers are from the Junkitz Cousins range. I used the Martha Stewart Cherish border punch on the striped paper. Again the edges were distressed with scissors but this time I used Chipped Sapphire Distress Ink.
I wrapped some Navy Blue Gingham ribbon around the striped paper and added a 'It's a Boy' brad.
I threaded some blue Baker's Twine into some beautiful Polka Dot Buttons that I got from Sam Poole Creative Studios and tied a bow.
The card was assembled as per Sketch Saturday Challenge this week.
I'm entering this card into the following challenges -
Sketch Saturday Week #179
CES Challenge 59 - New Beginnings
Oldie But A Goodie Challenge - Buttons and Bows
Simon Says Stamp - Buttons
Stampavie - Anything Goes
Thanks for stopping by.
Julia.
Today I'm sharing a card with you made with the Lili of the Valley Stamp Baby Blanket.
The image was stamped with Memento ink and coloured with Promarkers. I used a circle nestie to cut it out and inked around the edges with Stormy Sky Distress Ink while still in the die.
The polka dot paper is from Polka Doodles Sundae of Seasons CD. It was distressed with scissors and inked around the edges with Stormy Sky.
The other papers are from the Junkitz Cousins range. I used the Martha Stewart Cherish border punch on the striped paper. Again the edges were distressed with scissors but this time I used Chipped Sapphire Distress Ink.
I wrapped some Navy Blue Gingham ribbon around the striped paper and added a 'It's a Boy' brad.
I threaded some blue Baker's Twine into some beautiful Polka Dot Buttons that I got from Sam Poole Creative Studios and tied a bow.
The card was assembled as per Sketch Saturday Challenge this week.
I'm entering this card into the following challenges -
Sketch Saturday Week #179
CES Challenge 59 - New Beginnings
Oldie But A Goodie Challenge - Buttons and Bows
Simon Says Stamp - Buttons
Stampavie - Anything Goes
Thanks for stopping by.
Julia.
Sunday, 30 October 2011
Fairies - on Tiptoe
Hi Bloggers,
Today I'm sharing a card made with the beautiful Lili Of The Valley stamp Fairies - On Tiptoe. This has to be one of the prettiest fairy images around.
The Lili of the Valley Challenge this week is a sketch by Bev and this card follows that sketch.
The image has been stamped with Memento ink and has been coloured using Promarkers. I edged the dress, wings and flowers with Sakura Clear star to give a bit of sparkle.
I cut the image out using Spellbinders Eyelet Circles die and inked around the edges with Spun Sugar Distress Ink while still in the die. I made a faux nestie and edged it with the clear star.
The sentiment is from Wild Rose Studio. I cut the tags out with Spellbinders Labels Eight, inked them with Spun Sugar while still in the die and made a faux nestie for each one. I punched a hole in them and added some pretty fluffy yarn.
I used the Martha Stewart Doily Lace punch for the border. The flowers and brads are American Crafts, roses are from my stash. The leaves were cut from Spellbinders Foliage die set. The papers are My Minds Eye Lost & Found and DCWV Nursery. All the papers and card were edged with Spun Sugar Distress Ink.
The card was assembled as per Bev's sketch and I added a pearl in each corner.
I'm entering this card into the following challenges -
Lili of the Valley Challenge 118
I Love Promarkers Challenge 89 - Tags
Polka Doodles week 43 Challenge - Magical & Mystical
Charisma Cardz Challenge 43 - Anything Goes
Simon Says Stamp Challenge - Anything Goes
Hope you like the card.
Thanks for stopping by.
Julia.
Today I'm sharing a card made with the beautiful Lili Of The Valley stamp Fairies - On Tiptoe. This has to be one of the prettiest fairy images around.
The Lili of the Valley Challenge this week is a sketch by Bev and this card follows that sketch.
The image has been stamped with Memento ink and has been coloured using Promarkers. I edged the dress, wings and flowers with Sakura Clear star to give a bit of sparkle.
I cut the image out using Spellbinders Eyelet Circles die and inked around the edges with Spun Sugar Distress Ink while still in the die. I made a faux nestie and edged it with the clear star.
The sentiment is from Wild Rose Studio. I cut the tags out with Spellbinders Labels Eight, inked them with Spun Sugar while still in the die and made a faux nestie for each one. I punched a hole in them and added some pretty fluffy yarn.
I used the Martha Stewart Doily Lace punch for the border. The flowers and brads are American Crafts, roses are from my stash. The leaves were cut from Spellbinders Foliage die set. The papers are My Minds Eye Lost & Found and DCWV Nursery. All the papers and card were edged with Spun Sugar Distress Ink.
The card was assembled as per Bev's sketch and I added a pearl in each corner.
I'm entering this card into the following challenges -
Lili of the Valley Challenge 118
I Love Promarkers Challenge 89 - Tags
Polka Doodles week 43 Challenge - Magical & Mystical
Charisma Cardz Challenge 43 - Anything Goes
Simon Says Stamp Challenge - Anything Goes
Hope you like the card.
Thanks for stopping by.
Julia.
Tuesday, 25 October 2011
Tatty Button Snowman
Hi Bloggers.
Today I have a card made with the Tatty Button Snowman stamp from Creative Expressions.
I'm entering this card into the Friday Sketch Challenge this week.
The snowman was stamped with Jet Black Archival ink and quickly embossed with clear powder. I coloured him in with Cosmic Shimmer Matt Drawing Inks - I used Dark Spice, Marigold, Blue Lace, Blue Cotton and Black Night. I cut the image out using the largest of the Spellbinders Twenty Three dies and inked around the edges with Tumbled Glass Distress Ink using Cut & Dry Foam. I cut out a faux nestie in contrasting card.
I made the snowflakes using the Spellbinders Create A Flake dies. I cut some borders using a Spellbinders Parisian Accents die. The sentiment was made using my label maker.
The papers are from the Polka Doodles Sundae of Seasons CD.
The card was assembled onto a 6" x 6" card blank as per the sketch.
Hope you like it.
Thanks for stopping by.
Julia.
Today I have a card made with the Tatty Button Snowman stamp from Creative Expressions.
I'm entering this card into the Friday Sketch Challenge this week.
The snowman was stamped with Jet Black Archival ink and quickly embossed with clear powder. I coloured him in with Cosmic Shimmer Matt Drawing Inks - I used Dark Spice, Marigold, Blue Lace, Blue Cotton and Black Night. I cut the image out using the largest of the Spellbinders Twenty Three dies and inked around the edges with Tumbled Glass Distress Ink using Cut & Dry Foam. I cut out a faux nestie in contrasting card.
I made the snowflakes using the Spellbinders Create A Flake dies. I cut some borders using a Spellbinders Parisian Accents die. The sentiment was made using my label maker.
The papers are from the Polka Doodles Sundae of Seasons CD.
The card was assembled onto a 6" x 6" card blank as per the sketch.
Hope you like it.
Thanks for stopping by.
Julia.
Sunday, 16 October 2011
Pippi Longsocks with Lavender and Lace
Hi,
Today I have a card to share with you featuring Pippi Longsocks from Sugar Nellie. I must say that I have really enjoyed making this card. Hope you like it.
I started with the current challenge sketch from Sketch Saturday . I stamped Pippi Longstocks with Memento and coloured her with promarkers. I added some Sakura Clear Star to her wings to give her a bit of sparkle. I edged the image with some Dusty Concord Distress Ink using Cut & Dry foam. I mounted Pippi onto a purple frame made from a Spellbinders Lattice Rectangles die.
The papers used for the backing are all from the Polka Doodles CD Sundae of Seasons. The sentiment is from Lili of the Valley. The card blank is 8" x 8" from Craftwork Cards.
The backing for the sentiment was created from some lace. The lace was actually cream but I wanted lavender so I dyed it using the Dusty Concord Distress Ink. I added a couple of Creative Expressions Pins and the card was finished.
I'm entering this card into the following challenges -
Sketch Saturday Week #177 15th October
Allsorts Challenge 125 Lavender and Lace
Thanks for taking the time to stop by.
Julia.
Today I have a card to share with you featuring Pippi Longsocks from Sugar Nellie. I must say that I have really enjoyed making this card. Hope you like it.
I started with the current challenge sketch from Sketch Saturday . I stamped Pippi Longstocks with Memento and coloured her with promarkers. I added some Sakura Clear Star to her wings to give her a bit of sparkle. I edged the image with some Dusty Concord Distress Ink using Cut & Dry foam. I mounted Pippi onto a purple frame made from a Spellbinders Lattice Rectangles die.
The papers used for the backing are all from the Polka Doodles CD Sundae of Seasons. The sentiment is from Lili of the Valley. The card blank is 8" x 8" from Craftwork Cards.
The backing for the sentiment was created from some lace. The lace was actually cream but I wanted lavender so I dyed it using the Dusty Concord Distress Ink. I added a couple of Creative Expressions Pins and the card was finished.
I'm entering this card into the following challenges -
Sketch Saturday Week #177 15th October
Allsorts Challenge 125 Lavender and Lace
Thanks for taking the time to stop by.
Julia.
Saturday, 15 October 2011
Mia in the Snow in Blue & White
Hi,
I've posted several cards which have been coloured using promarkers recently so this time I thought I'd do something a bit different.
I have stamped Mia in the Snow (Wild Rose Studio) with Faded Jeans distress ink and have 'pulled' some of the colour out using a damp paint brush. I added Sakura Clear Star for the snow and Cosmic Shimmer Aurora Crystal Glitter on the furry bits on her clothes. I cut her out using Spellbinders Labels Eight and inked around the edges with Faded Jeans whilst the image was still in the die. I cut a faux nestie and mounted the image.
I cut a piece of gingham paper (from Wild Rose Studio Spring Papers CD) using Labels Eight and again made a faux nestie. I stamped little stars randomly over the gingham paper using a little Lavinia Stamp and Faded Jeans.
The blue border was made using the Martha Stewart Snowflakes PATP set. I added some navy gingham ribbon. The snowflake backing paper is from the Polka Doodles CD Jingle Jangle.
The sentiment is from Creative Expressions and has been cut out using the Spellbinders Double-Ended Tags die and again I inked around the edges with Faded Jeans whilst still in the die. I added a couple of pearls, a bow, a button with a bit of Baker's Twine and I was done.
I'm entering this card into the following challenges -
Wild Rose Studio Festive Frolics Blog Hop
Polka Doodles Week 41 Challenge - Ribbons and Bows
Willow Sketchie Challenge - 13th October
Thanks for stopping by.
Julia
I've posted several cards which have been coloured using promarkers recently so this time I thought I'd do something a bit different.
I have stamped Mia in the Snow (Wild Rose Studio) with Faded Jeans distress ink and have 'pulled' some of the colour out using a damp paint brush. I added Sakura Clear Star for the snow and Cosmic Shimmer Aurora Crystal Glitter on the furry bits on her clothes. I cut her out using Spellbinders Labels Eight and inked around the edges with Faded Jeans whilst the image was still in the die. I cut a faux nestie and mounted the image.
I cut a piece of gingham paper (from Wild Rose Studio Spring Papers CD) using Labels Eight and again made a faux nestie. I stamped little stars randomly over the gingham paper using a little Lavinia Stamp and Faded Jeans.
The blue border was made using the Martha Stewart Snowflakes PATP set. I added some navy gingham ribbon. The snowflake backing paper is from the Polka Doodles CD Jingle Jangle.
The sentiment is from Creative Expressions and has been cut out using the Spellbinders Double-Ended Tags die and again I inked around the edges with Faded Jeans whilst still in the die. I added a couple of pearls, a bow, a button with a bit of Baker's Twine and I was done.
I'm entering this card into the following challenges -
Wild Rose Studio Festive Frolics Blog Hop
Polka Doodles Week 41 Challenge - Ribbons and Bows
Willow Sketchie Challenge - 13th October
Thanks for stopping by.
Julia
Friday, 14 October 2011
Polka Doodles Challenge Week 40 - Handmade Flowers
Hi,
This if the card that I've entered into the Polka Doodles Challenge this week - Handmade Flowers.
I stamped Beviboo and coloured her in using Promarkers. I added Milled Lavender and Tumbled Glass Distress Ink to the Craftwork Cards frame using Cut & Dry foam. I blended some Milled Lavender around the outside of the frame too. The flowers were made using a Marianne Designs Die and the leaves are cur from the Foliage Spellbinders Die. I stapled a few scraps of baby blue gingham ribbon to the edge of the card.
Thanks for stopping by.
Julia
This if the card that I've entered into the Polka Doodles Challenge this week - Handmade Flowers.
I stamped Beviboo and coloured her in using Promarkers. I added Milled Lavender and Tumbled Glass Distress Ink to the Craftwork Cards frame using Cut & Dry foam. I blended some Milled Lavender around the outside of the frame too. The flowers were made using a Marianne Designs Die and the leaves are cur from the Foliage Spellbinders Die. I stapled a few scraps of baby blue gingham ribbon to the edge of the card.
Thanks for stopping by.
Julia
Thursday, 13 October 2011
Lili of the Valley Challenge 116 - Warm and Cozy
Hi.
This is my entry for Lili of the Valley Challenge 116 - Warm and Cozy.
I love polar bears and this Lili of the Valley stamp is so cute!
I used the Martha Stewart Punch Around the Page Snowflakes set. The snowy backing paper is from a Polka Doodles CD. I coloured the image with Promarkers, cut it out using Spellbinders Label Two and edged it with Chipped Sapphire Distress Ink. I made a faux nestie and mounted the image onto it.
I added some blue & white Bakers Twine around the bottom 2 layers and mounted the image with foam pads. The large snowflake is from the Cuttlebug Snowflake Punch & Emboss Set (which I believe is no longer available) and the smaller dark blue snowflake is cut from the Spellbinders Create A Flake die set. I topped it with a blue Glass Glintz.
The sentiment is from Creative Expressions (an odd one bought at Ally Pally) and I've cut it out using the Spellbinders Double-Ended Tags die. I inked around the edges using the Chipped Sapphire Distress Ink and added a couple of pearls.
Finally, I did some paper piercing all around the edge of the blue card.
Hope you like it. Please leave a comment.
Thanks for stopping by.
Julia.
This is my entry for Lili of the Valley Challenge 116 - Warm and Cozy.
I love polar bears and this Lili of the Valley stamp is so cute!
I used the Martha Stewart Punch Around the Page Snowflakes set. The snowy backing paper is from a Polka Doodles CD. I coloured the image with Promarkers, cut it out using Spellbinders Label Two and edged it with Chipped Sapphire Distress Ink. I made a faux nestie and mounted the image onto it.
I added some blue & white Bakers Twine around the bottom 2 layers and mounted the image with foam pads. The large snowflake is from the Cuttlebug Snowflake Punch & Emboss Set (which I believe is no longer available) and the smaller dark blue snowflake is cut from the Spellbinders Create A Flake die set. I topped it with a blue Glass Glintz.
The sentiment is from Creative Expressions (an odd one bought at Ally Pally) and I've cut it out using the Spellbinders Double-Ended Tags die. I inked around the edges using the Chipped Sapphire Distress Ink and added a couple of pearls.
Finally, I did some paper piercing all around the edge of the blue card.
Hope you like it. Please leave a comment.
Thanks for stopping by.
Julia.
Subscribe to:
Posts (Atom)