Showing posts with label Fluffy Stuff. Show all posts

Monday, 11 September 2017

Paper Cuts Merry Christmas Santa Bauble

Hi Bloggers.

Here's today's card -

For the background, I cut 5 of the snowflakes from the Paper Cuts Snowflake Frame and the little snowflakes from the Paper Cuts Merry Christmas Santa Bauble out of Coconut White Card. I glued all of them (except one) to a piece of Midnight Blue Peal Card and put aside for a few minutes for the glue to dry.

I cut the outer die from the Merry Christmas Santa Bauble Die Set out of Rich Red Card. I cut the outer and inner die plus the Merry Christmas insert out of Coconut White and also the moustache piece. I kept the waste from the face, hat trim and hat bobble. I glued the white santa die cu tto the Rich Red die cut. I scribbled some Tattered Rose Distress Marker onto my Craft Sheet and picked the ink up using a Water Brush. I used this to paint the face and the nose. I glued the face in place.

I added Woodware Fluffy Stuff to the hat bobble, hat trim and moustache and heated. I glued these to my Santa and added 5mm Black Pearls for the eyes. I added my remaining snowflake to the hat and a Baker's Twine Bow.

Going back to my background, I ran it through the Spellbinders Platinum Machine with the Creative Expressions Nordic Tiles Embossing Folder. I matted onto Coconut White Card, Rich Red Card and then another piece of Coconut White Card and added my Santa.

I edged my background with CS Glue and added CS Apple Red Glitterbitz. I completed my card by adding some Apple Red CS Twinkles to the snowflakes.

The winner of the card (plus mystery card) from Freebie Friday on 8th September is.............

PharmacyMichele

Please email me at juliawattscrafts@gmail.com with your address and I'll pop your cards in the post.

I'll be back tomorrow with a sneak peek from my Woodware shows on Thursday.

Thanks for stopping by.

Julia.
www.juliawattscrafts.co.uk
Free card with all website orders over £10 (ask for one in the comments box at checkout).

Saturday, 26 August 2017

Paper Cuts One Day Special continues today

Hi Bloggers.

As this post goes live I should just arrived at Hochanda to get ready for my first show of the day at 7am to the Netherlands. Do try and watch online at hochanda.nl or on Facebook as the demos are different to the UK demos and I explain everything in English. UK shows are at 9am, 1pm and 5pm.

I have a card and a tag for you today. Here's the card - not in traditional colours for Christmas but very elegant and with the variations in the die set, you can make it for many occasions.

I started by popping a piece of Creative Expressions Double Sided Self Adhesive Sheet onto a piece of Coconut White Card. I cut the 4 plain central dies from the Paper Cuts Festive Cornucopia Die Set from it. I then cut the tree die pair out of Antique Gold Pearl Card twice and the present pair out of Graphite Pearl Card twice. I removed the backing sheets and added my decorative die pieces. I added Cosmic Shimmer Midnight Sparkle Glitterbitz to the gold ones and Cosmic Shimmer Sahara Gold Glitterbitz to the graphite ones.

I cut the plain circle die out of Antique Gold Pearl Card and the decorative circle die out of Graphite Pearl Card. I stacked all my die cuts up as shown using Woodware 1mm Foam Tape and added a Bronze Vintage Button to the centre.

I cut a piece of Antique Gold Pearl Card using Sue Wilson's Double Pierced Squares and a mat out of Graphite Pearl Card using Sue's Double Pierced Squares Set B. I popped these onto another pieceof Antique Gold Pearl Card.

I cut one of the corner dies from the Festive Conucopia Die Set out of Graphite Pearl Card 4 times and added them to my card using CS Glue in a Woodware Fine Tip Glue Applicator.

Here's the Tag -

I cut the largest die in Sue's Pierced Tags Die Set out of Coconut White Card. I used the waste from cutting the 6 snowflake dies in the Paper Cuts Let it Snow Frame and dabbed through it with Faded Jeans Distress Oxide using a Smoothie. I distressed the edges of my tag using a Woodware Edge Crimper and then inked around the edges with Faded Jeans Distress Oxide.

I popped a piece of Creative Expressions Double Sided Self Adhesive Sheet onto a piece of Coconut White Card. I cut the outer die from the Paper Cuts Merry Christmas Santa Bauble from it. I cut all 3 of the inner dies with the outer die out of Coconut White Card. I retained the face section and the trim and bobble from the hat. If you're very careful, you can keep the waste Merry Christmas for another project (there's one in the Gallery). I peeled away the backing sheet from my outer die cut and added my decorative die cut and put aside for a moment. I cut the moustache die out of Coconut White Card.

I scribbled some Tattered Rose Distress Marker onto my Craft Sheet and picked it up using a Water Brush to paint the nose and the face. I added Woodware Fluffy Stuff to the moustache, hat trim and hat bobble and heated it.

I inserted the face, hat trim and hat bobble into the exposed adhesive on my main piece. I carefully sprinkled CS Periwinkle Glitterbitz into the hat and sentiment sections. I added a 3mm Black Pearls to the eyes and glued on my moustache piece.

I popped a little Adhesive Sheet onto Coconut White Card and cut 3 of the snowflakes in the Santa Bauble Set and the reinforcement ring from the Tag Set from it. I added these to my tag as shown.

I finished by adding some May Arts Sheer Iridescent Ribbon and a 3mm White Pearl.

I'm offering 10% discount on items I have on my website from the shows. You can find them here. Offer applies till midnight tonight or While Stocks Last. Discount will be applied automatically at checkout. Please note : the Paper Cuts Dies are Special Order items and are subject to availability. Please allow 7-10 for dispatch of orders containing them.

Thanks for stopping by.

Julia.
www.juliawattscrafts.co.uk
Free card with all website orders over £10 (ask for one in the comments box at checkout).

Monday, 21 August 2017

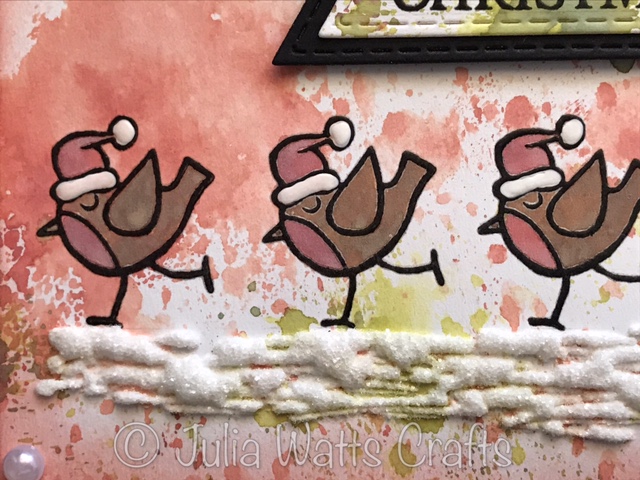
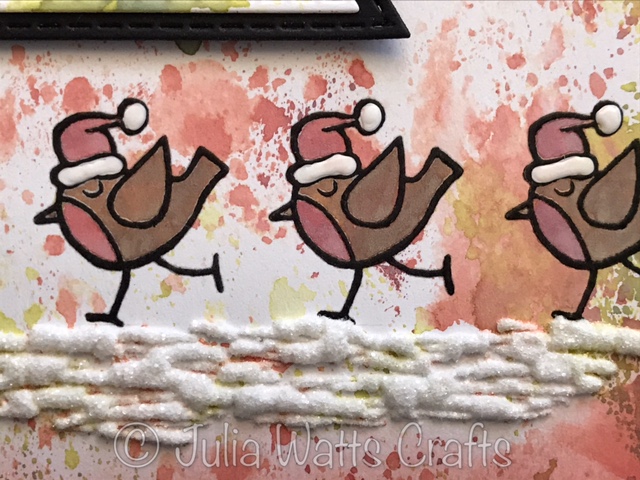
Skating Robins

Hi Bloggers.

Just a quickie today. As I write this on Sunday evening, I am extremely tired and I have to get a show proposal ready before I go to bed.

Anyway, here's today's card -

Products used -
Woodware - Self Portrait (robin), Little Festive Branch (sentiment)
Black Onyx Versafine Ink Pad
CS Matt Clear Embossing Powder
Distress Oxides - Vintage Photo, Fired Brick, Peeled Paint
Sakura Opaque White Gelly Roll Glaze Pen
Woodware Fluffy Stuff
CS Diamond Sprinkles
Sue Wilson Stitched Flags
5mm White Pearls
Card - Coconut White, Black


 Lisa Horton is launching a One Day Special on Hochanda today at 6pm with some brand new stamps designed by Lisa's other half, Danny. The stamps are exclusive to Hochanda until the end of the week. I'm offering 10% discount on the other items from the shows that I have on my website. You can find them here. Offer applies till midnight tomorrow night or while stocks last. Discount will be applied automatically at checkout.

The winner of the card from Freebiw Friday on 18th August is ......................

hazel young

Please email me at juliawattscrafts@gmail.com with your address and I'll pop your card in the post. June - I haven't received any email from you. I have checked my spam. Please check that you are sending your details to the correct email address.

Thanks for stopping by.

Julia.
www.juliawattscrafts.co.uk
Free card with all website orders over £10 (ask for one in the comments box at checkout).


Wednesday, 16 August 2017

Woodware Reindeer Bells Sneak Peek

Hi Bloggers.

I have another sneak peek for you today from tomorrow's Woodware shows on Hochanda - actually, it's a two-fer!

For the background, I used a paper from Lisa Horton's Christmas Wishes Paper Pad. I wanted to make use of the foliage on the paper so I planned where I wanted the baubles to hang from and cut out using Sue Wilson's Double Pierced Background Rectangles. I dusted with an Anti-Static Pad and stamped the baubles and the deer from the Woodware Reindeer Bells Stamp Set using Onyx Black Versafine Ink. I added CS Matt Clear Embossing Powder and heat set.

I swiped some Vintage Photo Distress Oxide onto My Craft Sheet. I picked the ink up using a Water Brush and painted my Deer. I used a little Fired Brick Distress Oxide in the same way to paint the deer's collar. I added a little Clear Star Stardust Pen to the bells on the collar.


I coloured the hanging bells with Broken China and Fired Brick Distress Oxide and added a little Clear Star Stardust.

I edged my piece with Vintage Photo Distress Oxide using a Smoothie. For the snow, I scribbled on some Woodware Fluffy Stuff (watch out for this, I think it's going to be popular!). I added some CS Diamond Sprinkles and tapped off the excess. I then heated it and it puffed up - really cool!

I matted onto Black Card and then onto Coconut White Card.

I stamped the sentiment from the same stamp set onto some leftover paper using Versafine and embossed with Matt Clear Embossing Powder. I cut it ut using my Woodware Trimmer and popped it on a Black Card Mat. I added it to my card using a little Creative Expressions Mounting Cushion.

Here's a very simple little card as an alternative - it could also be a gift tag!

I 've just stamped directly on a tiny card blank with Versafine. I've coloured the baubles in with Sakura Stardust Pens. The sentiment is from the Woodware Little Festive Branch Stamp Set. Simples!

I will try and get photos loaded onto Facebook and into the Gallery on this Blog at some point today.

Just before I sign off, there was a comment yesterday about not being able to watch my last set of shows on rewind. I don't actually use that when I want to catchup. If you go into TV Schedule you can see the tv schedule from about 10 days in the past and almost a week in the future. My last shows were on 9th and 10th August so if you select those dates from the drop down menu it will list all the shows on that date and you can select and watch the ones you want. Here's a quick link to the tv schedule section of the Hochanda website -

https://www.hochanda.com/TvSchedule

 Thanks for stopping by.

Julia.
www.juliawattscrafts.co.uk
Free card with all website orders over £10 (ask for one in the comments box at checkout).