Hi Bloggers.
As promised, today I have a sneak peek for you from the One Day Special that I'm launching on Hochanda at 6pm on Boxing Day. I know it's a busy time with family and friends but I do hope that some of you can tune in.
The shows are all about backgrounds. The ODS bundle comprises of some Sue Wilson Background Dies and there are a few more background dies available outside of the bundle and some Finishing Touches Dies too. For me, the show is not just about the dies (which are all lovely!) but it's about the backgrounds you create to use with them and the mediums you can use to create those backgrounds. There are lots and lots of goodies on the shows and quite a few on pick & mix so hopefully, there'll be something for everyone. I've certainly had alot of fun creating the samples - I would have kept going if I hadn't another show on 30th December to prep for!
Anyhow, here's your sneak peek for today -
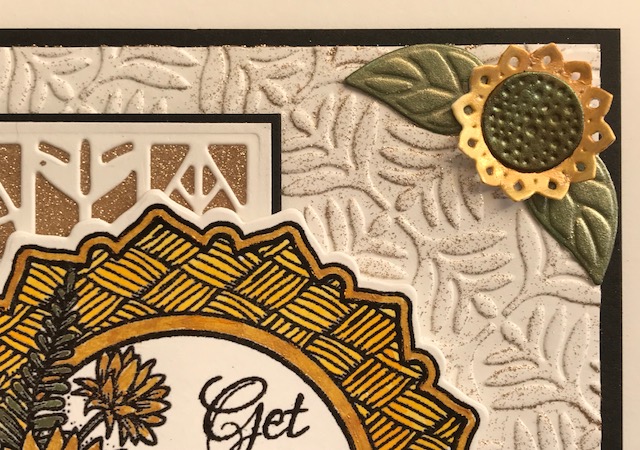
This is one of those cards that really does look better in real life. For the background, I have used Pixie Powders on felt! Who knew how fabulous it would look?
I used a piece of
Ivory Felt. It comes in a pack of 10 sheets. Each sheet is 9" square. I've cut a sheet in half. I tend to do this when I' experimenting - if it doesn't work, I haven't wasted much and if it does work, I have a piece big enough to use.
Back to my felt, I misted it with water - quite alot of water, and then added Pixie Powders in the usual way. I used
Plum Twist,
Sun Yellow and
Ancient Copper. You don't get such an immediate reaction as you do on card, it's a slow explosion. Cool though! Now, this isn't colour fast so if you do this, don't wash it unless you want the colour to come out.
Now, you may be wondering why you would do this on felt and not just on card as you would normally do? Well, you could, and it would look fabulous. However, here, it's all about the texture you get from using the felt. I have used every single scrap of my felt background, using the leftover bits on my foldover flowers and on the little flowers on my blossoming branch.
I made a frame out of
Milk and
Rich Plum Card using the
Indian Ocean Background and the
Double Pierced Background Rectangles. I added it to my felt background, trimming away the excess. I matted onto Milk Card, then Rich Plum and then onto another piece of Milk Card. The overall size falls just shy of A5.
I stamped a sentiment from the
Creative Expressions Petite Lavish Sentiments Stamp Set onto Milk Card using
Plum Archival. I cut it out using the
Pierced Flags Die Set and cut the next sized die out of Rich Plum Card.
I made a couple of flowers from my leftover felt using the
Classic Foldover Flowers Die Set.
I cut a pair of leaves out of Milk Card using the
Blossoming Branch. I cut the tiny flowers out of my remaining scraps of felt and added a
3mm Cream Pearl to the centre of each tiny flower.
I'll be back tomorrow with another sneak peek.
Thanks for stopping by.
Julia.
www.juliawattscrafts.co.uk
Free card with all website orders over £10 (Add a note to your order in your cart).