Hi Bloggers.
I wish you a 'Simply Fabulous' New Year!
Here's today's card -
For the background, I spritzed a piece of Coconut White Card with Cosmic Shimmer Egyptian Blue Vintage Mister. I then inked through the Floral Vines Mask with Paris Trunk Fountain Blue Dye Ink using Cut n Dry Foam. I moved the mask around so that the whole area was covered.
I stamped the image from the Creative Expressions You Look Scent'sational' Stamp Set using Jet Black Archival and embossed with Cosmic Shimmer Clear Embossing Powder. I coloured it in with the Fountain Blue ink and Golden Malachite Mica Powder from the Cosmic Shimmer Garden Flora Mica Spray Set. I cut it out using Spellbinders Floral Ovals and inked through the die with Fountain Blue. I cut another larger Floral Oval out and again inked through the die with Fountain Blue. I tied a bow using 2 lengths of Sky Blue American Seam Binding and added a Teal Dazzler.
I stamped the sentiment using Jet Black Archival and embossed with Clear Embossing Powder. I cut it out using Spellbinders Labels 25 and inked through the die with Fountain Blue.
I assembled the card as shown adding some 5mm White Pearls and some dots of Cosmic Shimmer Pearlescent PVA in White around the edges.
Thanks for stopping by.
Julia.
Showing posts with label Paris Trunk. Show all posts
Tuesday, 1 January 2013
Tuesday, 25 December 2012
Kick up Your Heels
Hi Bloggers.
Happy Christmas to you all - I hope you're having a lovely day. I'm off to my Mom & Dad's house today for a couple of days so relying on Blogger to schedule posts for me.
I have a few more cards from the shoes/handbags/corsets/perfume show I did at the end of November. This one is a very simple one - the embossing folder does most of the work.
So, the background is a piece of Coconut White Card popped inside the Couture Creations Timeless Embossing Folder and run through the Grand Calibur. I inked around the edges with Poppy Paris Trunk Dye Ink using Cut n Dry Foam. I wrapped a piece of Blue White American Seam Binding around the centre.
I stamped the sentiment from the Creative Expressions If the Shoe Fits .... Stamp Set using Jet Black Archival and embossed with Cosmic Shimmer Clear Embossing Powder. I cut it out using Spellbinders Floral Ovals and inked through the die with Poppy ink.
I stamped the shoe from the same stamp set using Jet Black Archival, embossed with clear powder and coloured it in using Poppy and Yellow Damasque Dye Inks. I cut it out with scissors and then went around the edges with a black marker pen to hide any white bits.
I stamped the hat from the Creative Expressions Handbags Galore Stamp Set using Jet Black Archival and embossed with clear powder. Again, I coloured in using Poppy and Yellow Damasque ink, cut out and went around edges with black pen.
I assembled the card as shown adding a bow made from 2 lengths of Blue White American Seam Binding and a Light Brown Dazzler, some 5mm White Pearls and some dots of Cosmic Shimmer Pearlescent PVA in White around the edges.
If you're looking to buy the stamp sets, I don't have any in my Amazon Store but Sam Poole has them here.
Thanks for stopping by.
Julia.
Happy Christmas to you all - I hope you're having a lovely day. I'm off to my Mom & Dad's house today for a couple of days so relying on Blogger to schedule posts for me.
I have a few more cards from the shoes/handbags/corsets/perfume show I did at the end of November. This one is a very simple one - the embossing folder does most of the work.
So, the background is a piece of Coconut White Card popped inside the Couture Creations Timeless Embossing Folder and run through the Grand Calibur. I inked around the edges with Poppy Paris Trunk Dye Ink using Cut n Dry Foam. I wrapped a piece of Blue White American Seam Binding around the centre.
I stamped the sentiment from the Creative Expressions If the Shoe Fits .... Stamp Set using Jet Black Archival and embossed with Cosmic Shimmer Clear Embossing Powder. I cut it out using Spellbinders Floral Ovals and inked through the die with Poppy ink.
I stamped the shoe from the same stamp set using Jet Black Archival, embossed with clear powder and coloured it in using Poppy and Yellow Damasque Dye Inks. I cut it out with scissors and then went around the edges with a black marker pen to hide any white bits.
I stamped the hat from the Creative Expressions Handbags Galore Stamp Set using Jet Black Archival and embossed with clear powder. Again, I coloured in using Poppy and Yellow Damasque ink, cut out and went around edges with black pen.
I assembled the card as shown adding a bow made from 2 lengths of Blue White American Seam Binding and a Light Brown Dazzler, some 5mm White Pearls and some dots of Cosmic Shimmer Pearlescent PVA in White around the edges.
If you're looking to buy the stamp sets, I don't have any in my Amazon Store but Sam Poole has them here.
Thanks for stopping by.
Julia.
Saturday, 8 December 2012
Hang in there!
Hi Bloggers.
Another card made with the Creative Expressions Frilly Things Stamp Set today.
For the background, I spritzed some Coconut White card with Cosmic Shimmer Egyptian Blue Vintage Mister. I dried it with my heat tool and then inked through the Eyelet Lace Mask with Fountain Blue Paris Trunk Dye Ink using Cut n Dry Foam. I moved the mask around the card so that the whole area was covered. I randomly stamped the coat hanger and 'Bra-vo!' stamps over the background using the Fountain Blue Ink.
I stamped the image using Jet Black Archival and embossed with Cosmic Shimmer Clear Embossing Powder. I coloured it in using the Fountain Blue Ink and Tropic Blue Mica Powder from the Cosmic Shimmer Garden Flora Mica Spray Set. I cut it out using Spellbinders Labels 25 and inked through the die with Fountain Blue Ink. I cut the largest of the Romantic Rectangles dies out of blue card. At the emboss stage I added the Polka Dots Mask. I inked through the die with Fountain Blue.
I stamped the sentiment from the same stamp set using Jet Black Archival and embossed with clear powder. I cut it out using Spellbinders Ribbon Banners and inked through the die with Fountain Blue. I cut another Ribbon Banner out of blue card and offset it behind the sentiment panel.
I made a ribbon rose out of Sky Blue American Seam Binding and another out of Blue White. I added some leftover bits of Pearl Swirls instead of leaves.
I assembled the card as shown adding some dots of Cosmic Shimmer Pearlescent PVA in Summer Blue around the edges.
Thanks for stopping by.
Julia.
Another card made with the Creative Expressions Frilly Things Stamp Set today.
For the background, I spritzed some Coconut White card with Cosmic Shimmer Egyptian Blue Vintage Mister. I dried it with my heat tool and then inked through the Eyelet Lace Mask with Fountain Blue Paris Trunk Dye Ink using Cut n Dry Foam. I moved the mask around the card so that the whole area was covered. I randomly stamped the coat hanger and 'Bra-vo!' stamps over the background using the Fountain Blue Ink.
I stamped the image using Jet Black Archival and embossed with Cosmic Shimmer Clear Embossing Powder. I coloured it in using the Fountain Blue Ink and Tropic Blue Mica Powder from the Cosmic Shimmer Garden Flora Mica Spray Set. I cut it out using Spellbinders Labels 25 and inked through the die with Fountain Blue Ink. I cut the largest of the Romantic Rectangles dies out of blue card. At the emboss stage I added the Polka Dots Mask. I inked through the die with Fountain Blue.
I stamped the sentiment from the same stamp set using Jet Black Archival and embossed with clear powder. I cut it out using Spellbinders Ribbon Banners and inked through the die with Fountain Blue. I cut another Ribbon Banner out of blue card and offset it behind the sentiment panel.
I made a ribbon rose out of Sky Blue American Seam Binding and another out of Blue White. I added some leftover bits of Pearl Swirls instead of leaves.
I assembled the card as shown adding some dots of Cosmic Shimmer Pearlescent PVA in Summer Blue around the edges.
Thanks for stopping by.
Julia.
Friday, 7 December 2012
Enjoy Your Day with Style
Hi Bloggers.
Would have loved to have demoed this card but a bit too much going on in it and I don't seem to get an awful lot of time to demo at the moment.
For the background, I spritzed some Milk Card with Marigold and Tarnished Gold Vintage Mister. I dried the ink of the first colour with my heat tool before misting the second one and then dried again. I inked through the Eyelet Lace Mask with Poppy Paris Trunk Dye Ink using Cut n Dry Foam. I moved the mask around the background as the area was larger than the mask. I then randomly inked through some flowers on the Flower Mask with the Sepia Paris Trunk Ink.
I stamped the large corset from the Creative Expressions Frilly Things Stamp Set onto some Foundations Dot & Dash Paper using Jet Black Archival and embossed with Cosmic Shimmer Clear Embossing Powder. I added a frill along the bottom using London Tan American Seam Binding. I used the same ribbon to tie a little bow and glued a 5mm Black Pearl in the centre of it.
I cut the largest Spellbinders Labels 25 out of Milk Card. At the emboss stage I added the Polka Dots Mask. I inked through the die with Sepia Ink. I cut the largest of the Spellbinders Romantic Rectangles out of Tan Card. At the emboss stage I added the Floral Vines Mask. I inked through the die with Sepia Ink.
I stamped the sentiment from the same stamp set using Jet Black Archival and embossed with Clear Powder. I cut it out using Spellbinders Splendid Circles and inked through the die with Sepia Ink.
I assembled the card as shown adding some Black Swirls and some dots of Cosmic Shimmer Pearlescent PVA in Choco Brown around the edges.
Thanks for stopping by.
Julia.
Would have loved to have demoed this card but a bit too much going on in it and I don't seem to get an awful lot of time to demo at the moment.
For the background, I spritzed some Milk Card with Marigold and Tarnished Gold Vintage Mister. I dried the ink of the first colour with my heat tool before misting the second one and then dried again. I inked through the Eyelet Lace Mask with Poppy Paris Trunk Dye Ink using Cut n Dry Foam. I moved the mask around the background as the area was larger than the mask. I then randomly inked through some flowers on the Flower Mask with the Sepia Paris Trunk Ink.
I stamped the large corset from the Creative Expressions Frilly Things Stamp Set onto some Foundations Dot & Dash Paper using Jet Black Archival and embossed with Cosmic Shimmer Clear Embossing Powder. I added a frill along the bottom using London Tan American Seam Binding. I used the same ribbon to tie a little bow and glued a 5mm Black Pearl in the centre of it.
I cut the largest Spellbinders Labels 25 out of Milk Card. At the emboss stage I added the Polka Dots Mask. I inked through the die with Sepia Ink. I cut the largest of the Spellbinders Romantic Rectangles out of Tan Card. At the emboss stage I added the Floral Vines Mask. I inked through the die with Sepia Ink.
I stamped the sentiment from the same stamp set using Jet Black Archival and embossed with Clear Powder. I cut it out using Spellbinders Splendid Circles and inked through the die with Sepia Ink.
I assembled the card as shown adding some Black Swirls and some dots of Cosmic Shimmer Pearlescent PVA in Choco Brown around the edges.
Thanks for stopping by.
Julia.
Tuesday, 4 December 2012
Good for the Sole
Hi Bloggers.
Easy peasy card today.
For the background, I popped a piece of blue card inside the Couture Creations Pastorale Embossing Folder and ran it through the Grand Calibur. The card was a little wider than the folder. I inked around the edges with Fountain Blue Paris Trunk Dye Ink using Cut n Dry Foam.
I stamped 2 of the shoes from the Creative Expressions If the Shoe Fits .... using Jet Black Archival and embossed with Cosmic Shimmer Clear Embossing Powder. I cut them out using Spellbinders Splendid Circles and inked through the die with Fountain Blue.
I stamped the sentiment from the same stamp set using Jet Black Archival and embossed with the clear powder. I cut it out using Spellbinders Fancy Framed Tags One and inked through the die with Fountain Blue. I added some 5mm White Pearls.
I assembled the card as shown adding some Pearl Swirls and some dots of Cosmic Shimmer Pearlescent PVA in White around the edges.
Thanks for stopping by.
Julia.
Easy peasy card today.
For the background, I popped a piece of blue card inside the Couture Creations Pastorale Embossing Folder and ran it through the Grand Calibur. The card was a little wider than the folder. I inked around the edges with Fountain Blue Paris Trunk Dye Ink using Cut n Dry Foam.
I stamped 2 of the shoes from the Creative Expressions If the Shoe Fits .... using Jet Black Archival and embossed with Cosmic Shimmer Clear Embossing Powder. I cut them out using Spellbinders Splendid Circles and inked through the die with Fountain Blue.
I stamped the sentiment from the same stamp set using Jet Black Archival and embossed with the clear powder. I cut it out using Spellbinders Fancy Framed Tags One and inked through the die with Fountain Blue. I added some 5mm White Pearls.
I assembled the card as shown adding some Pearl Swirls and some dots of Cosmic Shimmer Pearlescent PVA in White around the edges.
Thanks for stopping by.
Julia.
Saturday, 1 December 2012
If Friends were Handbags
Hi Bloggers.
Thanks for all the comments yesterday and emails to the studio - much appreciated as always.
Here's one of the demo cards from yesterday -
For the background, I ran some Coconut White card through the Grand Calibur with the Couture Creations Pastorale Embossing Folder. I used a piece of card which was wider than the folder to create a larger background. I inked around the edges with Fountain Blue Paris Trunk Dye Ink using Cut n Dry Foam. I wrapped a piece of Sky Blue American Seam Binding around the background as shown.
I stamped the image from the Creative Expressions Handbags Galore Stamp Set (designed by Sam Poole) using Jet Black Archival and embossed with Cosmic Shimmer Clear Embossing Powder. I coloured the main section in using the Fountain Blue ink and the handle was coloured with Silver Lustre from the Cosmic Shimmer Mica Spray Set 1 (Metallics). I cut it out using Spellbinders Labels 25 and inked through the die with Fountain Blue.
I spritzed some Coconut White Card with Cosmic Shimmer Vintage Mister in Egyptian Blue. I then cut out the second largest of the Spellbinders Romantic Rectangles dies and inked through the die with Fountain Blue.
I stamped the sentiment from the same stamp set using Jet Black Archival and embossed with clear powder. I cut it out using labels 25 and inked through the die with Fountain Blue.
I tied a bow using 3 lengths of the American Seam Binding and added a Teal Dazzler. I assembled the card as shown adding some Pearl Swirls, some 5mm White Pearls and some dots of Cosmic Shimmer Pearlescent PVA in White around the edges. I did not have the right coloured blue card so I spritzed a couple of pieces of white card with the Egyptian Blue Vintage Mister to create the mats.
Thanks for stopping by.
Julia.
Thanks for all the comments yesterday and emails to the studio - much appreciated as always.
Here's one of the demo cards from yesterday -
For the background, I ran some Coconut White card through the Grand Calibur with the Couture Creations Pastorale Embossing Folder. I used a piece of card which was wider than the folder to create a larger background. I inked around the edges with Fountain Blue Paris Trunk Dye Ink using Cut n Dry Foam. I wrapped a piece of Sky Blue American Seam Binding around the background as shown.
I stamped the image from the Creative Expressions Handbags Galore Stamp Set (designed by Sam Poole) using Jet Black Archival and embossed with Cosmic Shimmer Clear Embossing Powder. I coloured the main section in using the Fountain Blue ink and the handle was coloured with Silver Lustre from the Cosmic Shimmer Mica Spray Set 1 (Metallics). I cut it out using Spellbinders Labels 25 and inked through the die with Fountain Blue.
I spritzed some Coconut White Card with Cosmic Shimmer Vintage Mister in Egyptian Blue. I then cut out the second largest of the Spellbinders Romantic Rectangles dies and inked through the die with Fountain Blue.
I stamped the sentiment from the same stamp set using Jet Black Archival and embossed with clear powder. I cut it out using labels 25 and inked through the die with Fountain Blue.
I tied a bow using 3 lengths of the American Seam Binding and added a Teal Dazzler. I assembled the card as shown adding some Pearl Swirls, some 5mm White Pearls and some dots of Cosmic Shimmer Pearlescent PVA in White around the edges. I did not have the right coloured blue card so I spritzed a couple of pieces of white card with the Egyptian Blue Vintage Mister to create the mats.
Thanks for stopping by.
Julia.
Friday, 30 November 2012
If the Shoe Fits
Hi Bloggers.
This is probably going to be my first demo today.
For the background, I spritzed a piece of Milk Card with Cosmic Shimmer Vintage Mister in Marigold. I dried it with my heat tool and then popped the Floral Vines Mask on top. I inked through the mask using the Paris Trunk Dye Ink Pad in Sepia using Cut n Dry Foam. I then randomly stamped over the top with the circular shoes stamp from the Creative Expressions If the Shoe Fits.... Stamp Set (another one of Sam Poole's designs).
I stamped the shoe from the same stamp set using jet Black Archival and embossed with Cosmic Shimmer Clear Embossing Powder. I coloured the inside of the shoe and the heel using the Sepia ink and a paint brush (I swiped some ink onto a tile and added a little water to it from a paint brush). For the main design on the shoe, I dipped a damp paint brush into the Dark Bronze Mica Powder from the Cosmic Shimmer Mica Spray Set 1 - Metallics. I put the Mica Powder on to a tile and a little water until the desired consistency was reached. I cut the shoe out with scissors and then went around the edges with a marker pen to hide any white bits. I cut the largest of the Spellbinders Splendid Circles out of Milk Card and inked through the die with Sepia.
I stamped the sentiment from the same stamp set using Jet Black Archival and embossed with Clear Powder. I cut it out using Spellbinders Labels 25 and inked through the die with Sepia.
I assembled the card as shown adding some Black Swirls and some dots of Cosmic Shimmer Pearlescent PVA in Dark Bronze around the edges.
Hope you can join me on Create & Craft today at 1pm and 7pm.
Thanks for stopping by.
Julia.
This is probably going to be my first demo today.
For the background, I spritzed a piece of Milk Card with Cosmic Shimmer Vintage Mister in Marigold. I dried it with my heat tool and then popped the Floral Vines Mask on top. I inked through the mask using the Paris Trunk Dye Ink Pad in Sepia using Cut n Dry Foam. I then randomly stamped over the top with the circular shoes stamp from the Creative Expressions If the Shoe Fits.... Stamp Set (another one of Sam Poole's designs).
I stamped the shoe from the same stamp set using jet Black Archival and embossed with Cosmic Shimmer Clear Embossing Powder. I coloured the inside of the shoe and the heel using the Sepia ink and a paint brush (I swiped some ink onto a tile and added a little water to it from a paint brush). For the main design on the shoe, I dipped a damp paint brush into the Dark Bronze Mica Powder from the Cosmic Shimmer Mica Spray Set 1 - Metallics. I put the Mica Powder on to a tile and a little water until the desired consistency was reached. I cut the shoe out with scissors and then went around the edges with a marker pen to hide any white bits. I cut the largest of the Spellbinders Splendid Circles out of Milk Card and inked through the die with Sepia.
I stamped the sentiment from the same stamp set using Jet Black Archival and embossed with Clear Powder. I cut it out using Spellbinders Labels 25 and inked through the die with Sepia.
I assembled the card as shown adding some Black Swirls and some dots of Cosmic Shimmer Pearlescent PVA in Dark Bronze around the edges.
Hope you can join me on Create & Craft today at 1pm and 7pm.
Thanks for stopping by.
Julia.
Thursday, 29 November 2012
Happiness is Like Perfume
Hi Bloggers.
A sneak peak today of one of the sample cards for tomorrows shows.
For the background, I ran some Coconut White Card through the Grand Calibur with the Couture Creations Intrinsic Embossing Folder. I ran it through a second time to extend the pattern. It is not a repeating pattern but you can hardly see the join. I inked around the edges with Garnet Paris Trunk Dye Ink using Cut n Dry Foam.
I stamped the image from the Creative Expressions You Look Scent 'sational' Stamp Set (designed by Sam Poole) using Jet Black Archival and embossed with Cosmic Shimmer Clear Embossing Powder. I coloured it in using the Garnet ink. I swiped some ink onto a white tile and added a little water with a paint brush. The darker areas are where I coloured first. I then added some more water which lightened the colour and so that was what I used in the lighter areas. The gold is from the Cosmic Shimmer Mica Spray Set 1 - Metallics. I dipped a damp paint brush into the Pale Gold Mica Powder and popped it on my tile. I added water to get the correct consistency and painted the areas on the perfume bottle as shown. I cut the image out using the second largest Spellbinders Fleur de Lys Square die. I inked through the die with the Garnet Ink. I also cut the largest of the Fleur de Lys Squares and inked through the die with Garnet.
I stamped the sentiment from the same stamp set again using the Jet Black Archival and embossed with the clear powder. I cut it out using Spellbinders Labels 25 and inked through the die with Garnet. I tied a bow using 3 lengths of Rose Petal American Seam Binding and added a Pink Dazzler.
I assembled the card as shown adding a line of Self Adhesive White Pearls in various sizes above the sentiment and some dots of Cosmic Shimmer Pearlescent PVA in Vintage Pink around the edges.
Thanks for stopping by.
Julia.
A sneak peak today of one of the sample cards for tomorrows shows.
For the background, I ran some Coconut White Card through the Grand Calibur with the Couture Creations Intrinsic Embossing Folder. I ran it through a second time to extend the pattern. It is not a repeating pattern but you can hardly see the join. I inked around the edges with Garnet Paris Trunk Dye Ink using Cut n Dry Foam.
I stamped the image from the Creative Expressions You Look Scent 'sational' Stamp Set (designed by Sam Poole) using Jet Black Archival and embossed with Cosmic Shimmer Clear Embossing Powder. I coloured it in using the Garnet ink. I swiped some ink onto a white tile and added a little water with a paint brush. The darker areas are where I coloured first. I then added some more water which lightened the colour and so that was what I used in the lighter areas. The gold is from the Cosmic Shimmer Mica Spray Set 1 - Metallics. I dipped a damp paint brush into the Pale Gold Mica Powder and popped it on my tile. I added water to get the correct consistency and painted the areas on the perfume bottle as shown. I cut the image out using the second largest Spellbinders Fleur de Lys Square die. I inked through the die with the Garnet Ink. I also cut the largest of the Fleur de Lys Squares and inked through the die with Garnet.
I stamped the sentiment from the same stamp set again using the Jet Black Archival and embossed with the clear powder. I cut it out using Spellbinders Labels 25 and inked through the die with Garnet. I tied a bow using 3 lengths of Rose Petal American Seam Binding and added a Pink Dazzler.
I assembled the card as shown adding a line of Self Adhesive White Pearls in various sizes above the sentiment and some dots of Cosmic Shimmer Pearlescent PVA in Vintage Pink around the edges.
Thanks for stopping by.
Julia.
Tuesday, 17 July 2012
For a Special Couple
Hi Bloggers.
Another Wedding card today.
For the background, I put a 6” x 6” piece of Coconut White Card inside the Couture Creations Cultivated Embossing Folder and ran it through the Grand Calibur. I ran it through a second time to extend the pattern. I inked around the edges with Eco Green Parchment ink using Cut n Dry Foam.
I wrapped some Cream Crochet Ribbon around the left-hand side of the background and secured with some tape at the back. I then ran some Hi-Tack Tape down the centre of the Crochet Ribbon and ruffled some Ivory Vintage Ribbon down it.
Next I stamped the cake image from Creative Expressions Mr & Mrs Stamp Set using the Parchment Ink and embossed with Cosmic Shimmer Clear Embossing Powder. I cut the image out using the largest of the Spellbinders Decorative Heart Circles dies. I inked through the die with the Parchment Ink using Cut n Dry Foam. I cut in between each heart on the die cut with scissors. I cut another Heart Circle out of milk card and again cut in between each heart with scissors. I then glued the image circle on top of the milk circle turning slightly so that the hearts were offset. I folded the hearts forward a little.
I stamped the sentiment from the same stamp set again using the Parchment Ink and embossed with the Clear Embossing Powder. I matted it on to a slightly larger piece of milk card and added some little dots of Cosmic Shimmer Pearlescent PVA in Golden Pearl as shown and put aside to dry.
I cut 3 of the smallest of the Spellbinders Grand Peony dies, inking through the die with the Parchment Ink. I used these to make a standard 6 petal flower as described in the Paper Rose How To with Sue Wilson on the Creative Expressions here.
I tied a bow using 2 lengths of Ivory Vintage Ribbon and glued to the ruffled ribbon with Cosmic Shimmer Dries Clear Glue. I added my flower to the centre of the bow and add a couple of Decorative Stick Pins.
I assembled the card as shown adding some dots of Golden Pearl PVA around the edges.
Thanks for stopping by.
Julia.
Another Wedding card today.
For the background, I put a 6” x 6” piece of Coconut White Card inside the Couture Creations Cultivated Embossing Folder and ran it through the Grand Calibur. I ran it through a second time to extend the pattern. I inked around the edges with Eco Green Parchment ink using Cut n Dry Foam.
I wrapped some Cream Crochet Ribbon around the left-hand side of the background and secured with some tape at the back. I then ran some Hi-Tack Tape down the centre of the Crochet Ribbon and ruffled some Ivory Vintage Ribbon down it.
Next I stamped the cake image from Creative Expressions Mr & Mrs Stamp Set using the Parchment Ink and embossed with Cosmic Shimmer Clear Embossing Powder. I cut the image out using the largest of the Spellbinders Decorative Heart Circles dies. I inked through the die with the Parchment Ink using Cut n Dry Foam. I cut in between each heart on the die cut with scissors. I cut another Heart Circle out of milk card and again cut in between each heart with scissors. I then glued the image circle on top of the milk circle turning slightly so that the hearts were offset. I folded the hearts forward a little.
I stamped the sentiment from the same stamp set again using the Parchment Ink and embossed with the Clear Embossing Powder. I matted it on to a slightly larger piece of milk card and added some little dots of Cosmic Shimmer Pearlescent PVA in Golden Pearl as shown and put aside to dry.
I cut 3 of the smallest of the Spellbinders Grand Peony dies, inking through the die with the Parchment Ink. I used these to make a standard 6 petal flower as described in the Paper Rose How To with Sue Wilson on the Creative Expressions here.
I tied a bow using 2 lengths of Ivory Vintage Ribbon and glued to the ruffled ribbon with Cosmic Shimmer Dries Clear Glue. I added my flower to the centre of the bow and add a couple of Decorative Stick Pins.
I assembled the card as shown adding some dots of Golden Pearl PVA around the edges.
Thanks for stopping by.
Julia.
Monday, 16 July 2012
I Do
Hi Bloggers.
Here's a wedding card that I haven't shown you before.
I cut a piece of Coconut White Card to 6” x 6”. I placed the Ivy Background Mask on top and secured with low tack tape. I popped it through the Grand Calibur with the following sandwich – Base Plate, Tan Mat, Card, Mask, Pink Embossing Plate. I left the low tack tape in place and inked through the mask with the Eco Green Peach Satin Ink using Cut n Dry Foam.
I cut 2 borders out of the Coconut White Card using the Spellbinders Parisian Accents die set. I then threaded some Peach Fizz Vintage Ribbon through them as shown and secured them to the background, wrapping the ribbon to the back and securing the border with Cosmic Shimmer Glue at the front.
I cut a heart frame from peach card using the largest of the Spellbinders Decorative Heart Circles dies and a Circle Nestie.
Next I stamped the Wedding Dress from the Creative Expressions Mr & Mrs Stamp Set using the Peach Satin Ink and embossed with Cosmic Shimmer Aurora Crystal Sparkle Embossing Powder. I cut it out leaving a little border all round.
I stamped the sentiment from the same stamp set using the Peach Satin Ink and embossed with Cosmic Shimmer Clear Embossing Powder. I cut it out using the tag die from the Antique Frames and Accents die set. I inked through the die with the Peach Satin Ink using Cut n Dry Foam. I tied a little bow using peach Baker’s Twine from the Pastel Set and added it to the tag with Cosmic Shimmer Dries Clear Glue.
I assembled the card as shown and added some dots of Cosmic Shimmer Pearlescent PVA in Cosmic Pearl around the edges.
Thanks for stopping by.
Julia.
Here's a wedding card that I haven't shown you before.
I cut a piece of Coconut White Card to 6” x 6”. I placed the Ivy Background Mask on top and secured with low tack tape. I popped it through the Grand Calibur with the following sandwich – Base Plate, Tan Mat, Card, Mask, Pink Embossing Plate. I left the low tack tape in place and inked through the mask with the Eco Green Peach Satin Ink using Cut n Dry Foam.
I cut 2 borders out of the Coconut White Card using the Spellbinders Parisian Accents die set. I then threaded some Peach Fizz Vintage Ribbon through them as shown and secured them to the background, wrapping the ribbon to the back and securing the border with Cosmic Shimmer Glue at the front.
I cut a heart frame from peach card using the largest of the Spellbinders Decorative Heart Circles dies and a Circle Nestie.
Next I stamped the Wedding Dress from the Creative Expressions Mr & Mrs Stamp Set using the Peach Satin Ink and embossed with Cosmic Shimmer Aurora Crystal Sparkle Embossing Powder. I cut it out leaving a little border all round.
I stamped the sentiment from the same stamp set using the Peach Satin Ink and embossed with Cosmic Shimmer Clear Embossing Powder. I cut it out using the tag die from the Antique Frames and Accents die set. I inked through the die with the Peach Satin Ink using Cut n Dry Foam. I tied a little bow using peach Baker’s Twine from the Pastel Set and added it to the tag with Cosmic Shimmer Dries Clear Glue.
I assembled the card as shown and added some dots of Cosmic Shimmer Pearlescent PVA in Cosmic Pearl around the edges.
Thanks for stopping by.
Julia.
Thursday, 10 May 2012
For a Special Couple
Hi Bloggers.
All peachy today for today's post. This could easily be an anniversary card as well a wedding card.
For the background, I stamped one of the images from the Creative Expressions Design Elements Stamp Set using Eco Green Paris Trunk Dye Ink Pad in Peach Satin.
I popped 3 panels of white card through the Grand Calibur with the Heart Confetti Mask. I inked around the edges with the Peach Satin ink.
I stamped the sentiment from the Creative Expressions Mr & Mrs Stamp Set again using the Peach Satin ink and then stamped the frame from the same stamp set over it. I embossed it with Cosmic Shimmer Clear Embossing Powder. I cut it out using Spellbinders Labels Fourteen which fits perfectly. I made a faux nestie by drawing around the die and cutting out with scissors.
I made 3 ribbon flowers - 1 from White Crochet Ribbon dyed with the Peach Satin Ink, 1 from Peach Fizz Vintage Ribbon and White Wrinkle-Edge Ribbon and 1 from White Silky Crush Ribbon (cut in half length-ways but both pieces used). I cut some leaves out using the Spellbinders Foliage Die Set.
I assembled the card as shown,
Hope you like it.
Thanks for stopping by.
Julia.
All peachy today for today's post. This could easily be an anniversary card as well a wedding card.
For the background, I stamped one of the images from the Creative Expressions Design Elements Stamp Set using Eco Green Paris Trunk Dye Ink Pad in Peach Satin.
I popped 3 panels of white card through the Grand Calibur with the Heart Confetti Mask. I inked around the edges with the Peach Satin ink.
I stamped the sentiment from the Creative Expressions Mr & Mrs Stamp Set again using the Peach Satin ink and then stamped the frame from the same stamp set over it. I embossed it with Cosmic Shimmer Clear Embossing Powder. I cut it out using Spellbinders Labels Fourteen which fits perfectly. I made a faux nestie by drawing around the die and cutting out with scissors.
I made 3 ribbon flowers - 1 from White Crochet Ribbon dyed with the Peach Satin Ink, 1 from Peach Fizz Vintage Ribbon and White Wrinkle-Edge Ribbon and 1 from White Silky Crush Ribbon (cut in half length-ways but both pieces used). I cut some leaves out using the Spellbinders Foliage Die Set.
I assembled the card as shown,
Hope you like it.
Thanks for stopping by.
Julia.
Tuesday, 8 May 2012
May Today Be The Beginning
Hi Bloggers,
Another wedding card today. It's the theme for my stamping shows on Create & Craft next Monday so there's going to be a few of these featured over the next week or so. Hope you don't mind.
For the background, I stamped some champagne glasses from the Creative Expressions Mr & Mrs Stamp Set using the Eco Green Paris Trunk Parchment Dye Ink Pad. I gave it a quick blast with my heat gun to make sure it was dry. I then popped it through the Grand Calibur inside the Couture Creations Cultivated Embossing Folder. I ran it through a second time to extend the pattern. I edged it with the Parchment Ink and Cut & Dry Foam.
I stamped the sentiment from the Creative Expressions Bride & Groom Stamp set using Eco Green Paris Trunk Black Dye Ink Pad. I then stamped the frame from the same stamp set so the sentiment was within it. I added some Cosmic Shimmer Clear Embossing Powder and heat set. I cut out using Spellbinders Labels Thirteen.
I made some flowers out of cream crochet ribbon, white crochet ribbon and ivory vintage ribbon together with white wrinkle-edge ribbon - I'm liking the two ribbons in one flower. You'll be seeing me do that quite often, I think. I cut the crochet ribbon and ruffle-edge ribbon in half lengthways before using. I cut some 'leaves' from the Spellbinders Damask Accents Die Set and inked with the Parchment Ink while still in the die.
I assembled the card as shown added a Creative Expressions Self Adhesive Pearl Swirl, some dots of Cosmic Shimmer Golden Pearl Pearlescent PVA and a few punched leaves for contrast.
Hope you like the card.
Thanks for stopping by.
Julia.
Another wedding card today. It's the theme for my stamping shows on Create & Craft next Monday so there's going to be a few of these featured over the next week or so. Hope you don't mind.
For the background, I stamped some champagne glasses from the Creative Expressions Mr & Mrs Stamp Set using the Eco Green Paris Trunk Parchment Dye Ink Pad. I gave it a quick blast with my heat gun to make sure it was dry. I then popped it through the Grand Calibur inside the Couture Creations Cultivated Embossing Folder. I ran it through a second time to extend the pattern. I edged it with the Parchment Ink and Cut & Dry Foam.
I stamped the sentiment from the Creative Expressions Bride & Groom Stamp set using Eco Green Paris Trunk Black Dye Ink Pad. I then stamped the frame from the same stamp set so the sentiment was within it. I added some Cosmic Shimmer Clear Embossing Powder and heat set. I cut out using Spellbinders Labels Thirteen.
I made some flowers out of cream crochet ribbon, white crochet ribbon and ivory vintage ribbon together with white wrinkle-edge ribbon - I'm liking the two ribbons in one flower. You'll be seeing me do that quite often, I think. I cut the crochet ribbon and ruffle-edge ribbon in half lengthways before using. I cut some 'leaves' from the Spellbinders Damask Accents Die Set and inked with the Parchment Ink while still in the die.
I assembled the card as shown added a Creative Expressions Self Adhesive Pearl Swirl, some dots of Cosmic Shimmer Golden Pearl Pearlescent PVA and a few punched leaves for contrast.
Hope you like the card.
Thanks for stopping by.
Julia.
Wednesday, 2 May 2012
Monochromatic Wedding Card
Hi Bloggers.
As we head into what is traditionally the start of the wedding season, today I'm sharing another simple but effective wedding card.
I dusted a square piece of card with my anti-static pad and stamped the feather from the Creative Expressions Design Elements Stamp Set (on the Create & Craft Pick of the Week with Sue at the moment) using Perfect Medium. I added some Cosmic Shimmer Black Sparkle Embossing Powder and heat set it.
I stamped the image of the Bride & Groom (from the Creative Expressions Bride & Groom Stamp Set) using Eco Green Black Dye Ink Pad. I popped some Cosmic Shimmer Clear Embossing Powder on top and heat set. I did the same with the sentiment which is from the same stamp set.
I cut the Bride & Groom out using Spellbinders Labels Seventeen and used Spellbinders Labels Thirteen for the sentiment. I made a faux nestie for each using black card.
I assembled the card as shown adding a large bow made with black Silky Crush Ribbon with a button I got from Sam here. I added a black rhinestone swirl either side of the image panel and some Cosmic Shimmer Black Pearl PVA all around the edges.
Hope you like the card.
Thanks for stopping by.
Julia.
As we head into what is traditionally the start of the wedding season, today I'm sharing another simple but effective wedding card.
I dusted a square piece of card with my anti-static pad and stamped the feather from the Creative Expressions Design Elements Stamp Set (on the Create & Craft Pick of the Week with Sue at the moment) using Perfect Medium. I added some Cosmic Shimmer Black Sparkle Embossing Powder and heat set it.
I stamped the image of the Bride & Groom (from the Creative Expressions Bride & Groom Stamp Set) using Eco Green Black Dye Ink Pad. I popped some Cosmic Shimmer Clear Embossing Powder on top and heat set. I did the same with the sentiment which is from the same stamp set.
I cut the Bride & Groom out using Spellbinders Labels Seventeen and used Spellbinders Labels Thirteen for the sentiment. I made a faux nestie for each using black card.
I assembled the card as shown adding a large bow made with black Silky Crush Ribbon with a button I got from Sam here. I added a black rhinestone swirl either side of the image panel and some Cosmic Shimmer Black Pearl PVA all around the edges.
Hope you like the card.
Thanks for stopping by.
Julia.
Friday, 24 February 2012
Big & Blue Art Nouveau Lady
Hi Bloggers,
This is the last card sample I have to share from the Feb 7th show. Something new tomorrow!
This card ended up being much bigger than I'd planned - 8 1/4 inches square! It's another card that I'm not that fond of but I thought I's share it anyway.
I stamped the image from the Art Nouveau Ladies Stamp Set using Perfect Medium and I embossed with Cosmic Shimmer Bright Gold Metallic Embossing Powder.
The image was coloured using Paris Trunk Dye Ink Pads in Fountain Blue, Classic Cobalt, Amethyst, Walnut and Parchment. I added some Cosmic Shimmer Pearlescent Mica Powder to the first 3 colours. I rounded off the corners and added a mat in cobalt blue card.
For the background, I spritzed some Cosmic Shimmer Mister in Ocean Sunlight and Midnight Blue onto some white card. I dusted the area with my anti static pad and then stamped the small image from the Beautiful Ladies Stamp Set in each corner using Perfect Medium and I embossed them with Cosmic Shimmer Steel Blue Aurora Embossing Powder.
I cut the largest of the Spellbinders Eyelet Squares from Aqua card and 4 borders using the Spellbinders Parisian Accents die Set.
I assembled the card as shown.
Thanks for stopping by.
Julia.
This is the last card sample I have to share from the Feb 7th show. Something new tomorrow!
This card ended up being much bigger than I'd planned - 8 1/4 inches square! It's another card that I'm not that fond of but I thought I's share it anyway.
I stamped the image from the Art Nouveau Ladies Stamp Set using Perfect Medium and I embossed with Cosmic Shimmer Bright Gold Metallic Embossing Powder.
The image was coloured using Paris Trunk Dye Ink Pads in Fountain Blue, Classic Cobalt, Amethyst, Walnut and Parchment. I added some Cosmic Shimmer Pearlescent Mica Powder to the first 3 colours. I rounded off the corners and added a mat in cobalt blue card.
For the background, I spritzed some Cosmic Shimmer Mister in Ocean Sunlight and Midnight Blue onto some white card. I dusted the area with my anti static pad and then stamped the small image from the Beautiful Ladies Stamp Set in each corner using Perfect Medium and I embossed them with Cosmic Shimmer Steel Blue Aurora Embossing Powder.
I cut the largest of the Spellbinders Eyelet Squares from Aqua card and 4 borders using the Spellbinders Parisian Accents die Set.
I assembled the card as shown.
Thanks for stopping by.
Julia.
Wednesday, 22 February 2012
Wishing You a Day Fit For a Queen
Hi Bloggers.
Here's today's card -
The background for this was made using the Faux Batik method as described in an earlier post here. I used the Eco Green Paris Trunk Dye Ink Pads in Garnet and Amethyst Ink Pads. The stamps are from the Beautiful Ladies Stamp Set.
The main image is from the Art Nouveau Ladies Stamp Set. I stamped it using Jet Black Archival and embossed with Cosmic Shimmer Clear Embossing Powder.
I coloured the image in using Paris Trunk Dye Ink Pads in Parchment, Walnut and Amethyst plus the Pearlescent and Pale Gold Mica Powders from the Metallics Cosmic Shimmer Mica Spray Set. I edged the image panel with the Amethyst Ink Pad and Cut & Dry Foam.
The sentiment is from the Creative Expressions Simply Sentiments stamp set and has been stamped with the Jet Black Archival and embossed with clear powder then edged with the Amethyst Ink.
I finished the card with some pearl dots made with the Cosmic Shimmer Dusky Pink Pearlescent PVA.
Hope you like the card.
Thanks for stopping by.
Julia.
Here's today's card -
The background for this was made using the Faux Batik method as described in an earlier post here. I used the Eco Green Paris Trunk Dye Ink Pads in Garnet and Amethyst Ink Pads. The stamps are from the Beautiful Ladies Stamp Set.
The main image is from the Art Nouveau Ladies Stamp Set. I stamped it using Jet Black Archival and embossed with Cosmic Shimmer Clear Embossing Powder.
I coloured the image in using Paris Trunk Dye Ink Pads in Parchment, Walnut and Amethyst plus the Pearlescent and Pale Gold Mica Powders from the Metallics Cosmic Shimmer Mica Spray Set. I edged the image panel with the Amethyst Ink Pad and Cut & Dry Foam.
The sentiment is from the Creative Expressions Simply Sentiments stamp set and has been stamped with the Jet Black Archival and embossed with clear powder then edged with the Amethyst Ink.
I finished the card with some pearl dots made with the Cosmic Shimmer Dusky Pink Pearlescent PVA.
Hope you like the card.
Thanks for stopping by.
Julia.
Tuesday, 21 February 2012
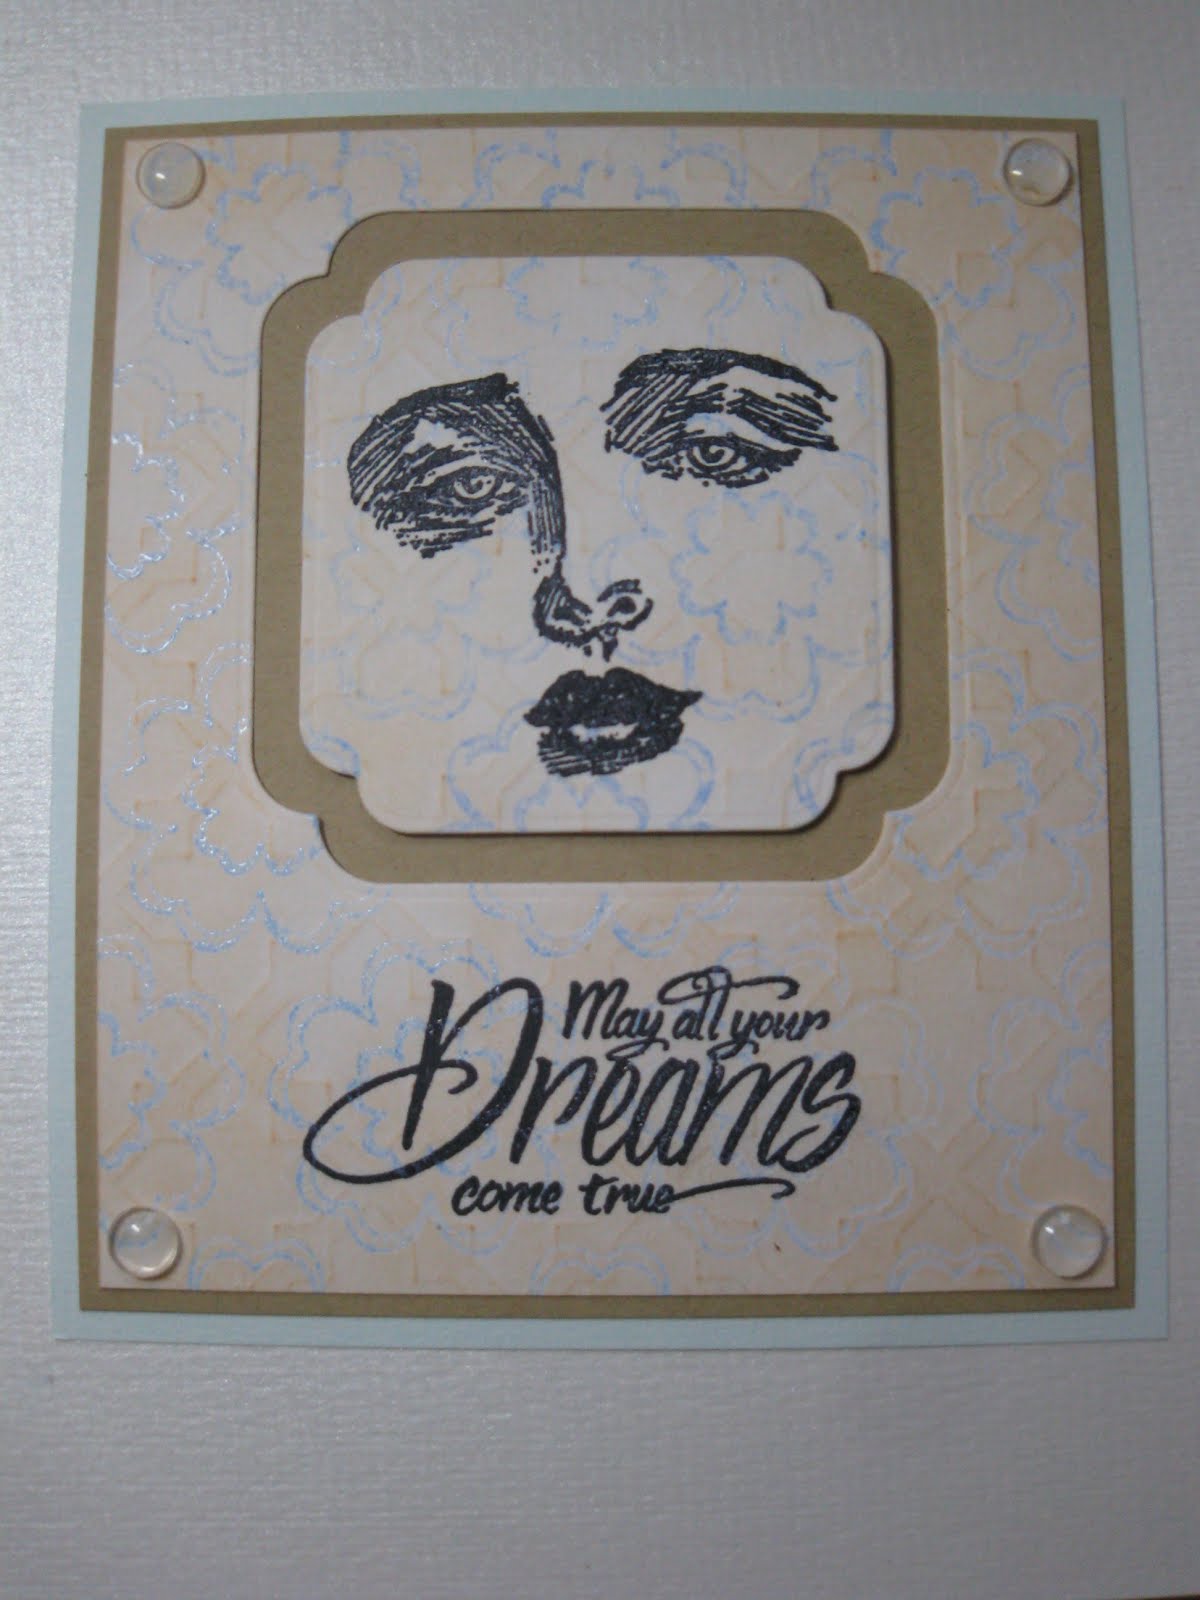
May All Your Dreams Come True
Hi Bloggers,
Today I'm sharing this card with you -
This is such a simple card to make.
I inked up one side of the Creative Expressions Floral Embossing Folder with the Paris Trunk Classic Cobalt Ink Pad. I popped a piece of white card on the clean side of the folder and folded the inked side down onto it. I brayered on top of the folder to transfer the ink to the card. I added Cosmic Shimmer Clear Embossing Powder and heated it with my heat tool.
Next I placed it face up on top of the Fretwork Mask and ran it through the Grand Calibur. I inked over the design with the Paris Trunk Peach Satin Dye Ink Pad using Cut & Dry Foam. The design 'popped out'.
I then cut an aperture out of the background using Spellbinders Labels Twelve. I then cut a smaller Labels Twelve from the piece already cut.
Putting the background through the Grand Calibur to cut the Spellbinders out flattened out the embossed pattern from the mask. This meant that I could stamp on top. The image is from the Creative Expressions Beautiful Ladies Stamp Set. The sentiment is from the Creative Expressions Simply Sentiments Stamp Set. They have been stamped with Jet Black Archival. I didn't emboss them.
The design was mounted onto some Kraft card and then some plain Foundations Paper. I finished it off with a Clear Glass Glintz in each corner.
Thanks for stopping by.
Julia.
Today I'm sharing this card with you -
This is such a simple card to make.
I inked up one side of the Creative Expressions Floral Embossing Folder with the Paris Trunk Classic Cobalt Ink Pad. I popped a piece of white card on the clean side of the folder and folded the inked side down onto it. I brayered on top of the folder to transfer the ink to the card. I added Cosmic Shimmer Clear Embossing Powder and heated it with my heat tool.
Next I placed it face up on top of the Fretwork Mask and ran it through the Grand Calibur. I inked over the design with the Paris Trunk Peach Satin Dye Ink Pad using Cut & Dry Foam. The design 'popped out'.
I then cut an aperture out of the background using Spellbinders Labels Twelve. I then cut a smaller Labels Twelve from the piece already cut.
Putting the background through the Grand Calibur to cut the Spellbinders out flattened out the embossed pattern from the mask. This meant that I could stamp on top. The image is from the Creative Expressions Beautiful Ladies Stamp Set. The sentiment is from the Creative Expressions Simply Sentiments Stamp Set. They have been stamped with Jet Black Archival. I didn't emboss them.
The design was mounted onto some Kraft card and then some plain Foundations Paper. I finished it off with a Clear Glass Glintz in each corner.
Thanks for stopping by.
Julia.
Monday, 20 February 2012
With Love
Hi Bloggers.
All in blue today -
For the background I inked through the Elegance Mask with the Paris Trunk Fountain Blue and Classic Cobalt Dye Ink Pads. I then spritzed with Ocean Sunlight Cosmic Shimmer Mister. I carefully removed the mask and dried the background with a heat tool. It's important to clean the mask at this point. I edged the background with the Classic Cobalt using Cut & Dry Foam.
I stamped the image from the Art Nouveau Ladies Stamp Set using the Classic Cobalt Ink Pad and then embossed with Cosmic Shimmer Clear Embossing Powder. I edged the image with the Classic Cobalt using Cut & Dry Foam.
I stamped the sentiment from the Simply Sentiments stamp set again with the Classic Cobalt, embossed with the clear powder and edged with Classic Cobalt.
For all the elements I created their mats from white card which was inked around the edges with the Fountain Blue Ink Pad. I then added a mat from navy card. I ruffled a piece of Limoges Blue Vintage Ribbon down one side of the background and assembled the rest of the card as shown.
Thanks for stopping by.
Julia.
All in blue today -
For the background I inked through the Elegance Mask with the Paris Trunk Fountain Blue and Classic Cobalt Dye Ink Pads. I then spritzed with Ocean Sunlight Cosmic Shimmer Mister. I carefully removed the mask and dried the background with a heat tool. It's important to clean the mask at this point. I edged the background with the Classic Cobalt using Cut & Dry Foam.
I stamped the image from the Art Nouveau Ladies Stamp Set using the Classic Cobalt Ink Pad and then embossed with Cosmic Shimmer Clear Embossing Powder. I edged the image with the Classic Cobalt using Cut & Dry Foam.
I stamped the sentiment from the Simply Sentiments stamp set again with the Classic Cobalt, embossed with the clear powder and edged with Classic Cobalt.
For all the elements I created their mats from white card which was inked around the edges with the Fountain Blue Ink Pad. I then added a mat from navy card. I ruffled a piece of Limoges Blue Vintage Ribbon down one side of the background and assembled the rest of the card as shown.
Thanks for stopping by.
Julia.
Saturday, 18 February 2012
Love in Purple and Pink
Hi Bloggers,
Today I'm sharing this card with you -
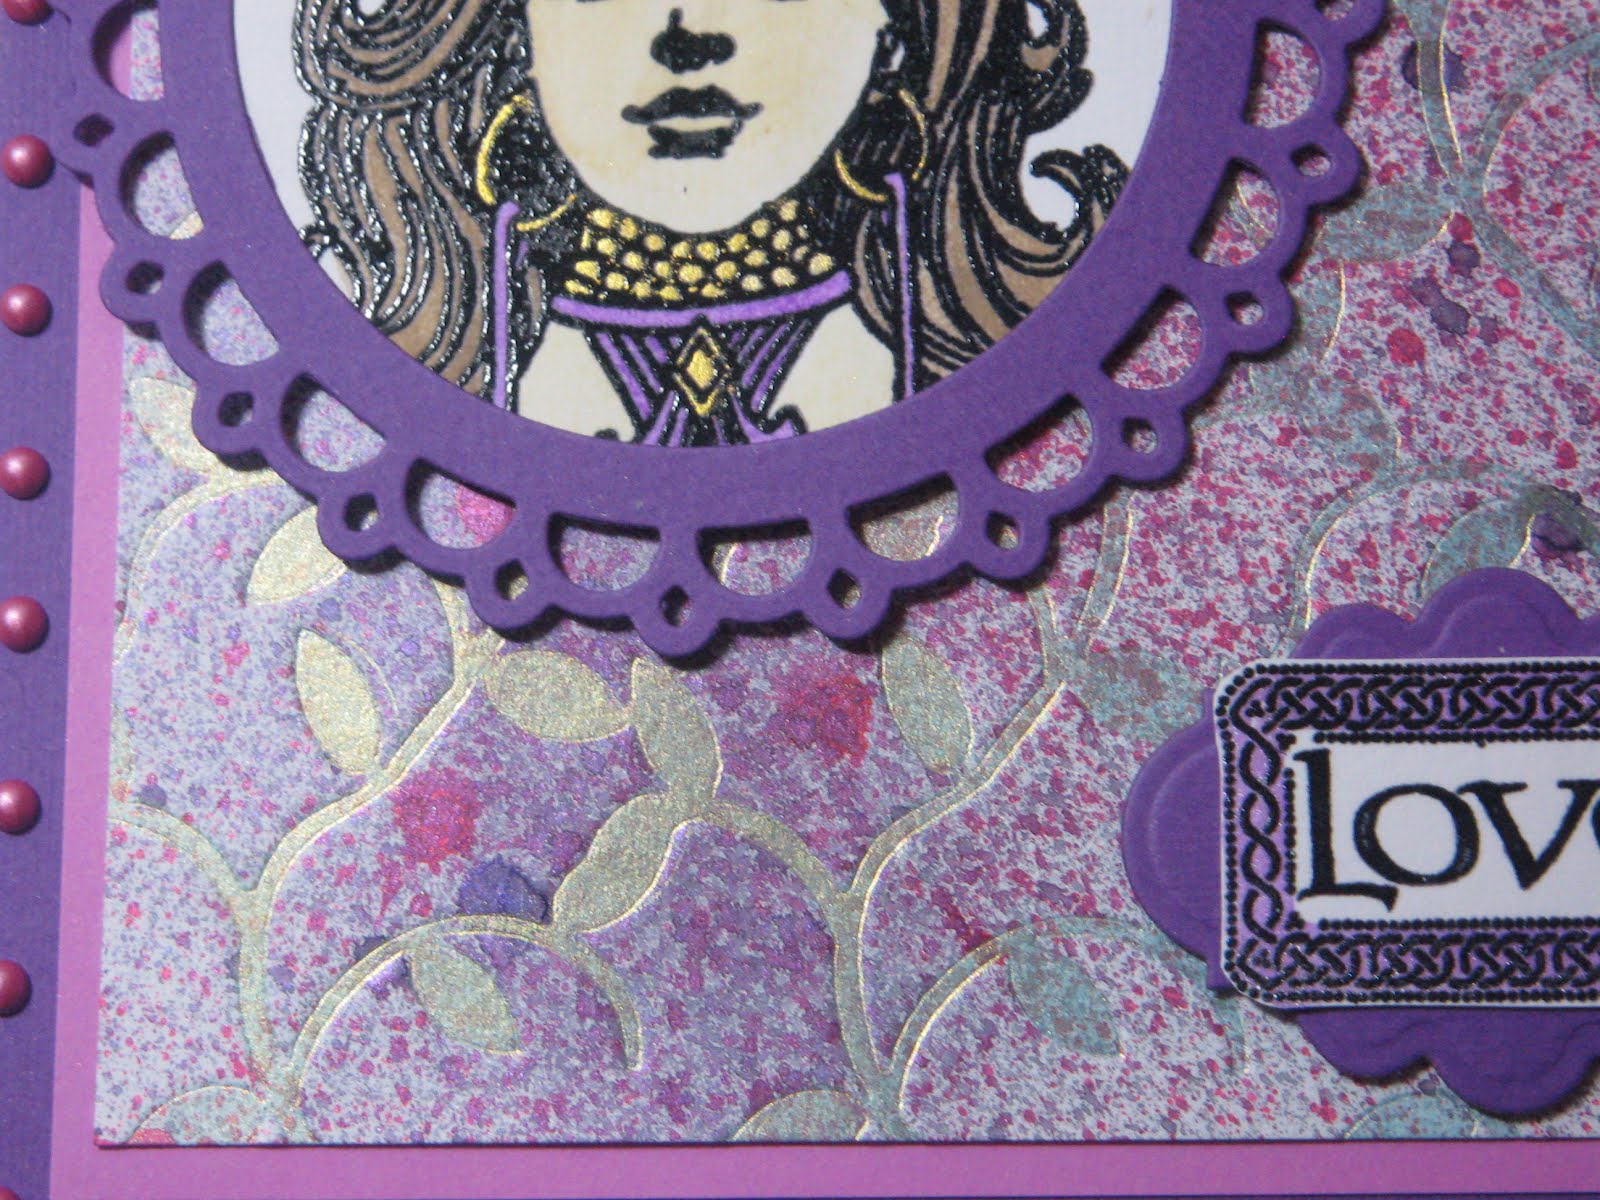
I stamped the image from the Creative Expressions Art Nouveau Ladies Stamp Set using Jet Black Archival and embossed with Cosmic Shimmer Clear Embossing Powder.
I cut a frame using Spellbinders Picot Edged Circles and a plain circle die. I cut my image to fit the frame and then coloured it using Eco Green Paris Trunk Dye Ink Pads in Walnut for the hair, Parchment for the skin and Amethyst for other bits as shown. I mixed some pearlescent mica powder from the Cosmic Shimmer Metallics Mica Spray Set with the Amethyst ink for the flowers. I used pale gold mica powder from the same set on the earrings, gems and the headress.
I stamped the sentiment from the Creative Expressions Simply Sentiments stamp set again using the Jet Black Archival and the Clear Embossing Powder. I cut it out and coloured it using the Amethyst Ink mixed with the Pearlescent Mica Powder. I mounted that on to some purple card cut with Spellbinders Labels Twenty.
For the background, I spritzed some white card with some Cosmic Shimmer Misters in Lilac Night and Mallow Blush. I dried it with a heat gun and then wiped it with my anti static pad. I inked the Ivy Background Mask with Perfect Medium. I then popped my background face down onto it, secured it with a little masking tape and ran it through the Grand Calibur. The ink transferred to my background in the debossed pattern. I then brushed Cosmic Shimmer Golden Malachite Mica Powder from the Garden Flora Mica Spray Set all over the inked pattern. I wiped away the excess with a dried out wet wipe.
I assembled the card as shown and added some dots with Cosmic Shimmer Dusky Pink Pearlescent PVA.
Hope you like the card.
Thanks for dropping by.
Julia.
Today I'm sharing this card with you -
I stamped the image from the Creative Expressions Art Nouveau Ladies Stamp Set using Jet Black Archival and embossed with Cosmic Shimmer Clear Embossing Powder.
I cut a frame using Spellbinders Picot Edged Circles and a plain circle die. I cut my image to fit the frame and then coloured it using Eco Green Paris Trunk Dye Ink Pads in Walnut for the hair, Parchment for the skin and Amethyst for other bits as shown. I mixed some pearlescent mica powder from the Cosmic Shimmer Metallics Mica Spray Set with the Amethyst ink for the flowers. I used pale gold mica powder from the same set on the earrings, gems and the headress.
I stamped the sentiment from the Creative Expressions Simply Sentiments stamp set again using the Jet Black Archival and the Clear Embossing Powder. I cut it out and coloured it using the Amethyst Ink mixed with the Pearlescent Mica Powder. I mounted that on to some purple card cut with Spellbinders Labels Twenty.
For the background, I spritzed some white card with some Cosmic Shimmer Misters in Lilac Night and Mallow Blush. I dried it with a heat gun and then wiped it with my anti static pad. I inked the Ivy Background Mask with Perfect Medium. I then popped my background face down onto it, secured it with a little masking tape and ran it through the Grand Calibur. The ink transferred to my background in the debossed pattern. I then brushed Cosmic Shimmer Golden Malachite Mica Powder from the Garden Flora Mica Spray Set all over the inked pattern. I wiped away the excess with a dried out wet wipe.
I assembled the card as shown and added some dots with Cosmic Shimmer Dusky Pink Pearlescent PVA.
Hope you like the card.
Thanks for dropping by.
Julia.
Subscribe to:
Posts (Atom)